In principle, my recommendation is to read up on the topic of irrigation carefully and start planning early. This way you develop a comprehensive understanding of the subject matter and get the most out of your irrigation project. The planning section here on the site offers extensive options for this. But if you are in a hurry for some reason, e.g. because you want to use your vacation for this and only have a few days to go through all the steps from the beginning of the planning to the fully installed irrigation system, then you can do it as described in this article and thus achieve a presentable result with the minimum amount of time possible.
I will then describe the steps necessary for this:
The first step in the irrigation project is to order a water flow tester. These cost from around 20 to 30 USD, better ones that also measure the water flow rate around 70 USD. A water flow tester serves two purposes:
This can be used to find out whether irrigation with the available water source is in principle feasible.
You can use it to simulate how large the water flow would be at a certain pressure in the pipeline. You need this value for your own planning and it is also necessary for using some irrigation planners, such as that from DVS Beregnung.
The better version with an integrated water flow meter can be ordered from Amazon:
No products found.
The necessary connectors for measuring on a 3/4 inch or 1 inch faucet are often included in the offer. If you plan to measure on a pump, you will also need a connection option between the pump output and the measuring device. There are matching intermediate pieces available for purchase, which you can also order from Amazon or Ebay for a few dollars. With a pump, this information can also be read from the pump’s characteristic curve as an alternative to measuring the amount of water at a certain water pressure. However, this procedure is a little less precise than the actual measurement, which is why I would recommend a measurement even if you use a pump!
Time required: None
Waiting for the postman…
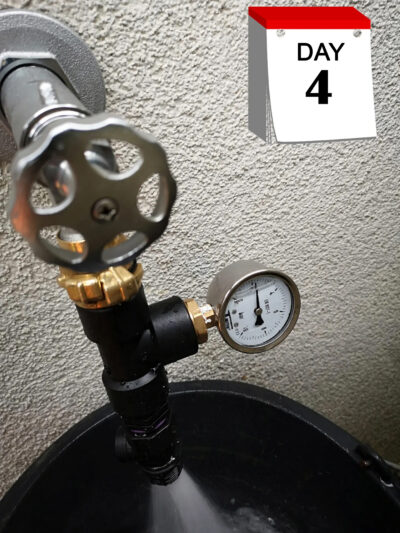
Measure pressure and flow
Time required: approx. 1 hour
The water flow tester should now have arrived and you can start measuring the pressure/flow. I explain in detail how the test device is mounted on the faucet and how to use it with some photos and a short video in the blog post about the water flow test device. The short version of this: The test device is screwed onto the tap, the water is turned on fully and the flow is narrowed with the valve lever until the desired pressure is reached on the pressure gauge. Once this is displayed, a 5 gallon (19 liter) bucket is placed under it and timed as to how long it takes to fill. The fill time is used to calculate the flow rate in gallons per hour (liters per hour). For example, if it takes 20 seconds to fill the 5 gallon bucket, you can fill 3 buckets in a minute and 180 buckets in an hour. Since a bucket holds 5 gallons (19 liters), you would have 900 gallons (3,420 liters) of water available per hour.
It’s best to start with the following measurements:
Amount of water when the valve is completely open
Water pressure when the valve is completely closed
This means you then know the static water pressure at the faucet and the maximum amount of water at the water source at zero back pressure. The static water pressure should ideally be at least 60 psi (4 bar), but irrigation can also be achieved with a little less with appropriate planning. The amount of water should be at least 500 gallons (1,900 liters) per hour, but preferably in the range of 650 to 1,000 gallons (2,500 to 3,800 liters) per hour.
As an absolute limit at which lawn irrigation can just be achieved, I would consider a water volume of around 300 gallons (1,100 liters) and a pressure of around 40 psi (2.8 bar). If you don’t achieve these values, your alternative is a micro-irrigation system. This only requires about 20 psi (1.4 bar) of static water pressure and also works with water volumes under 300 gallons (1,100 liters).
Measure flow at different pressure levels
Once the basic feasibility of an irrigation system has been ensured, you can now use the test device to determine what amount of water you have available at different pressure levels. The best way to do this is to start with 10 psi (1 bar) and then increase it in 5 psi (0.5 bar) increments by continuing to close the valve. So you first measure the amount of water at 10 psi (1 bar9, then at 15 psi (1.5 bar), then at 20 psi (2 bar) and so on until the valve is completely closed. Make a note of the amount of water obtained in each case.
Your recorded values can then look like this:
Water pressure
Bucket fill time
Water Flow
0 psi (valve fully open)
16 seconds
600 gallons (2,300 liters)
10 psi
17 seconds
560 gallons (2,100 liters)
15 psi
18 seconds
530 gallons (2,000 liters)
20 psi
19 seconds
490 gallons (1,850 liters)
25 psi
21 seconds
450 gallons (1,700 liters)
30 psi
23 seconds
415 gallons (1,550 liters)
35 psi
26 seconds
365 gallons (1,400 liters)
40 psi
29 seconds
335 gallons (1,250 liters)
45 psi
32 seconds
306 gallons (1,150 liters)
50 psi
34 seconds
277 gallons (1,050 liters)
60 psi (valve completely closed)
No water flow
0 gallons (0 liters)
Planning of irrigation
Time required: approx. 2 to 8 hours (depending on scope and complexity)
You can now plan your irrigation using the values determined in the previous step. The easiest and fastest method is to use an online irrigation planner like the one from DSV Beregnung.
Planning with the DVS irrigation planner
Note: The DVS irrigation planner is currently only available in German language, but the handling is largely self-explanatory. I explain the application in detail in a separate blog post about the DVS irrigation planner.
If you already have an account with DVS Beregnung, log in with it, otherwise free registration is required to use it
Either upload an existing floor plan of your garden to continue working from, or create a plan from scratch.
Draw the areas that should be irrigated and those that should not be irrigated and define what should be irrigated with normal irrigation (“lawn area”) and what should be irrigated with micro irrigation (“bed & hedge”).
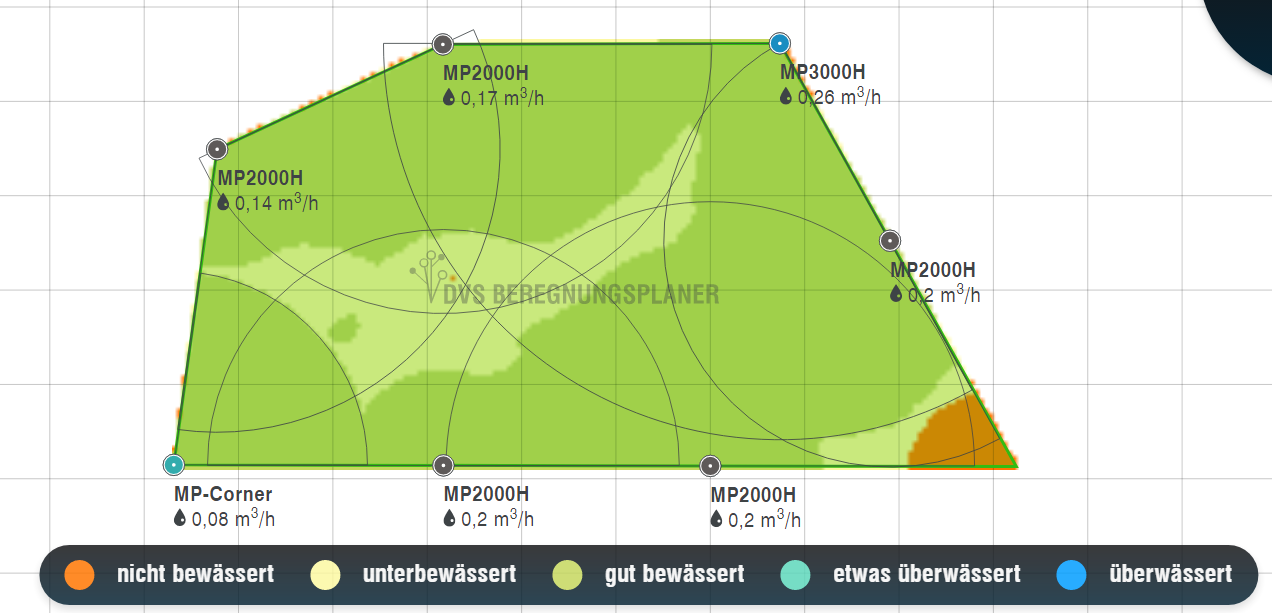
In the next step, the DVS planner automatically creates a suggestion for you on how you can position the sprinklers.
The suggestion works very well for simpler surfaces, but for more difficult surfaces it may be necessary to adjust. You can see whether this is necessary by looking at the color scale displayed in the planner after the positioning has been completed: Lush green areas are optimally watered, yellow areas are slightly underwatered and brownish to red areas receive very little or no water. For these areas it is necessary to either adjust the throw circle of existing sprinklers or to manually set additional sprinklers. If you would like to know more about the theoretical background, read the blog post on sprinkler positioning in the square pattern.
Different colors show which areas still need additional water
Once you are happy with the placement of the sprinklers and all areas are receiving adequate water, you can move on to the next step. In this you define water supply, irrigation control and solenoid valves.
When defining the water supply, the water flow value measured with the water flow tester must be entered. The one that was measured at 50 psi (3.5 bar) pressure! In the example above, that would be 277 gallons. This corresponds to 1,050 liters, since 1,000 liters correspond to one cubic meter, 1.05 would have to be entered. Why at 50 psi (3.5 bar)? DVS irrigation always automatically plans with Hunter MP-Rotator sprinklers at 40 psi (2.8 bar) line pressure and calculates a pressure loss in the line of 10 psi (0.7 bar), which is quite suitable for most irrigation systems.
What if you have too little water available at a pressure of 50 psi (3.5 bar)? I would define these as less than 180 to 210 gallons (700 to 800 liters).
Then you can either still try extremely economical planning and dividing it into many sectors, or you can switch to planning with 40 psi (2.8 bar) pressure instead. At this pressure you have more water available and you can also use the Hunter MP-Rotator, but not at 40 psi (2.8 bar), but the 30 psi (2.1 bar) pressure regulated version. And, as before, an additional 10 psi (0.7 bar) is used for the pressure loss. If you do it this way, you can use the positioning suggestion from the DVS irrigation planner as a guide, but you will have to check it and re-plan it if necessary, as you will not quite achieve the set throw distances with less water pressure. You can look up the throwing distances that can be achieved at 30 psi (2.1 bar) with the MP-Rotator in the post on the Hunter MP-Rotator (always subtract 10% from it!). In this case, you have to carry out the determination of the water consumption and all other steps taken over by the irrigation planner yourself, as the values from the planner are not correct 1 to 1 because they are set for the MP-Rotator version with 40 psi (2.8 bar) and not for the one with 30 psi (2.1 bar). The shopping list that is automatically created afterwards also refers to the version with 40 psi (2.8 bar). Of course, you can simulate the further course of your planning with the irrigation planner and use what is suggested as a guide for your own planning.
Next, the control and the solenoid valves must be defined:
When it comes to control, you can choose whether you want to use a web-enabled or non-web-enabled irrigation computer
With the solenoid valves, you can choose whether the valves should be installed in a valve shaft or on a wall bracket
As a final planning step, the irrigation planner automatically makes a suggestion for pipeline routing and automatically divides the sprinklers into irrigation sectors:
The DVS irrigation planner plans the line using the shortest possible route.
Here you should check whether the proposed pipeline routing is actually possible in practice and, if not, replan the critical points.
The proposed sector planning, i.e. which sprinklers will be operated in a common sector, should also be checked for practical suitability and adapted if necessary! The online planner does not have all the detailed information about the on-site situation that you have. Maybe one part of the lawn is much shadier than the other? Then it makes sense to operate the sprinklers in the shady part in a common sector in order to be able to set a shorter irrigation duration for them.
What cannot be defined in the DVS irrigation planner are water withdrawal points (“water sockets”). If you want to integrate one into your irrigation system, you will have to plan another separate pipeline line for it.
Finally, the program automatically creates a shopping list from the prepared plan with all the components that are necessary to implement the plan. You have now completed the workload for day 4, and you will have to purchase the irrigation system the next day. This gives you the opportunity to sleep on it for another day and think about the planning a little more. You can interrupt the planning at this point without any problems. Everything is saved and you can access the current status again the next day using the link that was sent to you by email.
Alternative: Planning on your own or with another tool
As an alternative to the DVS irrigation planner, there is the MyGarden planner from Gardena or the Online Irrigation planner from Orbit, which work similarly, but cannot keep up with the DVS irrigation planner in terms of functionality. The main weak point here is that the planning is based entirely on Gardena or Orbit products, which in many areas are significantly inferior to the products of international competitors such as Hunter or Rain Bird.
The final alternative is to create the plan from scratch, as I show on the planning page here on the blog. But you have to understand things enough to do them correctly. To do this, you first have to read up properly and therefore allow more time.
Of course, even if you plan independently, you can check your own considerations by using the online planner or get suggestions on how the planner would solve a specific problem.
Ordering the irrigation system
Time required: approx. 1 to 4 hours (depending on how extensive your research is)
Based on the planning with the DVS irrigation planner or another online planner or your own planning, the next step is to obtain the necessary components. If you plan independently, you must first create a parts list with the required products from your plan. If you use the DVS irrigation planner or another online planner, this is done automatically; they spit out a shopping list at the end of the planning.
With this shopping list you can now proceed as follows:
With all online planners you can print out the shopping list (list with all the required components and their number).
You can use this list to research where you want to buy things and check off what you’ve already purchased.
The material list displayed in the DVS irrigation planner can be ordered, adjusted or printed out at the push of a button
Practical: The shopping list from the DVS irrigation planner automatically includes swing joints, marking flags and an adjustment key for the MP-Rotator sprinklers that make assembly work easier. Of course, the components can also simply be purchased elsewhere.
You can of course modify the suggestion from DVS Irrigation if, for example, you want to use other products in some places (e.g. a more expensive or cheaper control).
If the suggestion is too expensive for you and you would like to spend less, then the best way to do this is with the controller. DVS irrigation always plans based on professional control with a irrigation computer and solenoid valves. For example, it is much cheaper to control the system with an irrigation computer and automatic water distributor. You can find out what alternatives you have here on the controlling page.
The DVS irrigation planner always plans without drainage, but assumes that the irrigation will be blown out with compressed air before winter. If you would like to install a drainage valve or a ball valve to drain the water into the irrigation system, you must also take the necessary components into account and order them. You can find out here more about drainage.
In addition to the irrigation system, it is advisable to get a few things useful for the installation work:
Ground anchors (Amazon Link) for securing the pipeline pipes in the trench during assembly
If necessary, some gravel for lining valve boxes, water sockets or for installing a drain valve
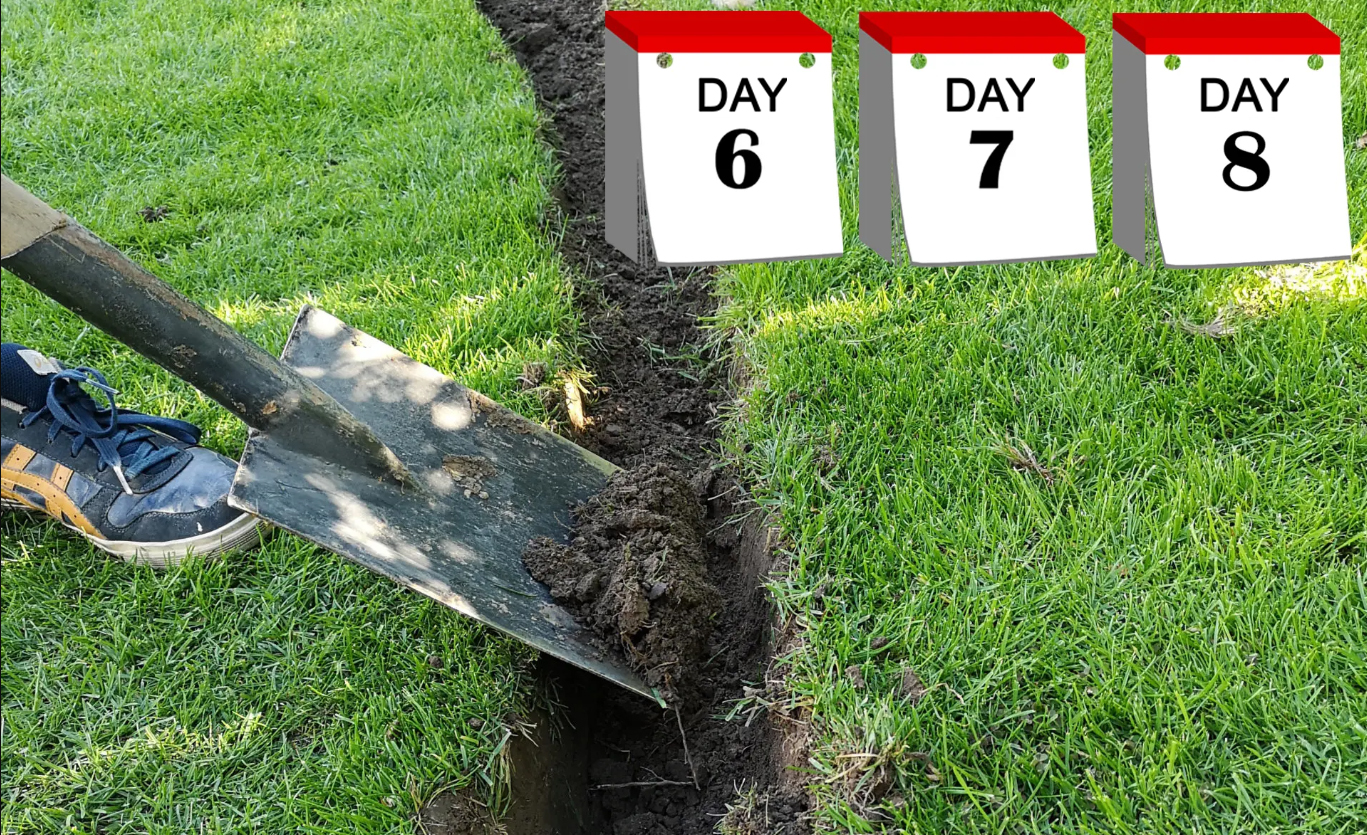
Dig trenches
Time required: estimated approx. 1 to 3 days (depending on the size of the irrigation and how many people help)
Now you can start digging the pipeline trench. This is physically demanding work and it is advisable to invite a few friends or acquaintances to do it.
Tip: Water the lawn thoroughly the day before so that the ground is softened! Especially if it hasn’t rained for a while, the ground can be hard as a pimple and therefore difficult to shovel.
In my experience, you can roughly estimate that one person can dig about 7 to 10 feet (2 to 3 meters) of trench per hour. Depending on your physical condition and the nature of the ground, it can also be a little less. Depending on how many people are helping, you can roughly calculate how many hours you will need to spend on the excavation work. For small projects this can sometimes be done in one day, for medium-sized projects it can take two or three days, and for large ones even more. In the latter case, it might be worth borrowing a trencher.
Mark the course of the trench
Before you start digging, the route of the trench is marked. This can be done using very simple means (ropes, sticks, stones, …) or very professionally using marking flags or marking spray. The more people are involved in the digging, the more important it is to have markings that are as clear as possible and prevent errors. With the DVS irrigation planner you can print out a plan with the trenches to be dug especially for this purpose (“Installation Instructions”).
Dig the trench
The trench is dug 10 to 12 inches (25 to 30 centimers) deep, which is about the length of a spade. How you dig is a matter of taste, I would only recommend not making the trench too wide, otherwise you will end up with an unnecessary amount of excavation. You can’t make it too narrow. If you want to preserve the lawn sod so that it can be used again later, it must be carefully separated and stored temporarily. Curves should be as long as possible so that the water comes through the pipeline with minimal pressure loss. It is best to keep a distance of 3 feet (1 meter) from trees, as digging in the rooted area can be very laborious.
Further information: Impressions and further detailed information about the excavation work can be found on the installing page.
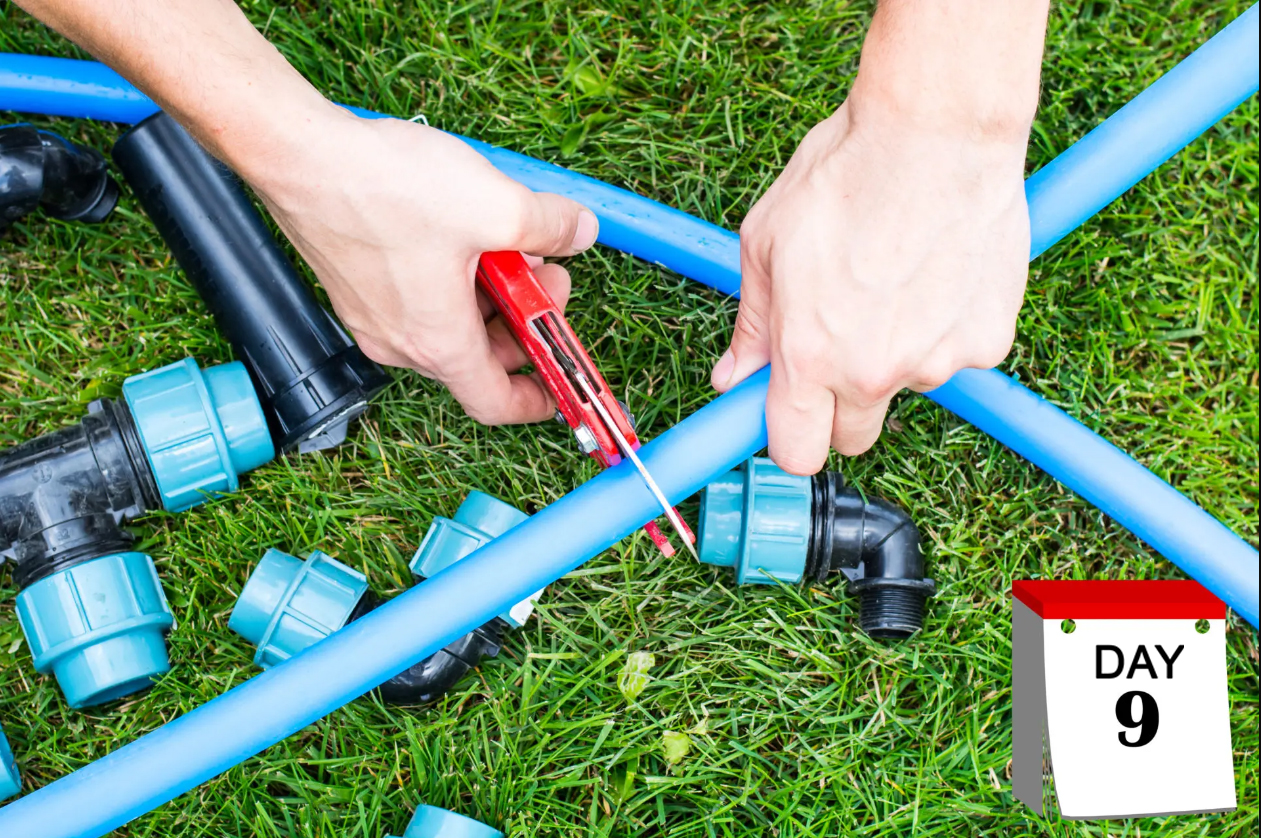
Lay the pipeline
Time required: approx. 3 to 6 hours
Tip: Lay the pipeline pipe as large as possible on the lawn the day before. It loses its rigidity, making it easier to lay!
The pipeline pipe is placed in the trench and cut to size using pipe cutters or saws and the sections are connected to each other with connectors. To ensure that the pipe does not wander around in the trench in a disruptive manner and that the position is correct when marking the cutting marks, you can help yourself by fixing it with ground anchors. To better distinguish the pipeline strands when installing multiple strands, I recommend color-coding the pipes every approximately 8 to 12 inches (20 to 30 centimeters). This also makes work easier if you need to repair something on the pipeline later.
Connecting the pipes
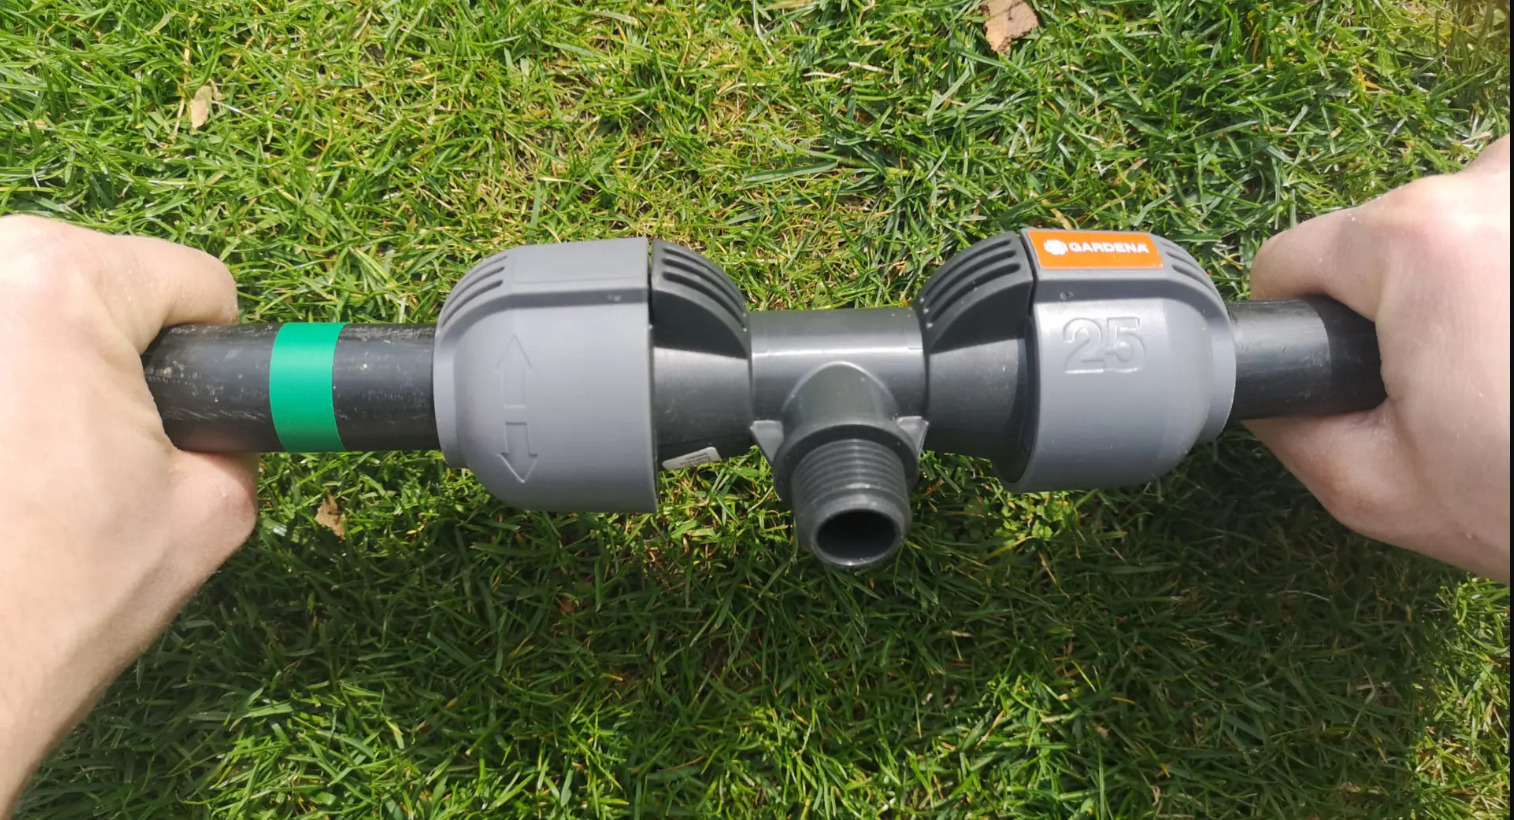
If you use clamp connectors, make sure to insert the pipes far enough when inserting the pipes into the connectors: the pipe initially slides quite easily into the connector until it rests against the clamp. You have to overcome this resistance with a little effort and push the pipe a little further into the clamp. Only then will a tight connection be achieved.
In this picture the pipe is not yet completely in the connector but only at the beginning of the clamp
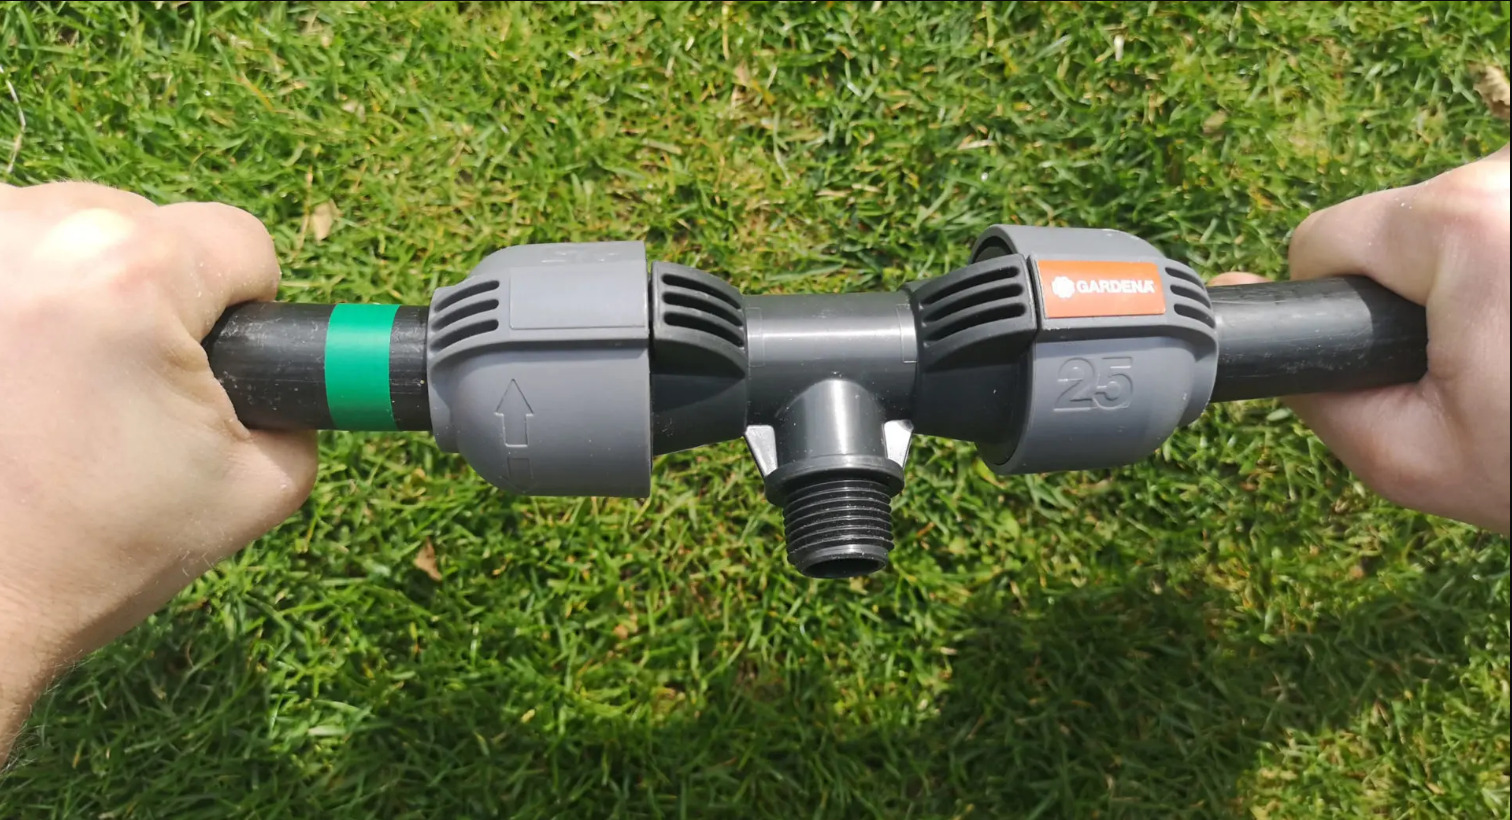
With a little effort, the pipe can be pushed a little further into the connector (recognizable by the green marking)
Installation depth of the sprinklers
You can either install the sprinklers directly into the pipeline using a suitable connector, or alternatively use a swing joint. This has the advantage that the sprinkler can be positioned more easily in the ditch. The sprinkler must be installed so that the sprinkler head extends approximately 0.2 inches (0,5 centimeters) above ground level. This ensures that it is not damaged when mowing the lawn and at the same time does not become muddy when it rains.
If installed directly into the pipeline, the sprinkler may need to be lined with soil; if a swing joint is used, this is simply adjusted to the required height. The final positioning of the sprinklers only takes place when the trenches are filled.
Carry out test runs
Time required: approx. 1 to 2 hours
Once the pipeline is installed, I recommend performing the following test runs to ensure proper functioning before refilling the trenches:
Flush pipes
This is a precautionary measure in case earth falls into the pipeline during assembly work. The pipeline is connected to the water source and the end of the pipeline is opened. This does not have to be done via the control system used later; instead, a provisional connection is sufficient for this and the further test steps. Now let water run through for 2 to 3 minutes to ensure that all impurities are rinsed out. This is done for each individual pipeline sector. This is particularly important for micro-irrigation pipelines, as these have difficulty cleaning themselves due to the low pressure in the pipeline.
Check the pipeline for leaks
This test step is the most important, as it is no longer so easy to notice or correct it after filling! This checks that all connections in the pipeline are tight so that no water comes out anywhere. To do this, you connect the pipeline to the water source and put it under pressure. The connections of the connectors, sprinklers, water sockets, drainage valves, etc. are then inspected for leaks. This is repeated for each sector so that every connection is checked. If the type of sprinkler allows it, turn off the irrigation during the test, otherwise you can place buckets over the sprinklers to avoid getting completely wet.
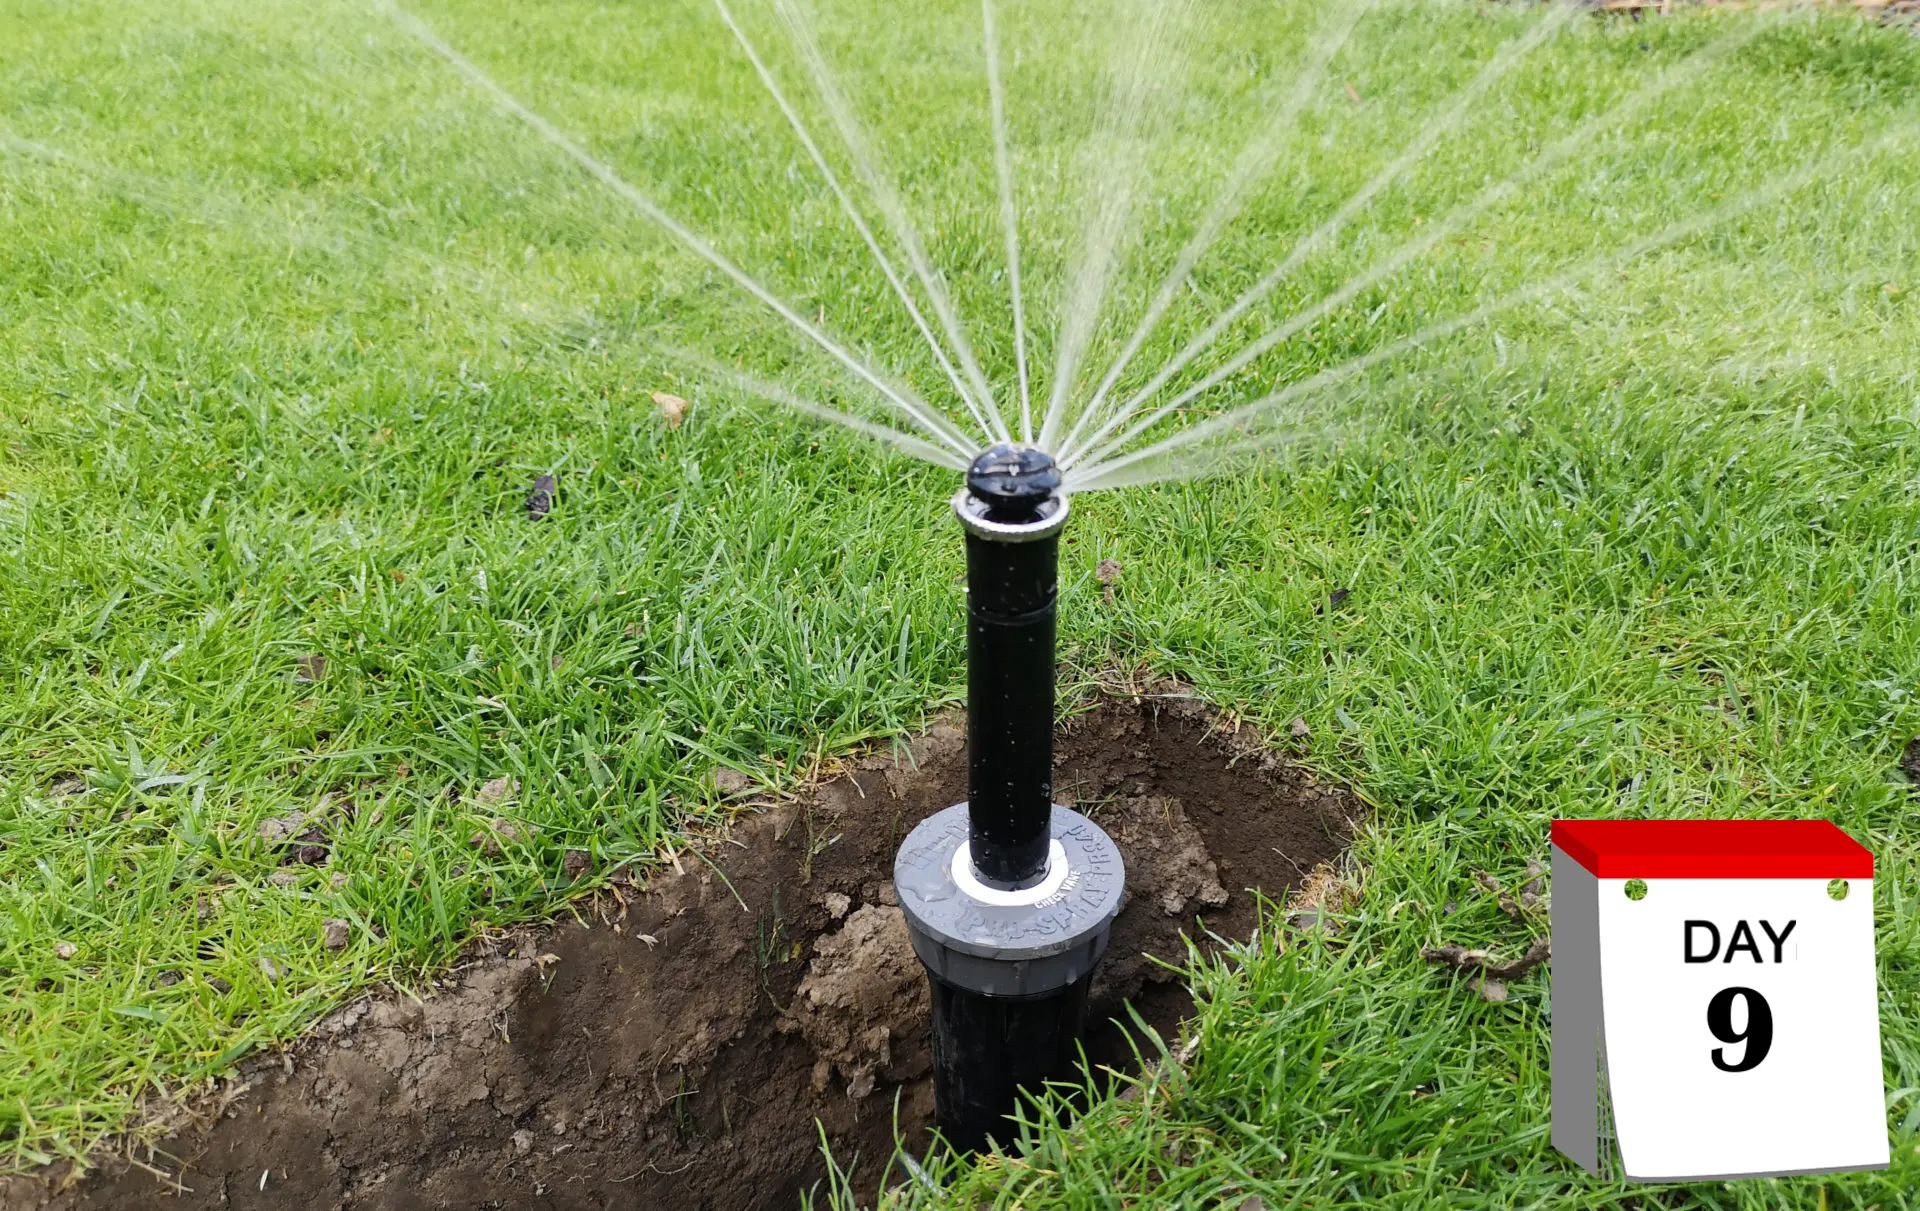
Check proper functioning of sprinklers and other components
For this step, you first bring the sprinklers into their correct position by tamping them down with soil. Now the pipeline is put under pressure again and checked sector by sector to ensure that the sprinklers are working and have the expected throw. The fine adjustment of the throwing distance and the irrigated sector is not an issue at this point; this will only be carried out at the very end, when the ditches have been filled in and the final control is connected.
If you use drainage valves, check that they drain water correctly when watering stops! If a water socket is installed, take water for testing! If micro-irrigation is planned, then check the basic functionality by connecting a drip hose or sprayer behind the pressure reducer and see whether they work properly.
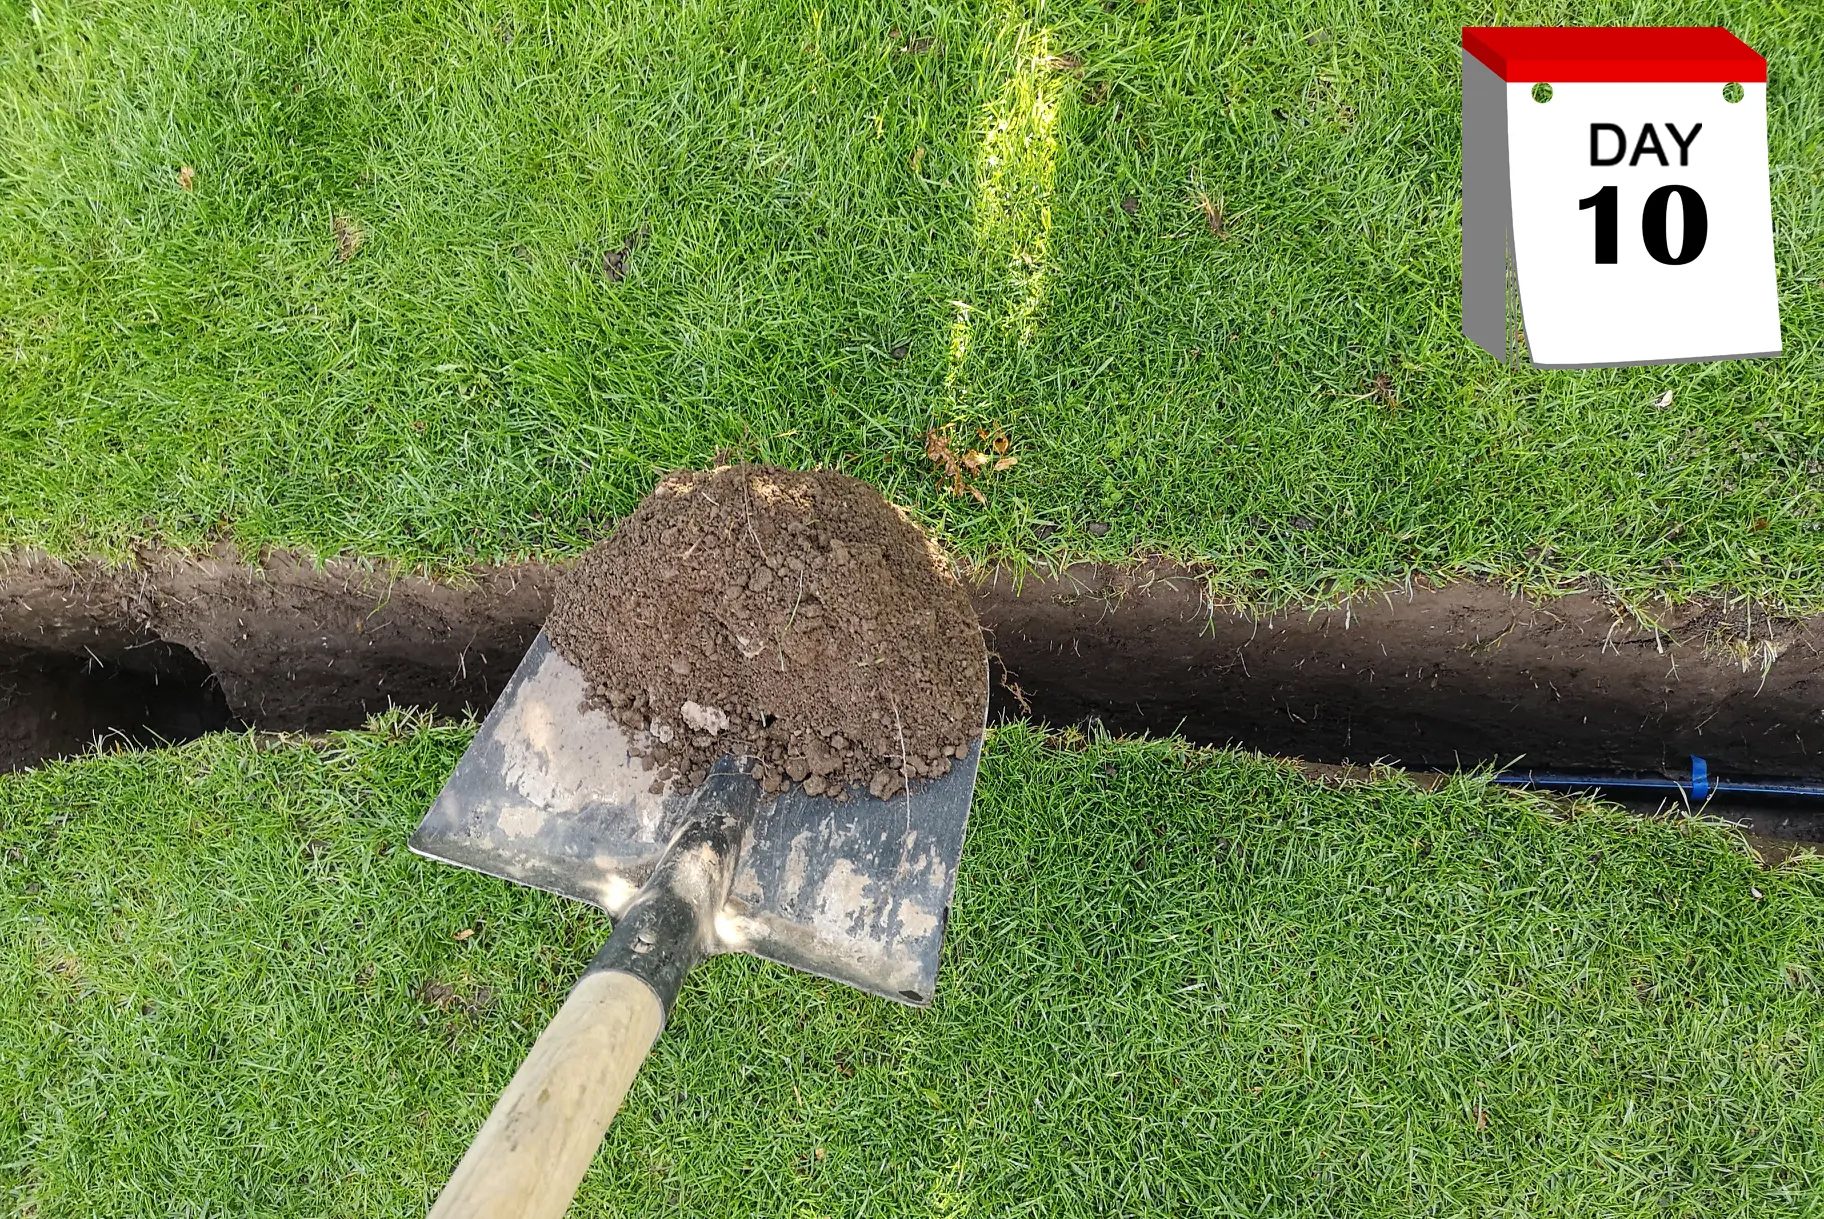
Fill in ditches again
Time required: approx. 2 to 6 hours
Before filling in, take a few photos of the pipeline trench for your documentation!
When filling in the trench, work carefully at first so that the sprinklers are not moved out of the intended position! It is best to add the soil in layers and tamp it down so that it compacts as well as possible. However, it will still sink a little in the following days, so you should pile it a little higher than the ground level. If you have put some lawn sod on the side, it can now be put back in place.
Install control and adjust sprinklers
Time required: approx. 2 to 6 hours
Finally, the irrigation system controller is installed and the desired irrigation program is created on the computer. The sprinklers are adjusted in width and sector to the value targeted in the planning. For this purpose you can use special sprinkler adjustment wrenches or a simple screwdriver. If part of the irrigation consists of micro-irrigation, then above-ground micro-irrigation is now set up (lay out a drip hose or set up a sprayers and drippers).
Hurray, the irrigation project is done! Last but not least, collect all planning documents, invoices, sketches, descriptions, photos, etc. and store them in a project folder! This means you have all the relevant information available should you ever need to fix a problem or feel the need to expand or change the irrigation system.
I am an enthusiastic do-it-yourselfer and have been running this blog on the subject of garden irrigation for more than 6 years now. In over 150 specialist articles, I share my own experiences and know-how from years of research and numerous product tests. -> More about me