Swing joints simplify the connection of sprinklers to the irrigation pipeline. Instead of being connected directly to the pipeline, the sprinkler is connected to the pipeline via an intermediate piece, the swing joint. The following blog post explains exactly how this works, what types of swing joints there are and which swing joints from different manufacturers you can choose from on the market.
Briefly beforehand, for comparison, the “classic” variant of connecting a sprinkler without a swing joint. The sprinkler is connected directly to the pipeline pipe using a suitable connector:

In the variant without a swing joint, the sprinkler is screwed directly onto a connector connected to the pipeline
And this is what the classic variant in the irrigation trench looks like:
Installation without the use of swing joints, sitting directly on the pipeline pipe
So straight to the most important point:
What are the advantages of using swing joints?
-
Swing Joints make it easier to get the sprinkler in the right position in the ground
This applies to the depth as well as the correct, straight alignment. The sprinkler head should end at ground level (or, strictly speaking, slightly above it) and the sprinkler should rise straight out of the ground. With a swing joint, you are independent of the course of the pipeline in terms of positioning and can easily and conveniently align the sprinkler precisely when filling in the trench. This also works with the sprinkler connected directly to the pipeline, but it requires a little more effort.
-
It is easier to correct the position of a sprinkler afterwards
If you accidentally installed the sprinkler a little too high or a little too low, or if it was installed at an angle and doesn’t rise straight up, then this can be corrected much more easily with a swing joint. The same also applies if the position of the sprinkler has been changed by external influences, e.g. by a heavy object rolling over it. In such a case, the swing joint also protects the pipeline pipe from damage thanks to its “flexibility”. If the accident happens, you only have to dig down far enough to be able to move the swing joint again and then readjust it. If you have mounted the sprinkler directly on the pipeline, then you would have to expose the entire pipeline so that you can move it, i.e. put it a little further up or down. This usually requires digging up a distance of at least one meter.
-
It’s easier to replace a sprinkler
The same argument applies to replacing a sprinkler. When using a swing joint, this is simply exposed up to the connection point, unscrew the sprinkler from the swing joint and screw on the new sprinkler. This is then aligned appropriately again, if the sprinkler is higher than the one before, you may have to dig out a little more around the swing joint. Complete. When connecting directly to the sprinkler, you have to dig up to the pipe. If you’re lucky, the sprinkler or housing will be the same size as before. If not, then it becomes very laborious, because then you have to correct the position of the pipe, see point above.
-
The sprinkler can be set off the pipeline
With swing joints, you are no longer tied to the course of the pipeline when positioning the sprinklers. Or viewed from the other side: You no longer have to lead the pipeline into every corner where a sprinkler is to be positioned. Instead, the swing joint branches off the pipeline and directs the water to the sprinkler placed in the desired location. This can be a great advantage, especially in narrow or uneven places. For this purpose, Swing Joints are not only available in the 6 or 12 inch standard versions, but you can put them together in any length by assembling the hose and connectors yourself.
-
It is very easy to relocate a sprinkler afterwards
Swing joints also give one greater flexibility in correcting wrong planning. If it turns out that the throw is too short and the sprinkler should have been placed a little further to the left or right, then this can be corrected very easily later when using swing joints: Dig up at the swing joint connection and from there a ditch to the location where the sprinkler is to be repositioned. Now simply rotate the swing joint so that the sprinkler is positioned in the new location. If the swing joint isn’t long enough to reach the newly planned spot, you can simply unscrew it and replace it with a longer one.
And what are the disadvantages of using swing joints?
In my opinion, there are no major disadvantages in that sense. The irrigation system is slightly more expensive, because with the use of swing joints you need an additional piece and this incurs additional costs. The prices for swing joints start at around 5 US dollars, due to the sometimes quite high price differences it is worth comparing prices. It’s even cheaper if you assemble the swing joint yourself. Then it starts from around 2.50 US dollars per swing joint.
Another point to consider is the issue of pressure loss: swing joints are usually designed with a 1/2 inch diameter and therefore represent a constriction (= loss of water pressure) compared to the 3/4 inch pipeline. Normally this doesn’t play a significant role, since the swing joints only narrow the short last piece to the sprinkler and this narrowing is also very short at 6 or 12 inches in length. However, if you are already driving at the very last point in terms of pressure, then this little bit can also be relevant under certain circumstances. In particular, it is important to keep an eye on the pressure issue when using non-preassembled swing joints, where you can determine the length yourself: If the water has to run a few meters through these swing joints, e.g. because the local conditions do not allow it otherwise, then a significantly reduced water pressure must be taken into account right from the planning stage. On the manufacturer’s website you will find more detailed information about the pressure loss to be expected.
How do you connect a swing joint?
In principle, the connection of a swing joint works very similarly to the connection of a sprinkler directly to the pipeline: Here too, the pipeline is interrupted with a connector, only in this case with a connector with a 3/4 inch internal thread connection.
One end of the swing joint (3/4 inch external thread) is screwed into the internal thread connection of the connector. The thread is screwed completely and “hand-tight” into the connector. The other side of the swing joint also ends in an external thread (1/2 inch or 3/4 inch, depending on the variant). The sprinkler is screwed onto this.
Alternatively, a connection is also possible via a so-called tapping clamp with a 3/4 inch internal thread. The pipeline pipe is not interrupted with a connector, but instead the tapping clamp is screwed onto the pipe. The wall of the pipe is then drilled through at the point provided on the clamp so that a connection is made between the pipe and the clamp. The further procedure is identical to that when using a connector.
Best practice for swing joints is to install them face up, meaning the connector opening is facing up from the pipe. This is also an advantage for later replacement work. Theoretically, lateral installation is also possible without any problems.
Different types of swing joints
The swing joints usually have an external thread at both ends for connection. The following connection sizes are usually offered:
- 1/2 inch thread to 1/2 inch thread
- 3/4 inch thread to 3/4 inch thread
- 1/2 inch thread to 3/4 inch thread
Which of these three size variants you need depends on which thread the sprinkler used has (1/2 inch or 3/4 inch). The pipeline pipe will usually be branched off with a 3/4 inch thread (see previous point “How do you connect a swing joint?”). So you normally need the 3/4 to 1/2 inch or the 3/4 to 3/4 inch variant.
Note: In the professional sector you can also find larger thread sizes up to 1 1/2 inches and in addition to male thread connections, female thread connections and other types of connections are also offered.
Following is an introduction to the 3 types of swing joints:
Hard plastic swing joints with swivel joints
The material of this type of swing joint is rigid, but the swing joint can be flexibly aligned using the built-in 360 degree joints. Depending on the manufacturer, there are 3 or 4 joints.
The 4 joints of the Hunter SJ Swing Joint
Hunter offers these swing joints in a 6 inch and a 12 inch length version (Hunter SJ). Rain Bird also has this swing joint type in their range (Rain Bird SA). In addition, both also offer a second line of swing joints in larger sizes, starting at 1 inch through 1 1/4 to a maximum of 1 1/2 inches. These are aimed at a professional audience working with large sprinklers with 1″ connections and larger. This line is called HSJ by Hunter and SJ or TSJ by Rain Bird.
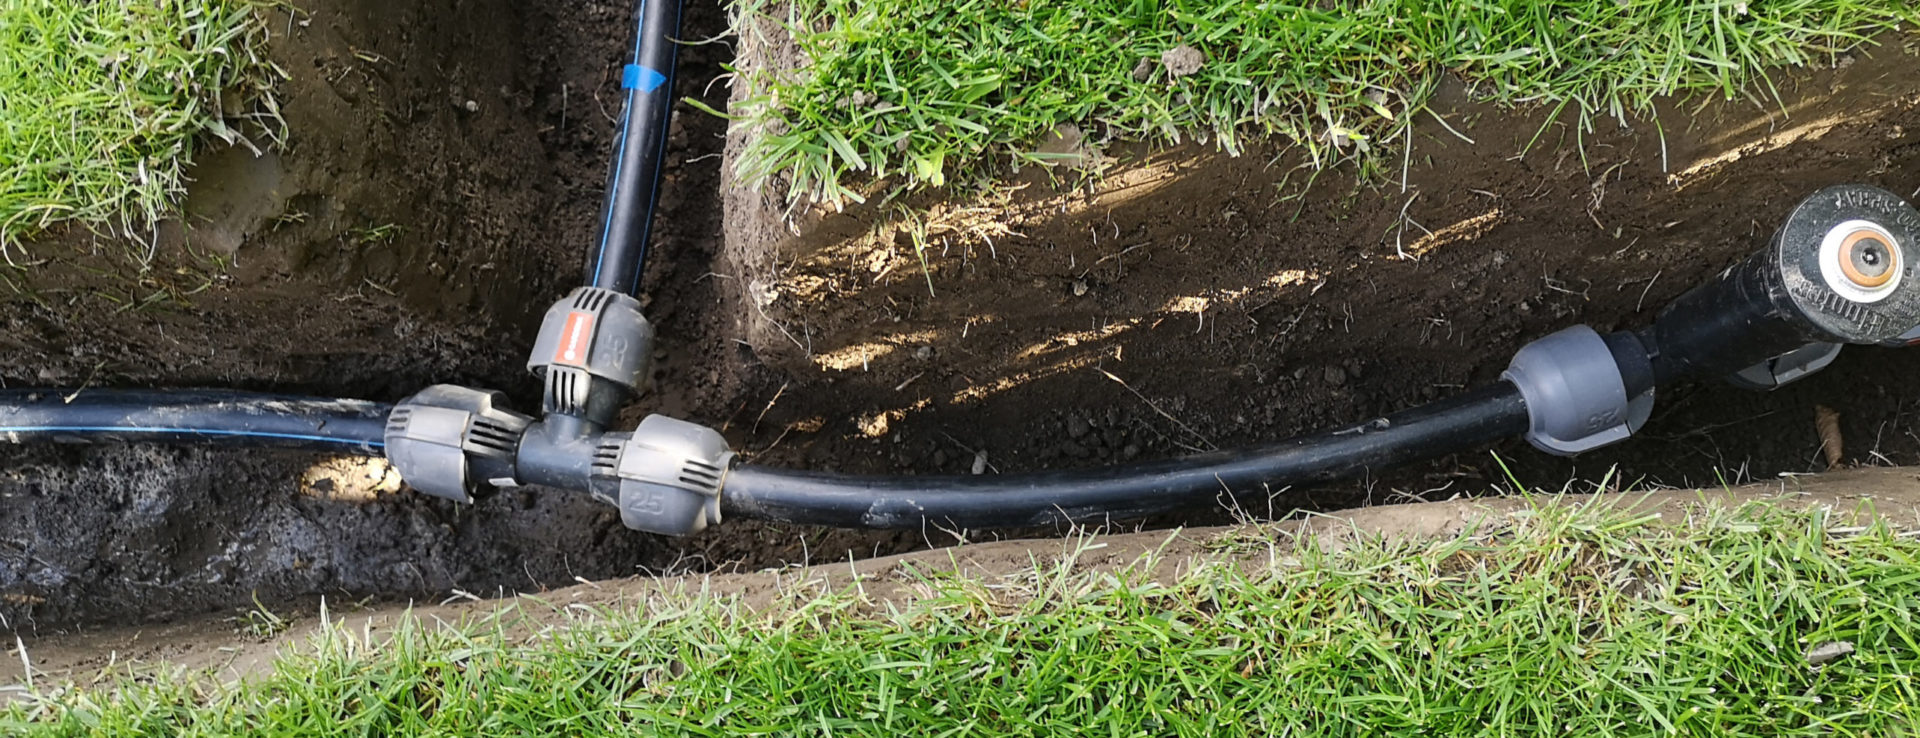
Below is an example image of an installation:
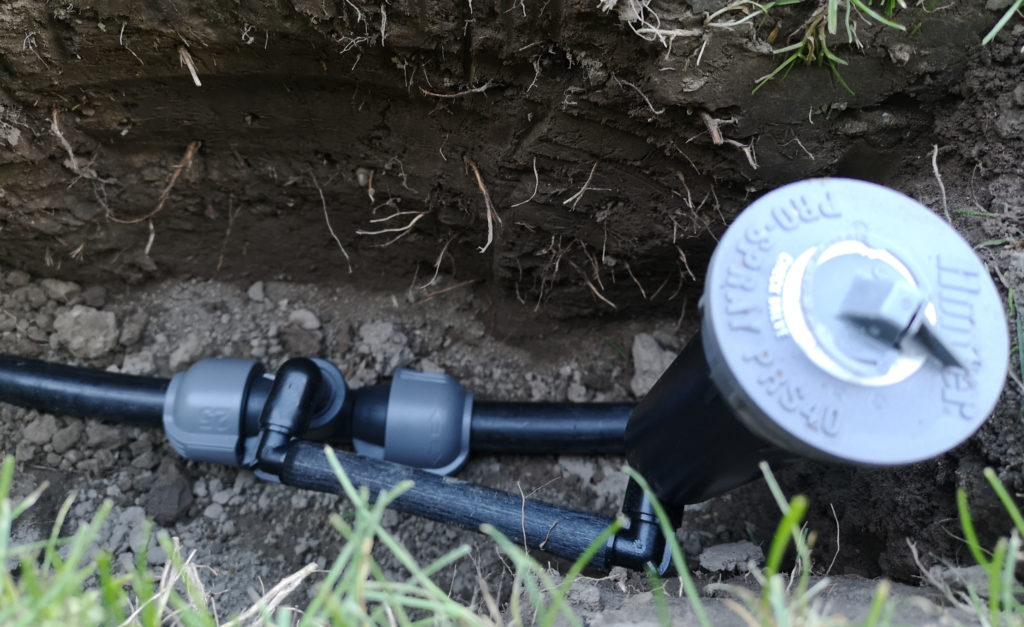
Hunter SJ-7506 swing joint, 6 inch length, 3/4 to 1/2 inch, connected to the pipeline via a 3/4 inch female connector
The following short video shows how flexibly the 4 joints can be adjusted:
Hard plastic swing joints with swivel joints on Amazon:
Auto Amazon Links: No products found.
Swing joints made of flexible hose (“Funny Pipes”) for self-assembly
This type of swing joint consists of a flexible tube that can be elastically adjusted. The diameter of this is a 1/2 inch hose, as known for manual watering in the garden, but the hose is much more stable and thick-walled, since it must not be crushed by the earth that weighs on it. Actually something between hose and pipe, not quite as hard as a pipe, not as soft as a hose. You can buy the hose in whole rolls or in pieces of several feet.
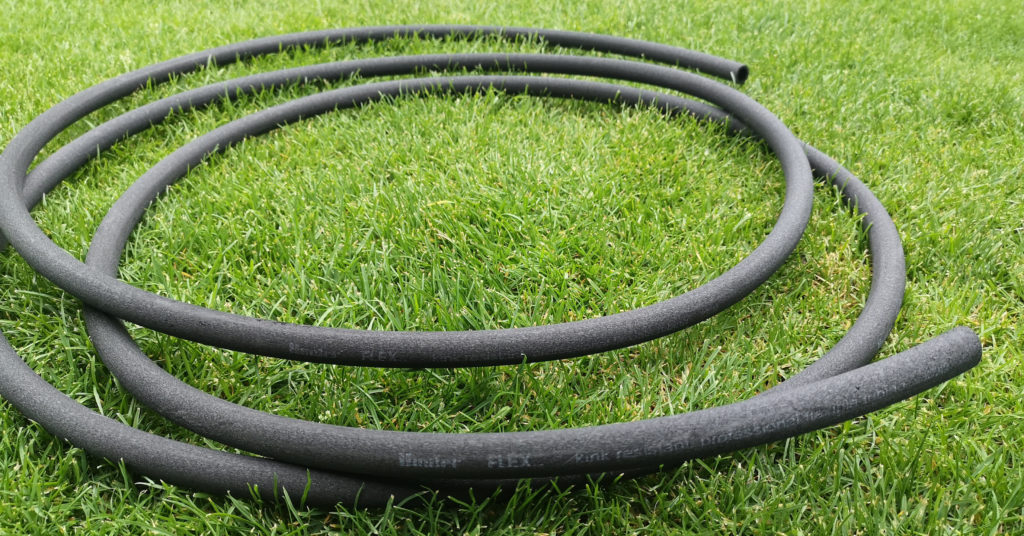
15 feet piece of Hunter Flex hose
Simply cut off the pieces of the required length from the roll. This is best done with pipe cutters. The external thread adapters are then mounted on both sides of the hose, either in 1/2 inch or 3/4 inch versions, depending on what you want to connect to the end. It is installed by simply screwing the angled intermediate pieces with a spiral thread into the hose. The intermediate pieces can be turned further after assembly is complete, so they are not rigid.

Screwing the angle piece into the hose
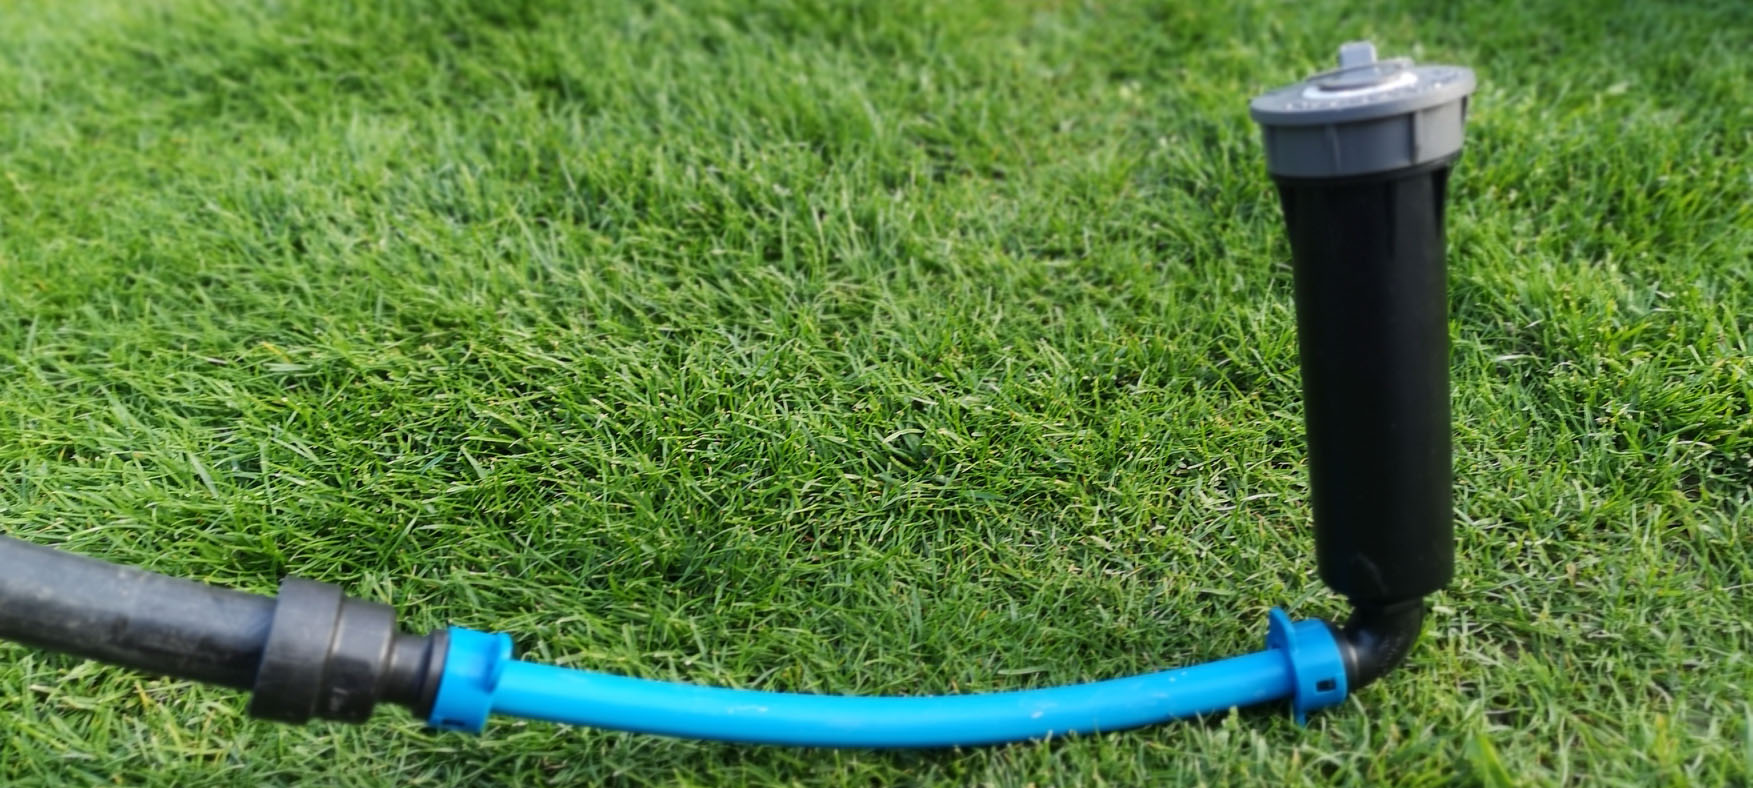
The fully assembled hose allows the sprinkler to be aligned very flexibly
Hunter’s system is called FlexSG, sometimes referred to as Pro-FlexSG or Profiflex in some sales listings. The hose is sold in 100 foot coils, but is also available in multiple foot lengths from some vendors. The associated threads are HSBE 050 (1/2 inch) and HSBE 075 (3/4 inch).
The counterpart of the Rain Bird is called SPX-FLEX. This is also offered in 100-foot rolls or, by some retailers, in pieces of several feet. The associated threads are called SBE-050 (1/2 inch) or SBE-075 (3/4 inch).
Toro has practically the same thing, here it’s called the Funny Pipe System.
A fourth option is the Blue Lock System from HydroRain. The Blue Lock system is designed with plug connections. The Blue Lock Swing Joint is not connected to the pipeline with a connector, but the pipeline is simply plugged into the coupling of the Swing Joint pipe.
Example of connecting a Blue Lock Swing Joints hose
Funny pipe components on Amazon:
Auto Amazon Links: No products found.
Swing joints made of flexible hose (“Funny Pipes”) pre-assembled
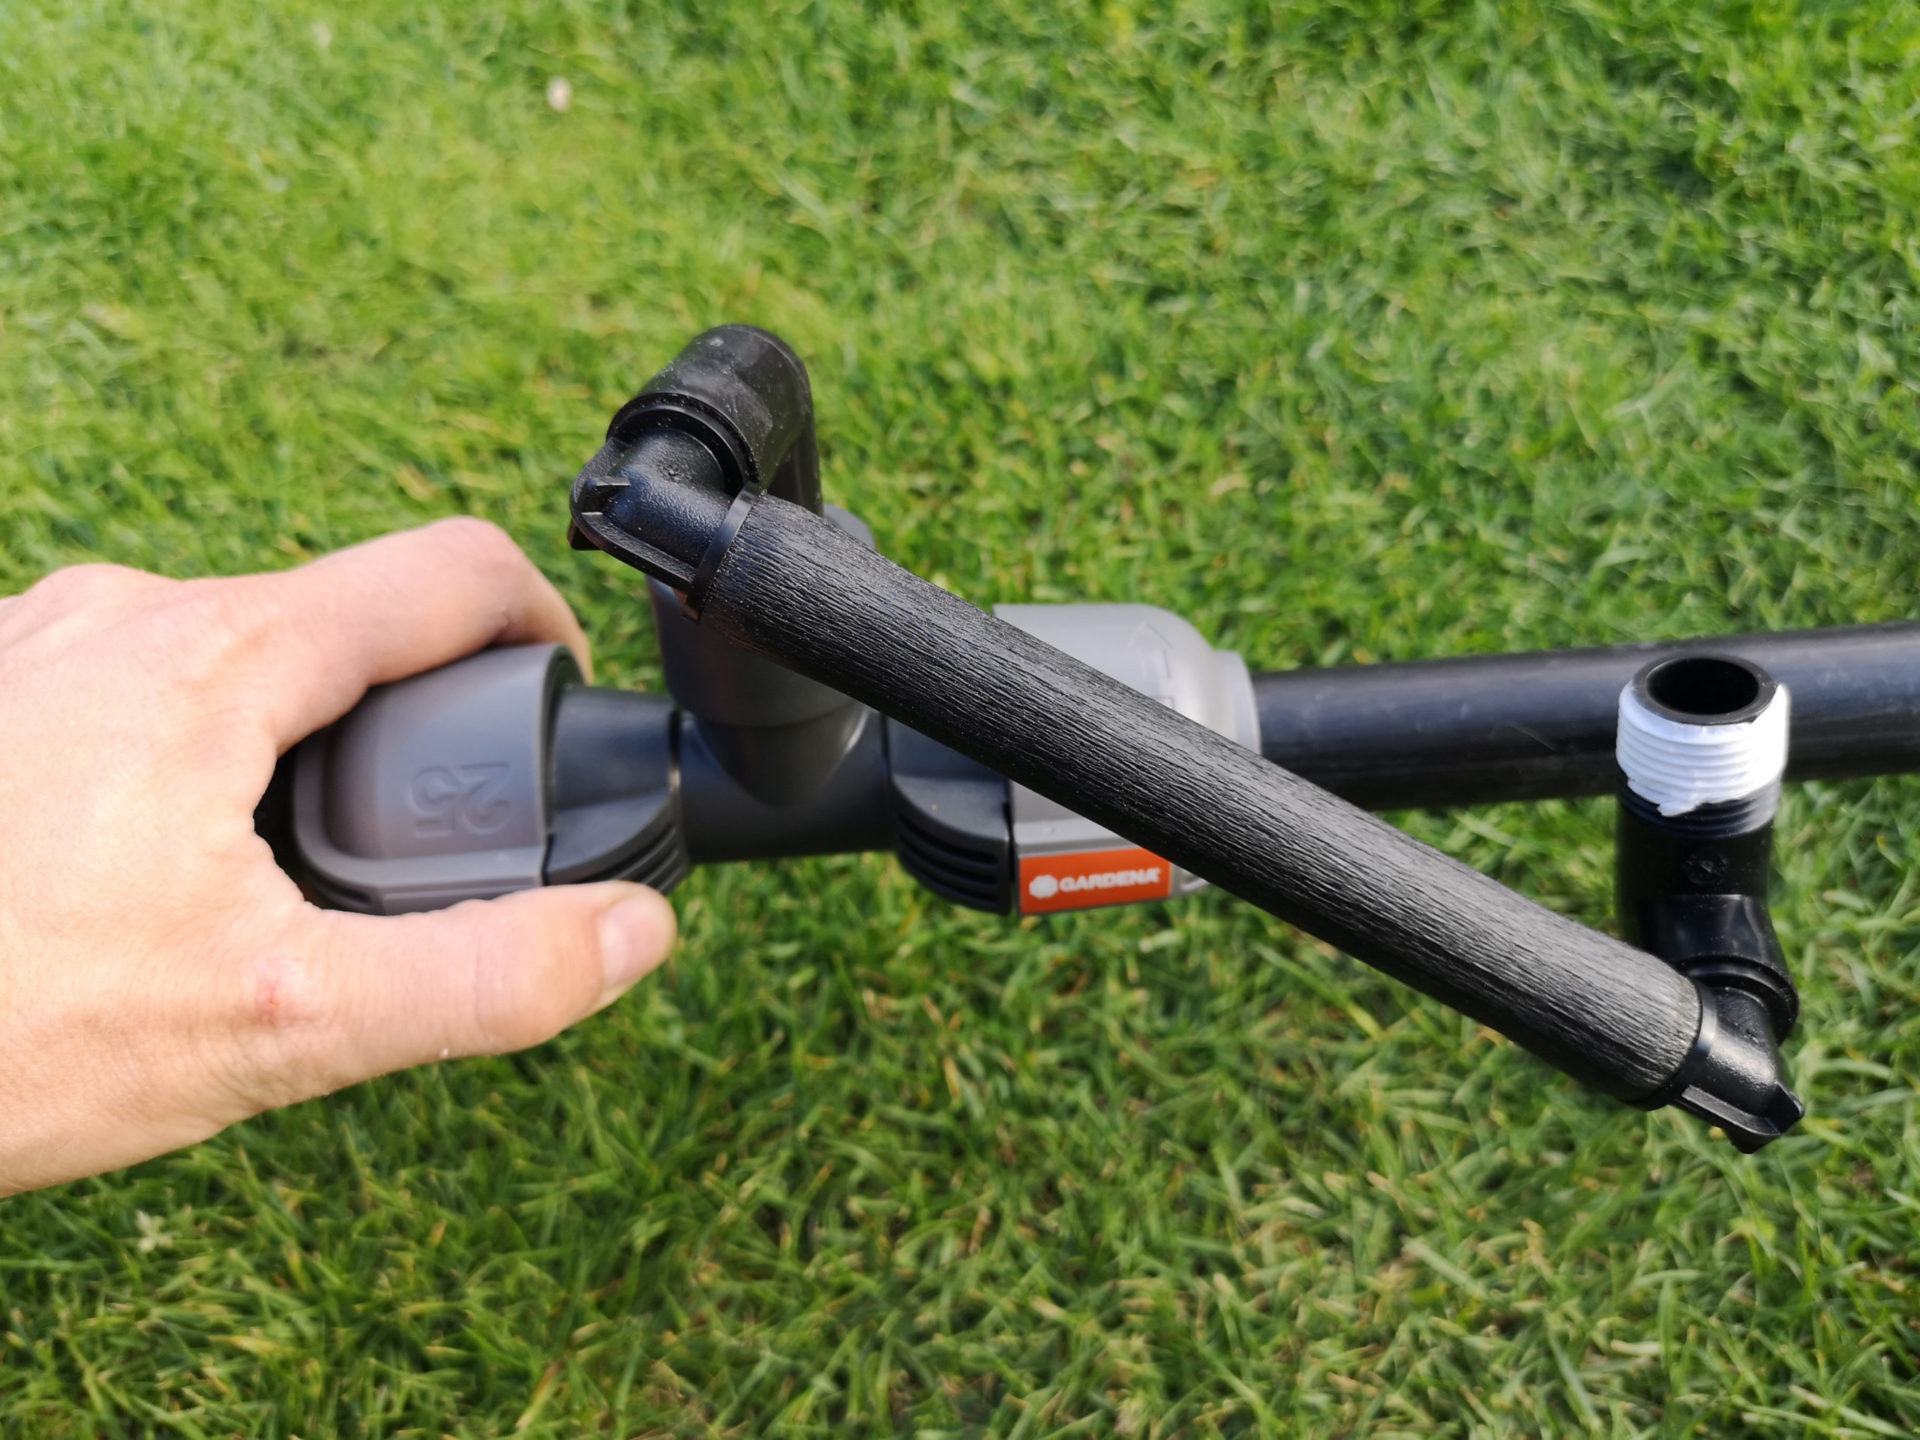
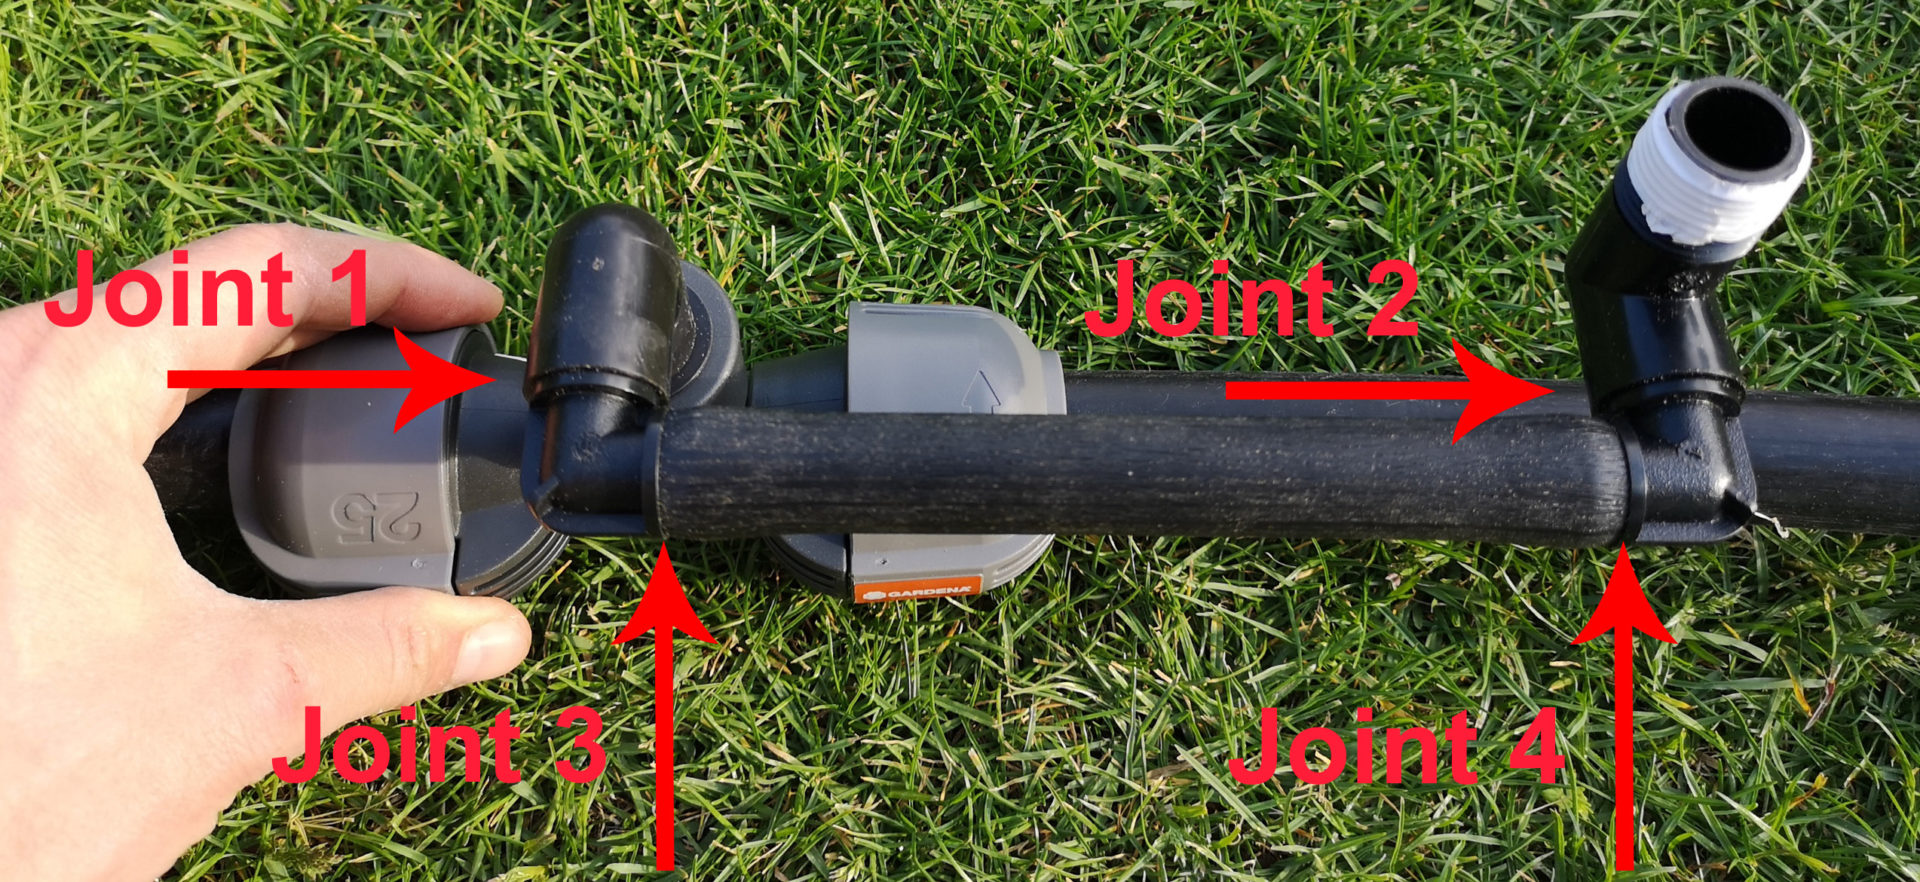
The only representative of this genus I know of at the moment is the Connector G2739-20 from Gardena. In principle, this has exactly the same structure as the swing joint type described above. The only difference is that the Swing Joint is sold fully assembled and the connecting pieces are fixed and not movable. The Gardena Connector has a length of 8 inches.
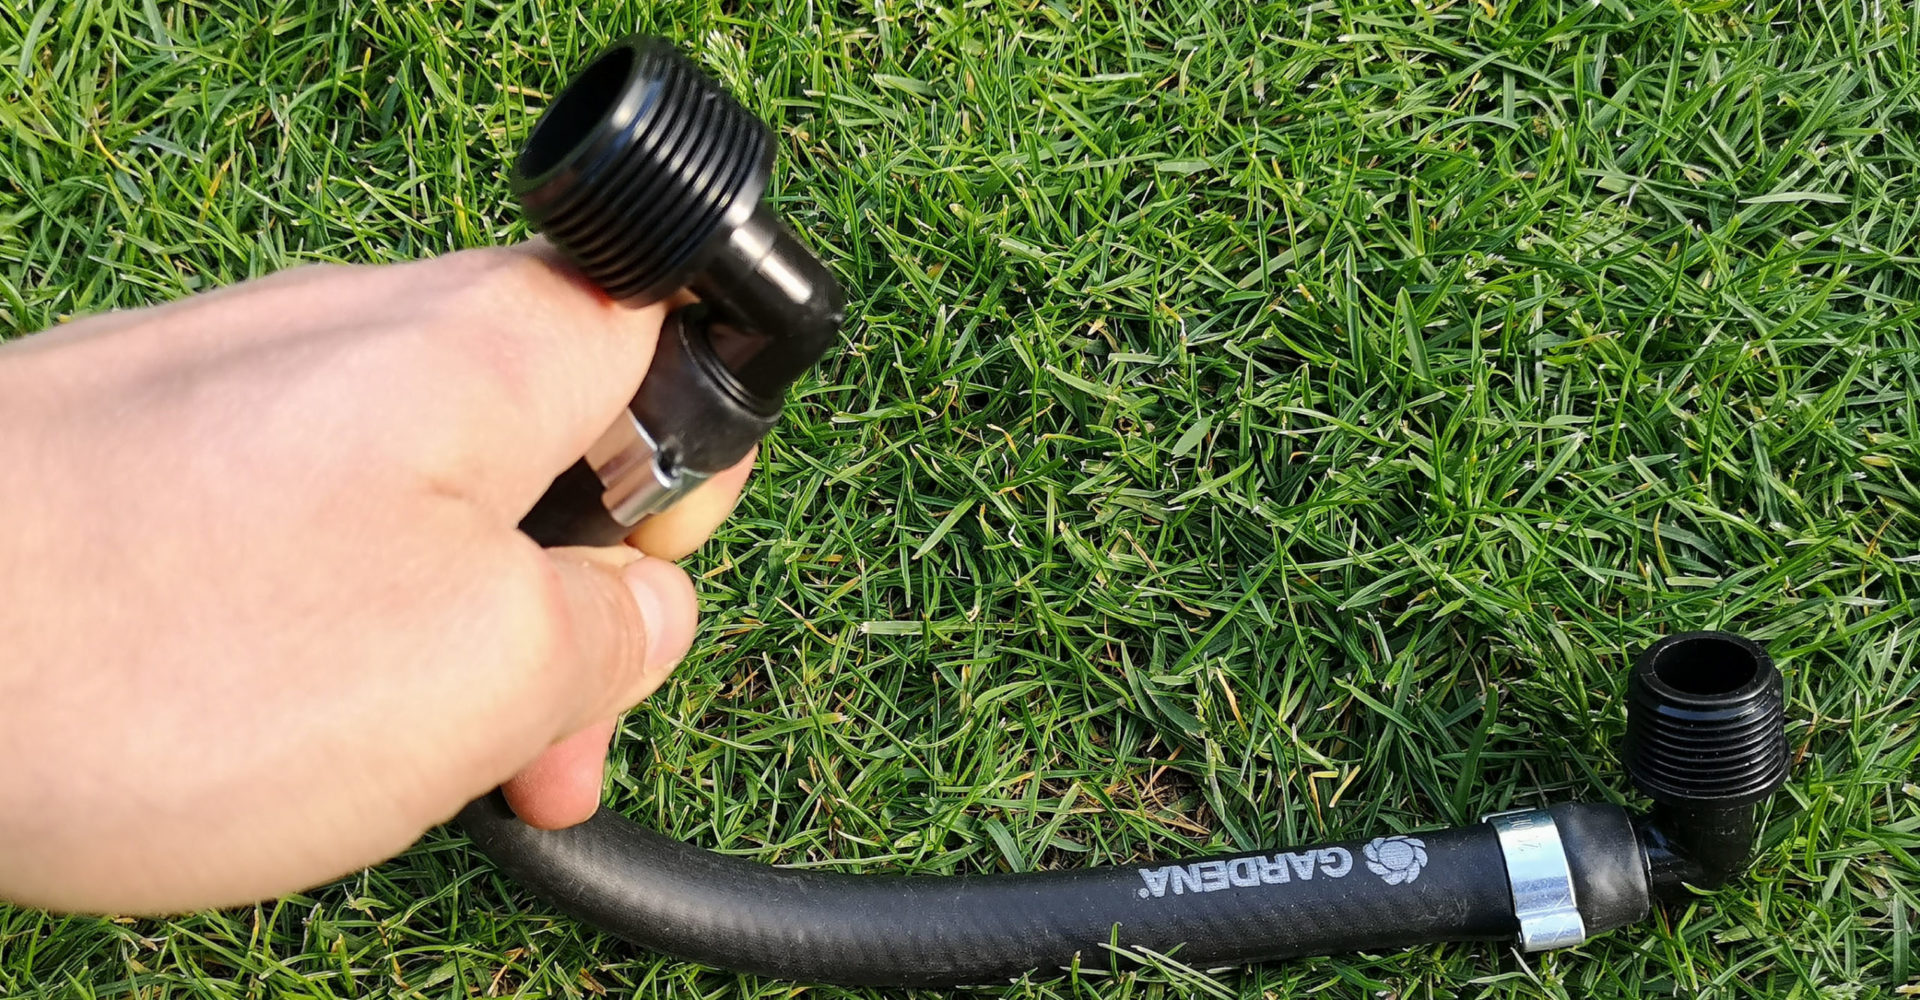
Gardena Connector Swing Joint with a length of 8 inches
Conclusion and recommendation
In my personal experience, swing joints actually make installing sprinklers a lot easier. You are also well prepared for future eventualities in the form of necessary sprinkler replacements or necessary restoration of the correct sprinkler position due to damage or lowered ground. These problems can thus be solved much more easily and quickly. In my opinion, which type of swing joint you use is a matter of taste. Personally, I enjoy working with Hunter’s rigid, hard plastic swing joints (Hunter SJ). In my opinion, the adjustment options are completely sufficient and this swing joint can also be temporarily set up and fastened so that it stays in its position even during a test run in an open trench.
If you need to cover distances greater than 12 inches with a swing joint, then the second type, the swing joint made of flexible tubing, comes into play. You can assemble this to the desired length yourself and it can be mounted just as flexibly as the variant with built-in joints. However, you should only use this type in longer lengths if it is necessary and keep in mind that swing joints are basically designed for connection over short distances due to their narrowed diameter. For typical short-range use, I prefer the hard plastic alternative above, although it’s slightly more expensive than the self-assembly option.
The third variant, also made of a flexible hose but fixed together, from Gardena, also works perfectly, but is a bit more expensive than the two types described above.