The correct positioning of the sprinklers on the area to be irrigated is one of the most important points when implementing automatic irrigation. A distinction is made between two different principles, the square pattern and the triangular pattern. I present the square pattern in a separate blog post. I explain in detail why a system is used to position the sprinklers in the planning pages. This post is about the triangular pattern: how it works, how to construct it and where it has advantages over the square pattern.
The triangular pattern has an advantage over the square pattern when it comes to watering non-rectangular areas. Especially when it comes to circular areas, it is much easier to use the triangular pattern. In the case of rectangular areas, on the other hand, the square pattern is easier to use.
Another advantage of the triangular pattern is that this formation allows the sprinklers to be spaced slightly further apart than is the case with the square pattern. This is of great importance, especially for the professional sector, in which huge areas are irrigated. In the square pattern the distance between the sprinklers is 50% of the sprinkler throw diameter, in the triangular pattern you can place the sprinklers with a distance of up to 60% of the sprinkler throw diameter and still have a sufficiently good overlap. If the maximum possible distance is exhausted, the triangular pattern manages with slightly fewer sprinklers on the same area than the square pattern. I then first show a triangular pattern with a sprinkler spacing of 50% of the sprinkler throw diameter (= throw) and then, for comparison, the same formation with a sprinkler spacing of 60% of the sprinkler throw diameter.
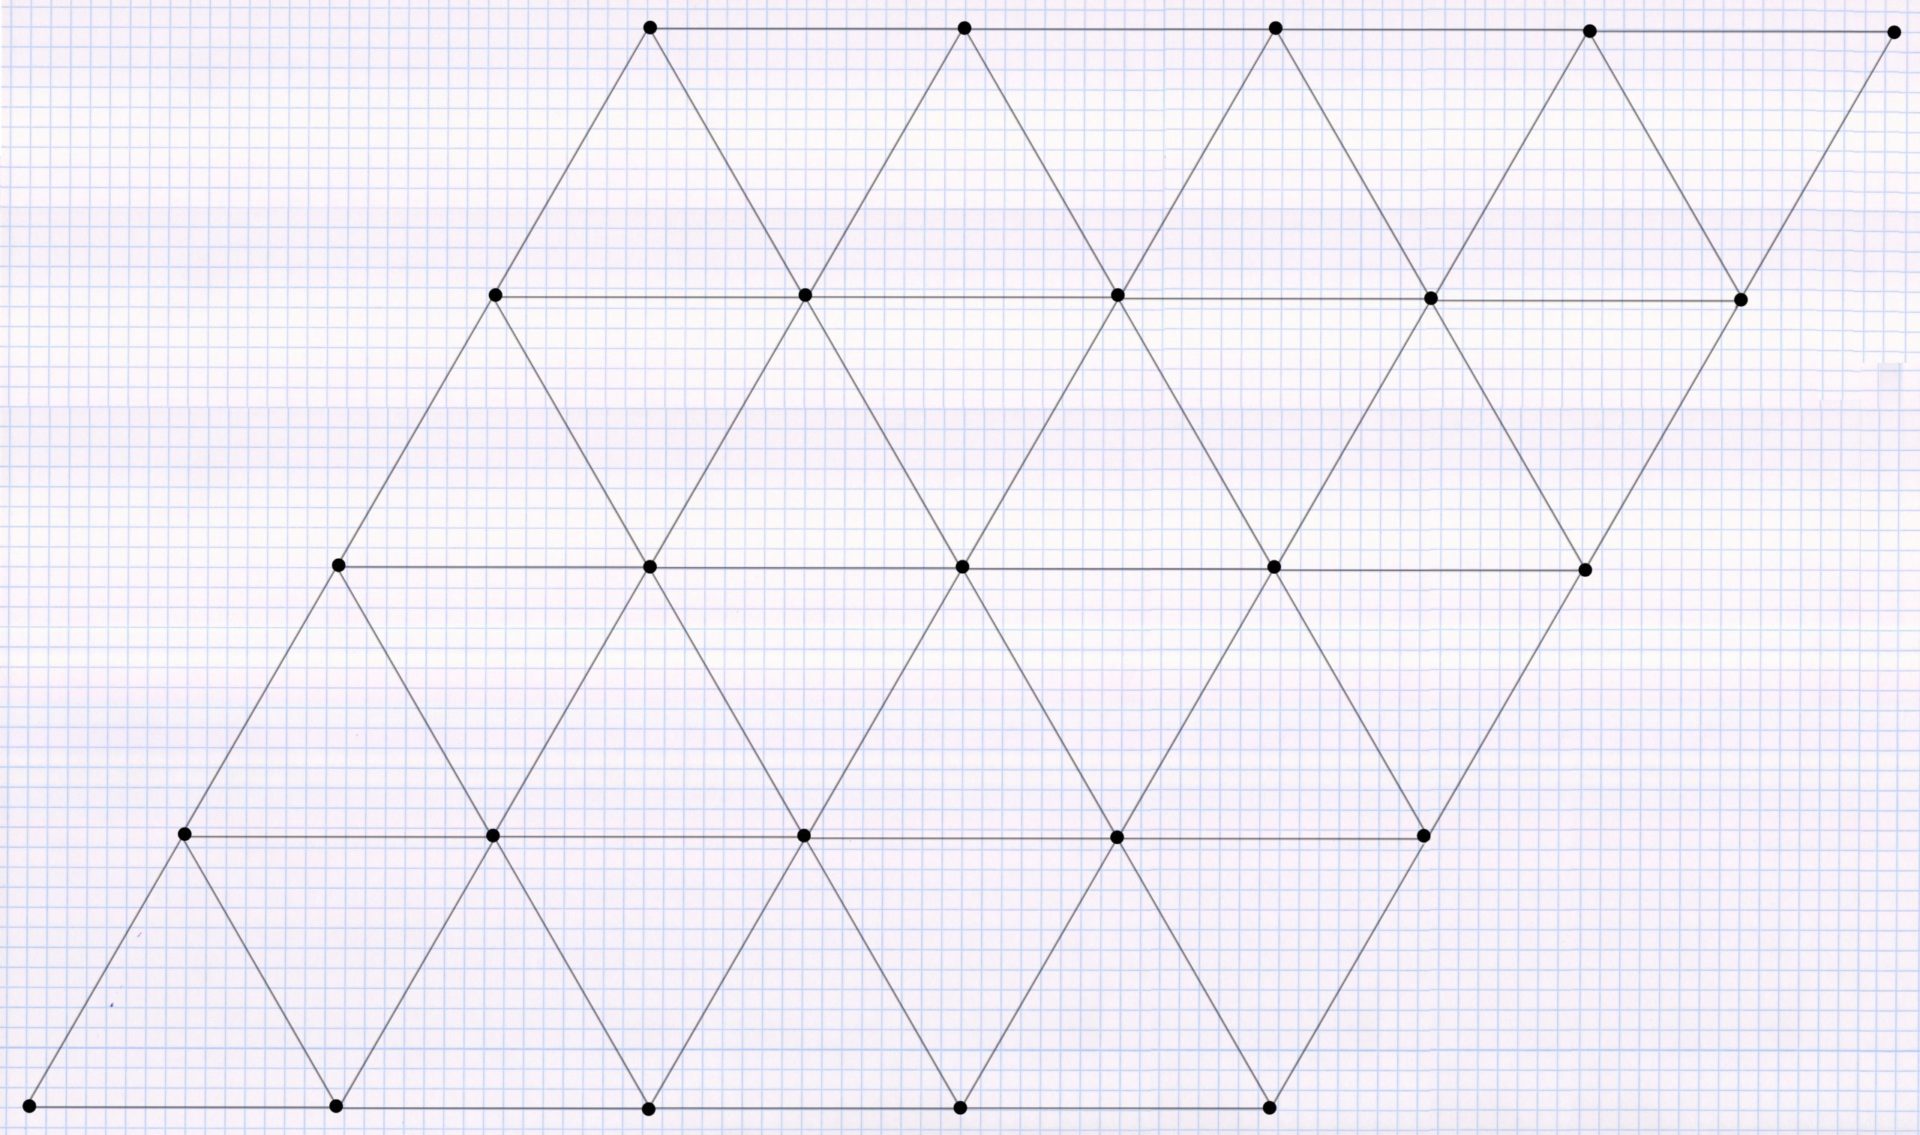
The sprinklers positioned in the triangular pattern on the irrigation area result in the image of equilateral triangles, which are placed offset in each row:
The distance between the rows in the triangular pattern is 86% of the radius width. The triangle pattern works particularly well for corners that are around 60 or 120 degrees (as in the image above).
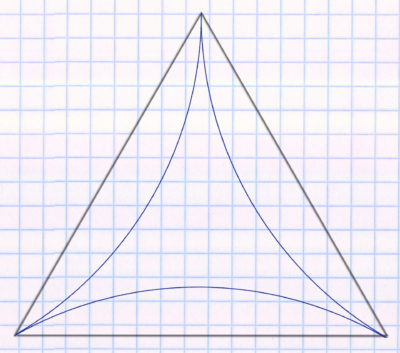
The single triangle will be watered in the triangle pattern with a pattern as below (at 50% sprinkler spacing):
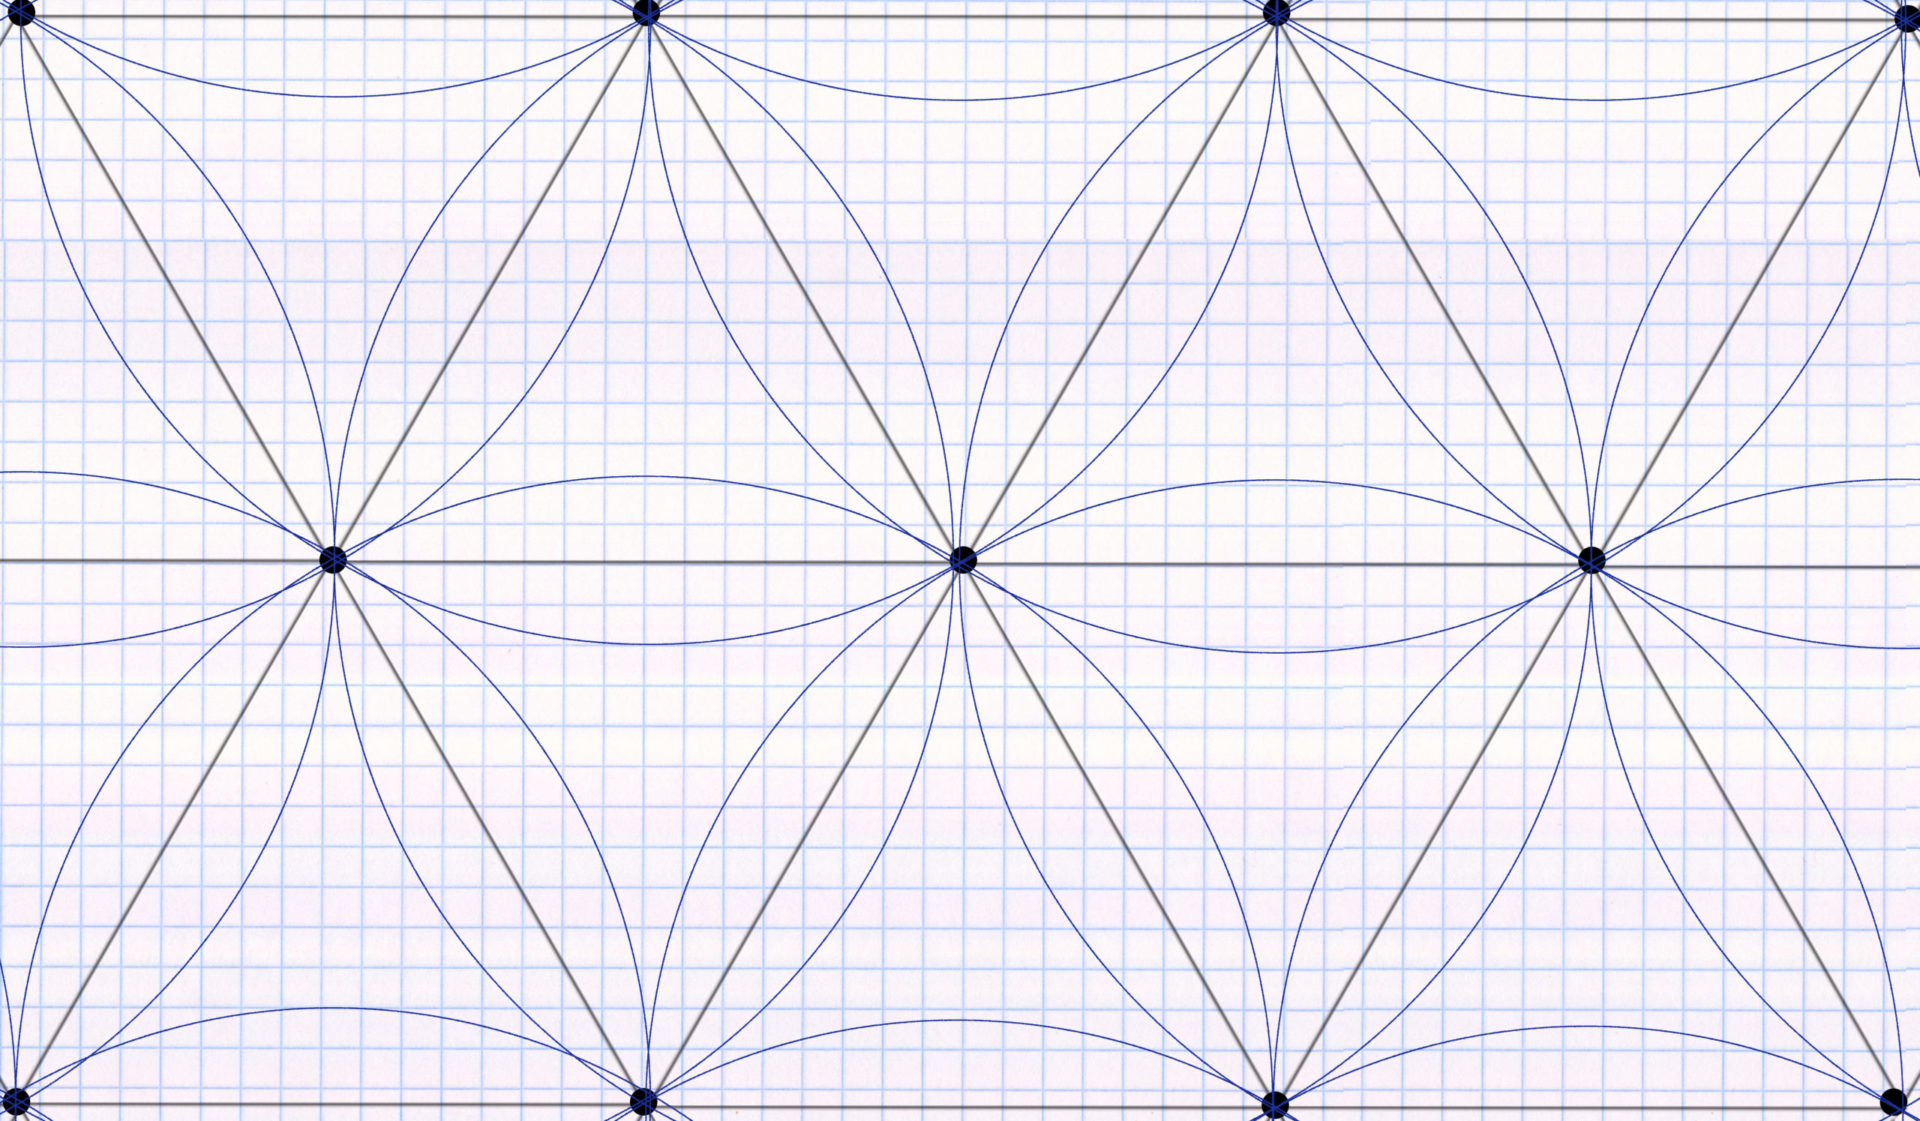
A sprinkler is placed in each corner of the triangle. Unlike the square formation, which only receives water from the 4 sprinklers in the square formation, the triangle also receives water from points outside the triangle. Two sprinklers from the neighboring triangles that are to the left and right of the upper corner point and one sprinkler from the triangle below rain into the triangle. This can be understood in the following sketch, in which you can see that the triangle framed in blue receives water from a total of 6 sprinklers:
This applies at least to those triangles that are not on the edge of the irrigation area. The triangles on the edge lack a neighboring sprinkler on the edge side and are therefore watered a little less. This even applies to the optimal basic shape with 60 or 120 degree corners.
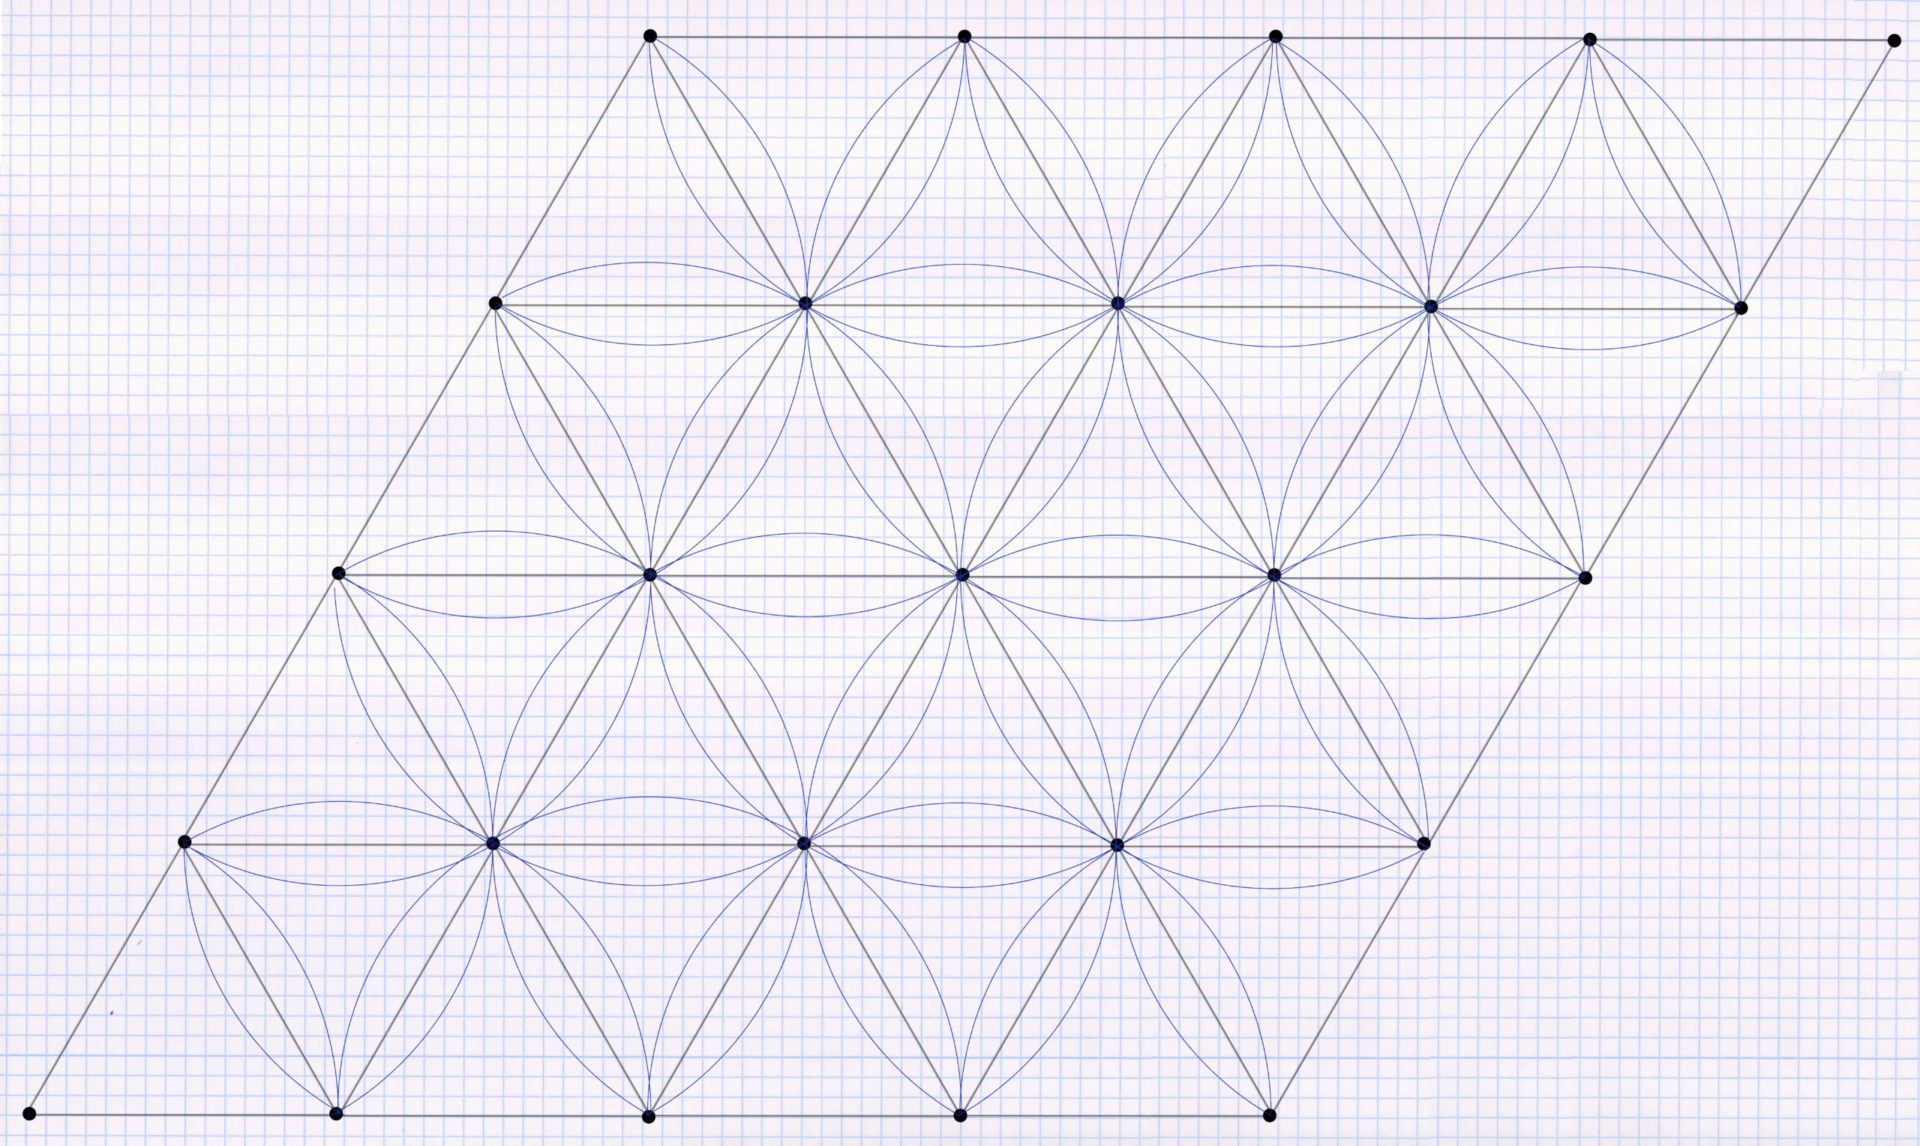
For example, over an entire irrigation area, the triangular pattern looks like this. It can be seen that the same pattern is repeated in each triangle in the same way, only rotated 180 degrees for the inverted triangles. And that the triangles on the edge are missing part of the pattern.
In practice, the reduced watering at the edges would have to be compensated for by installing additional sprinklers. For this reason, the triangular pattern is particularly suitable for large connected areas, where this fact plays a comparatively small role.
In any case, the best alternative is the triangular pattern for circular areas. The reason for this is that a circle can be divided into numerous pie slices, i.e. triangles. Exactly how this works is explained in a separate blog post on watering circular areas.
Reference to triangle formation in sprinkler operating data
The sprinkler manufacturers indicate the amount of precipitation for their sprinklers in their product descriptions. This is done for a particular water pressure and nozzle used, with reference to either the square or triangular pattern. For more on this topic, see the square formation blog post.
Adjusting the amount of precipitation – tuning the nozzles
When placing the sprinklers, make sure that the amount of precipitation from the sprinklers has to be adjusted depending on the size of the circular sector. Why? Most sprinkler models always release the same amount of water in a certain amount of time, e.g. 200 gallons/hour at 30 psi pressure. A quarter-circle sprinkler would therefore distribute four times the amount of water as a full-circle sprinkler on its sprinkling area in the same amount of time. A more detailed explanation of this and how to compensate for this effect or avoid it entirely by using sprinklers with an integrated MPR function can also be found in the explanation of the square formation.
Triangular pattern with a sprinkler spacing of 60% of the sprinkler throw diameter
Below is an example of a triangular pattern in which the maximum possible sprinkler spacing has been exhausted. The sprinklers were not placed within the sprinkler throw distance from each other, but a little further apart, at 60% of the sprinkler throw diameter. In the previous example, the sprinklers were placed 26 feet apart, now 31.20 feet apart. Since the sprinkler throw remains the same, this means there is slightly less overlap. Each triangle only receives water from 3 sprinklers instead of 6 before. This can be easily understood from the following sketch, which shows a positioning with 60% of the sprinkler throw diameter:
I am an enthusiastic do-it-yourselfer and have been running this blog on the subject of garden irrigation for more than 6 years now. In over 150 specialist articles, I share my own experiences and know-how from years of research and numerous product tests. -> More about me


")