Despite all the skepticism I have about some products from the German brand Gardena, especially about the sprinklers, I am an all the bigger fan of the Gardena water distributor automatic. How to use this and why there is currently no comparable product on the market, I describe in the following blog post.
First of all: In order to be able to use the automatic water distributor, you need a suitable watering computer. This is a watering computer with the ability to carry out at least 6 watering cycles in one day. Only certain irrigation computers can do that.
So why do you need the automatic water distributor?
As soon as the water consumption of the planned sprinklers exceeds the capacity of the water connection or the pump, you are forced to divide the irrigation into several sectors. It is then no longer poured all at once, but the sectors are irrigated one after the other. This is the usual case, operating the irrigation system with only one sector, only works for very small systems and is rather the exception. If 2 sectors are sufficient, then you still have the option of an irrigation computer with 2 outputs or sparsely offered computers with 3 or 4 outputs, at the latest from 5 sectors you only have the following two alternatives:
Control via irrigation computer and solenoid valves
Control via irrigation computer and automatic water distributor
The first alternative is the method used almost exclusively in the professional sector: the entrance to the sectors is opened and closed again using solenoid valves. In the initial state, all valves are closed, as soon as sector 1 is to be irrigated, solenoid valve 1 upstream of the sector opens, after the end of the programmed irrigation time it closes again and solenoid valve 2 continues in the same way. There is a separate type of irrigation computer for controlling the solenoid valves. In these irrigation computers, the solenoid valve is not built into the computer, but the computer transmits impulses via a cable connection, which control the solenoid valves located elsewhere, e.g. in a valve box. The pipeline is not routed to the computer, but to the solenoid valves. The irrigation computer requires a power connection (except for 9 volt valves).
This variant works perfectly, but for one or the other it can be oversized or too complicated to implement or even too expensive. Then the second alternative with the automatic water distributor comes into play. This is cheaper and has a very low complexity. The installation is very easy and quick and it can be broken or defective during operation.
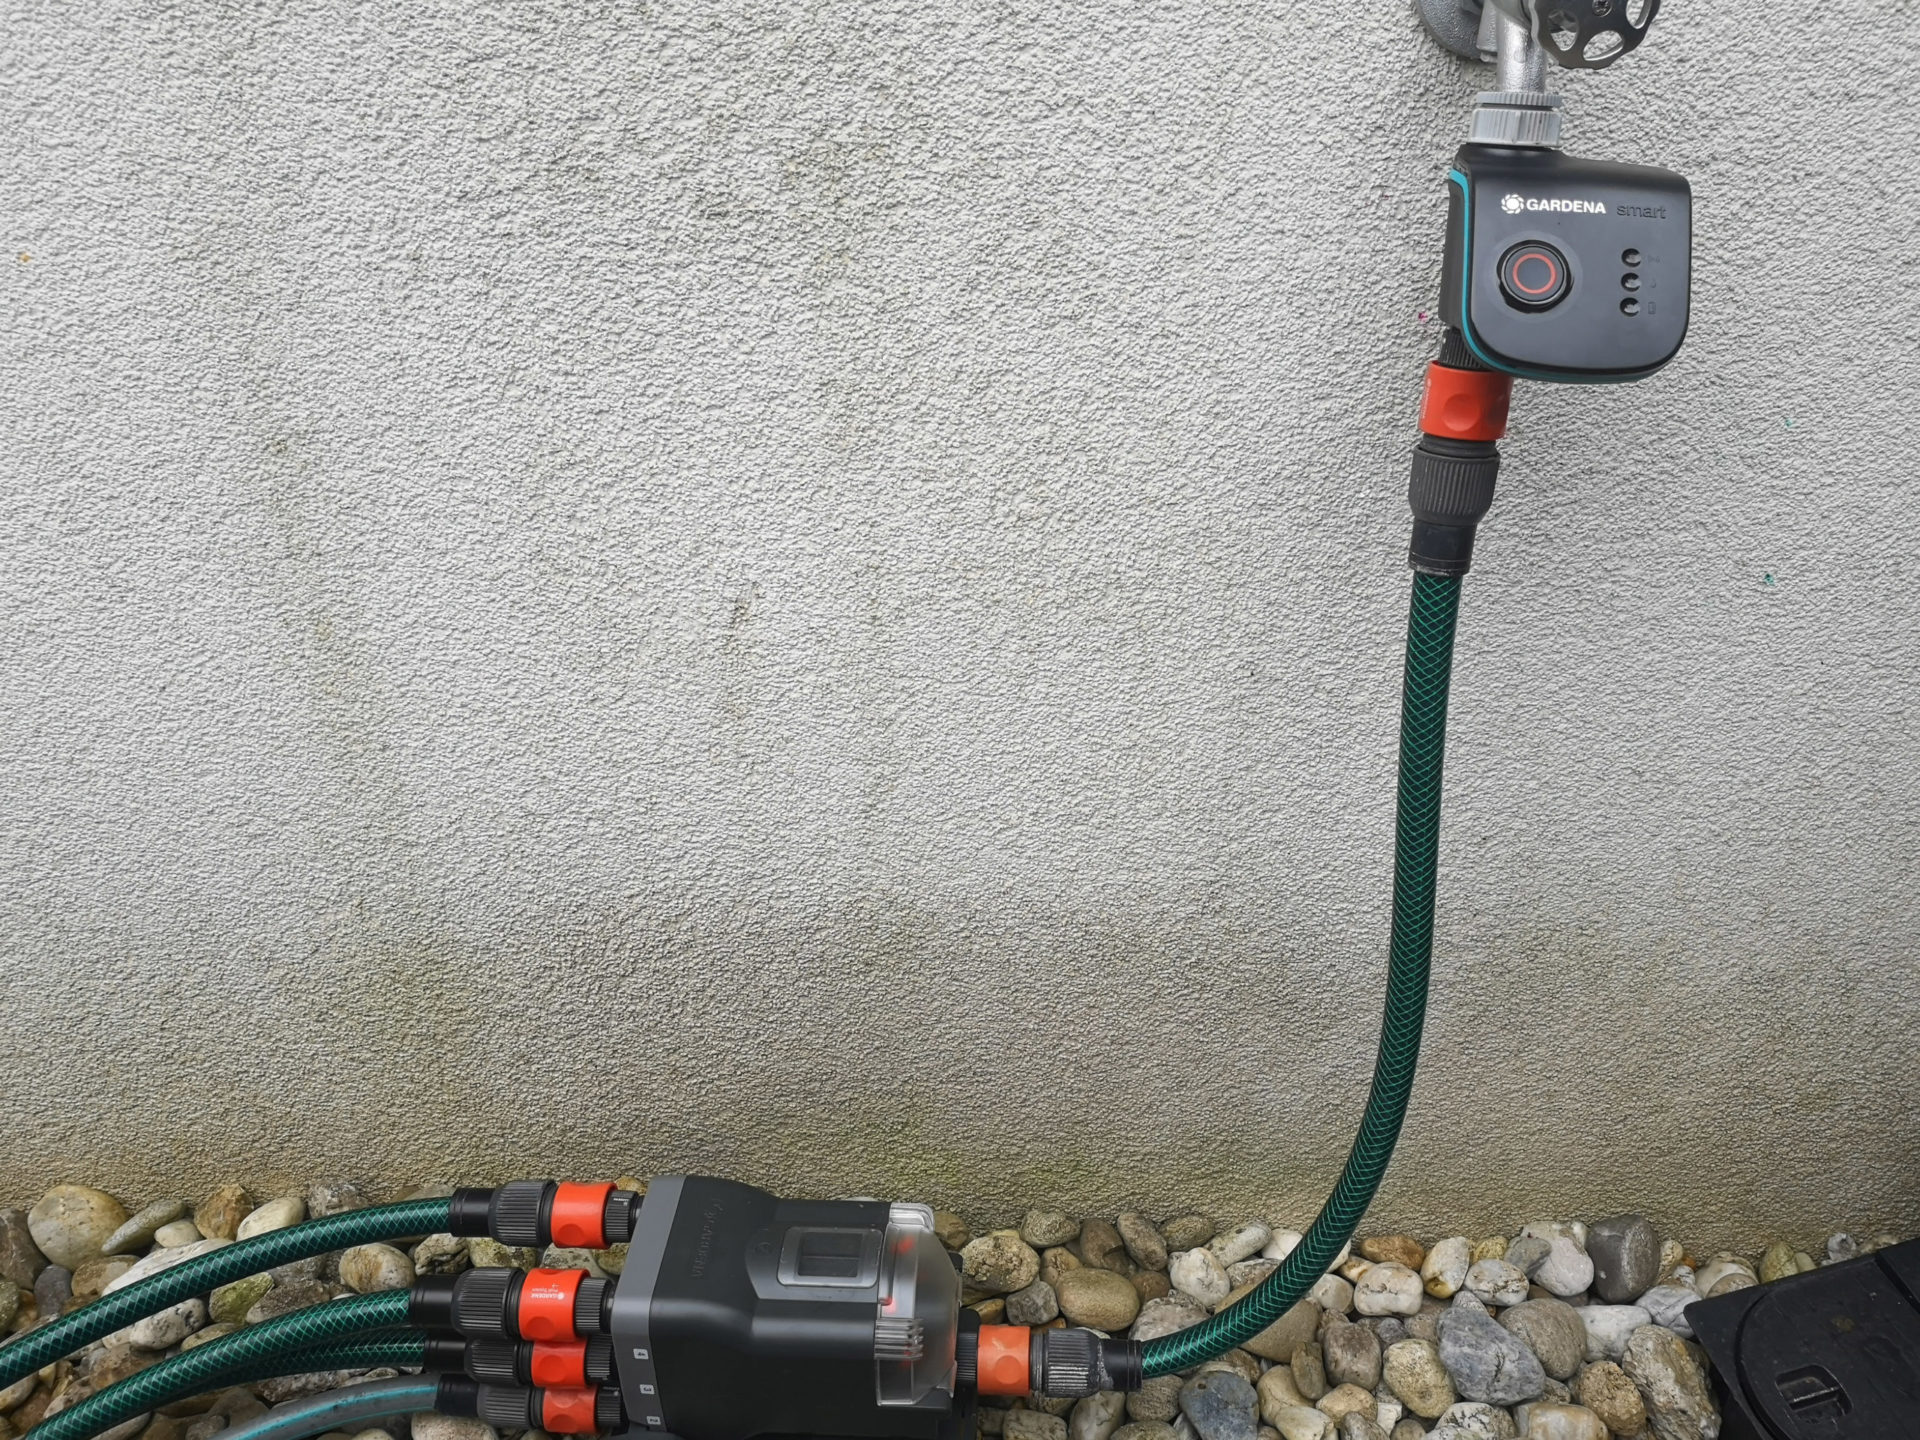
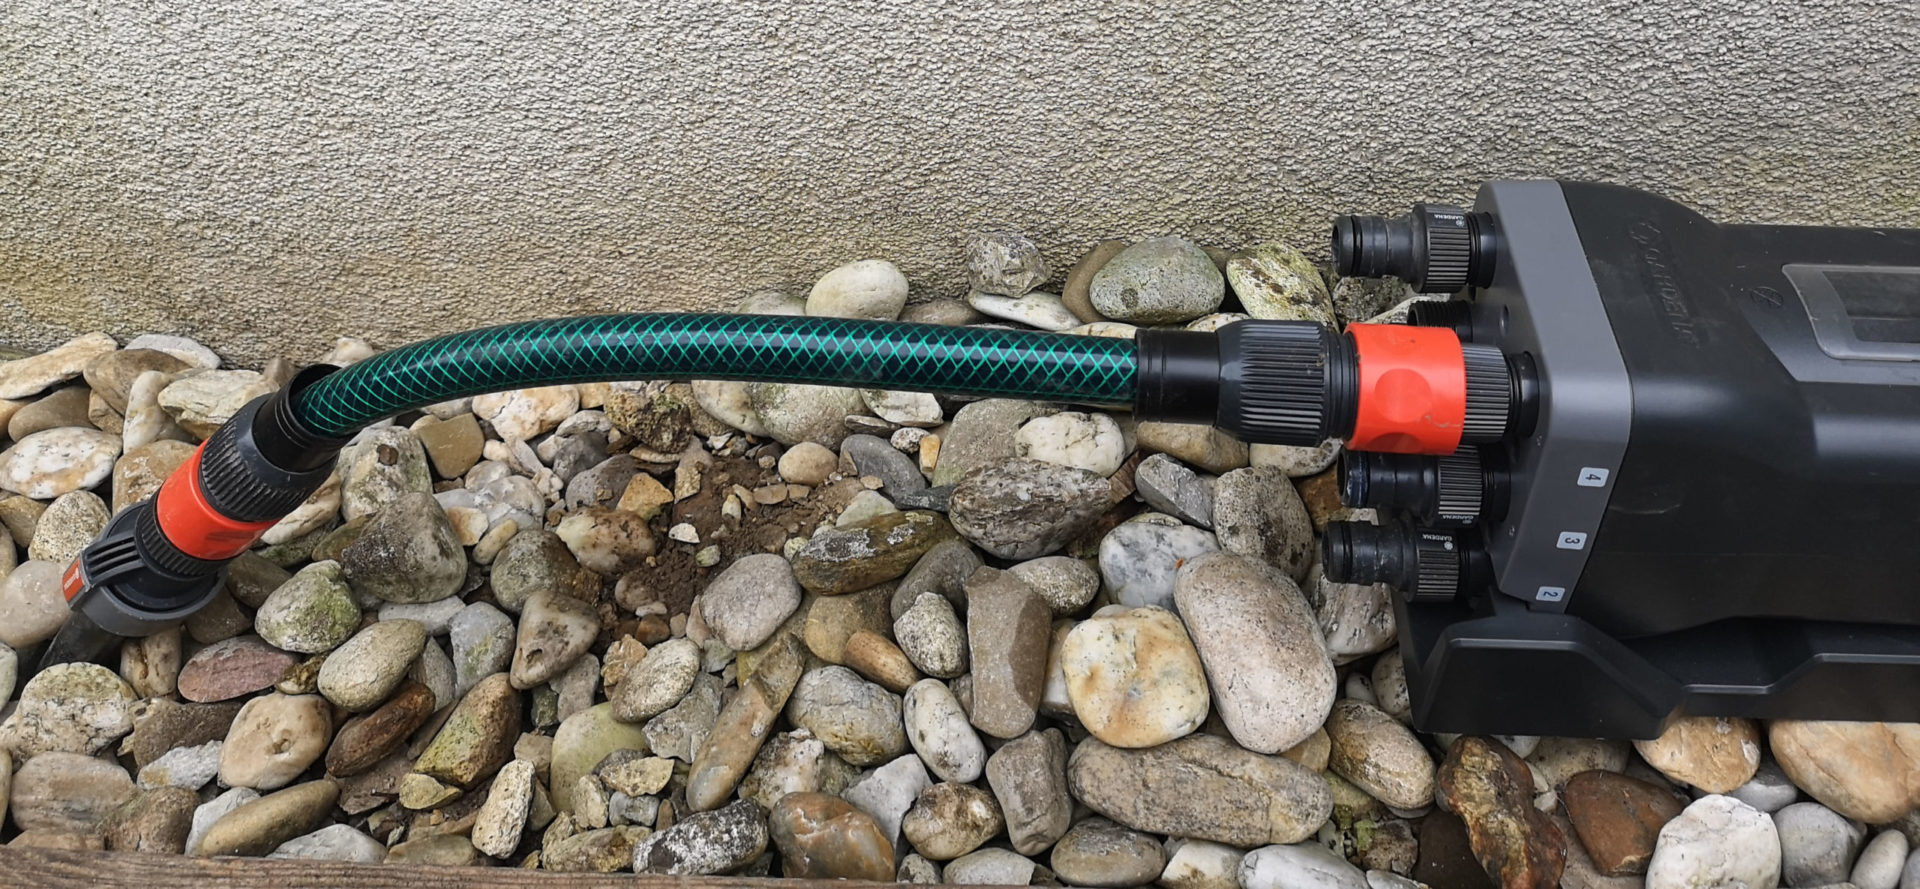
No power connection is required to use the automatic water distributor: the automatic water distributor works purely mechanically, without any electronics, and the type of irrigation computer required for operation is battery-operated. The irrigation computer is attached directly to a water tap or after a pump. A 3/4 inch hose connection is connected from the computer to the inlet of the automatic water distributor.
Automatic water distributor connected to the irrigation computer
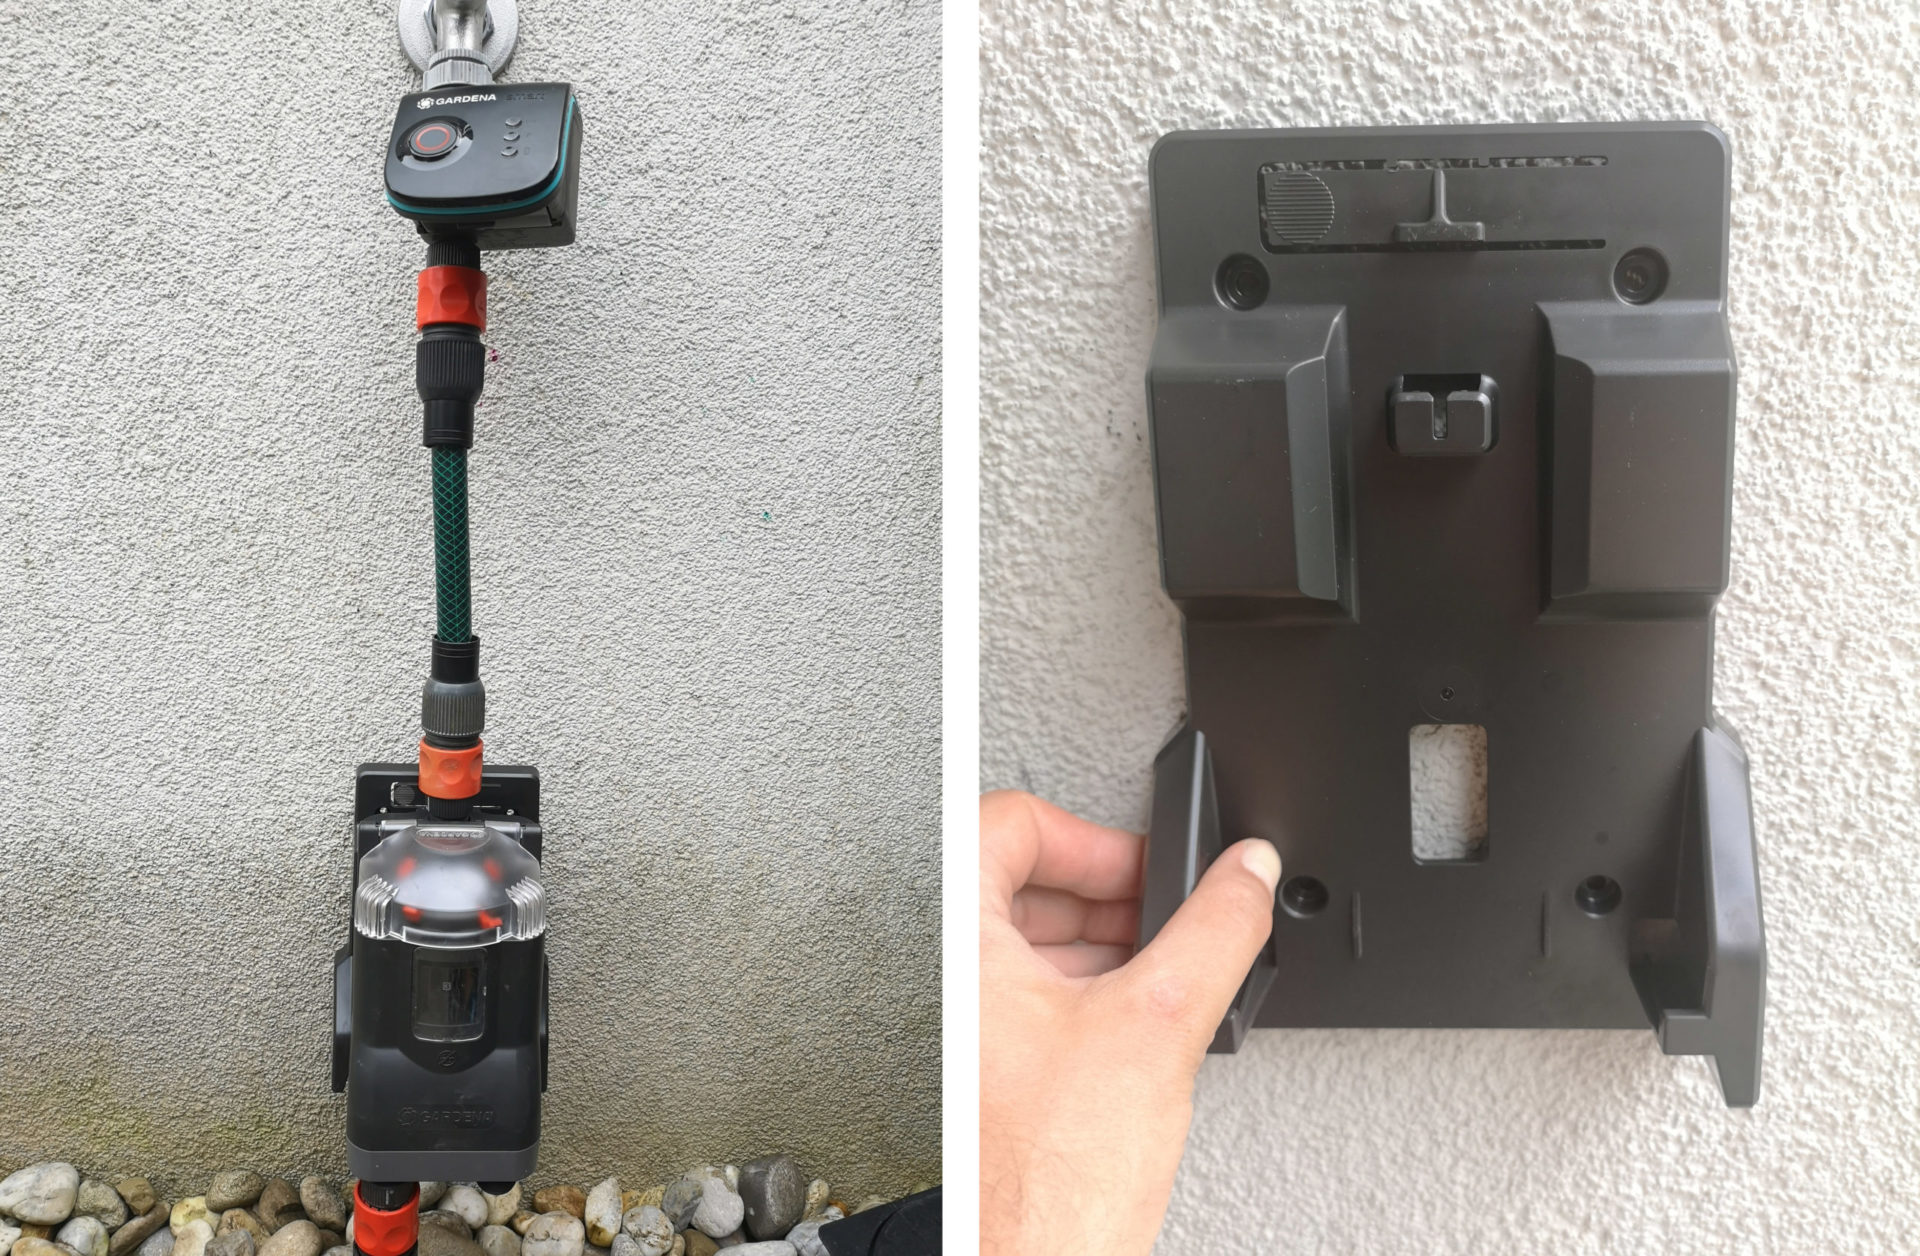
Alternatively, the automatic water distributor can also be operated hanging. To do this, the mounting plate (see right picture) must be mounted on the wall with screws and the water distributor hung on it.
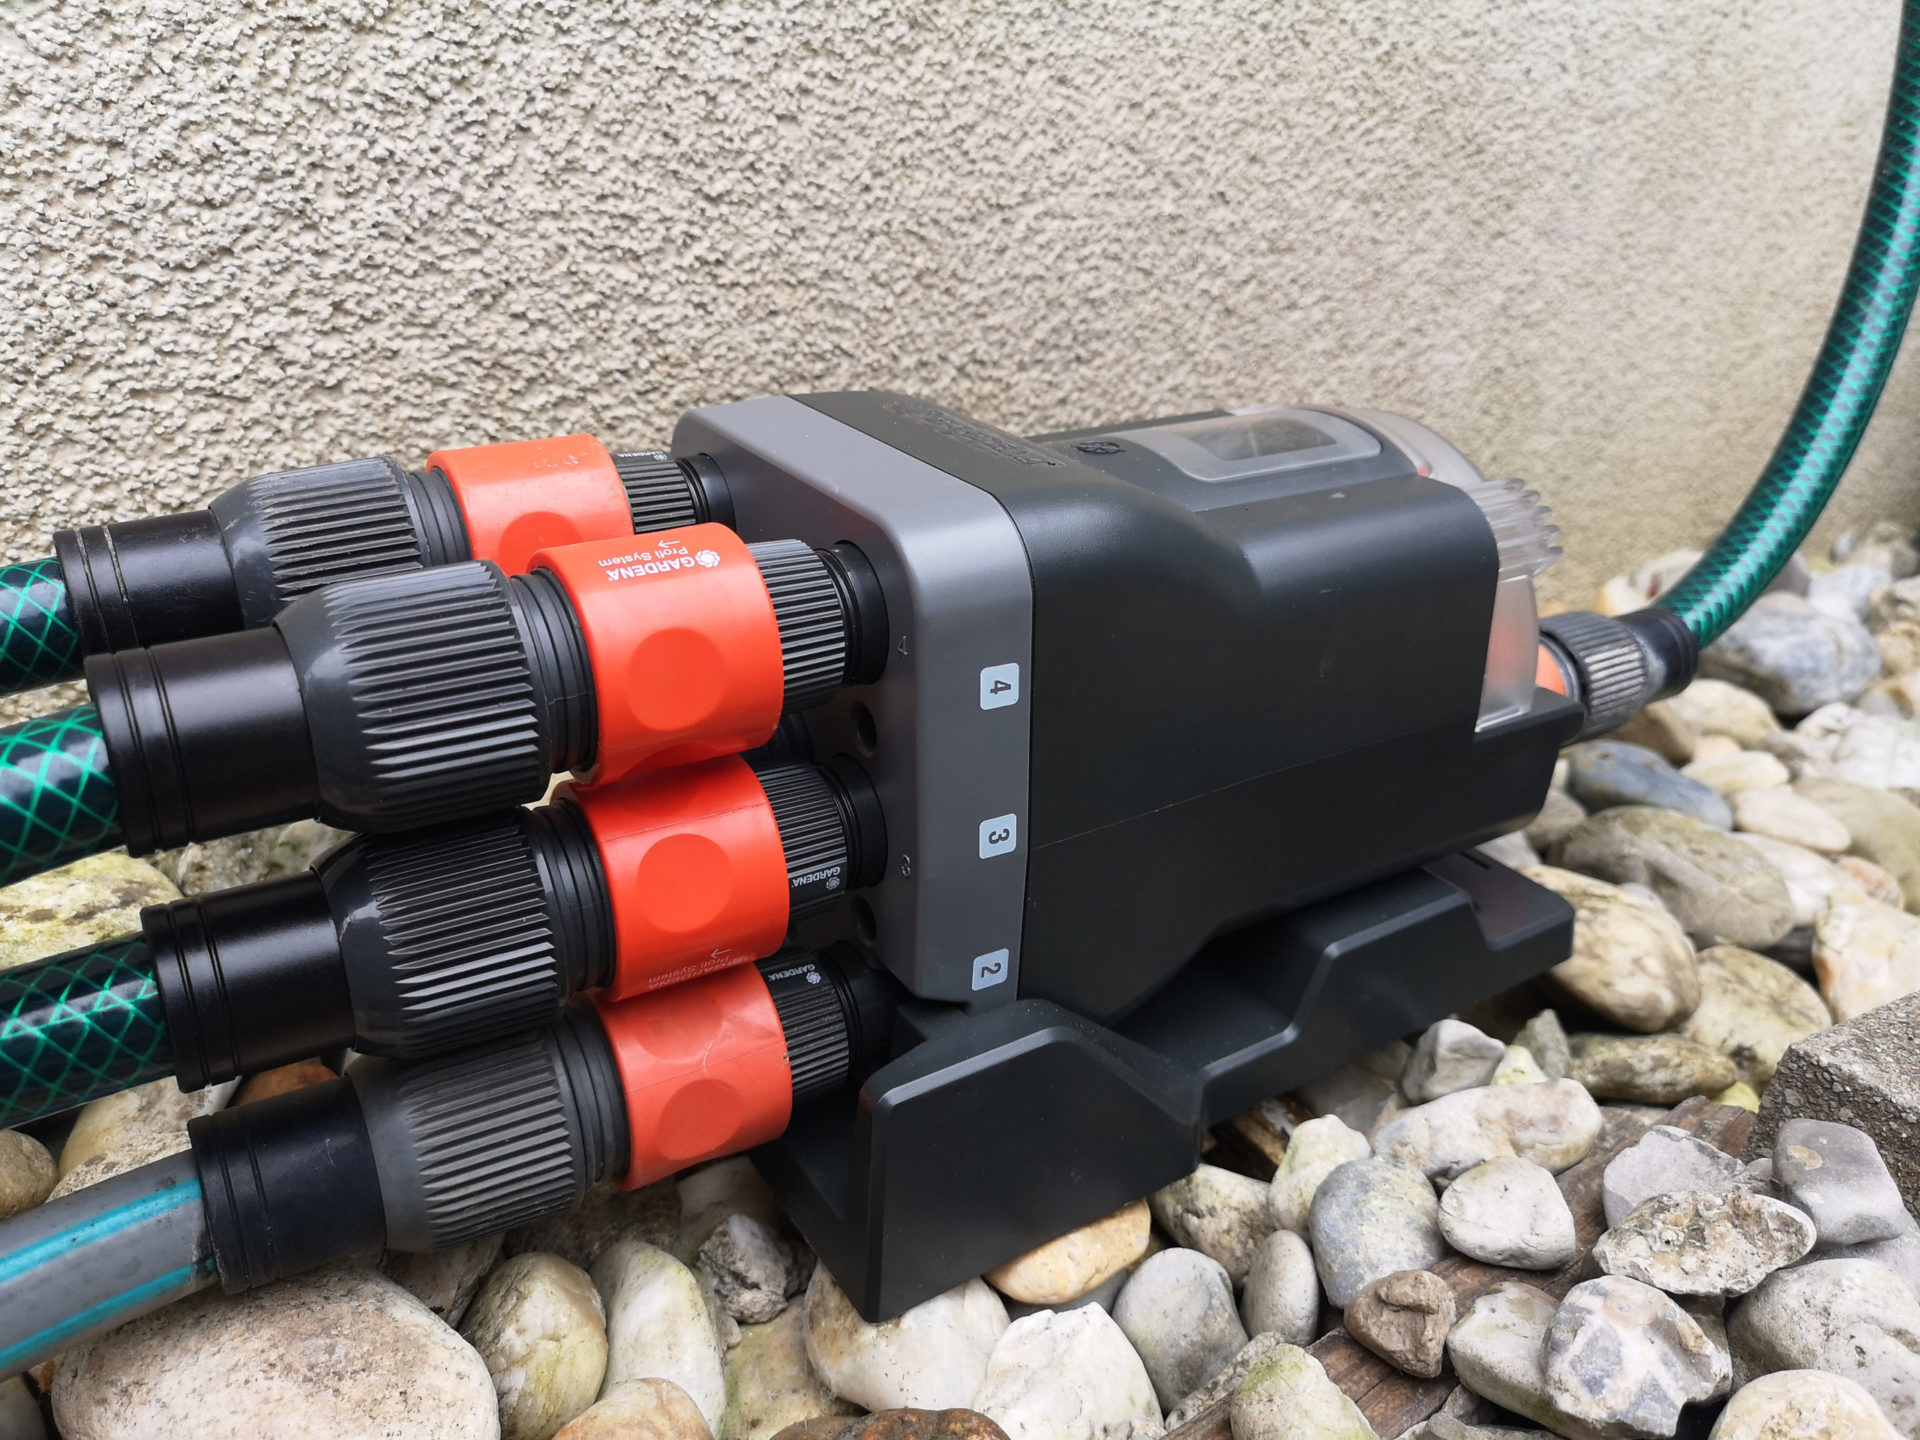
The automatic water distributor has six threaded outlets. A sector can be connected to each of these outputs. This can either be done by connecting the pipeline pipes directly using the appropriate connectors, but it is better to use 3/4 inch hose connections. These are then either connected directly to the appropriate pipeline pipe or optically elegant junction boxes are used for this purpose.
Example of a connection to a water socket
Example of a direct connection to the pipeline pipe
The automatic water distributor always runs through its six outlets in a fixed order (counterclockwise, the outlets are marked with the numbers 1 to 6 on the device). This is done by means of a mechanism that is tensioned at the start of irrigation by the pressure of the water flowing through it and as soon as irrigation ends and the pressure decreases it jumps to the next position. This closes the currently watered outlet and opens the connection to the next outlet. This process is repeated every time the water runs through, the sixth time you jump the circle closes and the water distributor has returned to the starting point.
Jumping on to the next outlet after the irrigation has stopped is not always abrupt, but can take a few minutes for technical reasons. For this reason, a few minutes should always be left between the individual watering runs in watering programs in combination with the automatic water distributor. Gardena recommends 5 minutes. According to the manufacturer, the automatic distributor needs this time to reliably jump to the next outlet. This also agrees with my experience, the water distributor usually switches on immediately in my test, sometimes it takes a few moments. According to individual field reports on the Internet, however, longer breaks of up to half an hour are necessary for certain constellations.
My tip: Plan with a 5-minute break. If this turns out to be too short in practice and the distributor sometimes doesn’t jump any further, then gradually increase the pause until it fits!
How to program irrigation with an automatic water distributor?
As previously mentioned, the mechanism of the automatic water distributor rotates one step further with each watering and runs through outlets 1 to 6 of the distributor in order, only to end up again at the first outlet. In order to be able to use the distributor, you need a watering computer that allows you to program a watering program with 6 watering cycles.
The irrigation computer does not know which of these cycles controls which sector and how this happens. The program simply defines when the six watering runs should start and how long they last. And it is important to ensure that there is a break of at least 5 minutes between the end of one run and the beginning of the other. The order of the watering runs reflects the order in which the water distributor runs through its outlets. The mechanism of the automatic water distributor now has to be set manually to the outlet at which the watering should start and then it can already begin.
An example:
The irrigation system consists of six sectors. The sectors are connected to the water distributor in the following order:
Outlet 1: Lawn
Outlet 2: Lawn
Outlet 3: Lawn
Outlet 4: Lawn in the shade
Outlet 5: Micro irrigation hedge
Outlet 6: Micro-irrigation vegetable patch and flower pots
Irrigation is always started at outlet 1 and should take place early in the morning on Monday. A possible irrigation program would therefore be:
Irrigation run 1: Monday 4:00 a.m. to 4:40 a.m. (Lawn)
Irrigation run 2: Monday 4.45 a.m. to 5.25 a.m. (Lawn)
Irrigation run 3: Monday 5:30 a.m. to 6:10 a.m. (Lawn)
Irrigation run 4: Monday 6:15 a.m. to 6:40 a.m. (Lawn in the shade)
Irrigation run 5: Monday 6.45 a.m. to 7.30 a.m. (Hedge)
Irrigation Run 6: Monday 7:35 a.m. to 8:00 a.m. (Vegetable patch and flower pots)
What do you do if you have less than 6 sectors?
Of course, the automatic water distributor can also be used with fewer than 6 sectors. According to Gardena, at least outputs 1 and 2 must always be used, but this is not a restriction, since using a water distributor for just one sector would make no sense anyway. If you do not want to use all six sectors, you have two options:
Possibility 1: You close the outlets of the water distributor that are not required with the enclosed end caps. As before, you program six watering runs on the watering computer and simply let the watering runs for the unused outlets run against the end caps for 1 minute.
If we assume that outlets 5 and 6 are not used, then the watering program would look like this:
Irrigation run 1: Monday 4:00 a.m. to 4:40 a.m. (Lawn)
Irrigation run 2: Monday 4.45 a.m. to 5.25 a.m. (Lawn)
Irrigation run 3: Monday 5:30 a.m. to 6:10 a.m. (Lawn)
Irrigation run 4: Monday 6:15 a.m. to 6:40 a.m. (Lawn in the shade)
Irrigation Run 5: Monday 6:45 a.m. to 6:46 a.m. (No watering)
Irrigation run 6: Monday 6:51 a.m. to 6:52 a.m. (No watering)
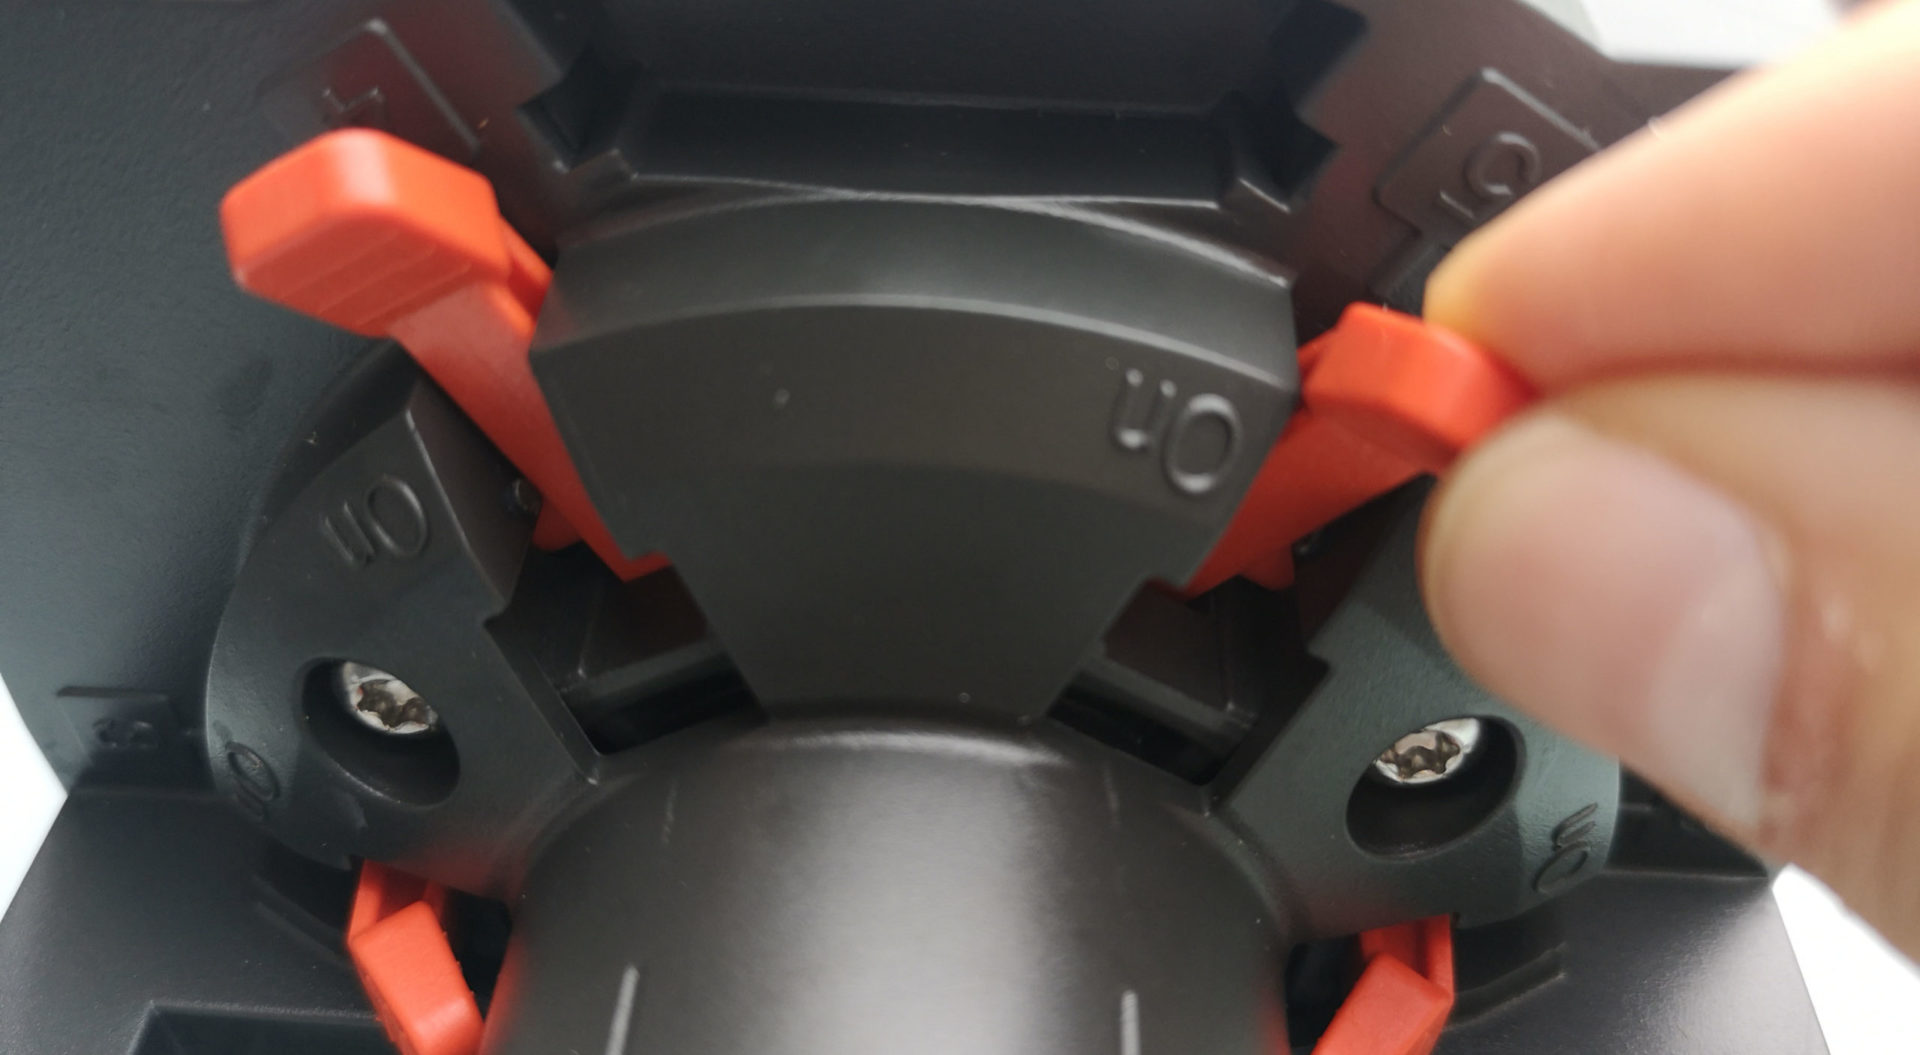
Possibility 2: You switch off the outlets that are not required on the automatic water distributor. The water distributor then automatically skips the disabled outlets and continues with the next enabled outlet.
Outlets 3 to 6 can be activated or deactivated with levers (outlets 1 and 2 are always active)
Accordingly, the non-activated outlets are left out in the watering program. For example, if outlets 3 and 5 were disabled, the irrigation run would look like this:
Irrigation run 1: Monday 4:00 a.m. to 4:40 a.m. (Lawn)
Irrigation run 2: Monday 4.45 a.m. to 5.25 a.m. (Lawn)
Irrigation run 3: Monday 5:30 a.m. to 5:55 a.m. (Lawn in the shade)
Irrigation run 4: Monday 6:00 a.m. to 6:25 a.m. (Vegetable patch and flower pots)
In this case, too, the deactivated outlets must be provided with end caps.
Manual watering
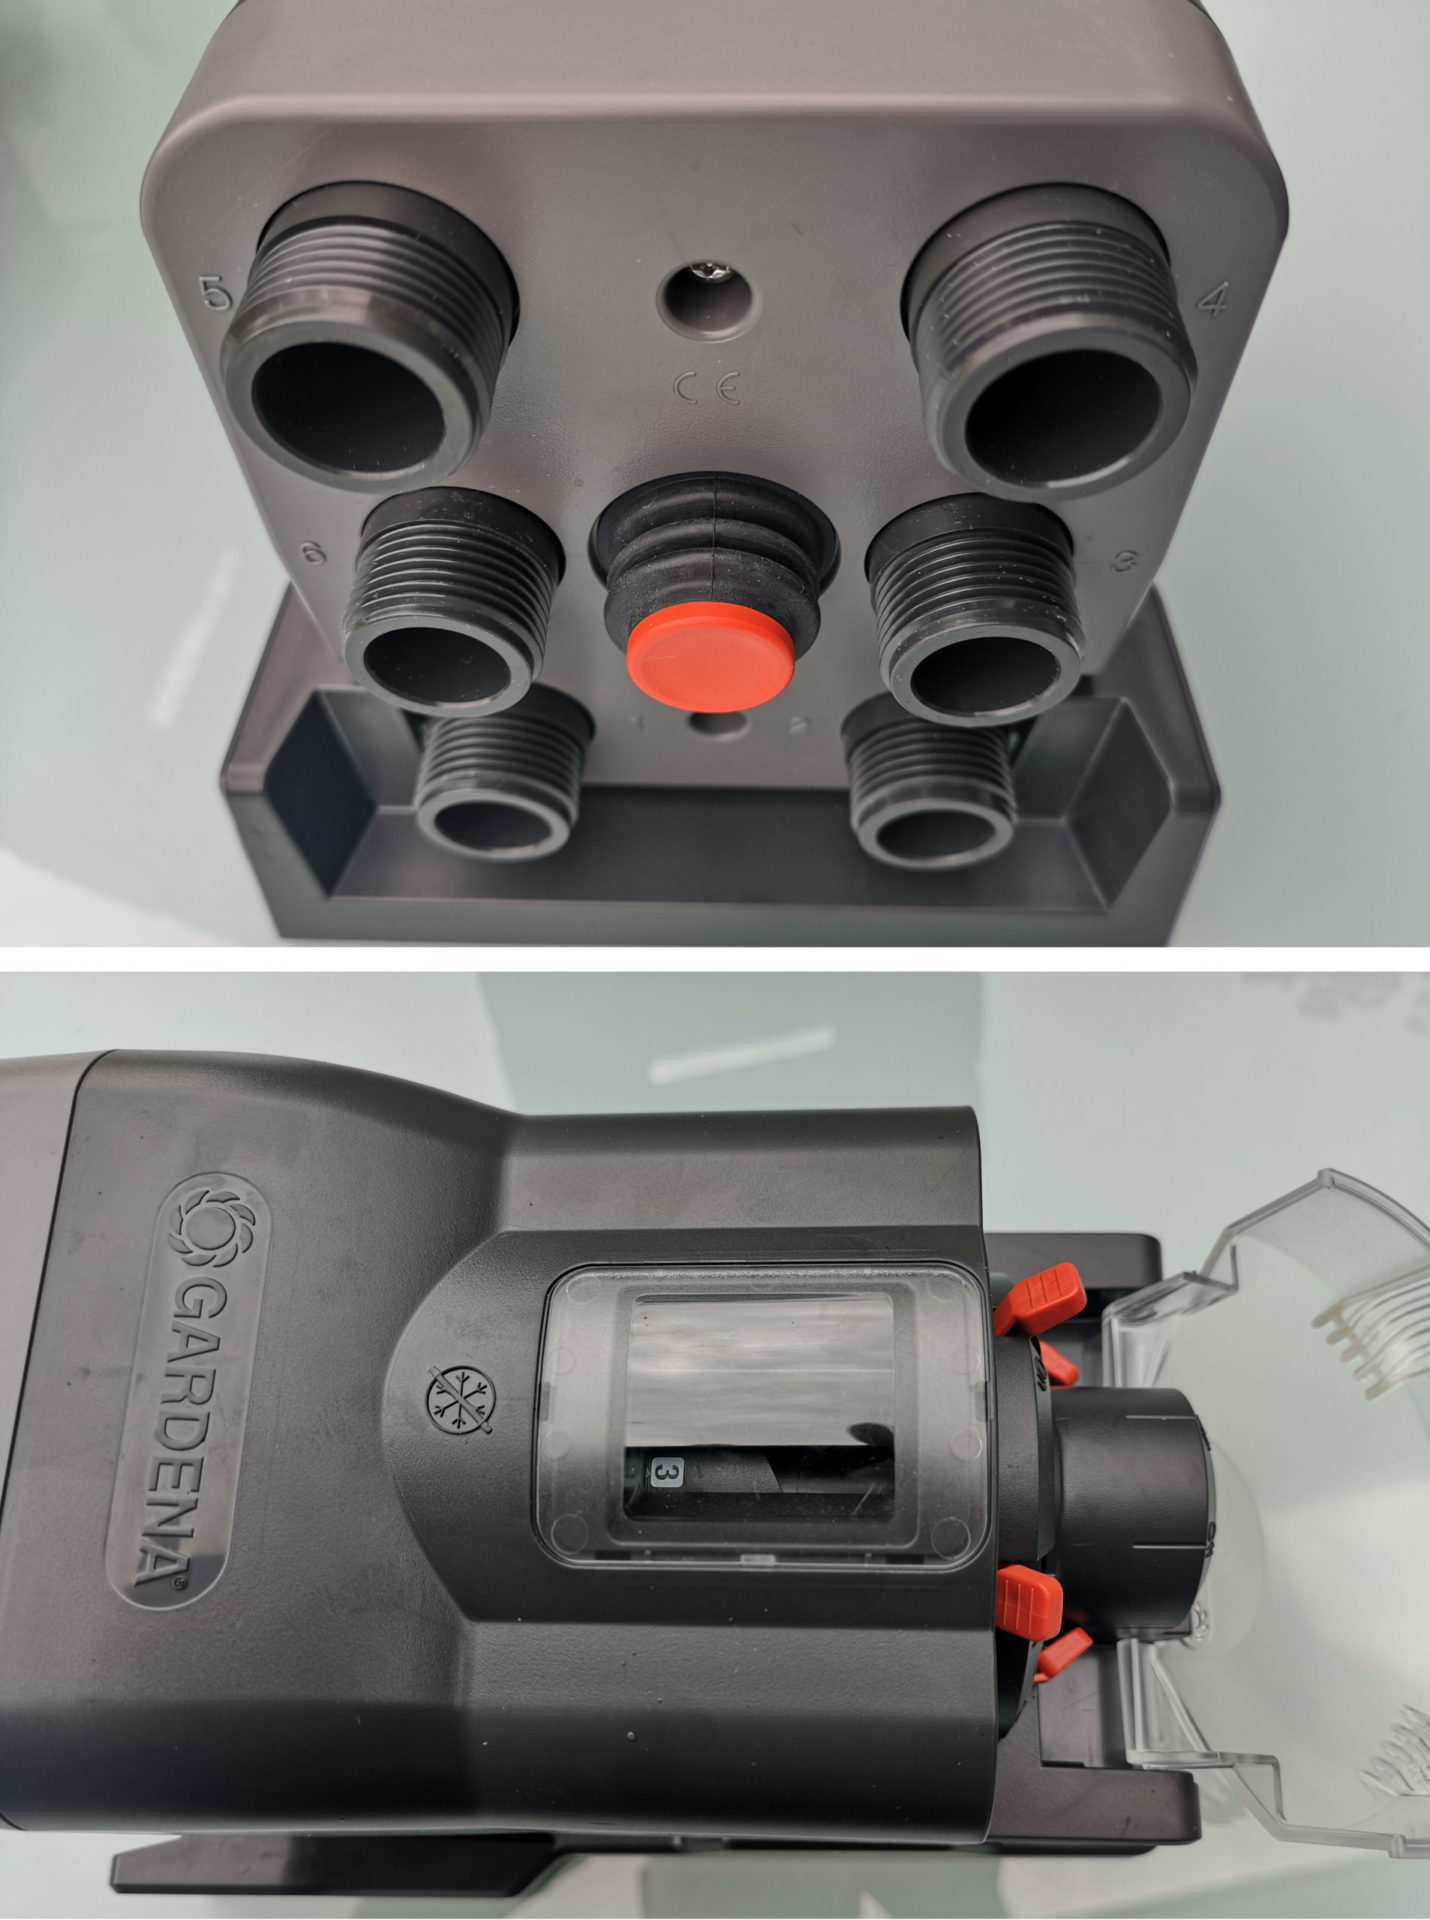
If you want to water one of the sectors manually, e.g. spontaneously water sector 3 for 50 minutes without going through all the others, you can manually switch the water distributor to this output by pressing the red button on the back and then start manual watering on the irrigation computer. Which of the sectors is selected is shown through the viewing window on the top.
You can manually switch to the next outlet by pressing the red button. The currently selected outlet is displayed in the viewing window on the top (outlet no. 3 in this picture)
After the end of manual watering, you only have to make sure that the water distributor is set back to the starting sector for a possibly programmed watering run. If you want to have water continuously available on an irrigation line, e.g. at a connected water socket, then I do not recommend connecting this line to the manual water distributor, but branching off to it before the water distributor.
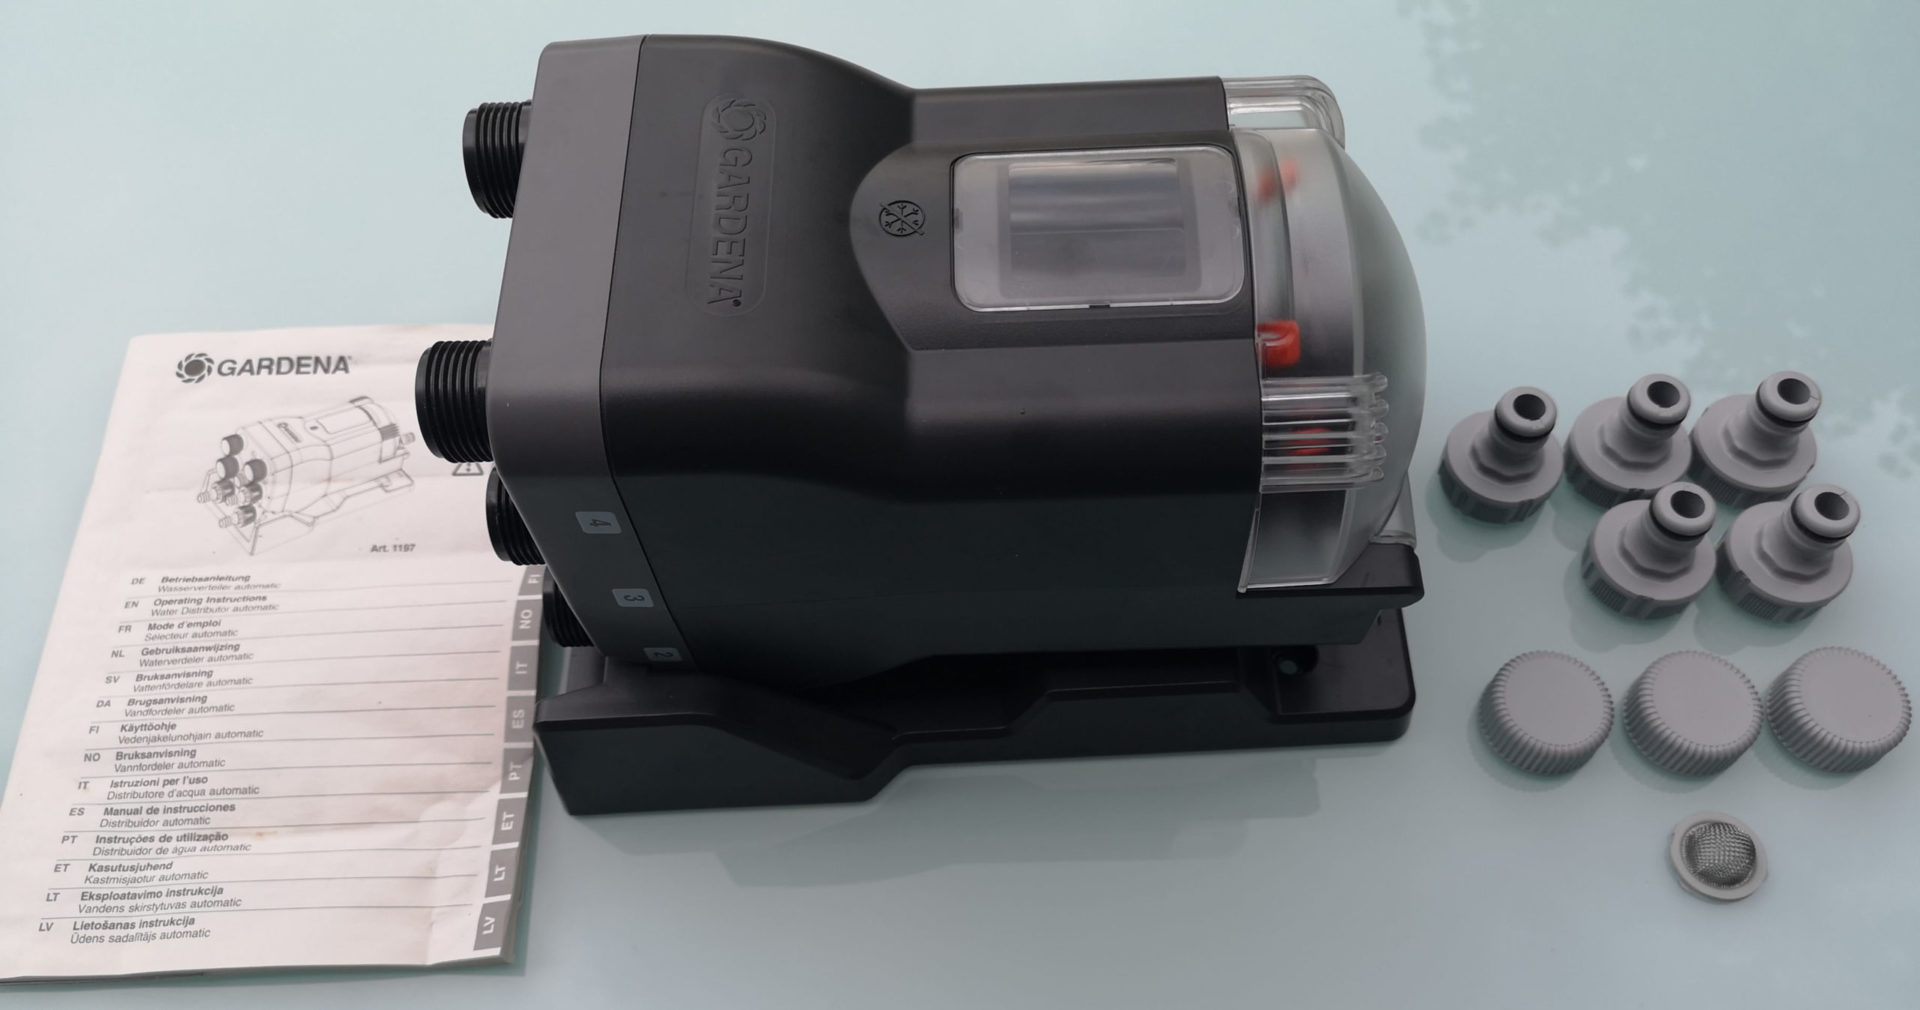
Scope of delivery
In addition to the device itself, the following is also included in the scope of delivery:
5 tap fittings 1/2 inch
3 end caps
1 strainer
operating manual
Why only three end caps and not four is a bit incomprehensible. For those buyers who only want to operate two sectors with the water distributor, this means that they have to get an additional 3/4 inch end cap. The included five 1/2 inch tap connectors are well intentioned, but completely unsuitable for the typical purpose of use of the water distributor from the outset. Irrigation systems are operated in at least 3/4 inch dimensions and using the 1/2 inch tap fittings would result in an unnecessary constriction and thus a large loss of flow pressure and thus available water volume would be accepted. You can therefore throw the 1/2 inch tap pieces into the spare parts box and get the necessary 3/4 inch tap pieces. This applies to both the water inlet and the six water outlets. When operating 6 sectors, you would need 7 pieces of 3/4 inch tap connectors.
Parts included
Assembly
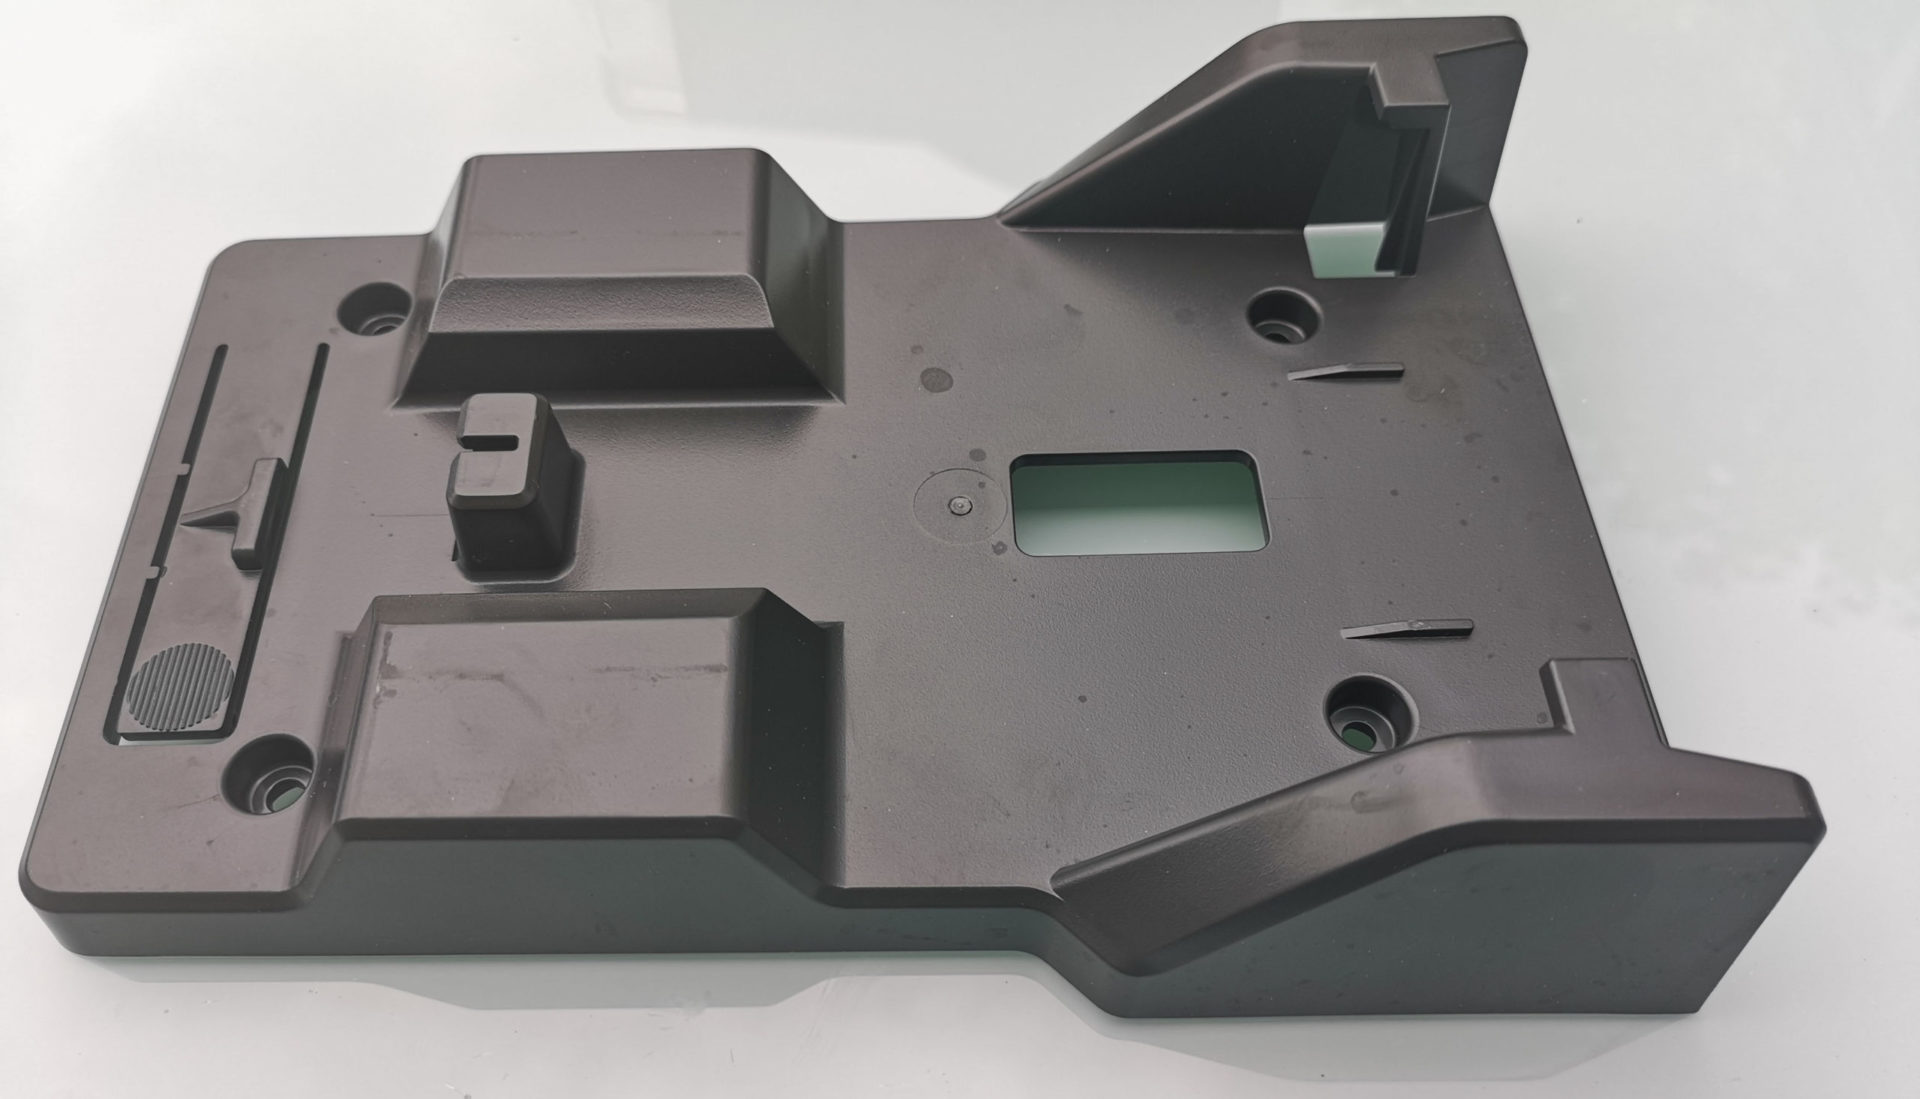
The Gardena water distributor can either simply be placed on the floor without any assembly, or you can mount it on the floor or hang it on the wall to save space. This is done using the mounting plate attached to the underside, which can be separated from the device for installation. This is done simply by pressing the release button and pulling off the water distributor. The mounting plate can then be screwed on with 4 screws and, if necessary, the appropriate dowels (neither of which are included in the scope of delivery). Finally, the water distributor is then simply pushed back into the mounting plate until it snaps into place.
Fixing plate detached from the water distributor with 4 holes provided for screwing the plate. On the far left is the unlock button (marked with the dashed circle)
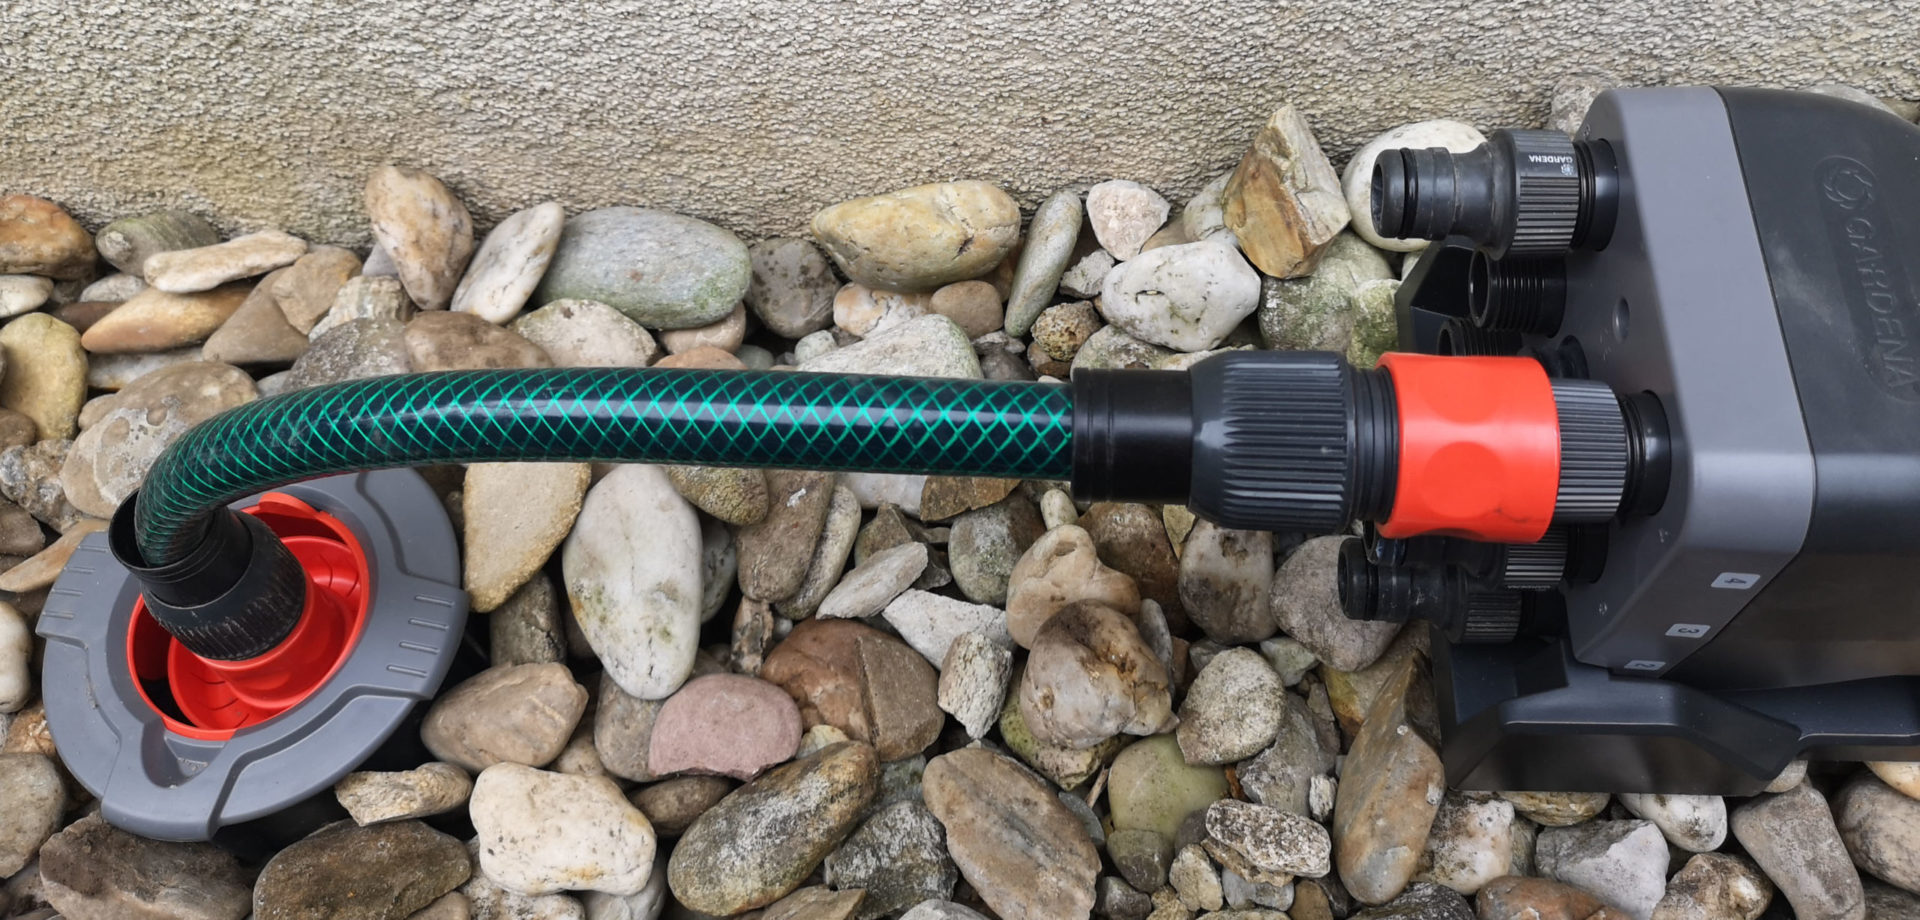
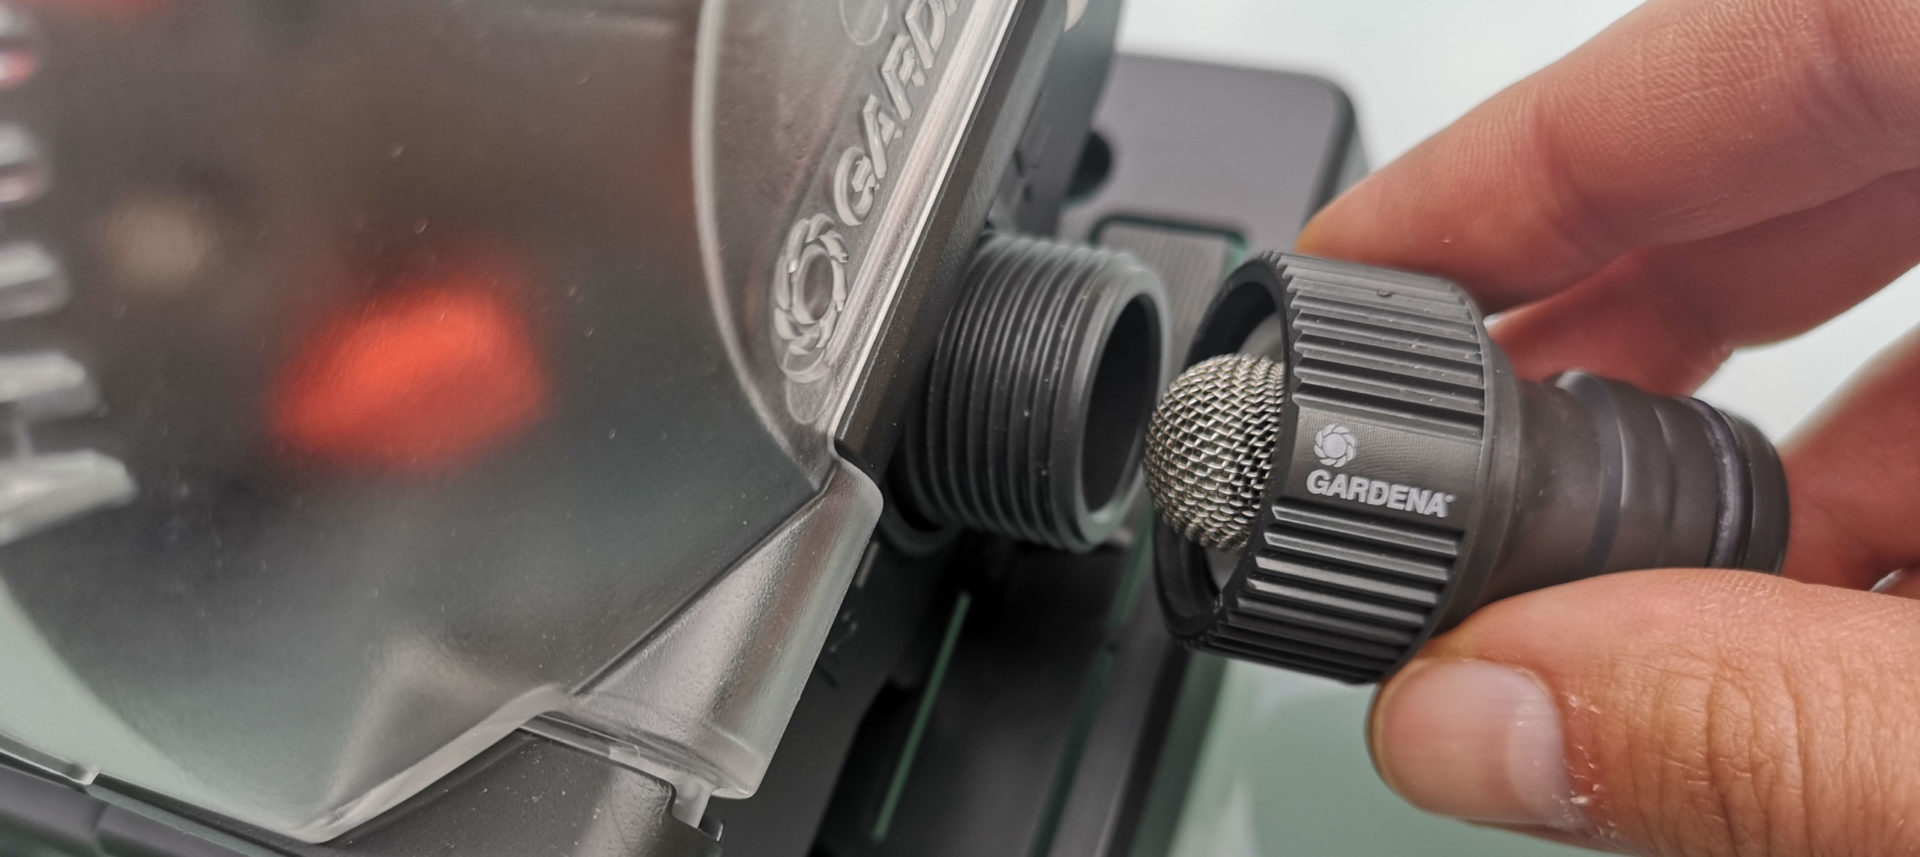
On the water inlet, the dirt strainer that is included is to be used in front of the tap, which protects the distributor from contamination. It should be checked from time to time and cleaned if necessary.
The strainer is installed between the water inlet thread and the tap piece
Conclusion and purchase option
As you will have noticed, only the Gardena water distributor automatic is mentioned in the article. There is a simple reason for this: There is currently only this one automatic water distributor on the market! This product type is an invention of the Gardena company and this has a unique selling point. In my experience, however, the lack of competition has no negative effect in this case: the previous model 1198-20 was already a reliable and durable product that, according to my own experience, survived 10 years of use and more. The current model 1197-20 connects seamlessly there. In contrast to the old model, the design is also a bit more practical. On the 1198-20 the outlets were circular away from the distributor, on the current model 1197-20 they are all on the back. This makes the connection easier. The current model can also be mounted on the floor using the mounting plate attached to the underside or, to save space, on the wall.
I find the price of about 90 USD appropriate and fair and if I remember correctly, this is even cheaper than what was paid for the previous model back then. For me, a clear purchase tip for anyone who does not want to rely on a control solution with solenoid valves!
Gardena water distributor automatic 1197-20 at Amazon*:
I am an enthusiastic do-it-yourselfer and have been running this blog on the subject of garden irrigation for more than 6 years now. In over 150 specialist articles, I share my own experiences and know-how from years of research and numerous product tests. -> More about me