In contrast to lawn irrigation, micro-irrigation refers to irrigation with small amounts of water and low water pressure. The water is also not distributed over large areas, but is released in the vicinity of the micro-irrigation pipeline using drippers, sprayers or other components. Compared to lawn irrigation, this is a completely different type of irrigation, which differs greatly from lawn irrigation and also uses completely different components. This blog post explains what they are, what their purpose is, how they differ, why you need micro-irrigation at all and how micro-irrigation can be integrated into an lawn irrigation system.
Note: Depending on the manufacturer or the country of use, micro-irrigation is also referred to as micro-drip or drip irrigation.
So straight to the fundamental question: What is micro-irrigation for? Why not just use regular irrigation instead?
Applications of micro-irrigation
In contrast to lawn irrigation, which is always about sprinkling entire areas, e.g. a piece of lawn, individual plants can be watered in a targeted manner using micro-irrigation. For example, if there are 6 bushes and 3 shrubs on a 20 x 20 foot area covered with bark mulch or soil, then these 9 plants can be watered in a targeted manner without watering the rest of the subsoil. This saves water compared to lawn irrigation, in which a sprinkler would irrigate the area over a large area. Using micro-irrigation, even more efficient irrigation is possible for some purposes. According to the literature, more than 90 percent efficient irrigation can be achieved in comparison to 75 to 85 percent with lawn irrigation. Also because the water in micro-irrigation is released very slowly and close to the ground and thus to the roots. Little water is lost through evaporation or because it flows past the root area of the plant.
Another reason for micro-irrigation is uneven terrain. Lawn irrigation sprinklers are not designed for this. If the area to be irrigated falls to a large extent, if it rises or goes up and down, then the area can be irrigated very well with micro-irrigation pipes laid on the slope. These discharge the water directly at the pipe near the ground, so that the gradient is not a problem.
Micro-irrigation also shows this advantage in areas that have a very small and irregular floor plan, e.g. often change the direction or width. As previously described, the micro-irrigation tube here follows the irregular shape and delivers the water at the desired points.
Another area of application are plants that do not grow in the ground but in pots or planters. A targeted supply of each individual pot or box is possible by means of micro-irrigation. This is especially true for balcony plants. Micro-irrigation is also used in root zone irrigation systems.
A major reason for the use of micro-irrigation is also the much more sensitive irrigation, compared to the rather coarse jet of sprinklers. With this one would flush the soil out of a vegetable patch or injure young plants. With the fine droplets of micro-irrigation, this is not an issue.
From the above, the following areas of application for micro-irrigation result:
- hedges
- vegetable and plant beds
- flower pots and boxes
- plants in greenhouses
- planting in uneven or small-scale, irregular terrain
- root irrigation of trees
- balcony watering
How can micro-irrigation be implemented or integrated into an irrigation system?
This works relatively easily. The first part of the irrigation system, i.e. what happens immediately after connection to the water source, the irrigation computer, the solenoid valves and the main pipeline, are – if you want to implement micro-irrigation – the same as with lawn irrigation. With the solenoid valves, care must be taken to ensure that they are low-flow capable, i.e. that they function correctly even with a low water flow. So up to this point there is no difference. The pipeline is routed to the micro-irrigation start point. A reduction in water pressure is now necessary here, since micro-irrigation works with a much lower water pressure than normal irrigation. You need a pressure regulator for this. After the pressure regulator, the pipeline is no longer continued with the large pipe of the main pipeline, but with the smaller, 1/2 inch large connecting pipe for micro-irrigation and the appropriate connectors. From here only the special micro-irrigation components are used.
If you don’t want to implement a pure micro-irrigation system, but want to combine lawn irrigation with micro-irrigation, then you simply route one or more of the pipeline strands after the solenoid valves to pressure regulators (= micro-irrigation starting point) and the others are used for lawn irrigation.
What are the components of micro irrigation?
Below is a presentation of the various components that can be used to implement micro-irrigation:
Pressure regulators and filter
The basis of micro-irrigation is always the pressure regulator, which is placed at the beginning of the micro-irrigation pipeline as described above. You actually always need this. The only exception would be that you already have such a low pressure innately. Micro irrigation systems are typically rated at around 22 to 30 psi pressure. All irrigation manufacturers have pressure reducers in their range, whereby there are two basic types of pressure reducers:
- Pressure regulators with integrated filter
- Pressure regulators without integrated filter
Pressure regulators with integrated filters also ensure that no impurities get into the micro-irrigation system in parallel with the pressure reduction. Due to the low pressure and the small, easily clogged outlets, micro-irrigation has little opportunity to free itself from impurities and therefore a filter is mandatory here. To clean the filter, the pressure regulator can be opened and the filter removed. If no filter is integrated in the pressure regulator, a separate filter must be used instead.
The mesh size is the key figure for the filter. This is given in units of mesh and indicates the number of openings per inch. The higher this number, the tighter the mesh and the finer impurities are filtered out. A mesh size of 100 means that there are 100 holes per inch. In Europe and many other regions the measure microns is used instead of mesh. The following blog post explains what this means and how mesh can be converted into micrometers and vice versa:
Blog post: Filter – Mesh to micron conversion
The combination of pressure regulator and filter in one component has the disadvantage that it also significantly reduces the water flow. The Gardena Master Unit 1000, for example, reduces the pressure to 22 psi while limiting the water flow to 264 gallons per hour. The Master Unit 2000 also reduces to 22 psi but allows for a flow of 528 gallons per hour. The Rain Bird PRF-075 (30 psi) also limits the flow very significantly to 300 gallons. This may not matter if you don’t need more water at all, if you do, then you should instead use a non-filter pressure regulator such as the Rain Bird PS-M30. This lets through up to 1,300 gallons per hour. In addition, you then need an extra filter, such as the Rain Bird LCRBY. This has a capacity of up to 6,600 gallons per hour and is therefore definitely not a bottleneck. Finally, if you want to avoid using two separate components as much as possible, the Hunter HFR-075-25 is a possible alternative. This reduces the pressure to 25 psi, filters with 150 mesh and has a comparatively high maximum flow of 900 gallons/hour. It costs around 35 USD.
In most cases, the pressure reducers are set to a certain pressure, so they ensure that the water leaves them at this pressure. But there are also variably adjustable pressure regulators such as the Hunter Accu Sync-ADJ, which can be adjusted from 20 to 100 psi, but has a significantly higher price than the other models. Hunter’s Accu Sync pressure regulators are also special in that they are not installed directly in the pipeline, but screwed into the appropriate Hunter solenoid valve.
Comparison Pressure regulators
| Gardena Master Unit 1000 | Gardena Master Unit 2000 | Rain Bird PRF-075 | |
|---|---|---|---|
Auto Amazon Links: No products found. |
Auto Amazon Links: No products found. |
Auto Amazon Links: No products found. |
|
| Maximum flow | 264 gallons/hour | 528 gallons/hour | 300 gallons/hour |
| Pressure reduction to | 22 psi | 22 psi | 30 psi |
| Filter included? | Yes | Yes | Yes |
| Filter mesh size | 60 Mesh | 100 Mesh | 200 Mesh |
| Price | approx. 10 USD | approx. 20 USD | approx. 25 USD |
| Rain Bird PSI-M30 | Hunter Accu Sync-ADJ | Hunter HFR-075-25 | |
|---|---|---|---|
Auto Amazon Links: No products found. |
Auto Amazon Links: No products found. |
Auto Amazon Links: No products found. |
|
| Maximum flow | 264 gallons/hour | 528 gallons/hour | 300 gallons/hour |
| Pressure reduction to | 22 psi | 22 psi | 30 psi |
| Filter included? | Yes | Yes | Yes |
| Filter mesh size | 60 Mesh | 100 Mesh | 200 Mesh |
| Price | approx. 10 USD | approx. 20 USD | approx. 25 USD |
Micro Irrigation Pipeline
Two types of pipe are used in micro-irrigation: ½ inch diameter pipe used as a pipeline to transport water between each micro-irrigation component. And thin ¼ inch diameter hose-like pipes that you can couple to the larger pipe to carry the water the last few feet. In this way, for example, individual flower pots or flower boxes can be supplied with water elegantly and unobtrusively.
With micro-irrigation, too, the sizes are normally the same across manufacturers, so that here too components can be mixed without problems or, if a component is replaced, another manufacturer can be bought. Don’t be fooled by the different sizes given by individual manufacturers. This is because some manufacturers specify the inner diameter, but usually the outer diameter is given.
As with the pipes for lawn irrigation, you can alternatively use commercially available ½ inch PE pipes from sanitary technology without any loss of quality. This alternative does not exist with the thinner distributor hoses, here one has to rely on products from the garden irrigation manufacturers.
In principle, the hard currency for irrigation pipes is the maximum permissible pressure (PN), i.e. the maximum pressure that can prevail in the pipe. However, since the pressure in a micro-irrigation system is very low, this key figure does not play a major role here, since pipes with a comparatively low PN value also easily meet the requirement.
½ inch micro irrigation tubes at Amazon:
Auto Amazon Links: No products found.
¼ inch micro irrigation tubes at Amazon:
Auto Amazon Links: No products found.
Connectors
To install the pipeline, only the fittings are missing to connect the pipeline pipes to each other or to lead them around corners, these are called connectors. In contrast to ordinary irrigation, which uses connectors fixed with glue or with a locking mechanism, micro-irrigation uses plug connectors. The tube is not inserted into the connector and then screwed tight with a locking mechanism like a clamp, but the connector is only inserted into the tube. This is not as stable as a glued or a clamp connection, but it is sufficient for the low pressure that prevails in micro irrigation. If you can’t do without clamp connectors, you can find a small range of micro-irrigation clamp connectors with a bit of searching.
The selection of different connectors is similar to that of lawn irrigation, although there is an additional type with the cross piece. Below is a brief list of the available connector types:
- Coupling fitting (for connecting the micro-irrigation pipeline to another piece of pipeline, to a thread, the lawn irrigation pipeline etc.)
- Elbow fitting (to realize 90 degree changes of direction)
- Tee fitting (to split a pipeline string into two strings)
- Cross fitting (to split a pipeline string into three strings)
- End fitting (to close the end of a tube)
The connector types listed above are available for both the large 1/2 inch pipeline and the small 1/4 inch distribution hoses. In addition, there are reducers to connect the large 1/2 inch pipeline with the small 1/4 inch pipeline:
- Reducer fitting (to reduce the large pipeline to the small distribution hose, usually designed as a Tee-piece: the pipeline continues straight, the small distribution hose branches off at a right angle)
And pieces for connecting drippers or sprayers:
- T-piece for spray nozzles (the pipeline continues straight, the outlet for the spray nozzle branches off at a right angle)
- T-piece with built-in dripper (the pipeline continues straight, a dripper built into the T-piece branches off at a right angle)
Pipe holders and guides
In addition to the connectors, there are a few assembly aids to make laying the pipes easier and to ensure that the pipes stay in the intended place:
- Pipe holder
- Pipe guides
- Pipe clamps
This lists all the components that are required for the micro-irrigation pipeline, i.e. for transporting the water to the consumers. The following points present the various options for supplying plants with water using drip irrigation.
Drip tubes
Drip tubes are tubes into which drippers are screwed or outlet openings are made at regular intervals, e.g. every inch. Each of these drippers or openings slowly drips a certain amount of water per hour, e.g. 0.5 gallons. There are drip tubes ready-made, i.e. you can buy them with drippers/openings already screwed in, or you can use a pipeline tube as described above and screw the drippers into the tube yourself at the desired distances. Only one dropper can be screwed into the thin 1/4 inch distribution hoses at the end of the hose. An overview of the range of different drippers can be found in the next point.
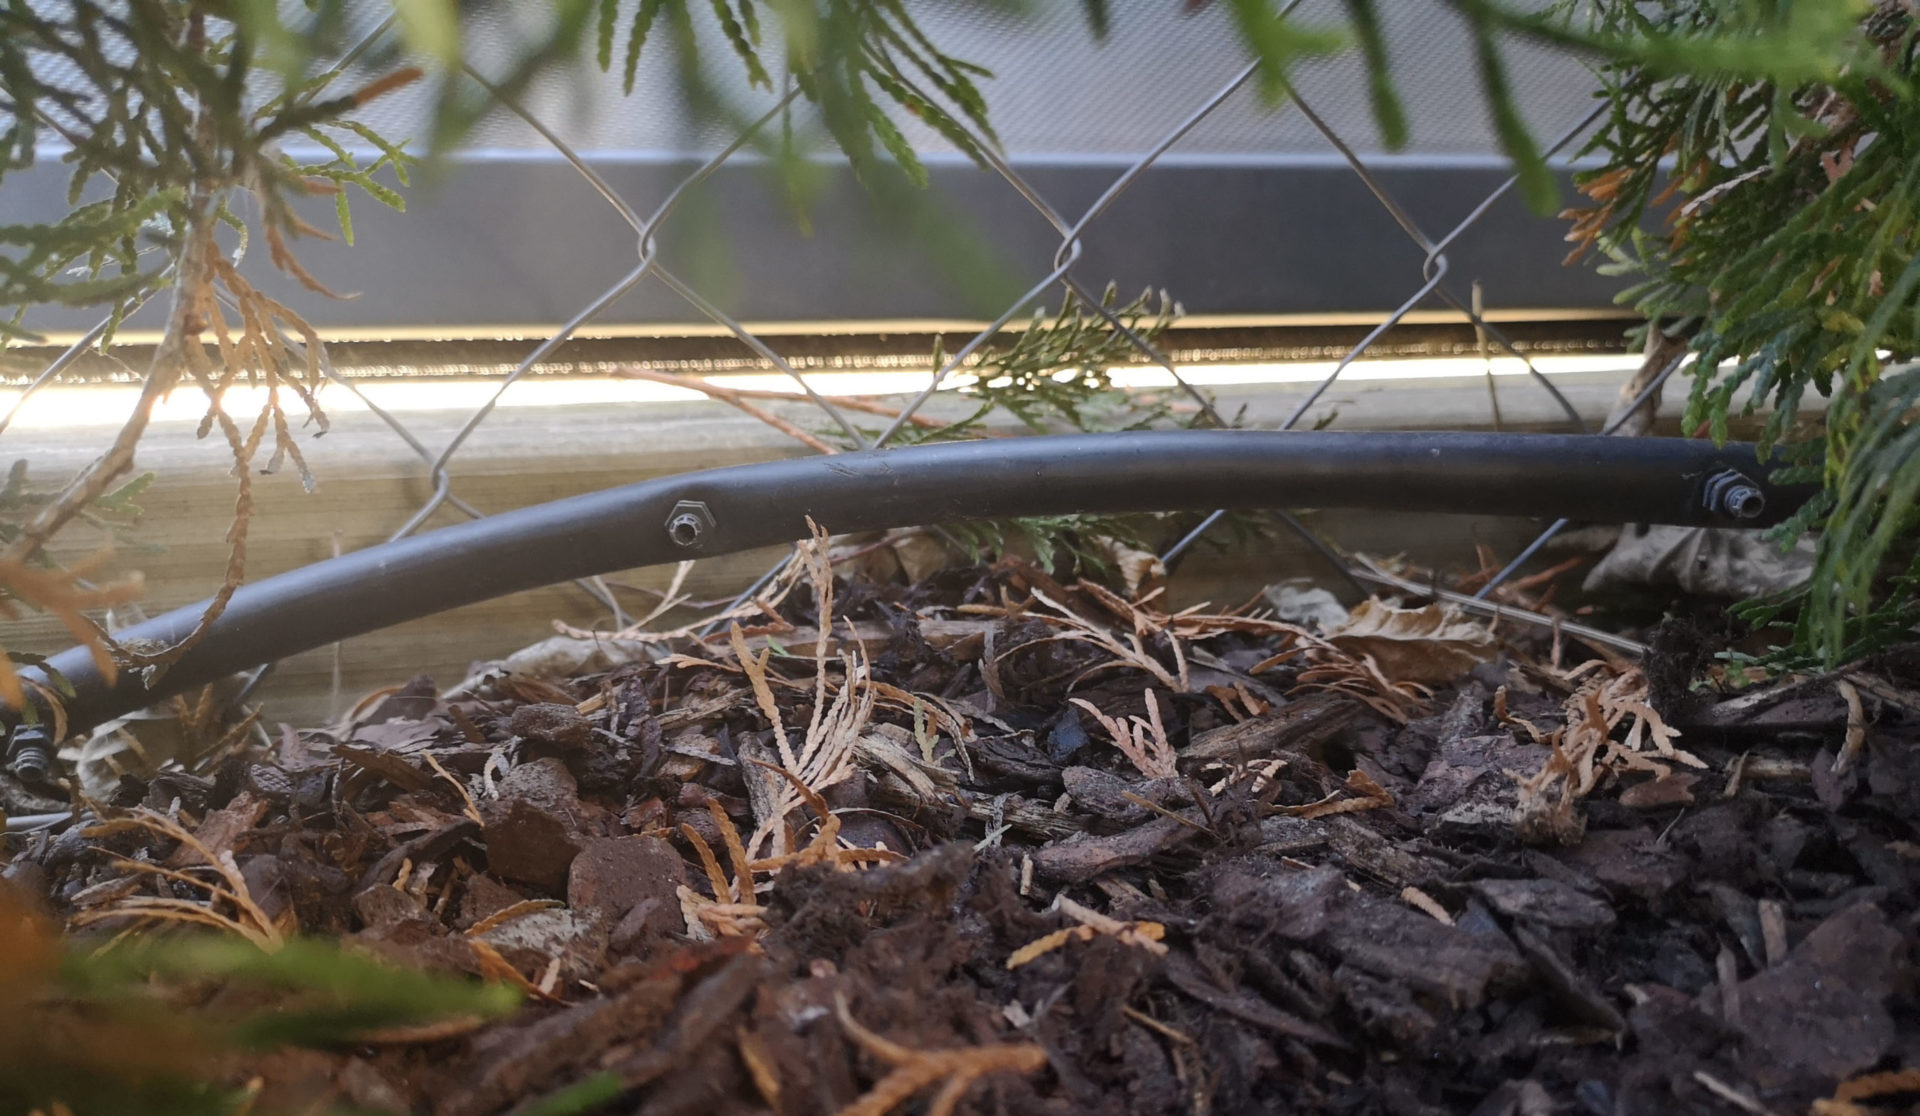
Example of a pipeline pipe with drippers screwed in
Apart from whether the drippers are already fixed or whether they have to be screwed in first, there is a second important difference:
- Drip lines laid above ground
- Drip lines laid underground
The first type is much more common and is what is commonly understood as drip irrigation: the drip line is placed on the surface of the earth, it may be slightly covered with bark mulch or other loose material for optical reasons. You can always get to the pipe without any problems, have a good insight into whether everything is working correctly and, if the worst comes to the worst, you can react with little effort and, for example, clean a clogged dripper, or replace a dripper that is too small with one that releases more water.
Drip lines that can be laid underground give you the option of making the drip line completely disappear from view. Conversely, the correct functioning can be controlled less well and corrections are only possible with excavation work. A new trend is to lay underground drip lines not only under hedges and shrubs, but also – laid in strips – under the lawn. Ready-to-use combinations of drip hose and full-surface fleece mats are also available for this purpose, see below.
My tip: Whether it is better to buy a ready-made drip tube or to create it yourself by screwing drippers into a pipeline depends on the planned application. If you need a longer stretch of drip line with regular dripper spacing, e.g. for a hedge, then it makes sense to use the ready-made drip line. If, on the other hand, you only need shorter pieces of drip line and the distance between the drippers varies, e.g. because the plants to be watered are placed irregularly, or because distances have to be bridged in between, then it makes more sense to create the drip line yourself. The same applies if drippers with different capacities are to be used in one tube because the plants supplied with the drip tube have different water requirements. Opinions differ on the use of underground drip lines. Personally, I don’t think it’s a good idea in the private sector, you have a number of potential problems with it and if you install it skillfully, the pipes above ground are also not visible.
Excerpt from the range of drip tubes on Amazon:
Auto Amazon Links: No products found.
Dripper
A variety of different drippers are available. These can be distinguished according to the following criteria:
Fixed or adjustable amount of water
Most drippers release a fixed, predefined amount of water, but there are also models that allow the amount of water to be adjusted within a specified range.
According to the amount of water
There is a wide range of sizes for the drippers, which release a predefined amount of water: the most common sizes are 0.5, 1.0 or 2.0 gallons per hour, but models with up to 16 gallons per hour are also available. Hunter and Rain Bird color code their drippers based on their water volume.
With or without pressure compensation
This may seem unnecessary at first glance, as it says a few lines before that the drippers release a certain amount of water. However: First of all, this only works approximately and only if there is a certain pressure in the line. If the assumed pressure is exceeded or not reached, if the pressure in the line fluctuates, or if the pressure in a longer tube at the beginning of the tube is significantly different than at the end of the tube, then the performance of the drippers deviates from that specified. In order to avoid this and to ensure that the desired amount of water is poured absolutely reliably and evenly, pressure compensating drippers are offered. These regulate the pressure down to a certain level, so that there is always the same pressure on all drippers. Visually, these are very easily recognizable by the more “beefy” design. Rain Bird and Hunter only offer pressure compensating drippers.
Examples of pressure compensating drippers:
Auto Amazon Links: No products found.
With spike or thread
90 percent of the time, droppers are offered with spikes. These can be screwed directly into the tube with the spike, a barb ensures that they hold well. Alternatively, droppers with internal or external threads are also available.
My tip: I think the adjustable drippers are more of a gimmick than a useful function. It is better to simply screw in the dropper with the appropriate liter capacity. Since the price is not that much higher, I would definitely recommend pressure compensating drippers. Which manufacturer? With the drippers from Hunter or Rain Bird you can’t go wrong and you get a guaranteed quality. But even products with lesser-sounding names sometimes get good ratings on Amazon.
Finally, two tips for working with drippers:
Tip: Do not put the dripper directly into the pipeline pipe, but rather branch off a small piece of connecting hose from the pipeline pipe and attach the dripper to it! This increases flexibility when there are small changes in the irrigated terrain.
Tip: To lay the drippers, use one of the tools specially provided for this purpose. It doesn’t cost too much and also helps if you want to remove drippers from the pipe.
Micro-Sprays
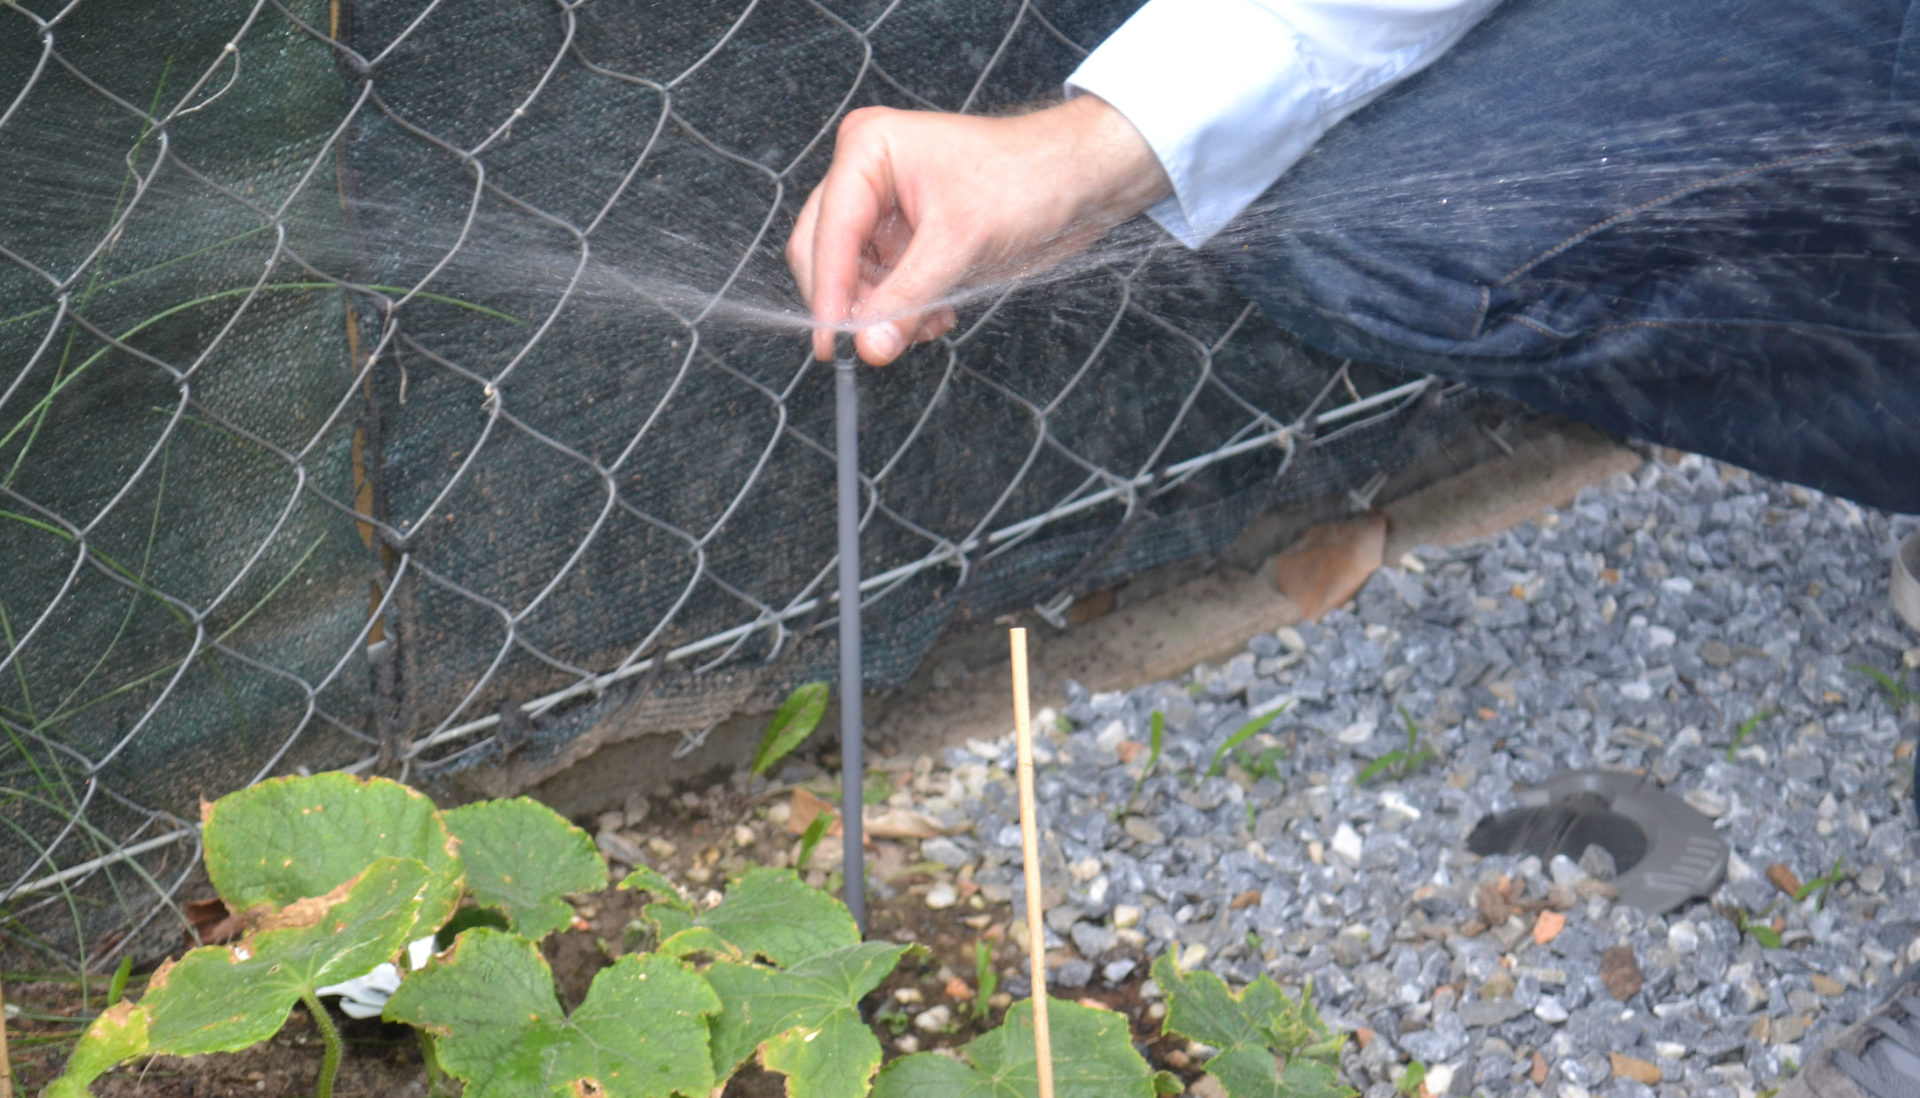
In contrast to drippers, from which the water only drips out, micro-sprays release the water in a fine shower of droplets. This fineness of the spray pattern and the comparatively smaller throw distance as well as the lower water consumption also distinguish the micro-irrigation spray nozzles from the spray sprinklers of lawn irrigation.
Compared to drippers, they have the advantage that you don’t have to run a pipe to all the places to be irrigated, but can irrigate the entire area from one or more points. This can be an advantage if, for example, you don’t want to have any pipes lying around in the vegetable patch that would interfere with your work. When placing it, it should be noted that plants grow tall and, if not planned ahead, can possibly change the throwing range of the sprayer, e.g. if the tomato plant in the vegetable patch piles up right in front of the sprayer. Here it is often advisable to attach the sprayers to ground spikes or extensions.
Micro-sprays are differentiated according to the following criteria:
By spray pattern
Either as a full-surface water umbrella (most common variant) or divided into thin water jets or swirled into individual droplets.
By irrigated circle sector
There are full-circle nozzles, nozzles that only water a semicircle (180 degrees) or a quarter circle (90 degrees). Some models also allow manual setting of the circle sector to be irrigated. One possible application, for example, is to place two 90-degree nozzles diagonally opposite one another in a bed in order to cover the bed area well.
By throw distance
There are sprayers with a very short throw and those with a slightly longer throw.
Throw range fixed or adjustable
Some models have a fixed throw distance that only depends on the water pressure. Other models also allow manual adjustment of the throw distance. Instead of adjustable nozzles, some manufacturers use a separate control valve that is placed between the pipeline and the sprayer and allows the throw distance to be adjusted steplessly.
Submersible or not
Micro-irrigation sprayers are typically not submersible, but are fixed to a pipe, hose, stake or extension. However, there are a few retractable models: The Rain Bird Xeri-Pop is a pop-up sprinkler specially developed for micro-irrigation, which is connected to a 1/4 inch connecting line with a simple snap lock. In addition, both Rain Bird and Hunter offer their own micro-irrigation nozzle that can be installed in the housings of ordinary irrigation.
On spikes or not
Some of the micro-irrigation spray nozzles are already available in a fixed combination with a ground spike or a height extension.
Micro Sprays at Amazon:
Auto Amazon Links: No products found.
My tip: The same applies to the micro spray nozzles as to the drippers: many no-name products are fine, but those from the quality manufacturers Rain Bird and Hunter are even better in my opinion. For nozzles that do not have to be attached directly to the pipe, but rather raised, I would definitely pay attention to a stable extension, some systems offered are very filigree here. Otherwise you get annoyed in practice if you repeatedly bend your extensions due to small carelessness, or the extensions do not hold properly or have to be readjusted again and again.
Underground fleece mats
This is a whole new trend. Everyone has to decide for themselves to what extent it makes sense in the private sector. The product consists of non-woven mats approximately 32 inches wide with drip tubes incorporated into them. If the drip tubes start to release water, then the flow mats will gradually fill with water. This ensures an absolutely even watering, which also has the advantage that the fleece mats store the water for a very long time after the end of the watering and thus a water reservoir is available for a longer period of time.
According to the manufacturer, this makes sense below surfaces that should not get wet, such as areas in amusement parks or public parks that have a very high frequency of visitors. Another area of application is green roofs. The system also has the advantage that it is protected from vandalism by being installed underground. At the moment I’m only aware of Hunter’s Eco-Mat system in this area.
Root Zone Irrigation
Both Rain Bird and Hunter offer solutions for targeted root zone irrigation of trees or large shrubs. A sieve tube is placed underground in the ground to the left and right of the tree or shrub, close to its root area. Depending on the model, these reach a depth of 10 to 36 inches and are connected to the irrigation pipeline just below the surface of the earth. During irrigation, the water is let directly into the screen pipes and thus reaches the roots of the trees directly.
Root zone systems on Amazon:
Auto Amazon Links: No products found.

