In this article, I’ll show you how to adjust the sector to be watered and the throw distance for Gardena sprinklers from the T-series, SD-series, MD-series, and OS-140 rectangular sprinkler.
These series currently include the following models:
T Series: T-100, T-200, T-380
SD Series: SD30, SD80
MD Series: MD40, MD80, MD180
OS-140: Available in only one model version
I also provide information on the best settings to make on the sprinkler before use, to avoid any wet surprises when adjusting the settings, for example, to prevent accidentally watering sensitive areas in the garden or giving your neighbor a cold shower. This allows even inexperienced users to adjust the settings without hassle or stress.
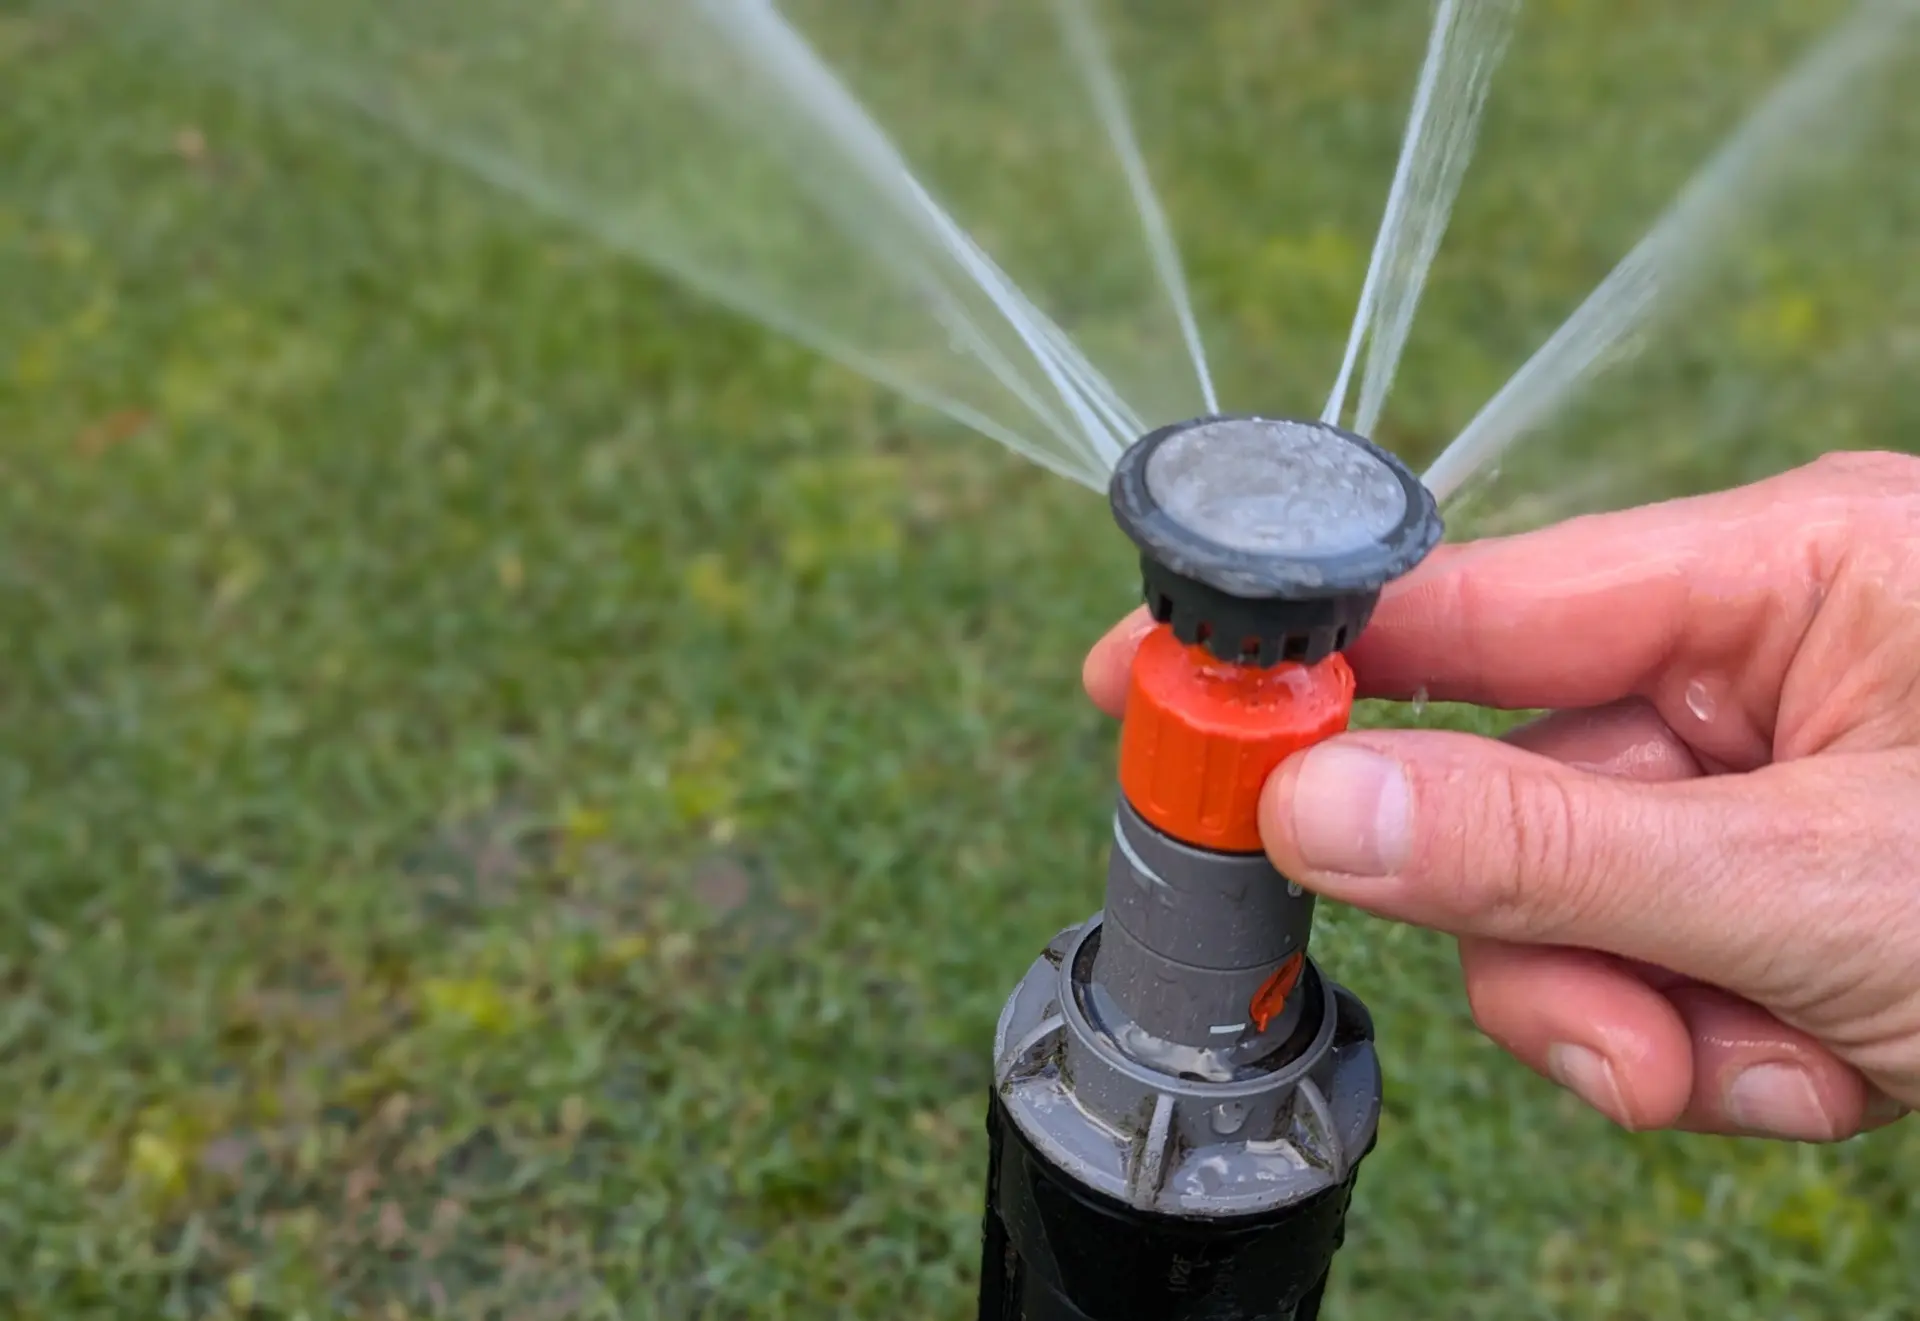
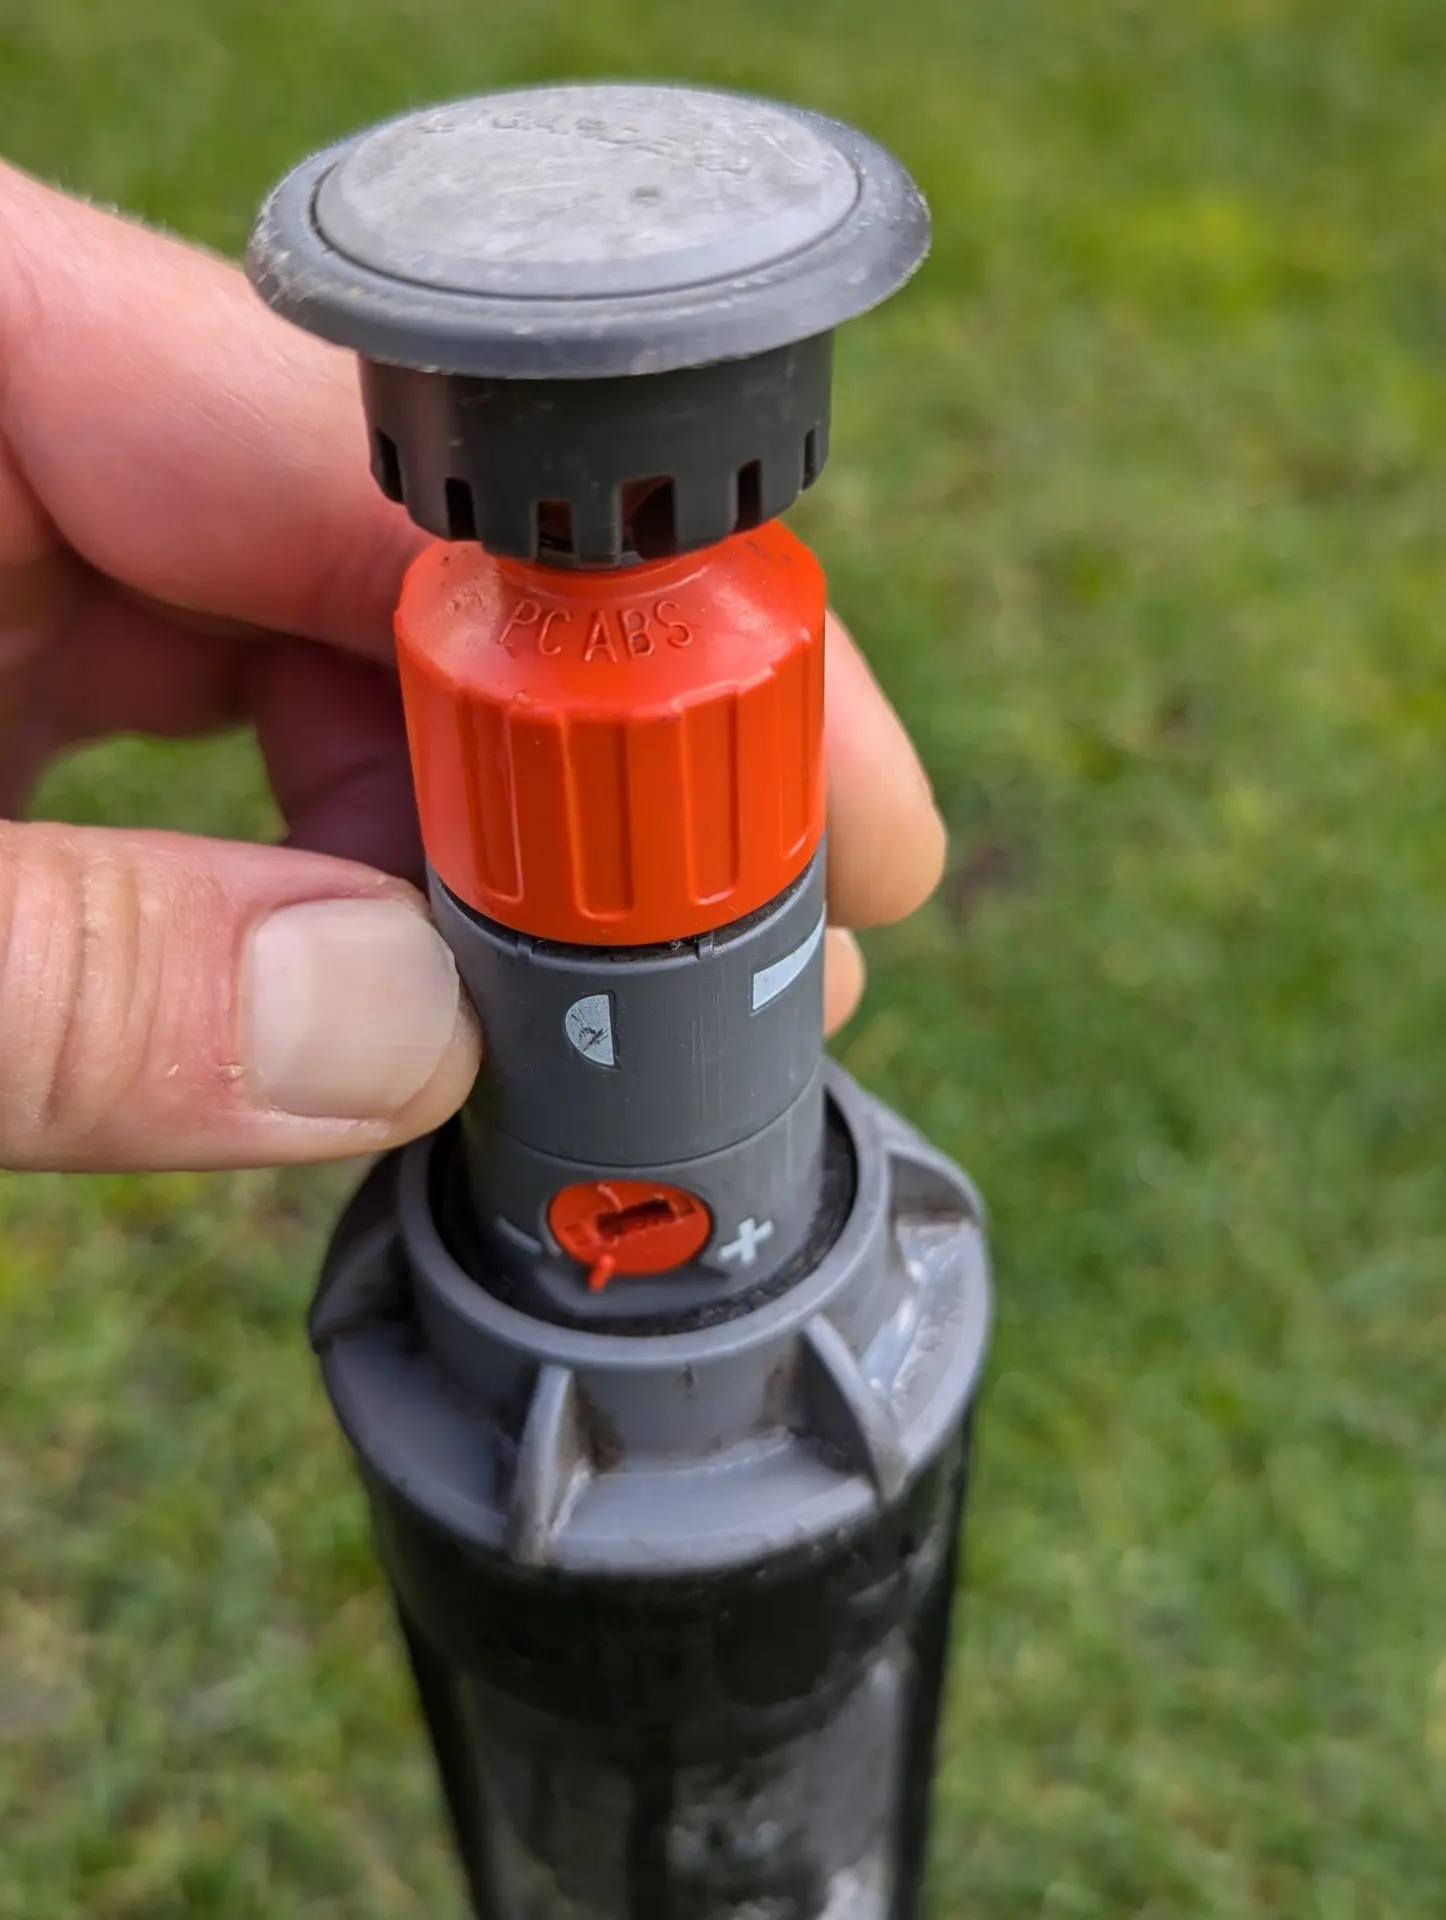
Gardena T-Sprinkler
The settings for the three T-sprinklers differ for the T-100 and the T-200/T-380 models.
Gardena T-100
Preparation (before turning on the water supply)
The T-100 sprinklers are factory-set for 360-degree full-circle irrigation. This can be recognized by the black adjustment arrow on the orange rotating sleeve pointing to the full-circle symbol below. Turning the orange sleeve counterclockwise reduces the area of the circle to be watered. To set the maximum possible reduction, turn the sleeve to the white line. The area to be watered is now only 70 degrees, i.e., smaller than a quarter of a circle.
The arrow is factory-set above the full-circle symbol, meaning 360-degree irrigation is performed.
Turning the orange sleeve counterclockwise to the line symbol reduces the area to be watered to 70 degrees.
By turning the gray piston, the entire sprinkler can be rotated; the sprinkler makes a rattling noise. If you turn it so far that the semicircle symbol points toward you, the sprinkler will spray away from you.
Rotate the entire sprinkler by turning the gray piston.
If the semicircle symbol points toward you, the sprinkler will spray away from you.
Activate the water supply
Now turn on the water supply; the spray pattern should now look something like this.
After turning it up, a small, approximately 70-degree circular section will be watered.
Adjust the sector to be watered
The left starting point of the sprinkler, i.e., the point up to which the sprinkler waters on the left side, is determined by grasping the entire sprinkler by the gray piston and twisting it, as described above.
If the left starting point is correct, you can adjust how far to the right the watering should extend by turning the orange sleeve clockwise, thus determining the size of the circular section to be watered. The further you turn clockwise, the larger the circular section is. If you turn it to the maximum possible point, the sprinkler will water a full circle.
Adjust the left limit point by turning the entire sprinkler.
Adjust the right limit point by turning the orange sleeve.
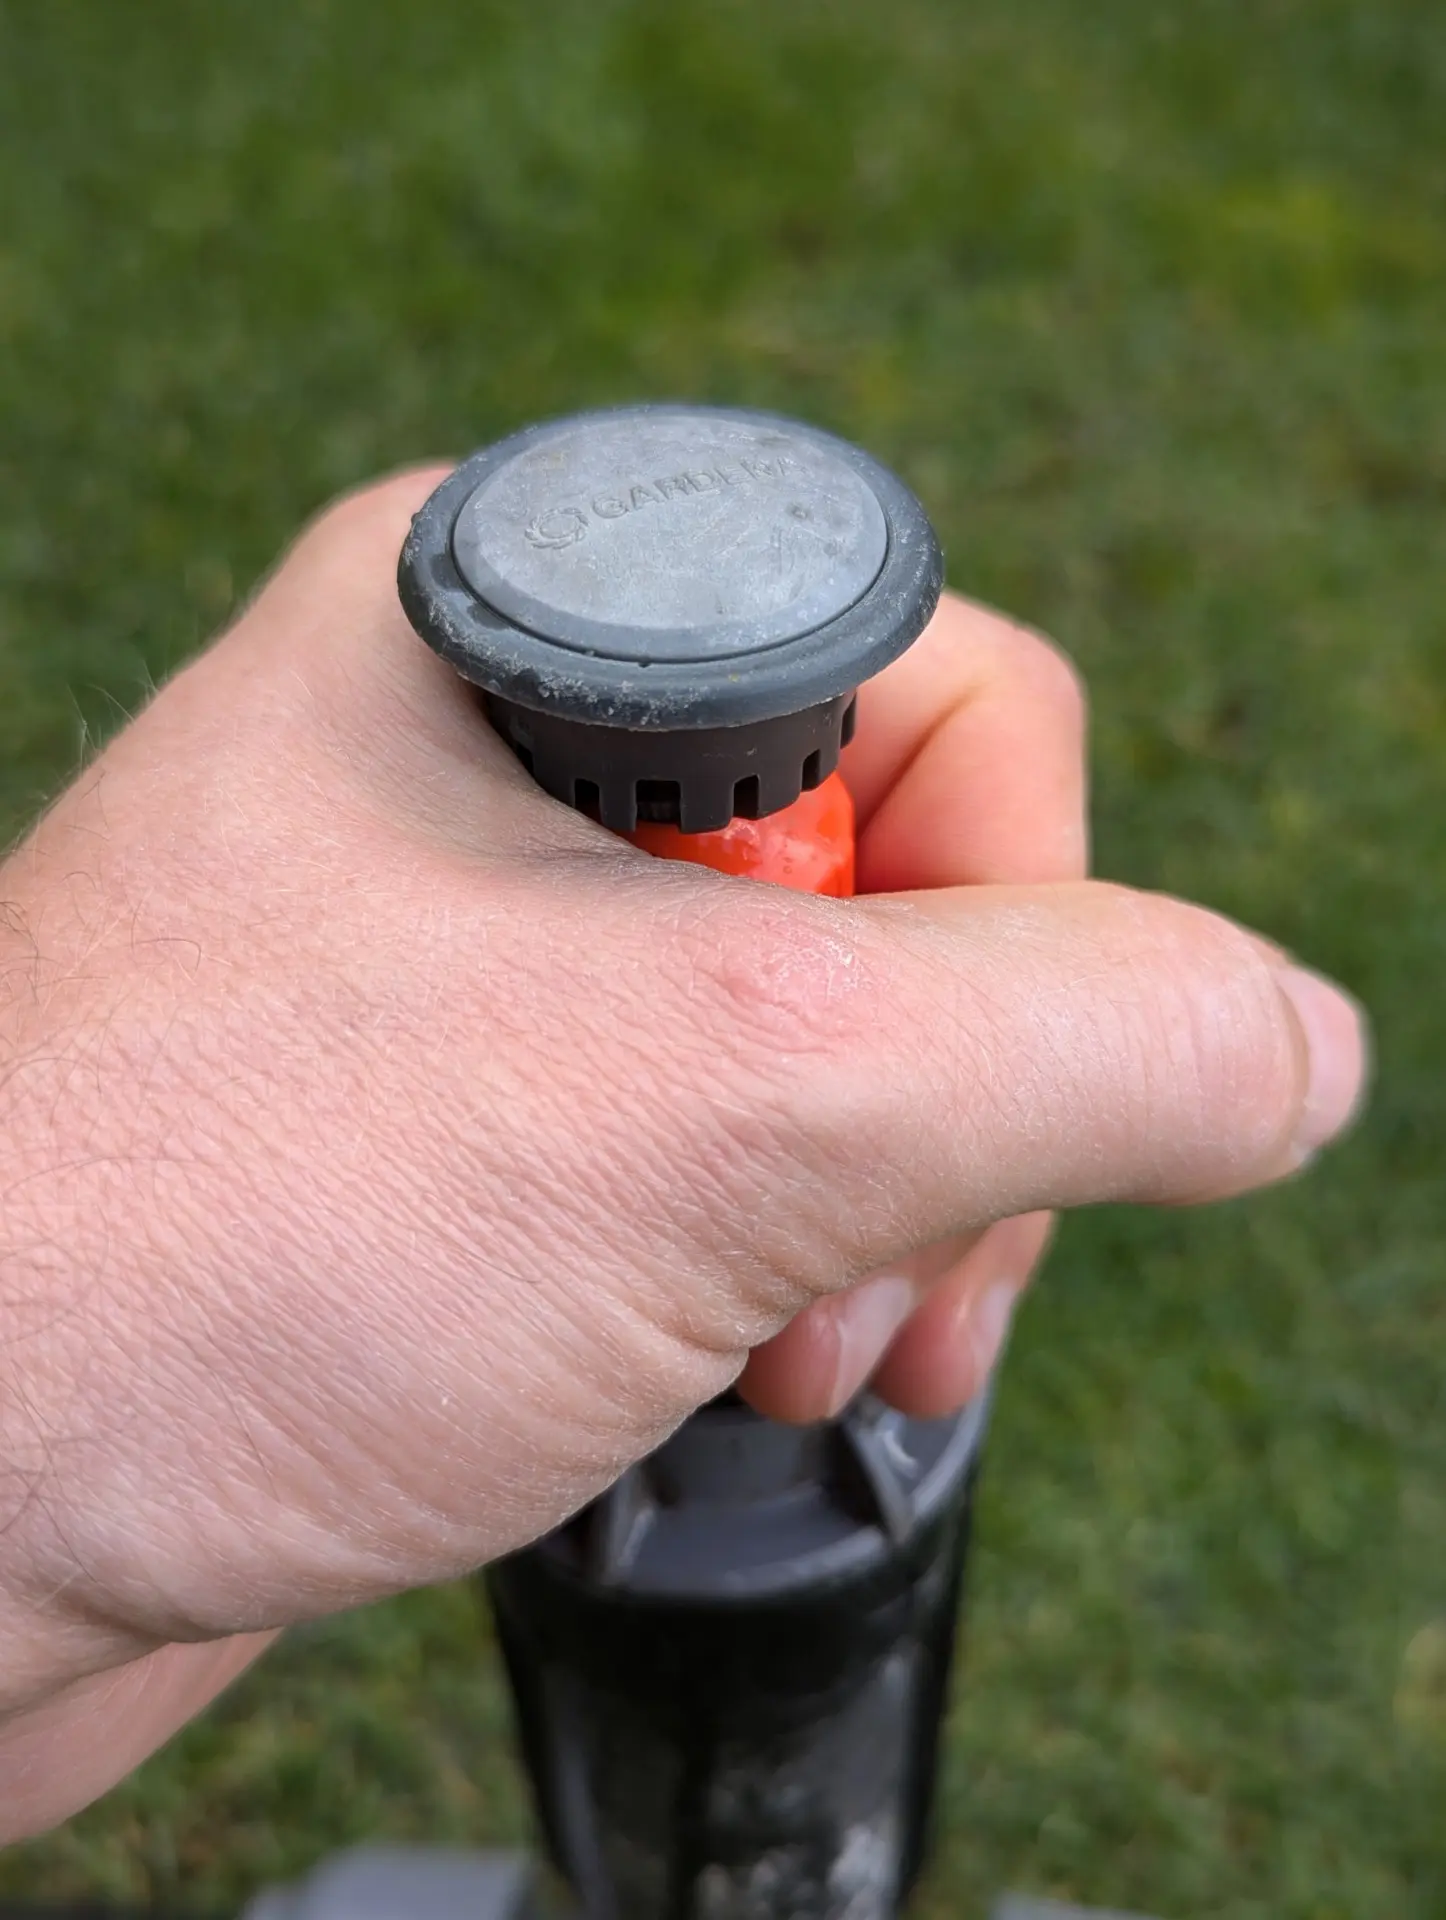
Note: Turning the gray cap at the very top of the nozzle has no effect on the irrigated sector. Even if the cap is turned, the previously set area will continue to be watered.
Adjusting the Throw
By turning the orange screw located in the riser, you can reduce the water flow and thus shorten the sprinkler’s throw. It is best to use a screwdriver for this.
Turning it to the left reduces the throw, and turning it to the right increases it again.
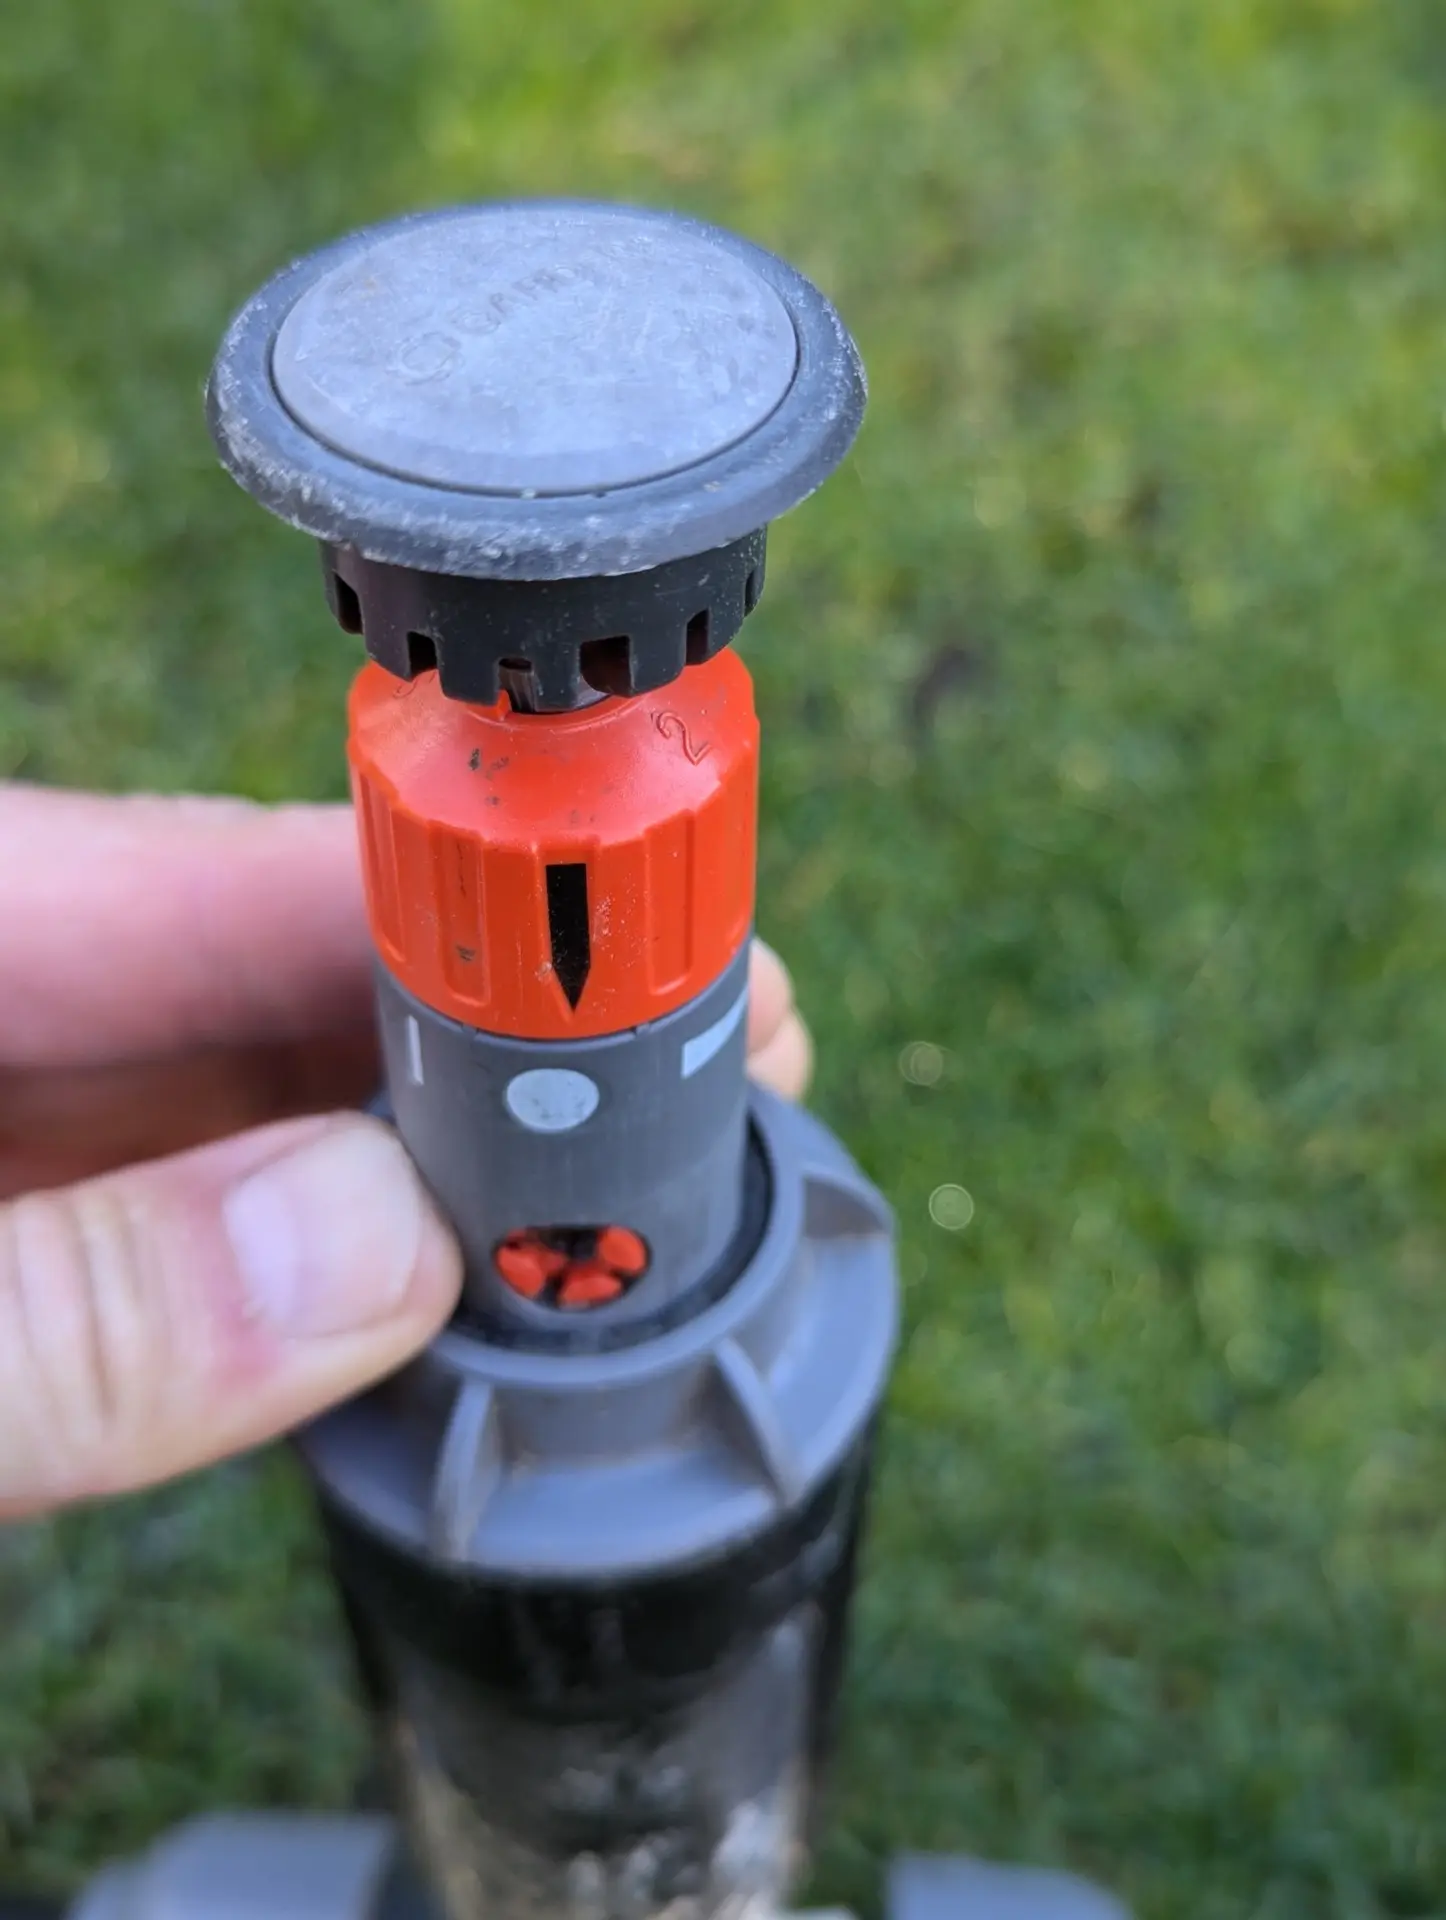
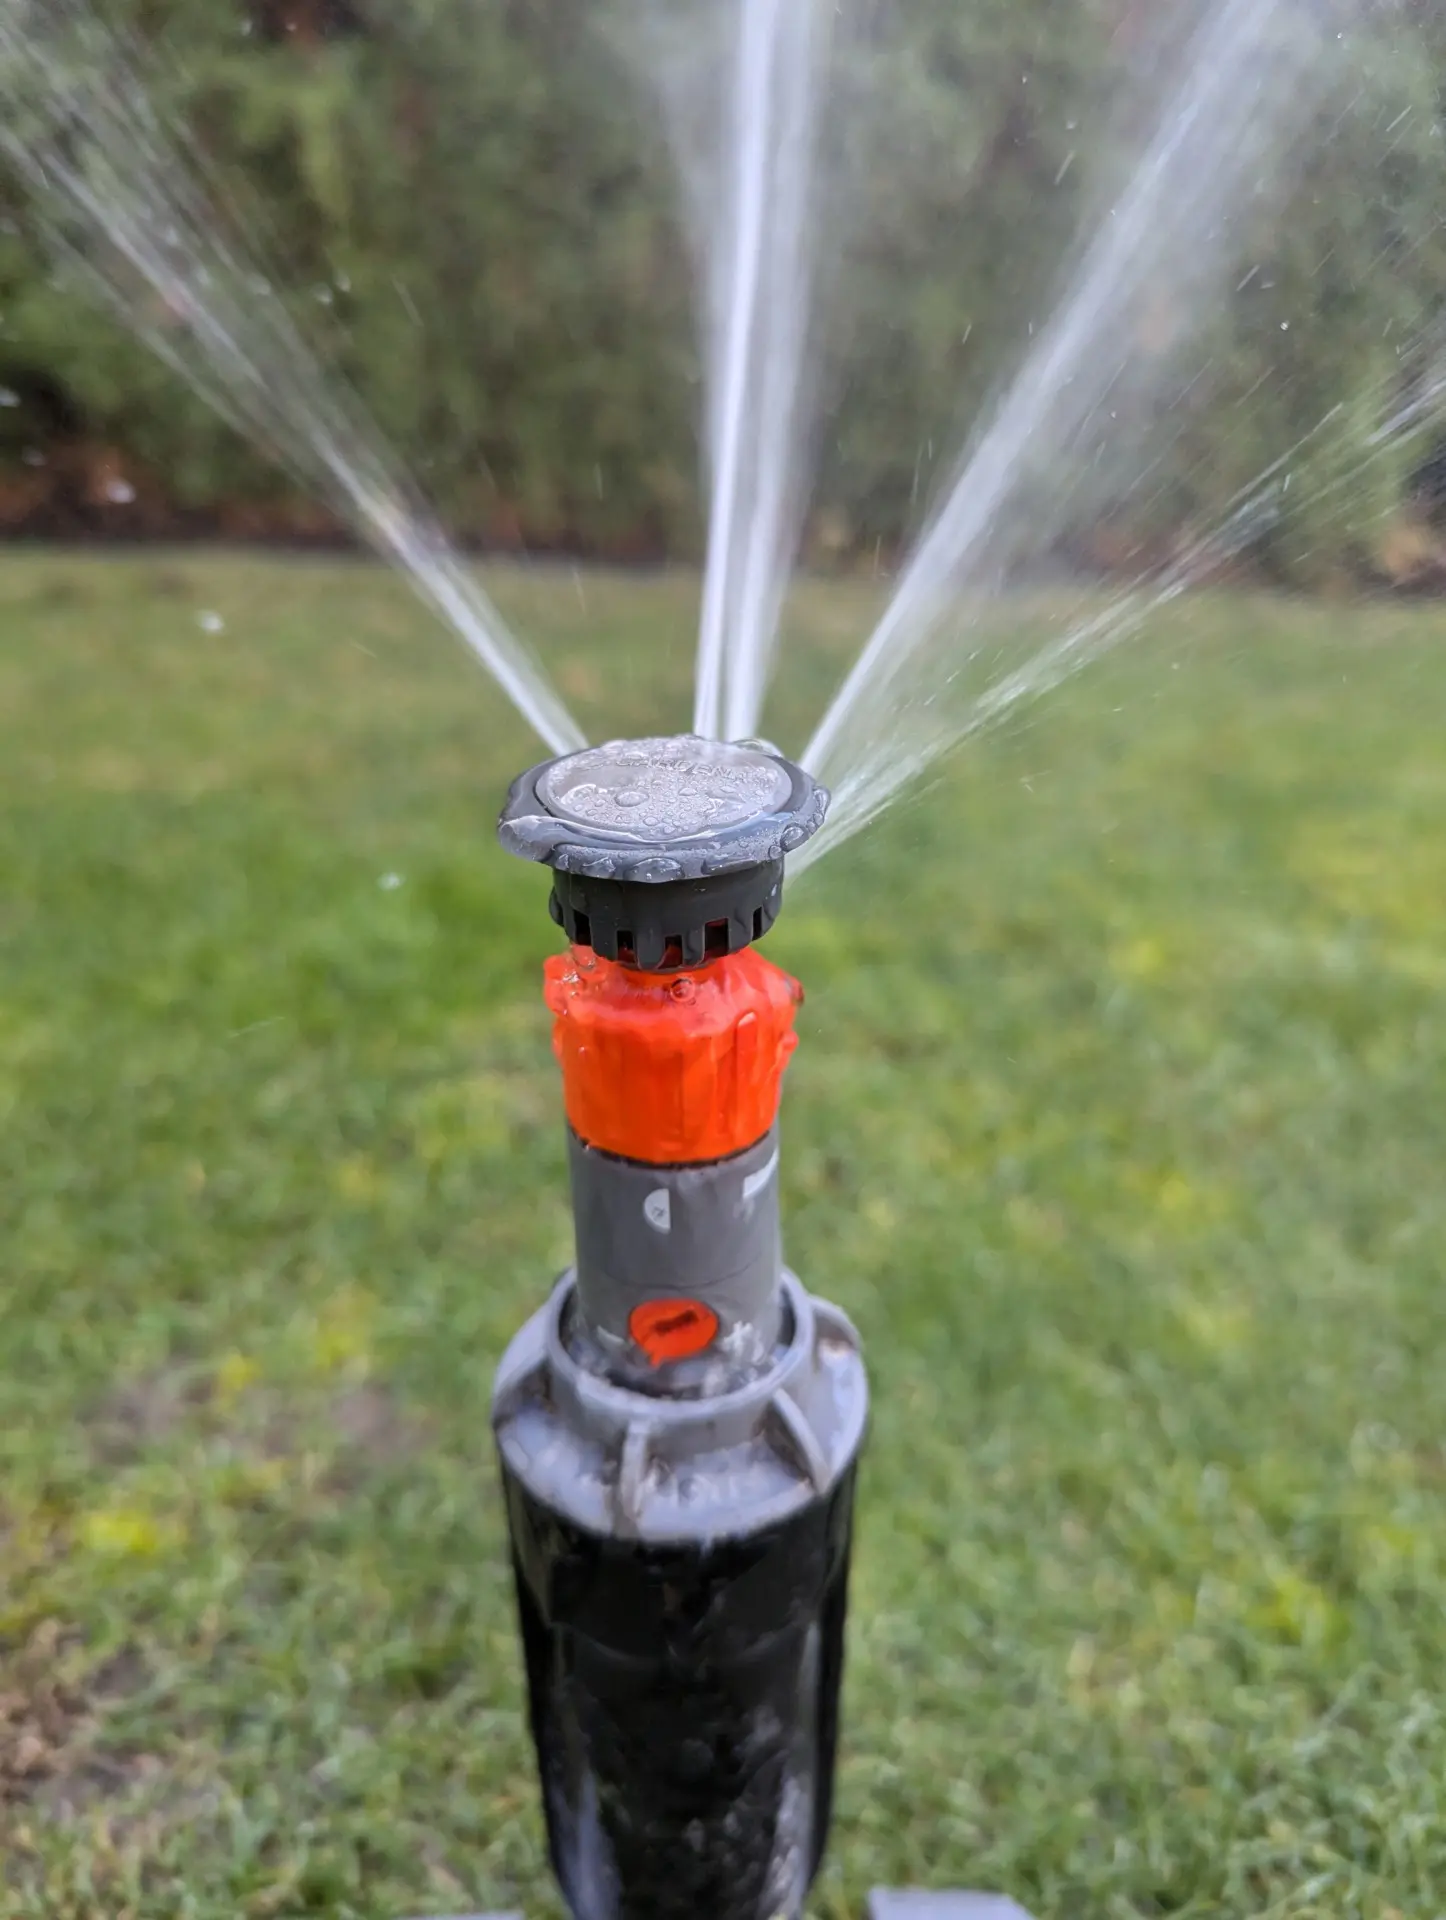
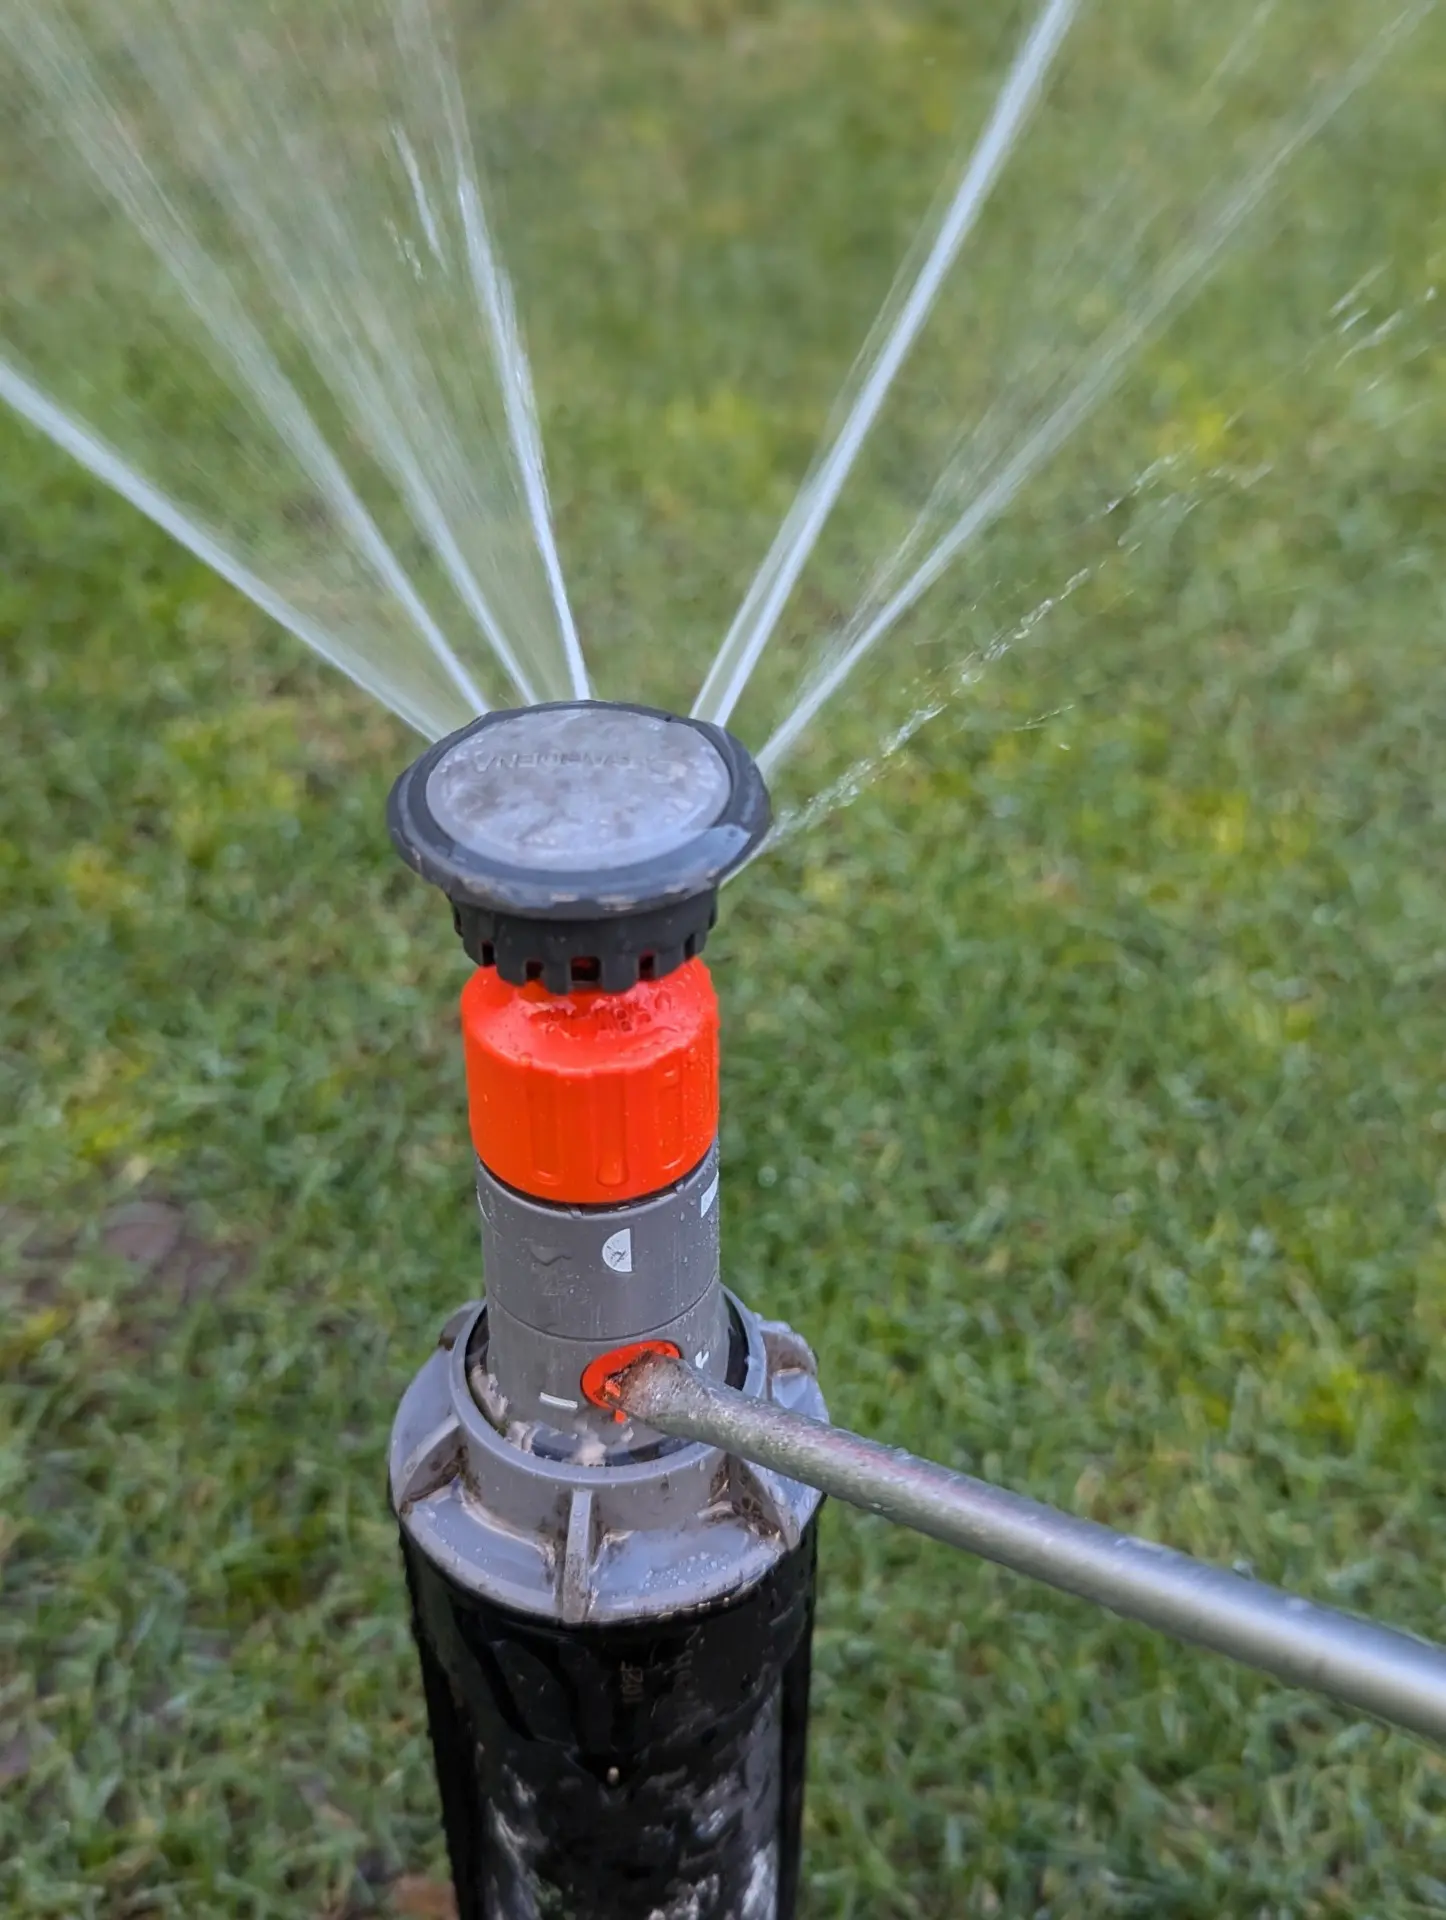
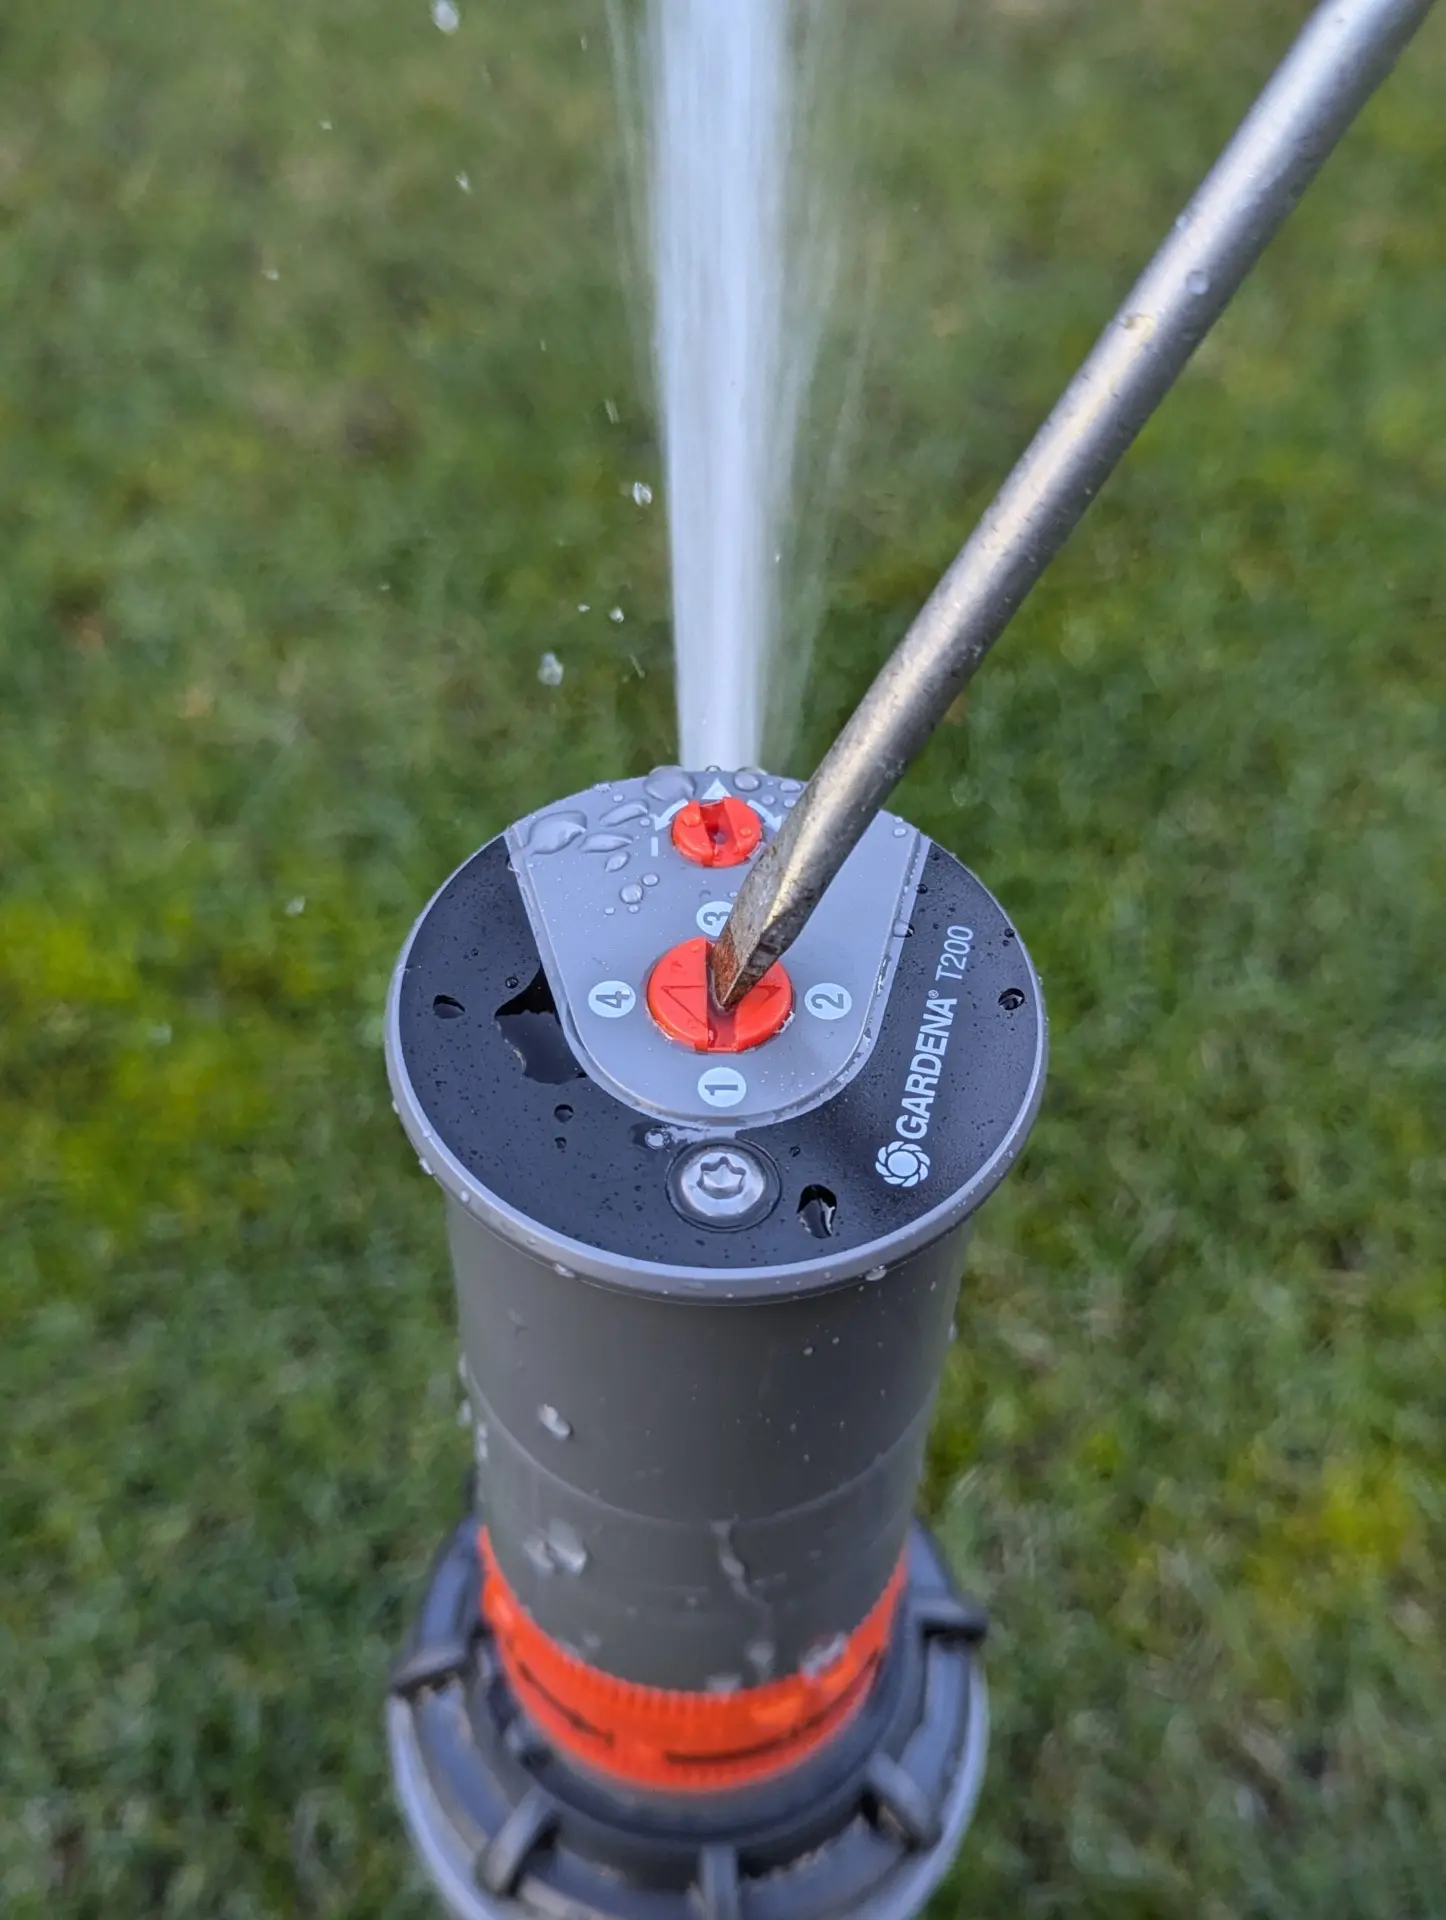
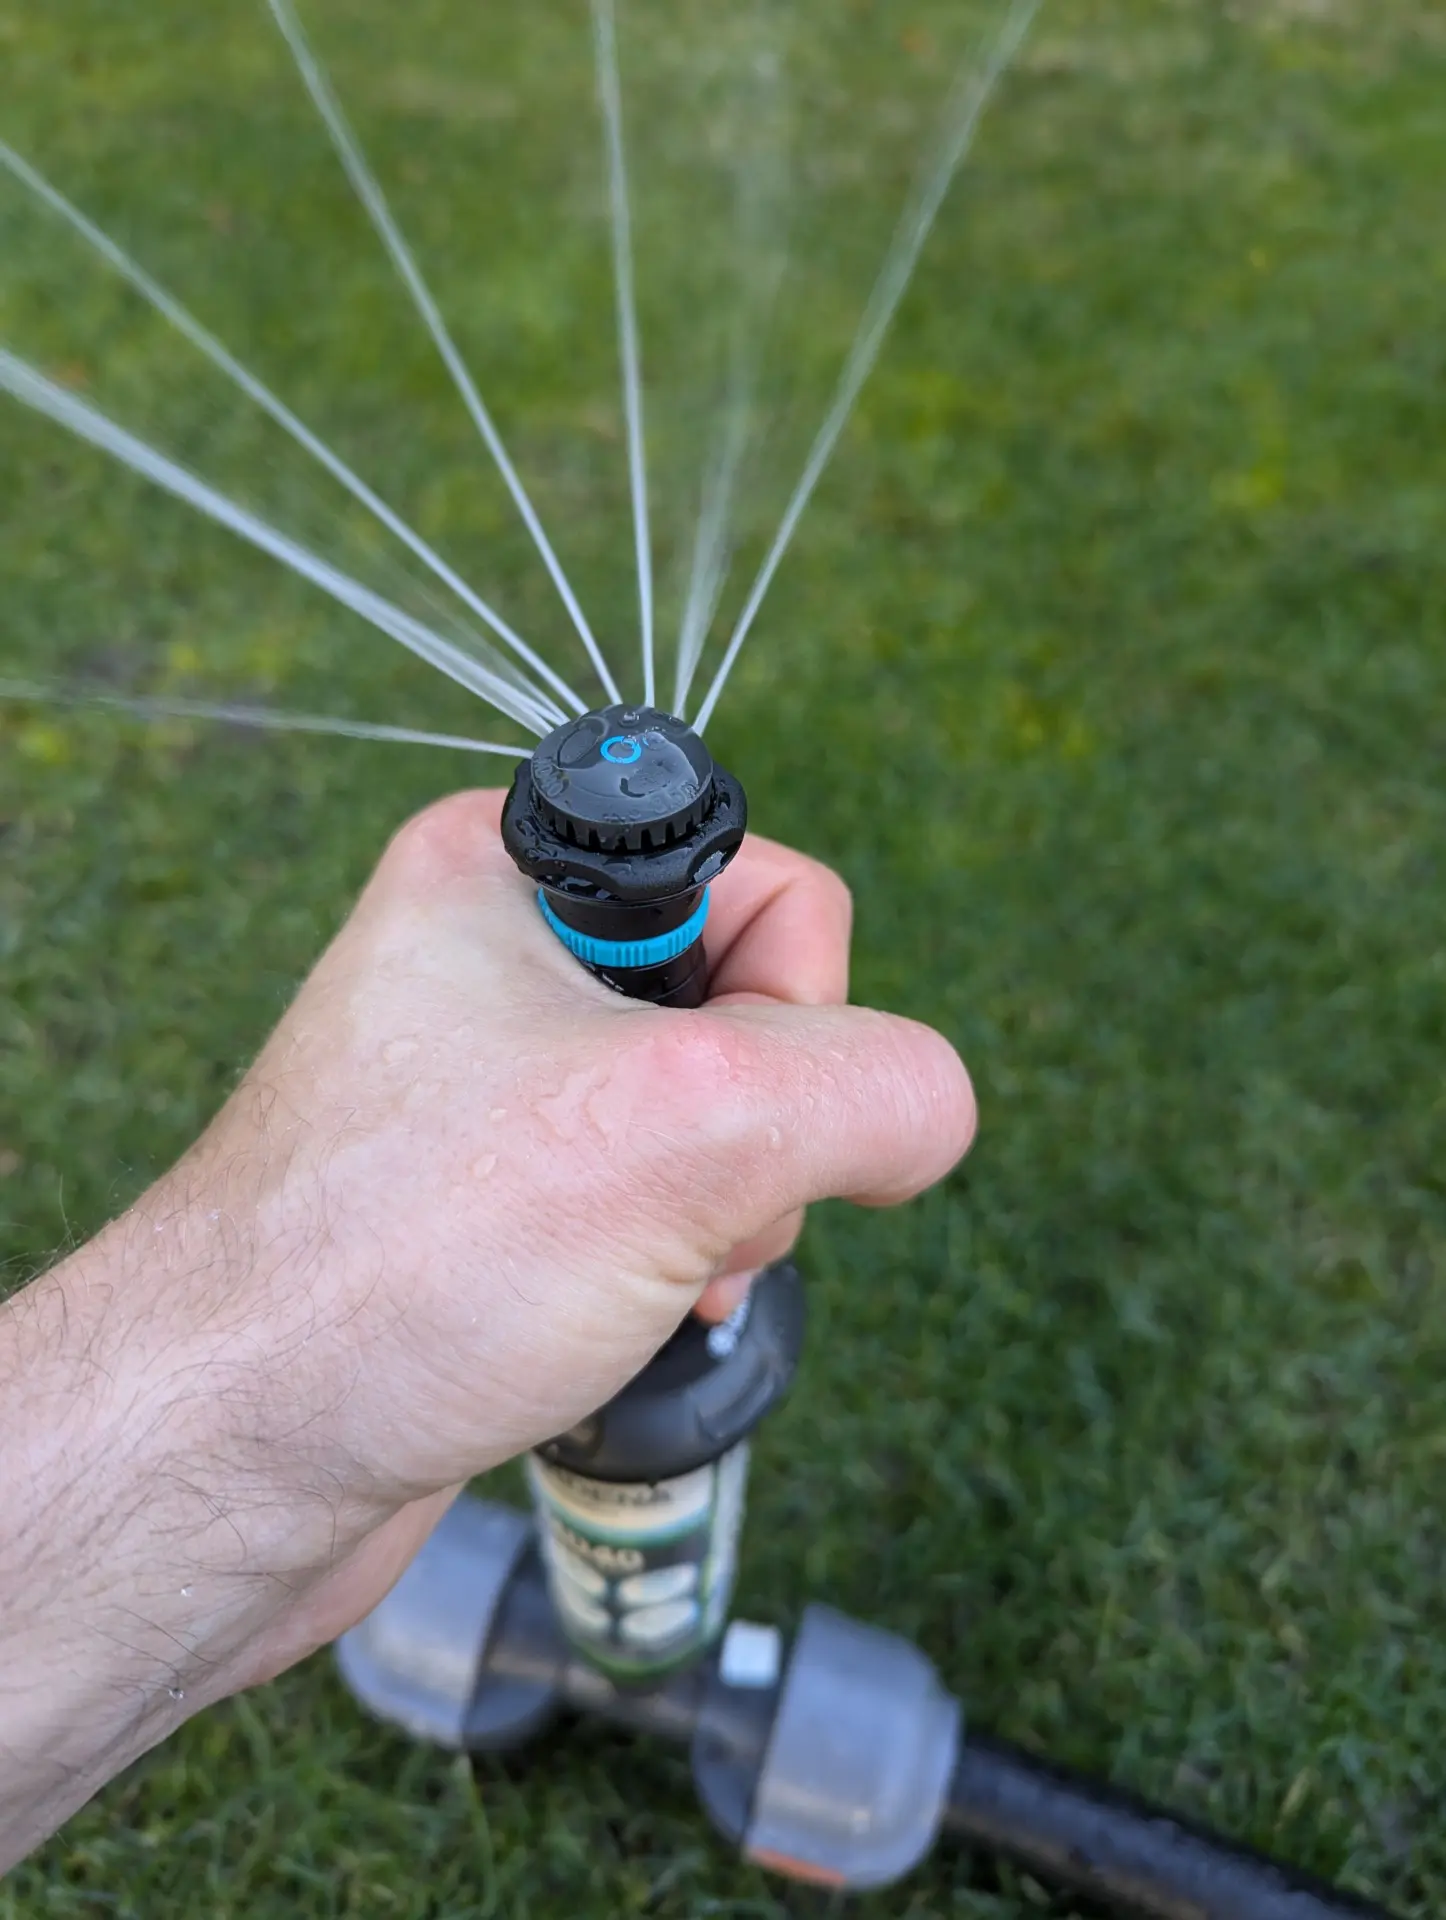
Gardena T-200/T-380
These two sprinklers are adjusted in the same way; I’ll demonstrate this using the T-200 as an example.
Preparation (before turning on the water supply)
Since this type of sprinkler delivers a very concentrated water supply, it is sufficient to prepare by turning the sprinkler nozzle away from you and toward the sector to be watered. This is done by turning the thin plate at the very top of the sprinkler head so that the small white arrow points in the direction of the sector. The sprinkler will begin watering at the position of the arrow.
This small white arrow shows where the nozzle is located and thus starts watering.
Activating the water supply
Now you can activate the water supply without getting wet. If you have sensitive terrain around the sprinkler that should not be sprayed with water, it is better to read the next section beforehand so that you can quickly adjust the sector setting.
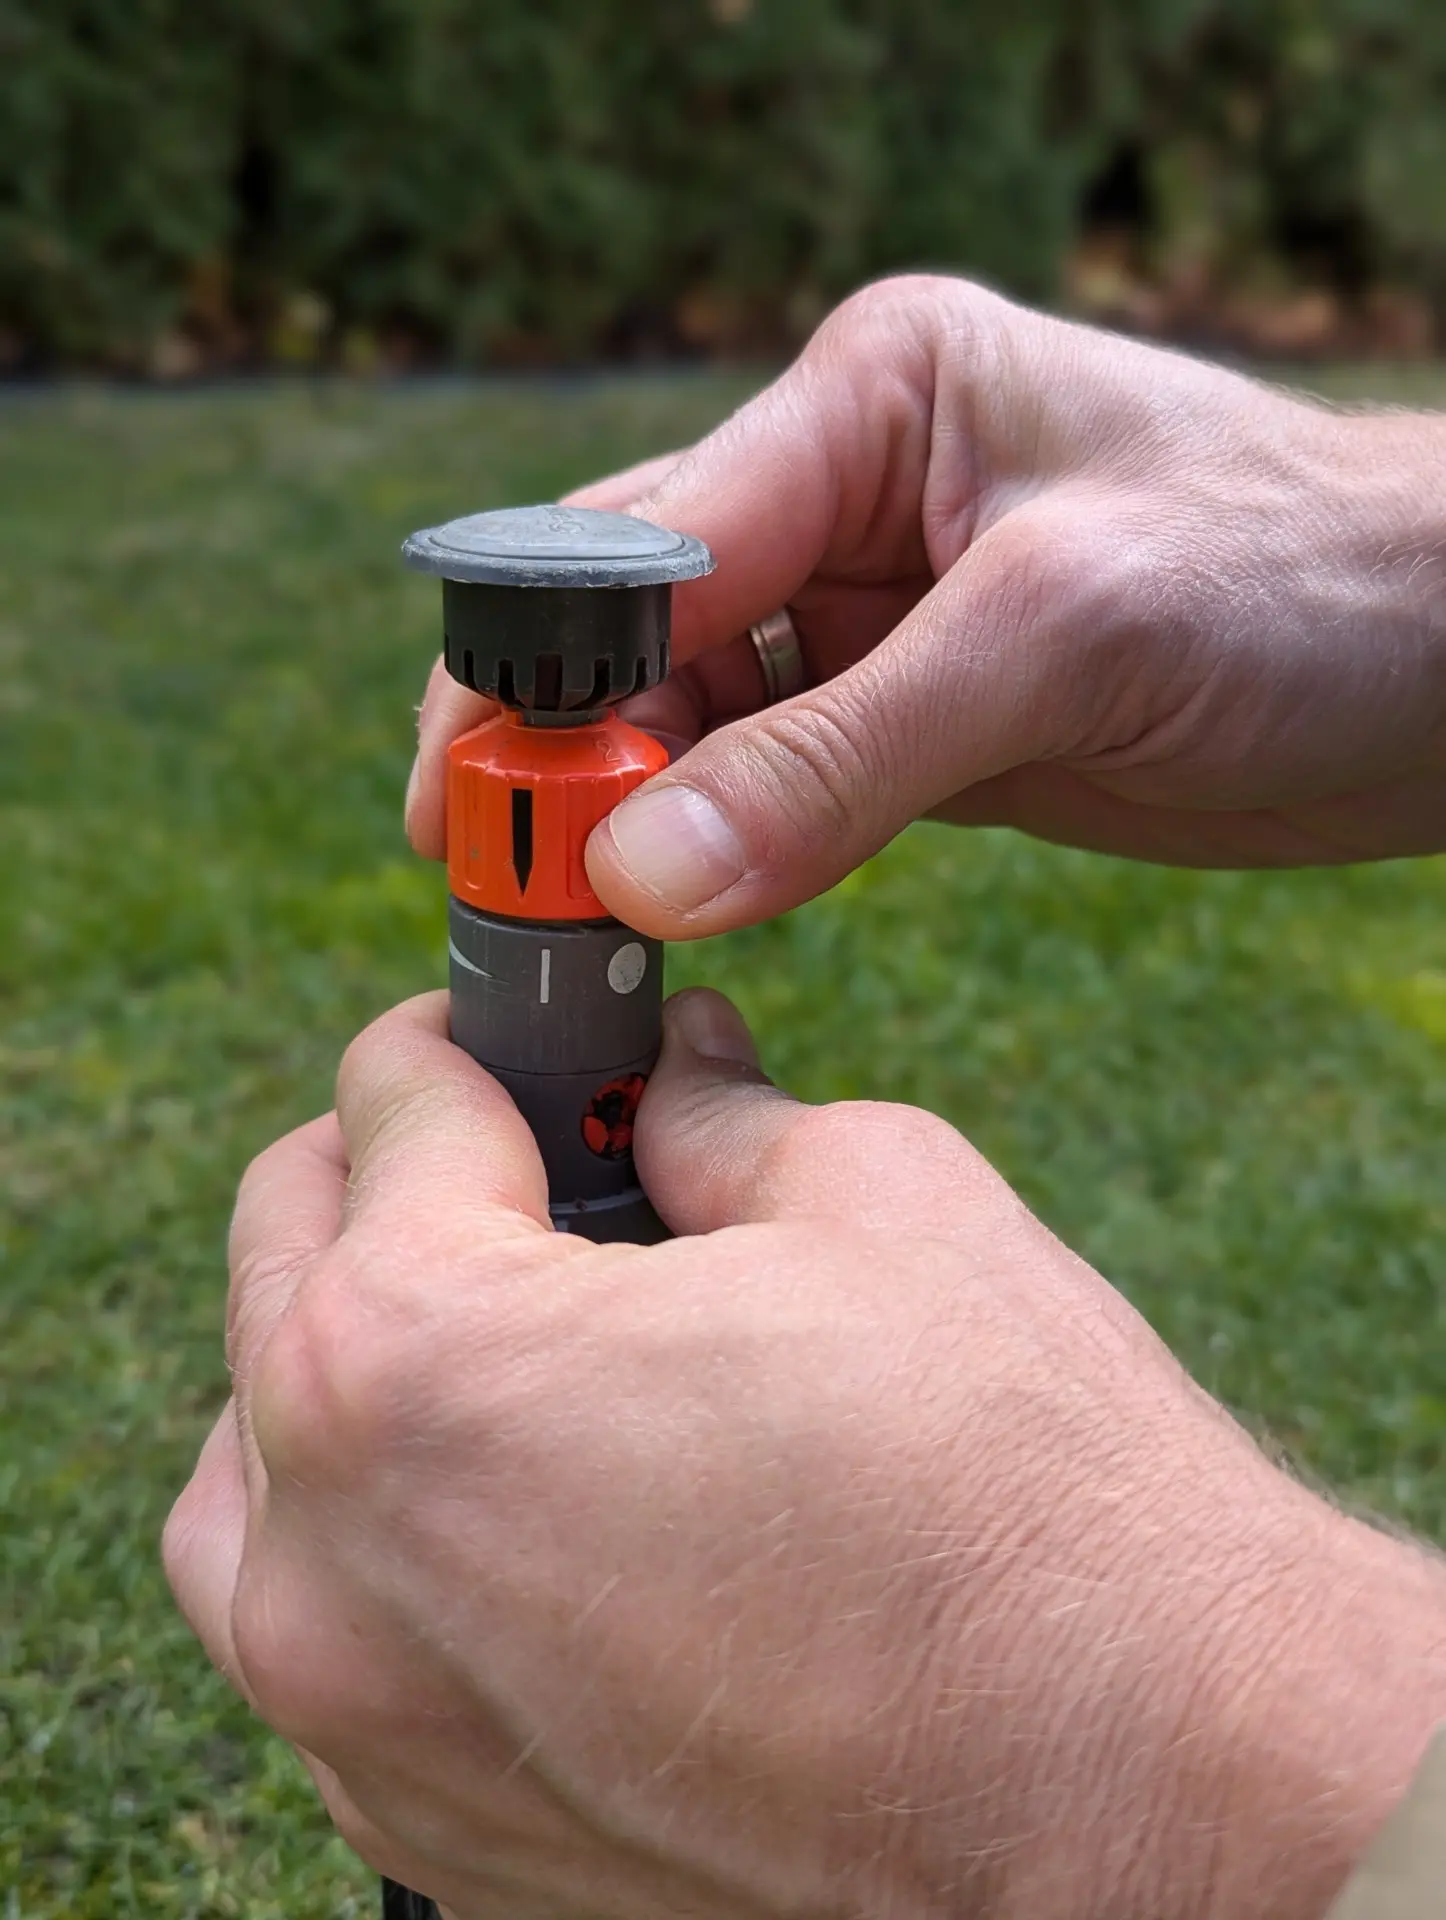
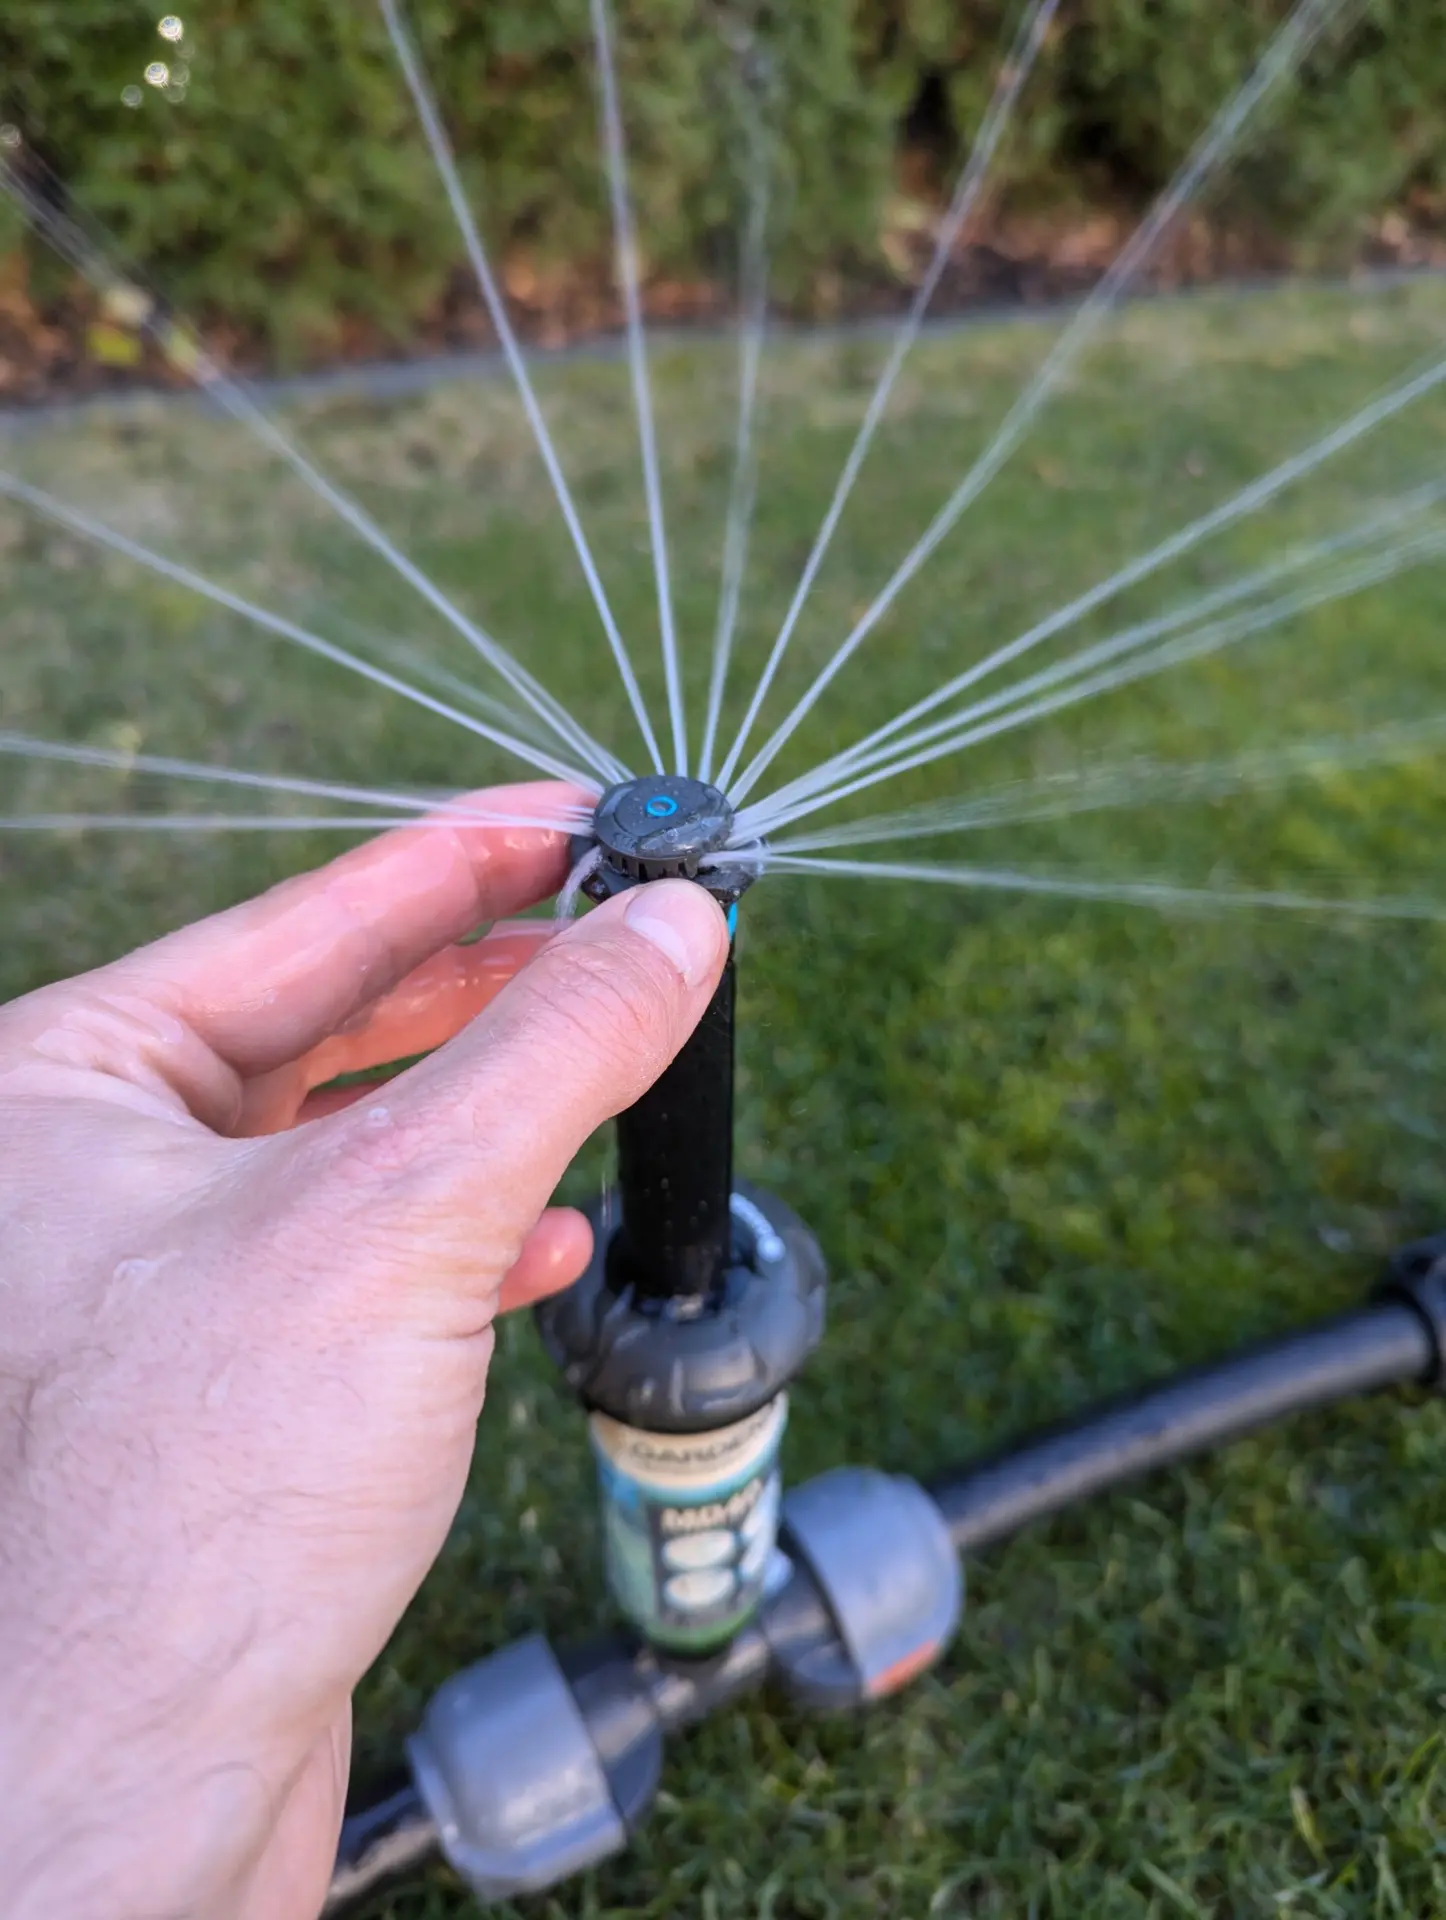
Setting the sector to be watered
The section of the circle that the sprinkler should water is defined by turning the two orange rings located in the riser. The left sector limit is set with the upper ring, and the right sector limit with the lower ring. The line marking on the ring defines the point to which the sprinkler rotates left or right.
Note: If the sprinkler head is accidentally rotated in everyday use, this will not affect the sector setting; the sprinkler automatically returns to the correct sector setting. Gardena calls this the “memory function.”
The left stop is set with the upper rotating ring.
The right stop is set with the lower rotating ring.
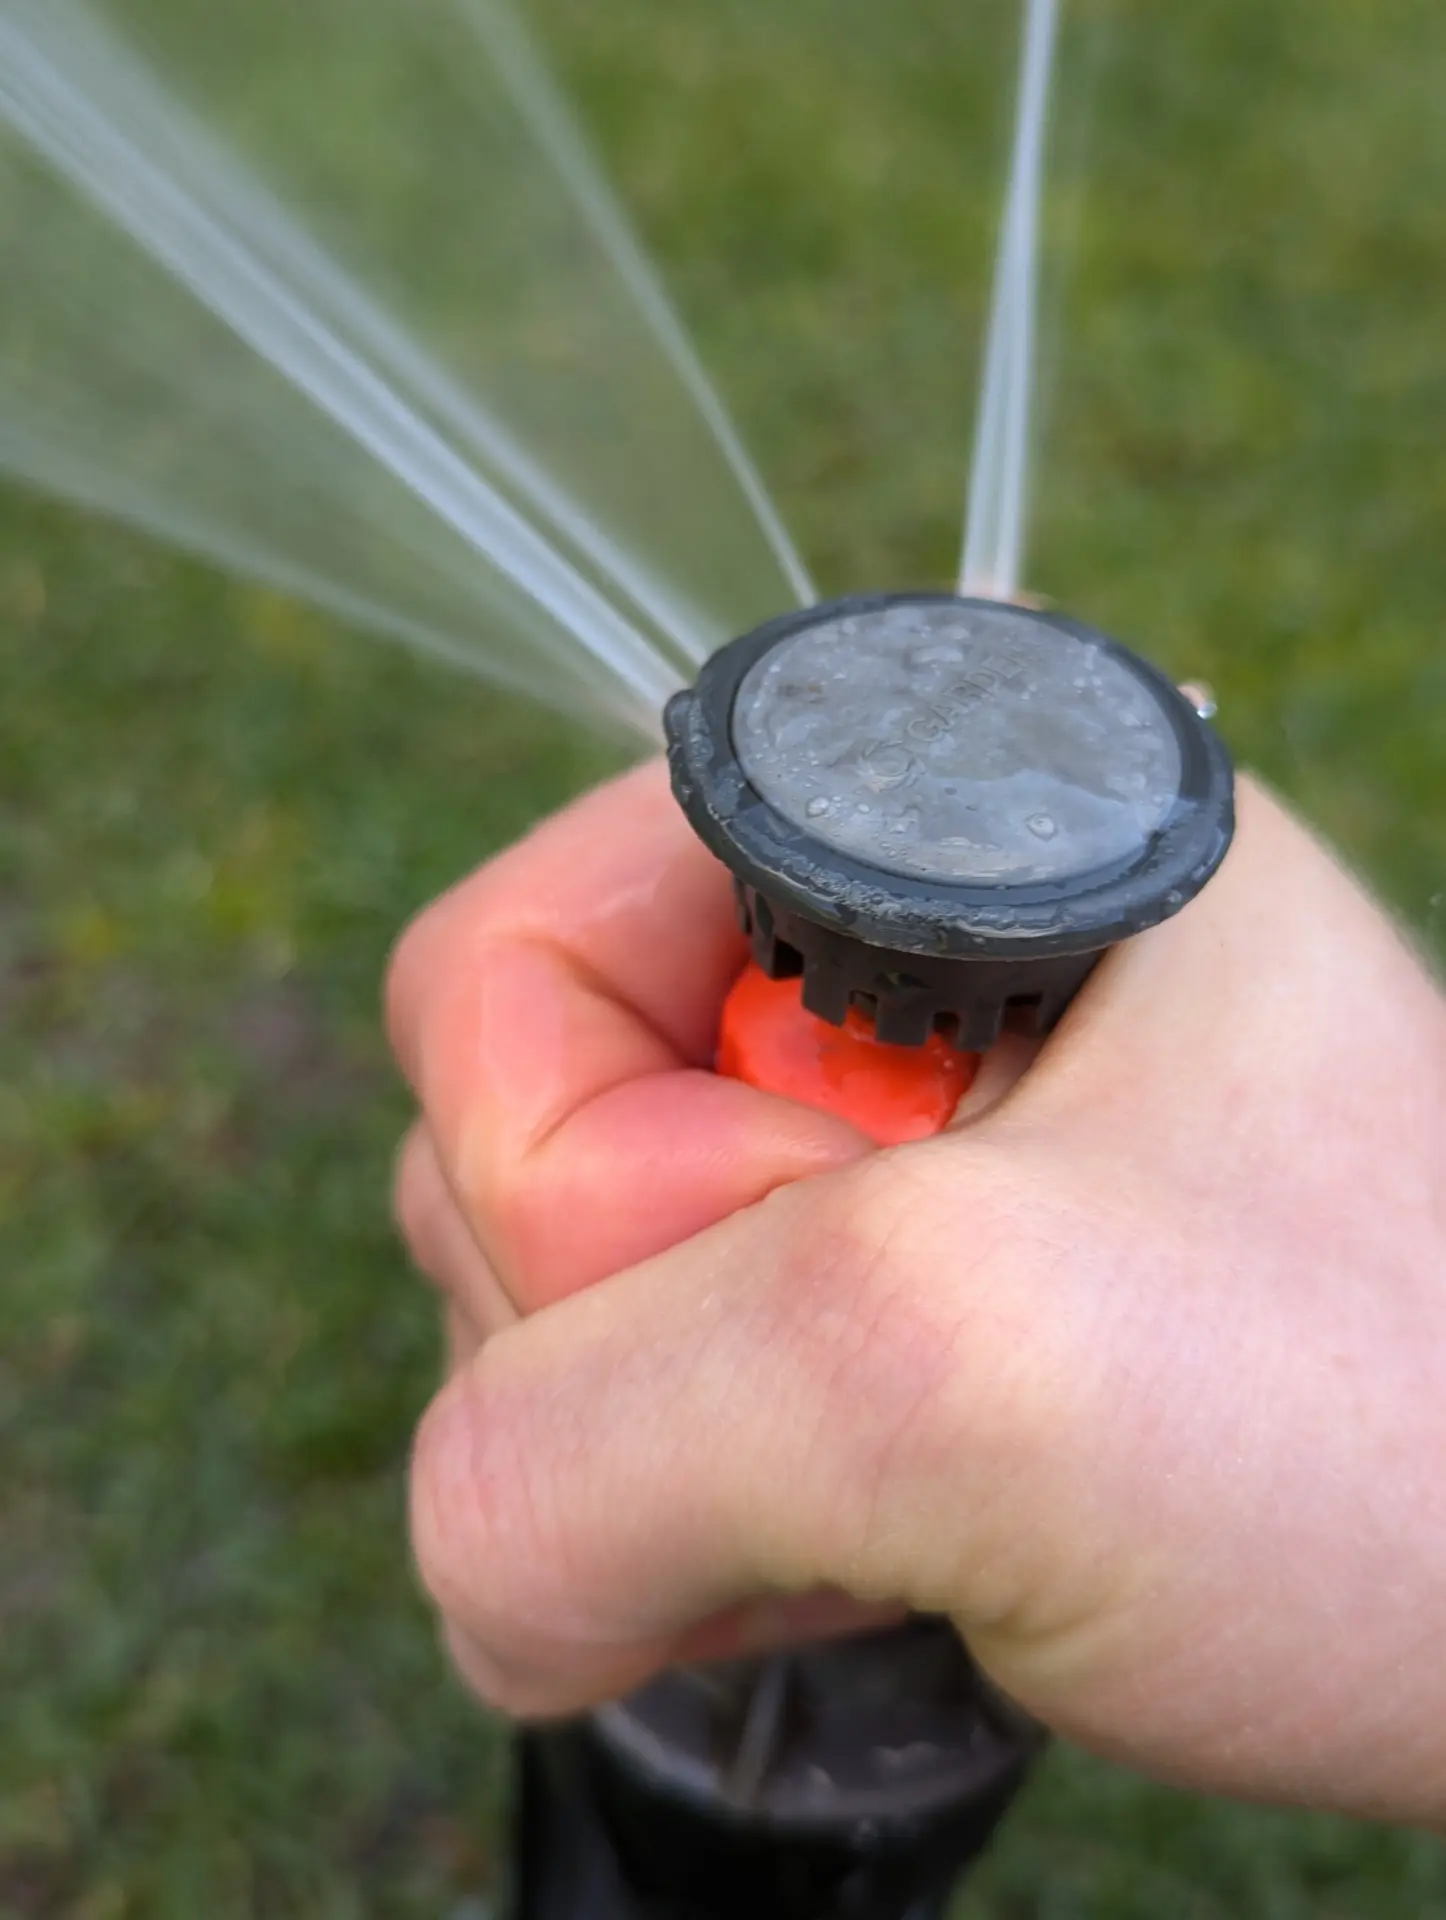
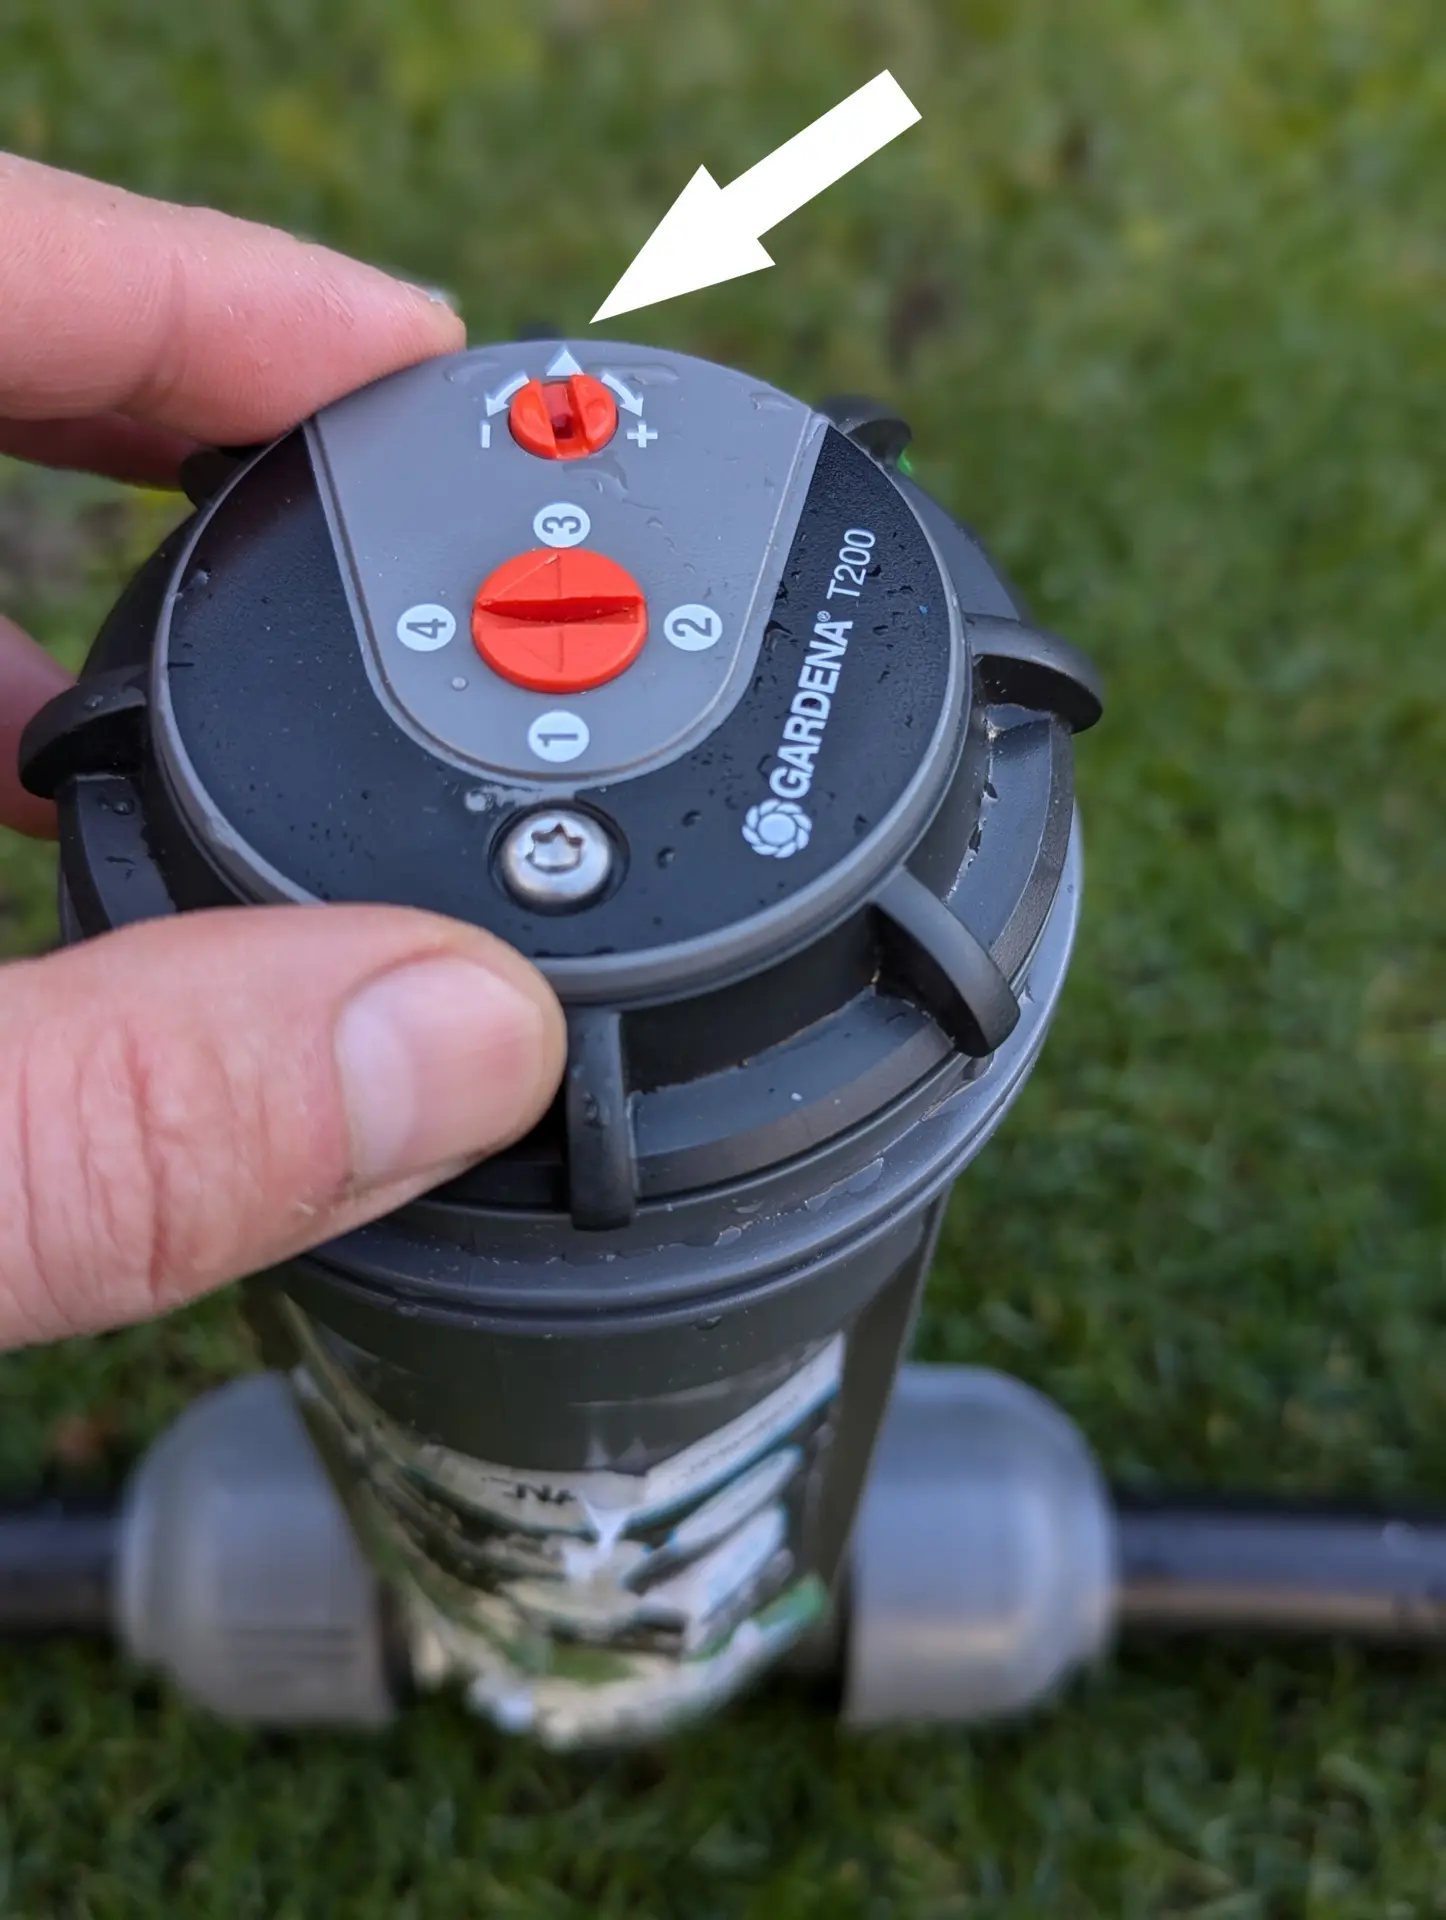
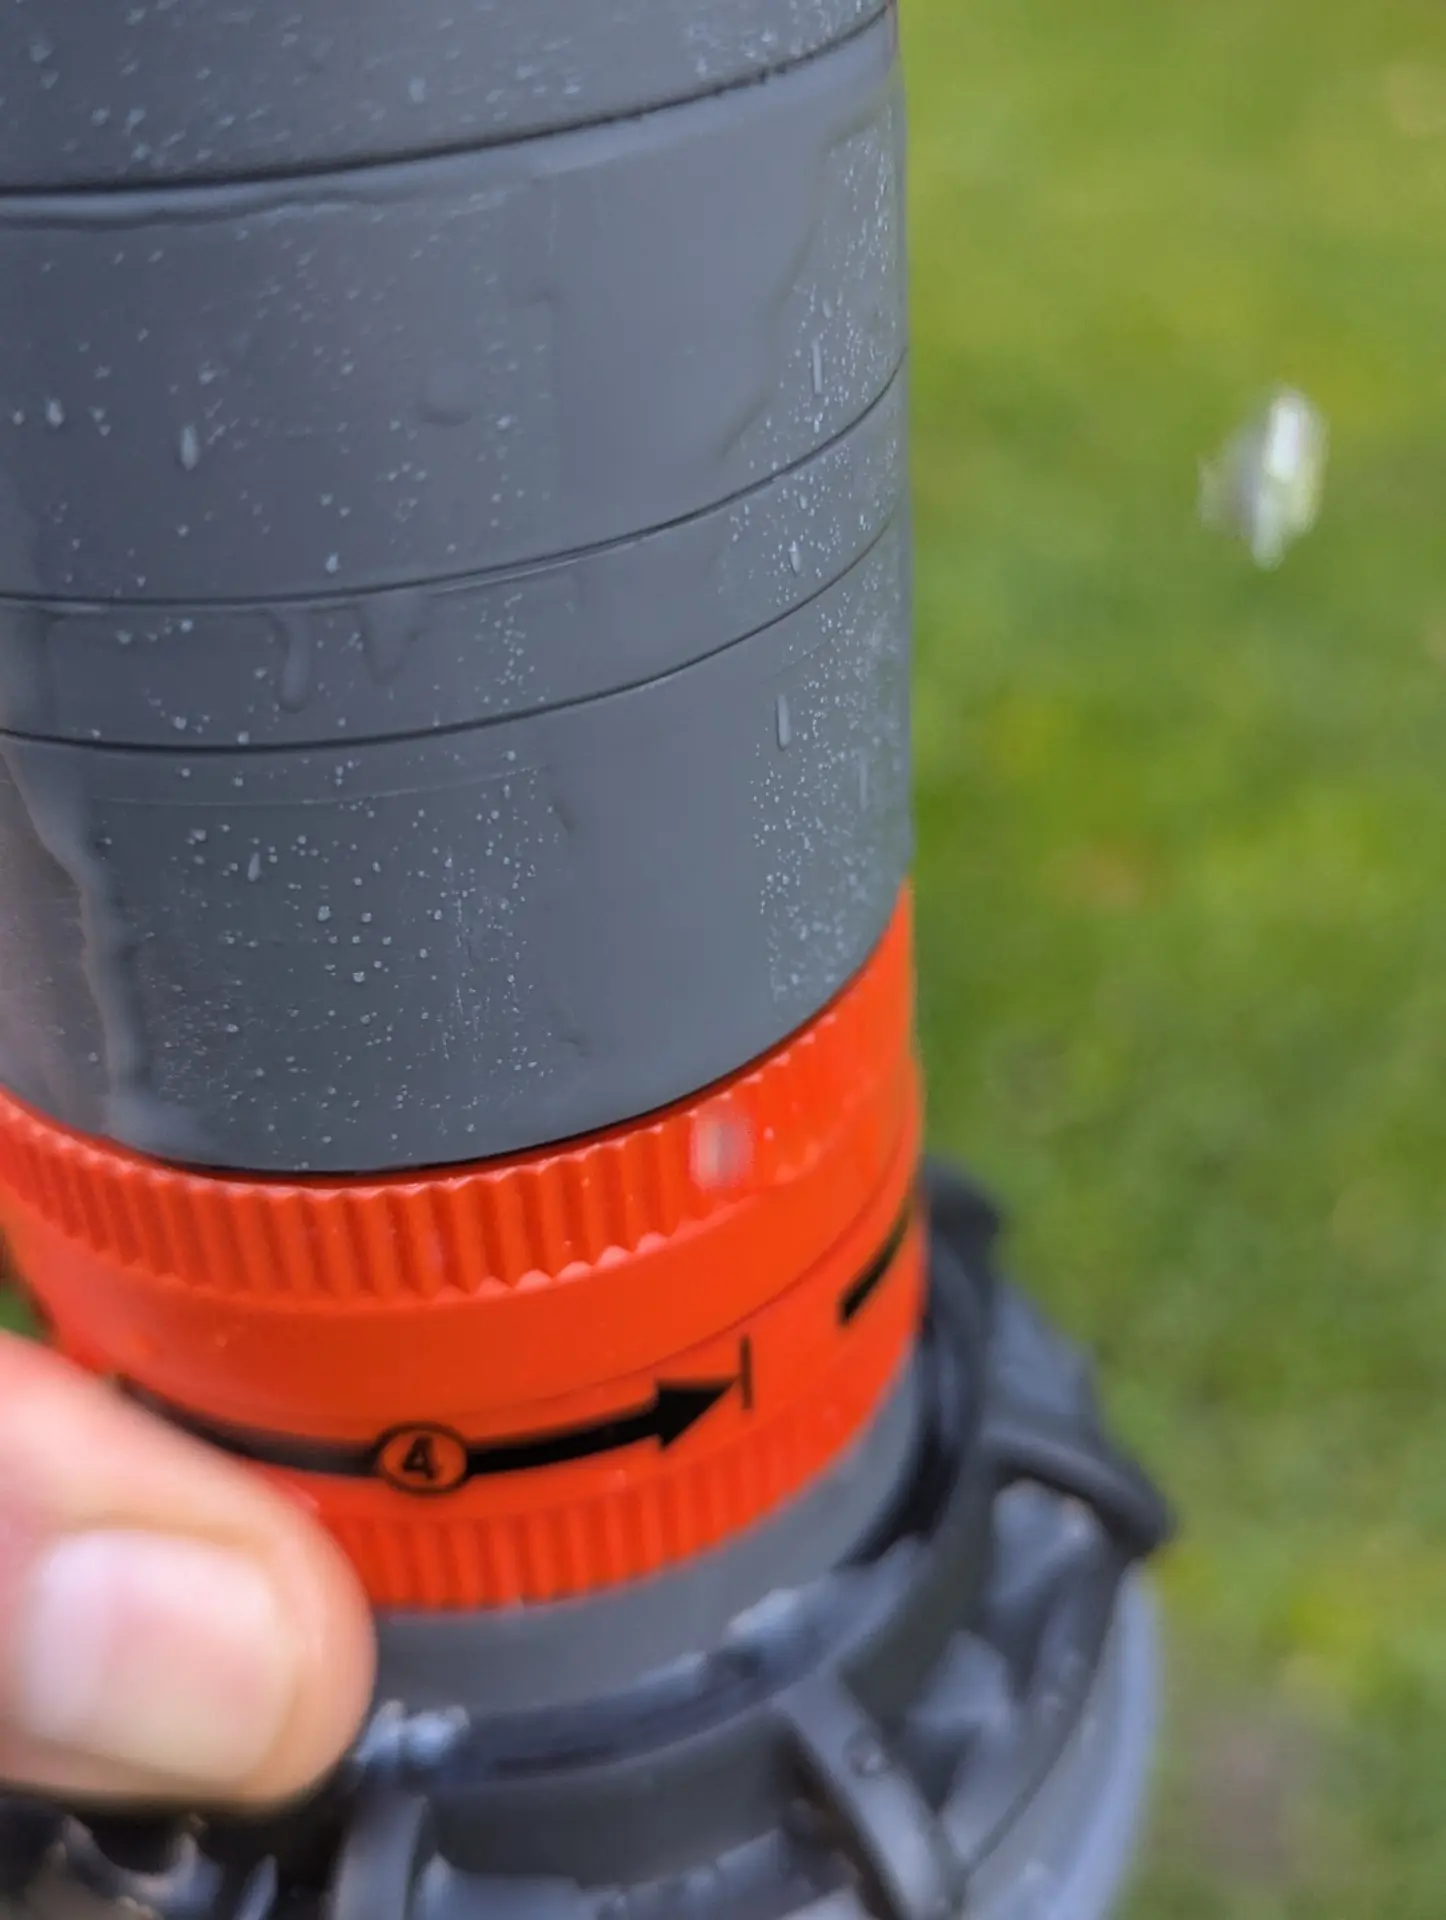
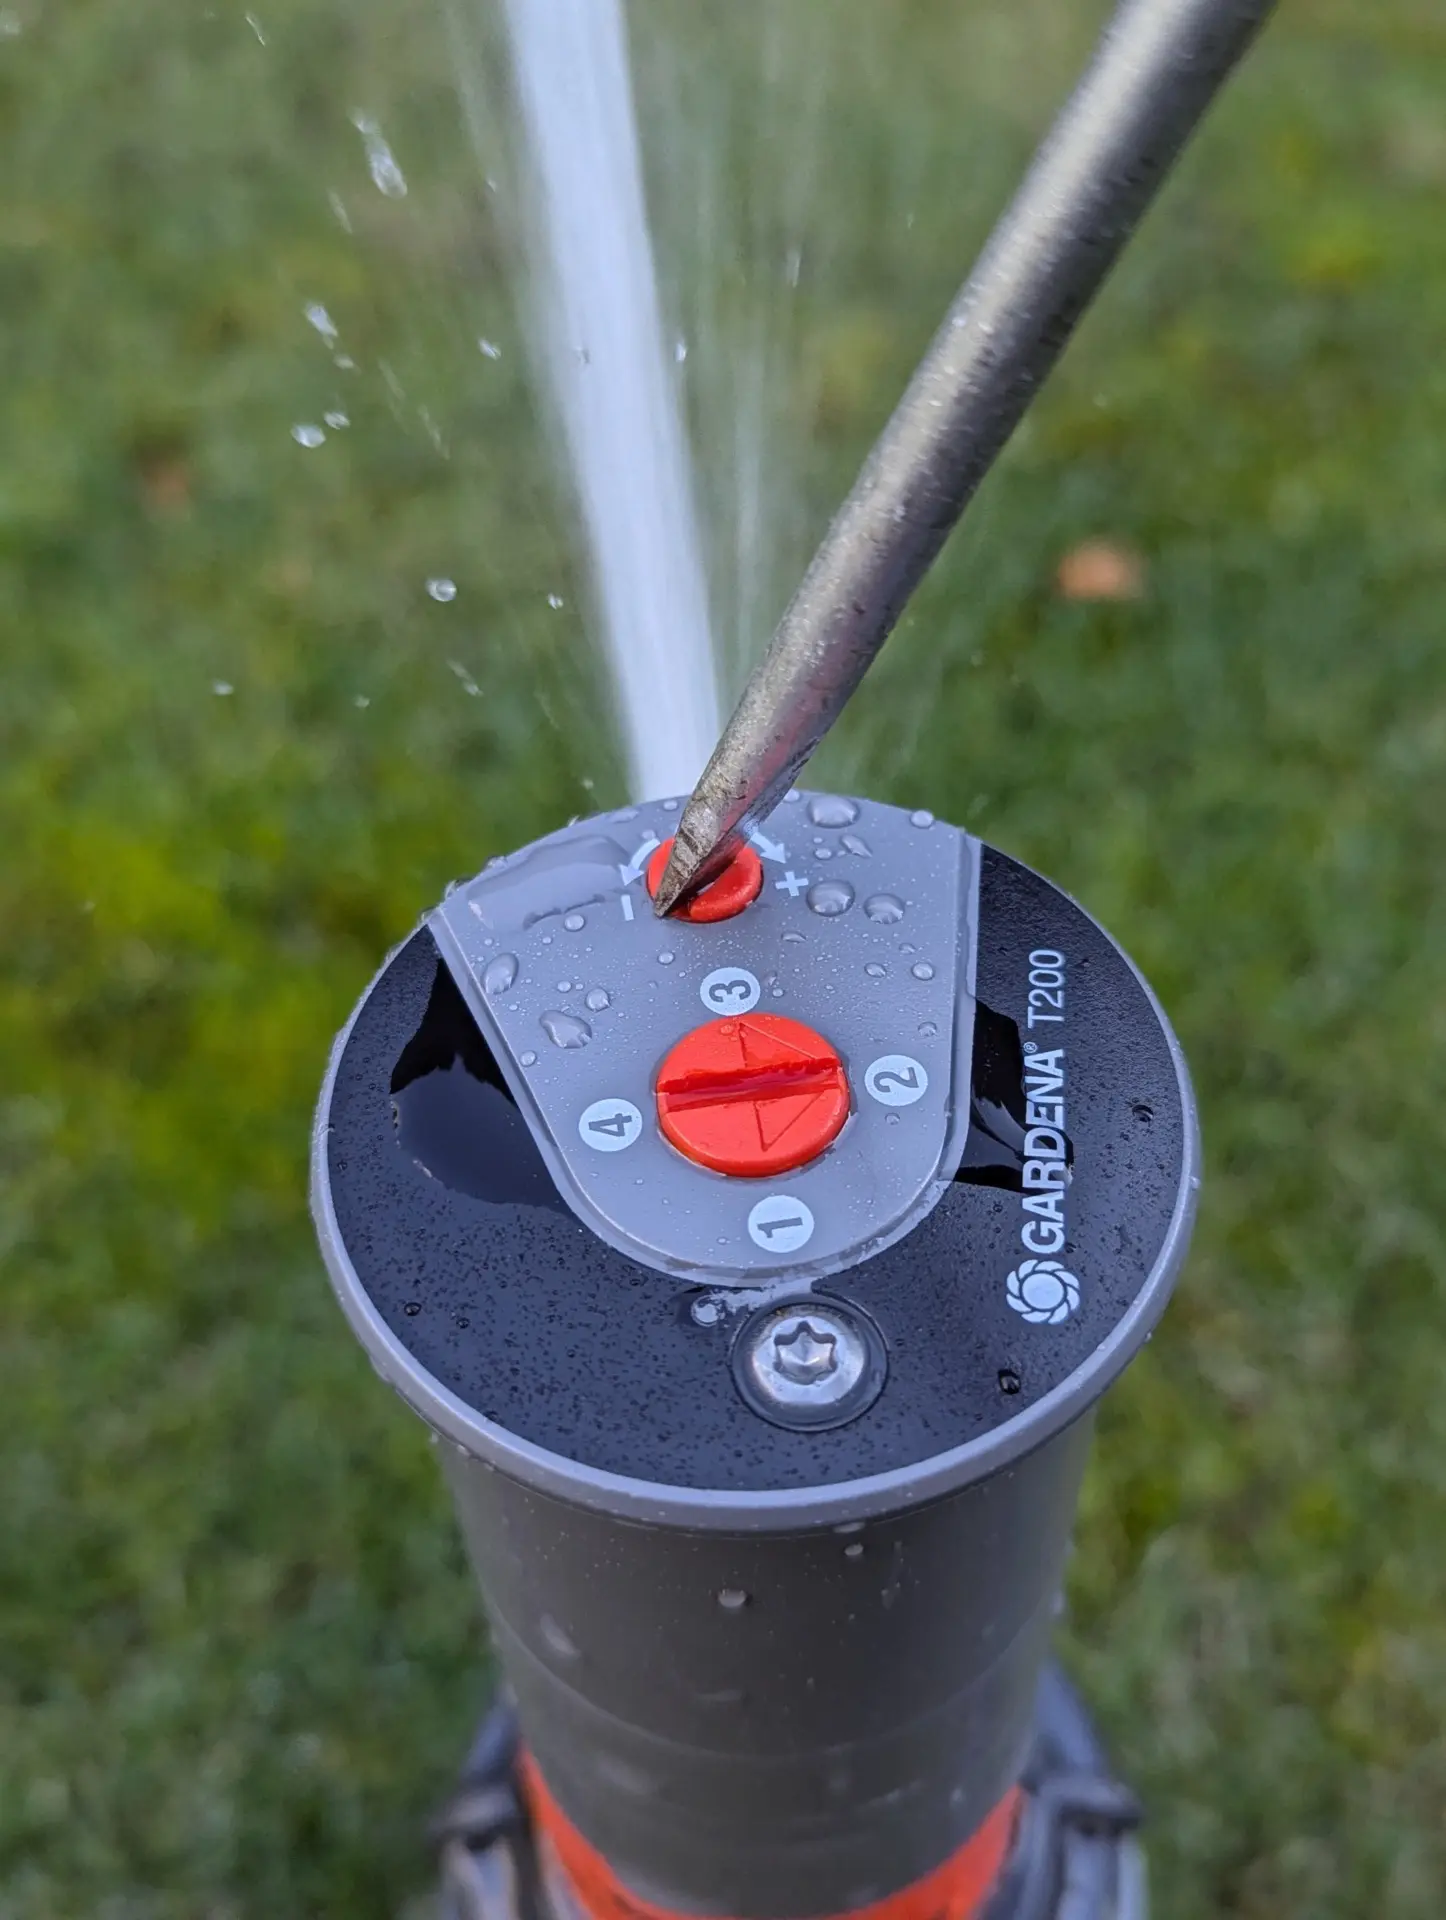
Nozzle Selection
There are four nozzles to choose from, each providing a different water flow. Nozzle 1 provides the smallest amount of water, and Nozzle 4 the largest.
The purpose of this nozzle selection is to enable coordination of the water flow rate (MPR) when operating the sprinkler simultaneously with other sprinklers that water different sector sizes in a single irrigation cycle. For example, if the first T-200 irrigates a full circle, the second only a semicircle, and the third only a quarter circle.
Since completing a full circle takes four times as long as completing a quarter circle, the irrigated area of the quarter-circle sprinkler would receive four times as much water in the same time as that of the full-circle sprinkler, resulting in completely uneven irrigation.
This can be compensated for by using different nozzle sizes. These should be used as follows:
Nozzle No. 1 – Quarter Circle
Nozzle No. 2 – Semicircle
Nozzle No. 3 – Three-Quarter Circle
Nozzle No. 4 – Full Circle
The nozzle is selected using a screwdriver by moving the arrow imprinted on the orange screw to the desired nozzle number.
Selecting one of four nozzles
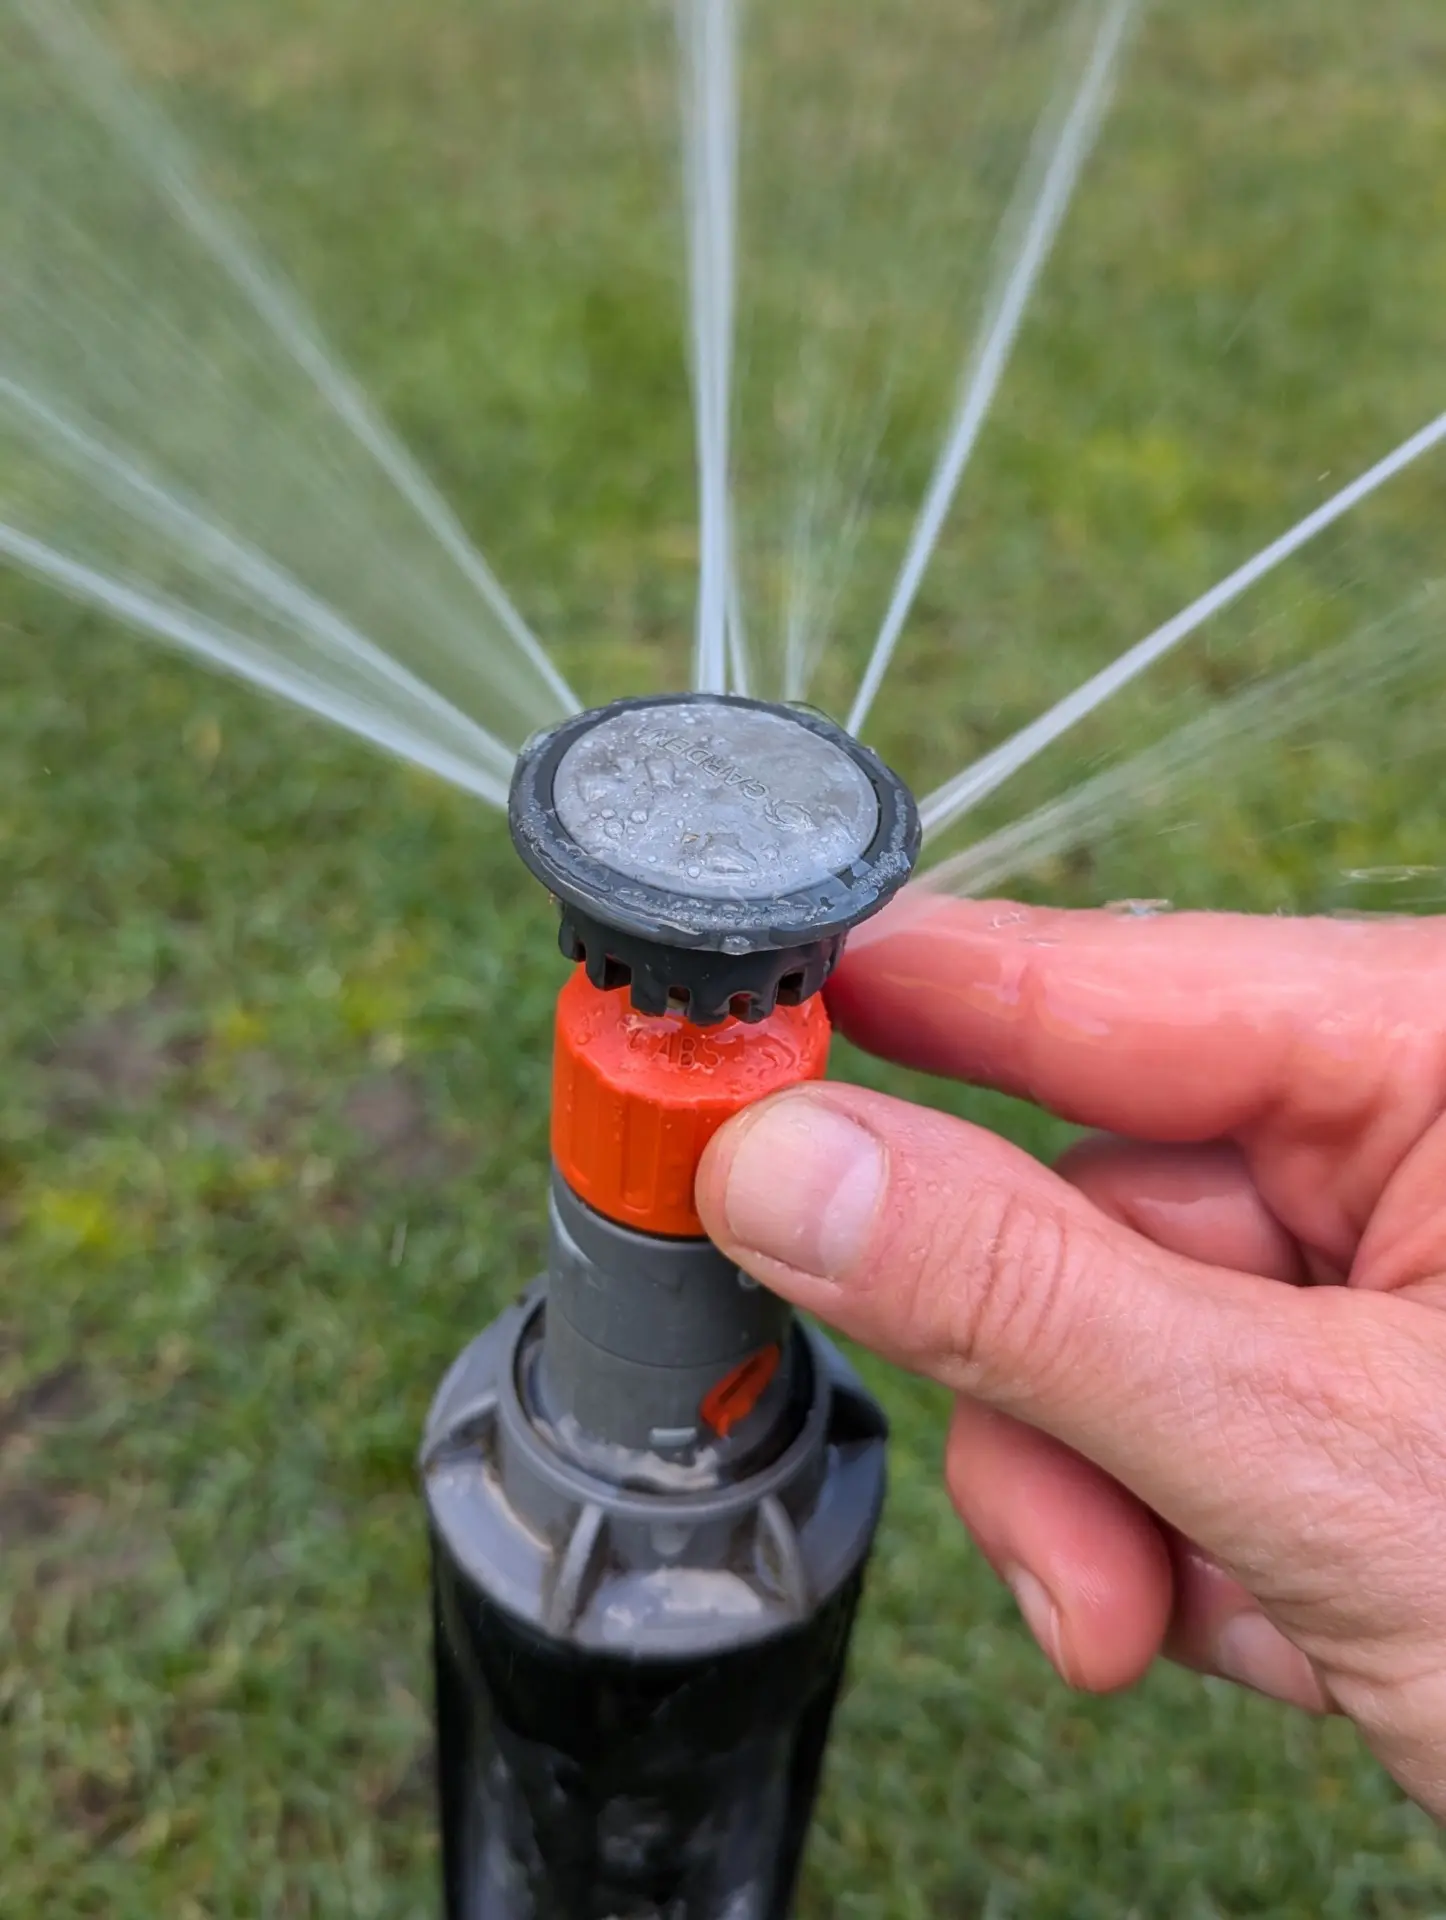
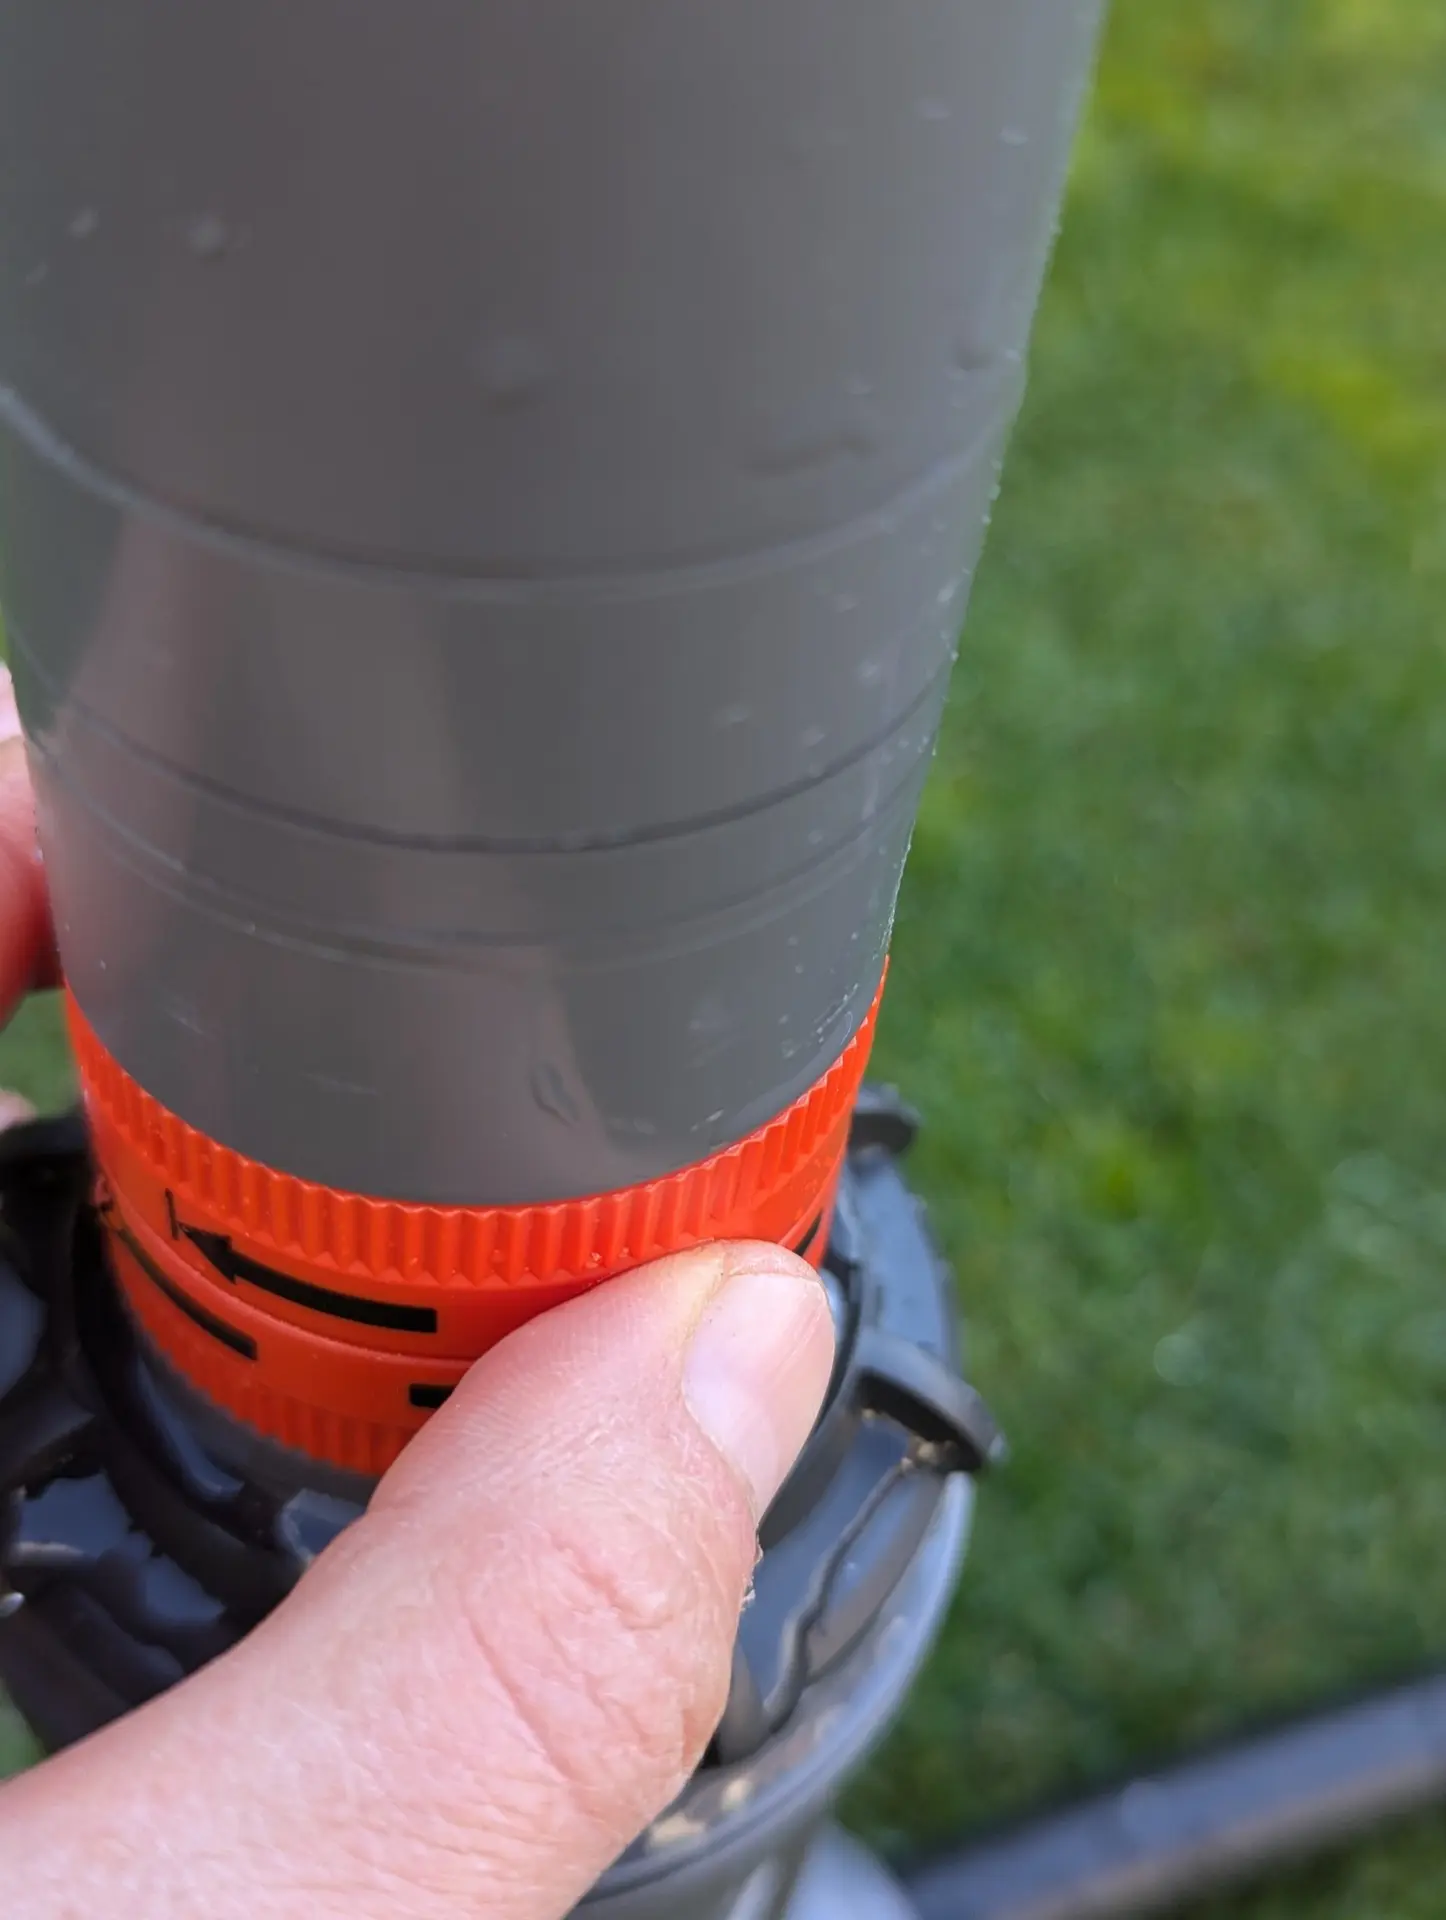
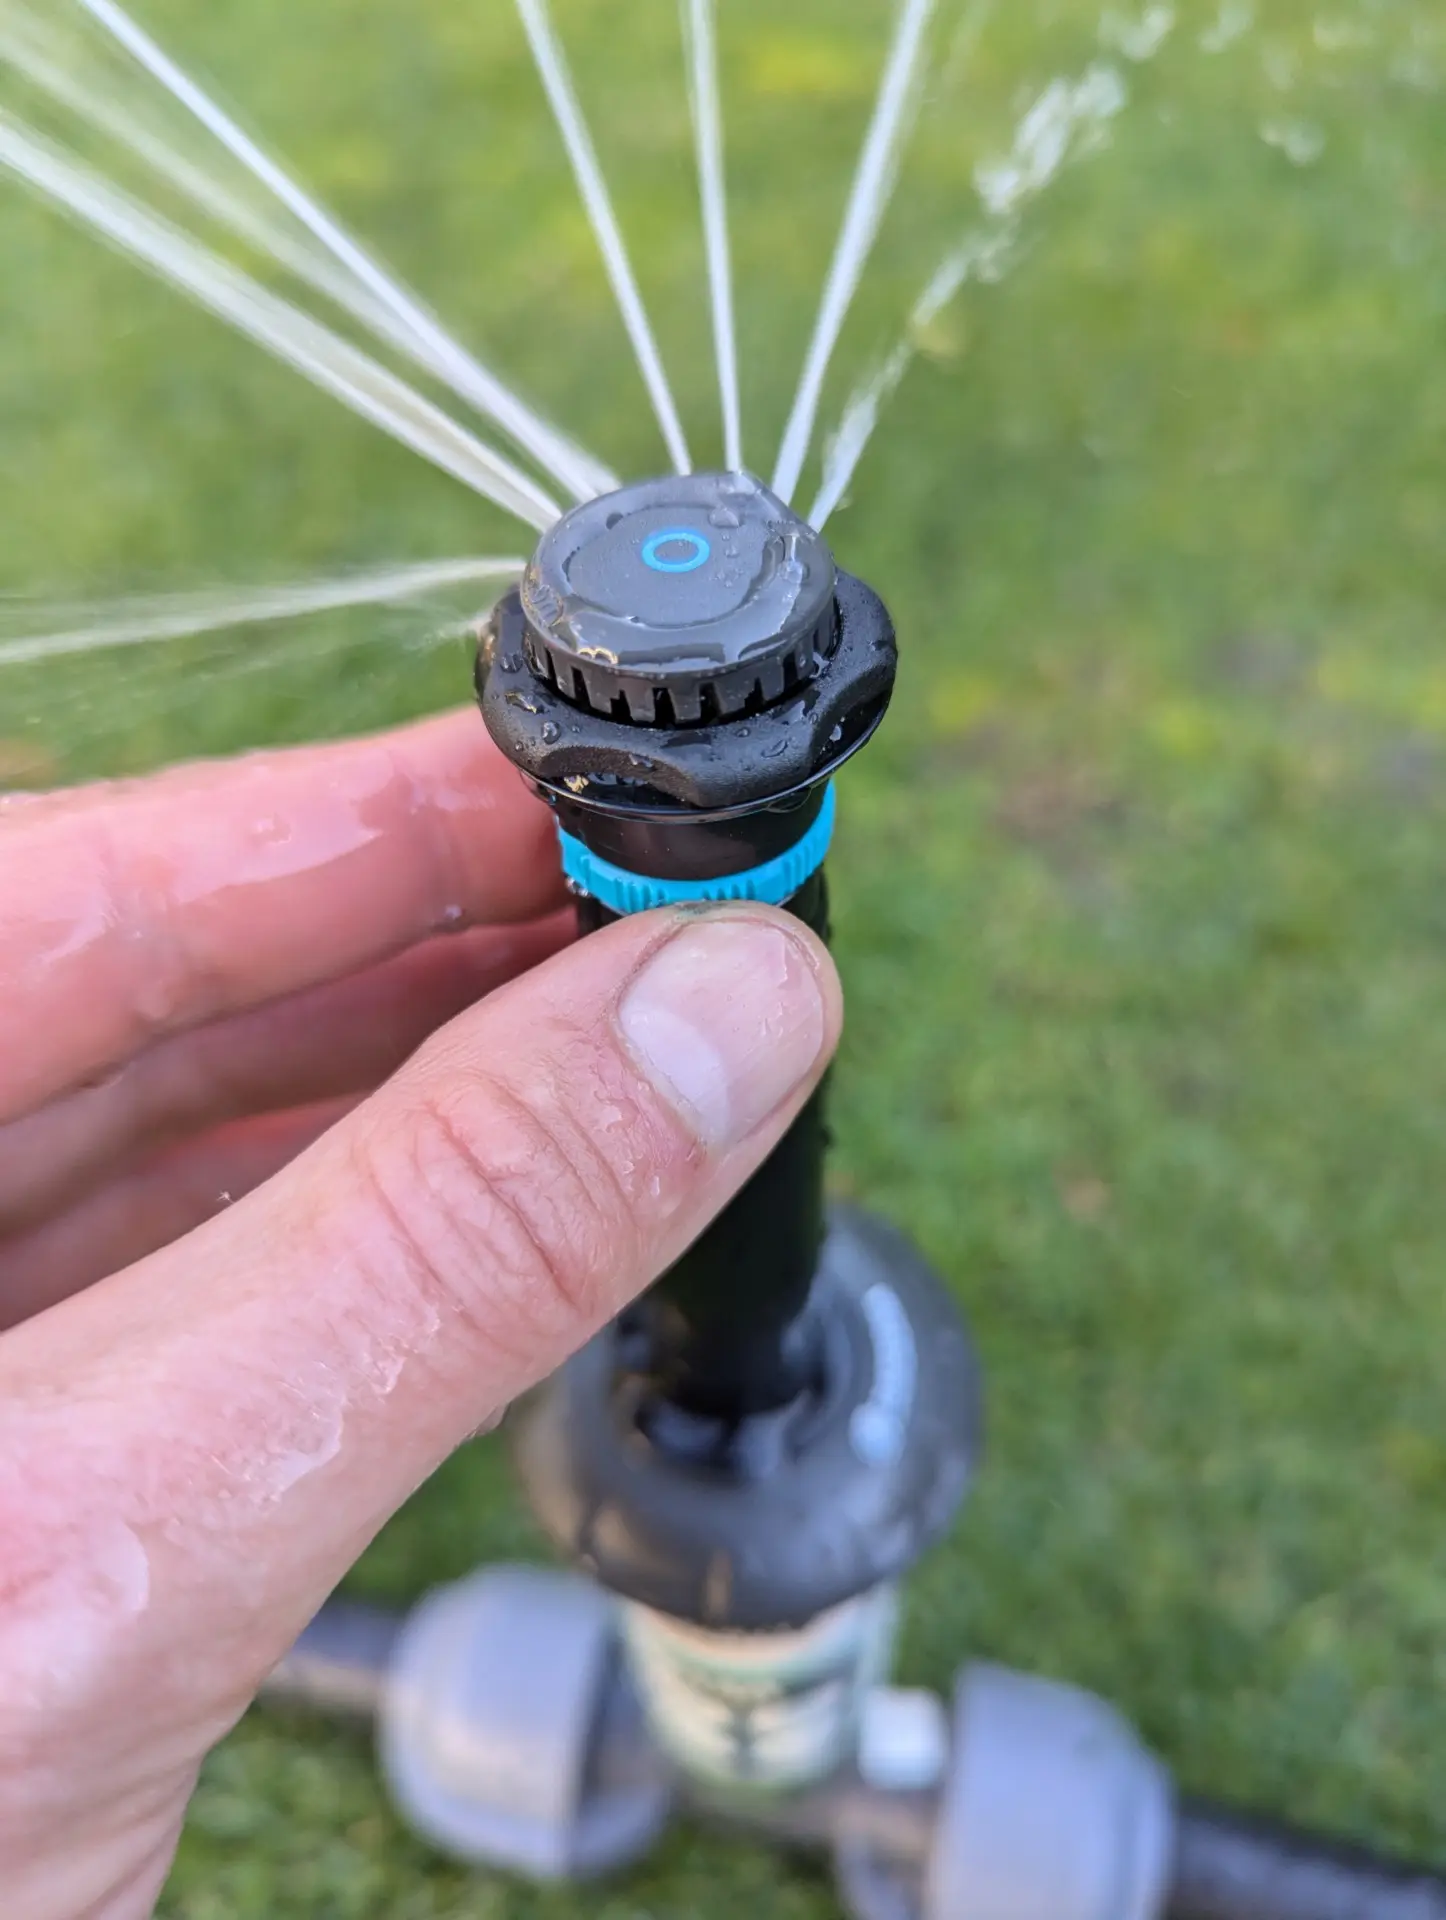
Adjusting the throw distance
The throw distance can be reduced to 5 meters. This is done with the adjustment screw located above the nozzle. Turning it toward the minus symbol decreases the throw distance. Turning it back toward the plus symbol increases it again.
Adjusting the throw distance
Gardena SD Sprinkler
The two SD models, SD30 and SD80, use the same adjustment method.
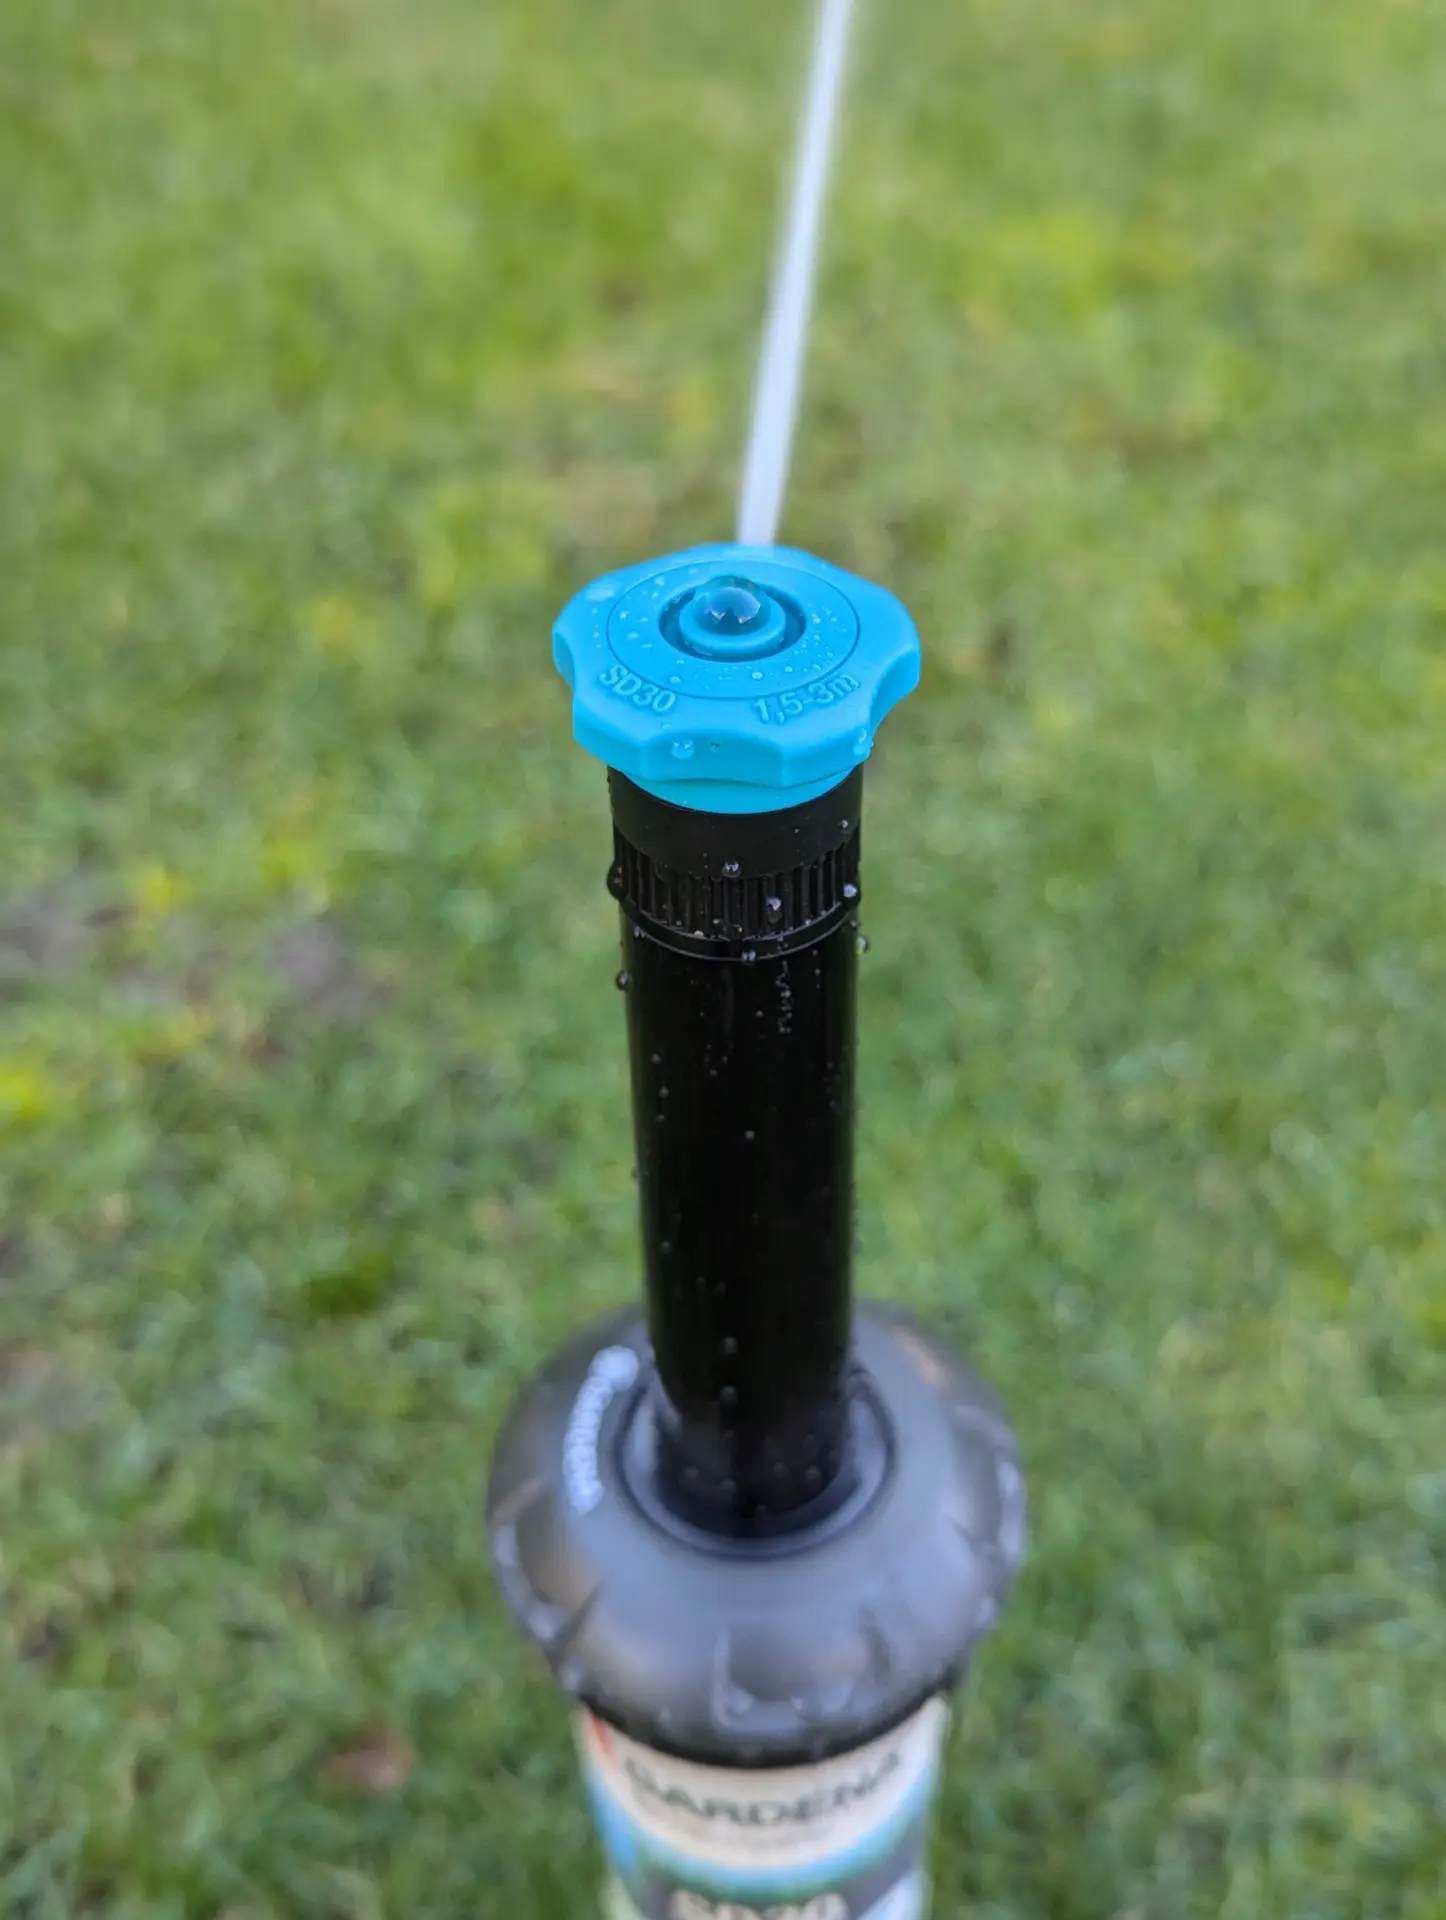
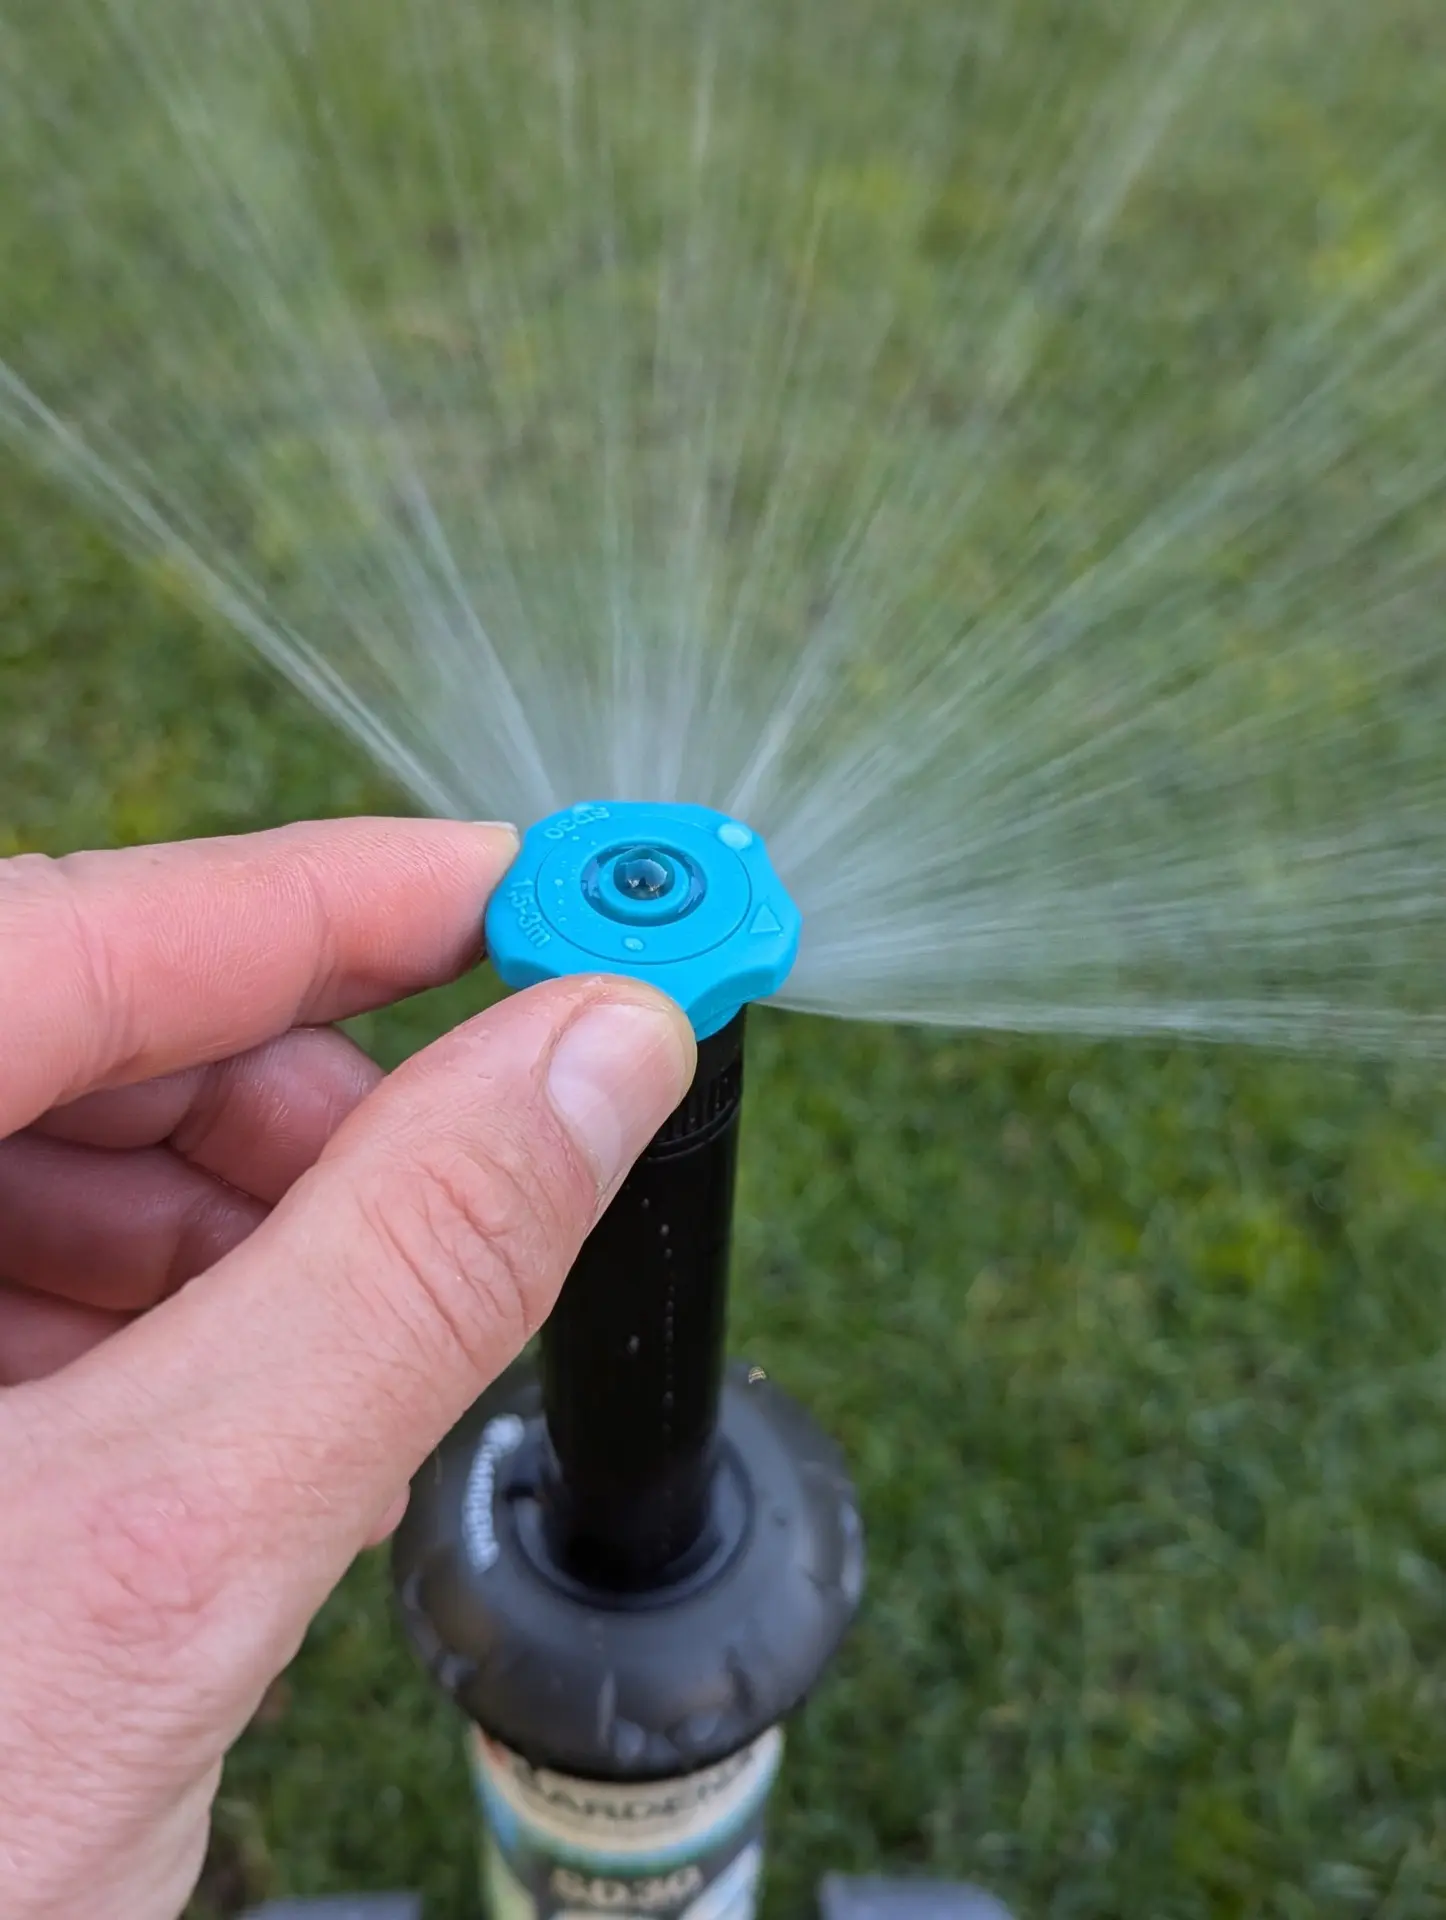
Gardena SD30/SD80
Preparation (before turning on the water supply)
By turning the turquoise adjusting ring on the black nozzle counterclockwise as far as possible, you reduce the area of the circle being watered to the smallest possible size of just 5 degrees. The adjusting ring can be turned about 1 1/2 turns until it stops.
Then, turn the sprinkler on the black riser so that the arrow on the adjusting ring points away from you in the direction you want to water.
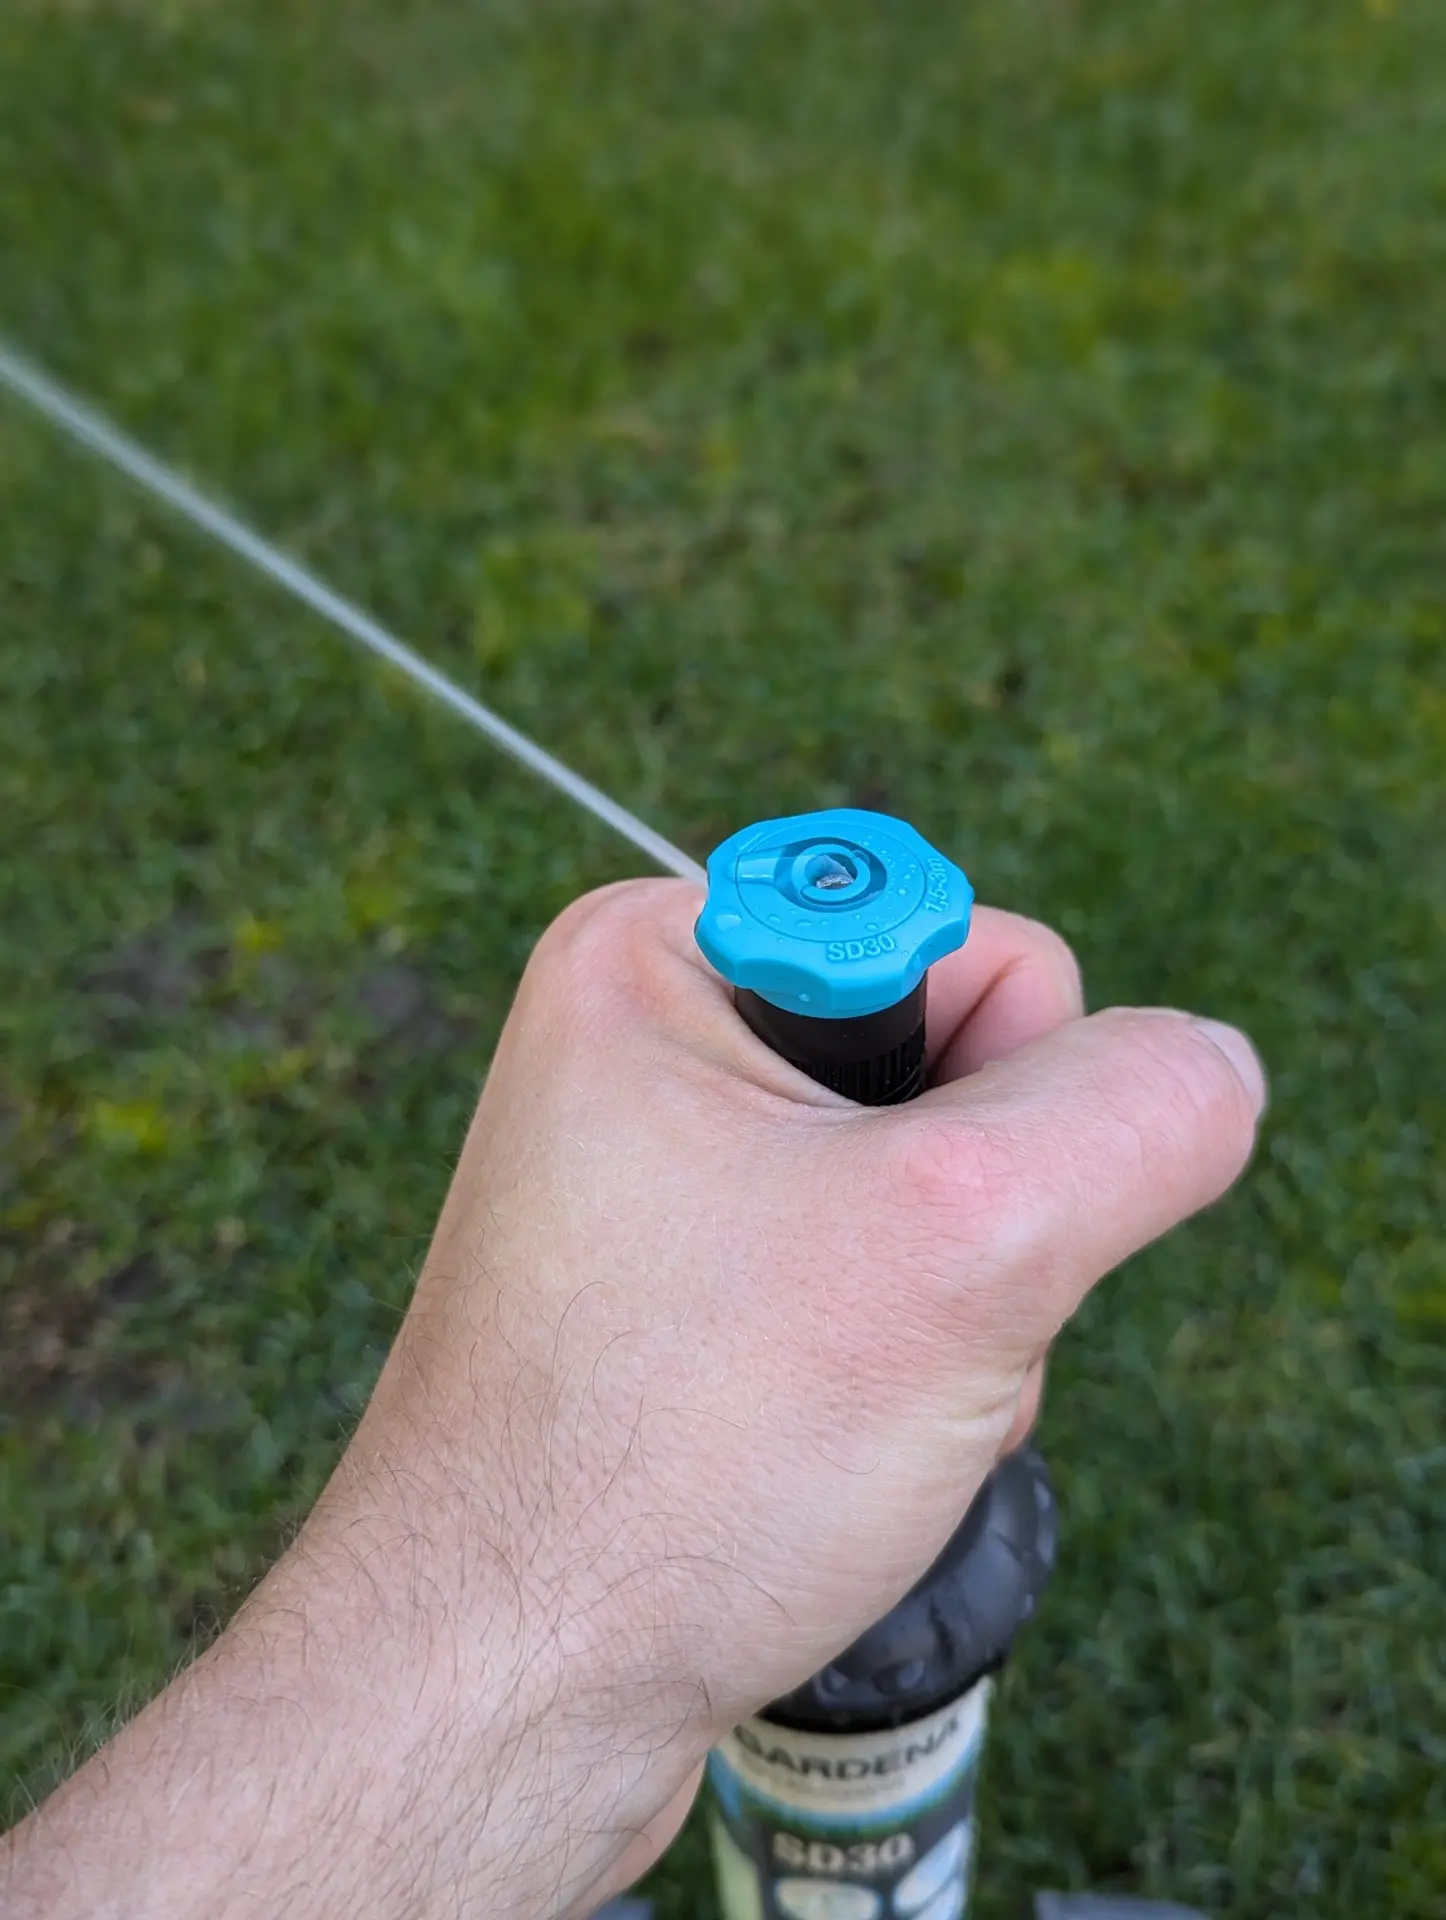
Activate the water supply
When you activate the water supply, the sprinkler will spray in the direction of the arrow. Since the irrigation sector has been reduced to the minimum, only a single jet will initially emerge from the sprinkler.
This is how the SD30 sprays with the smallest possible sector set at 5 degrees.
Setting the sector to be watered
To do this, first turn the sprinkler on the riser as far to the left as you want the sprinkler to spray to the left. Then turn the turquoise adjusting ring clockwise as far as you want the sprinkler to spray to the right.
Set where the irrigation should begin…
… and where it should end.
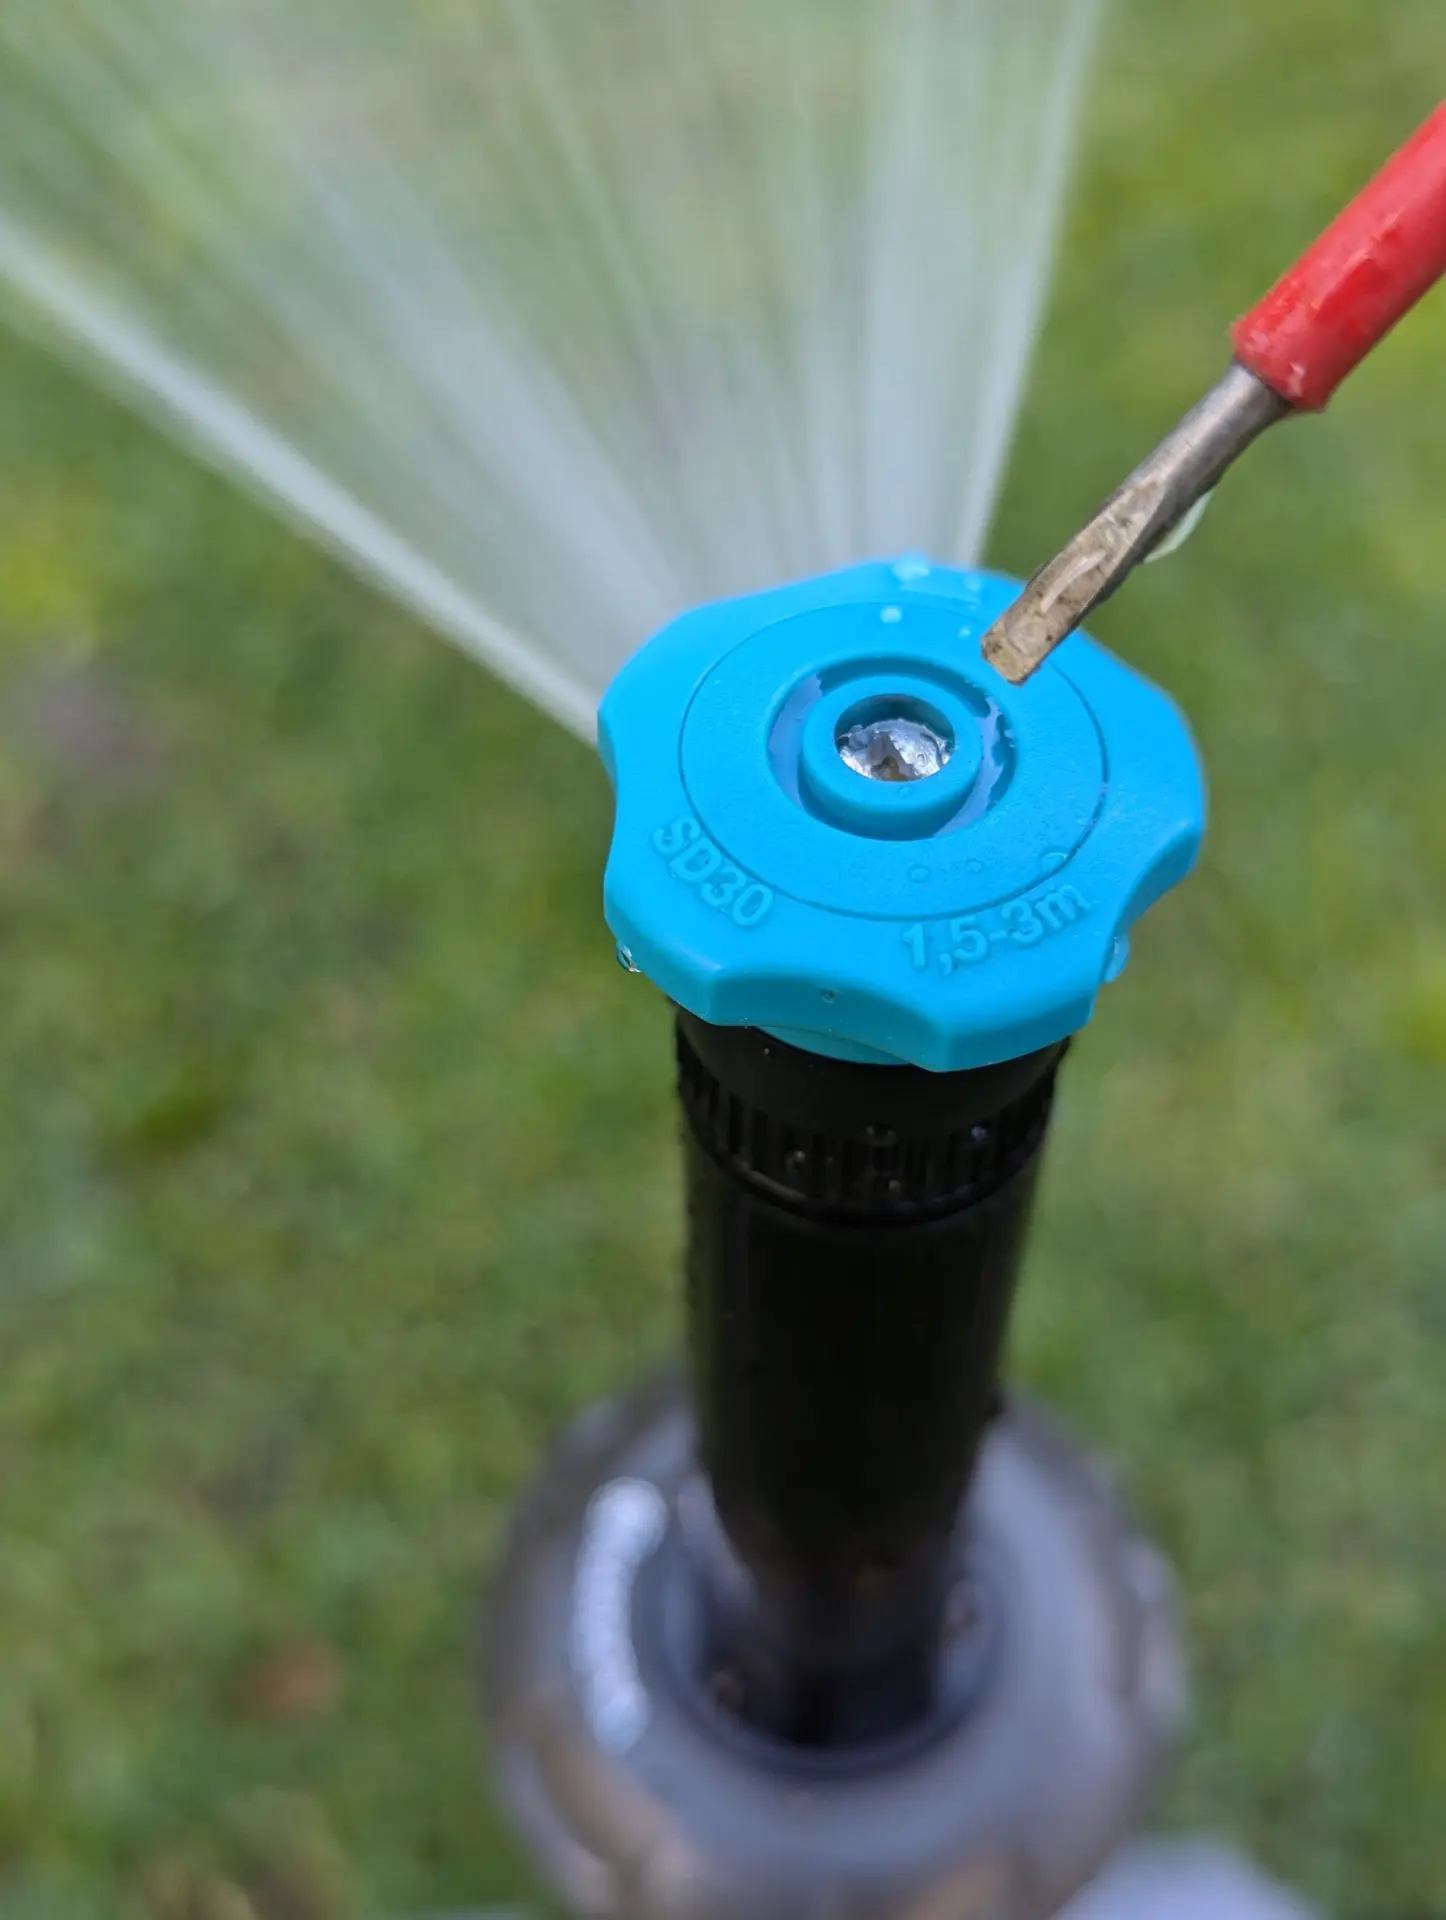
Adjusting the throw distance
The throw distance is adjusted by turning the screw in the adjusting ring. Turning it counterclockwise decreases the throw distance. With SD sprinklers, the throw distance can be adjusted significantly. If you turn it far enough to the left, you can even turn off the irrigation completely.
Warning: Do not loosen the control screw too much, otherwise the sprinkler head will come off!
Control screw for adjusting the throw distance
Gardena MD Sprinklers
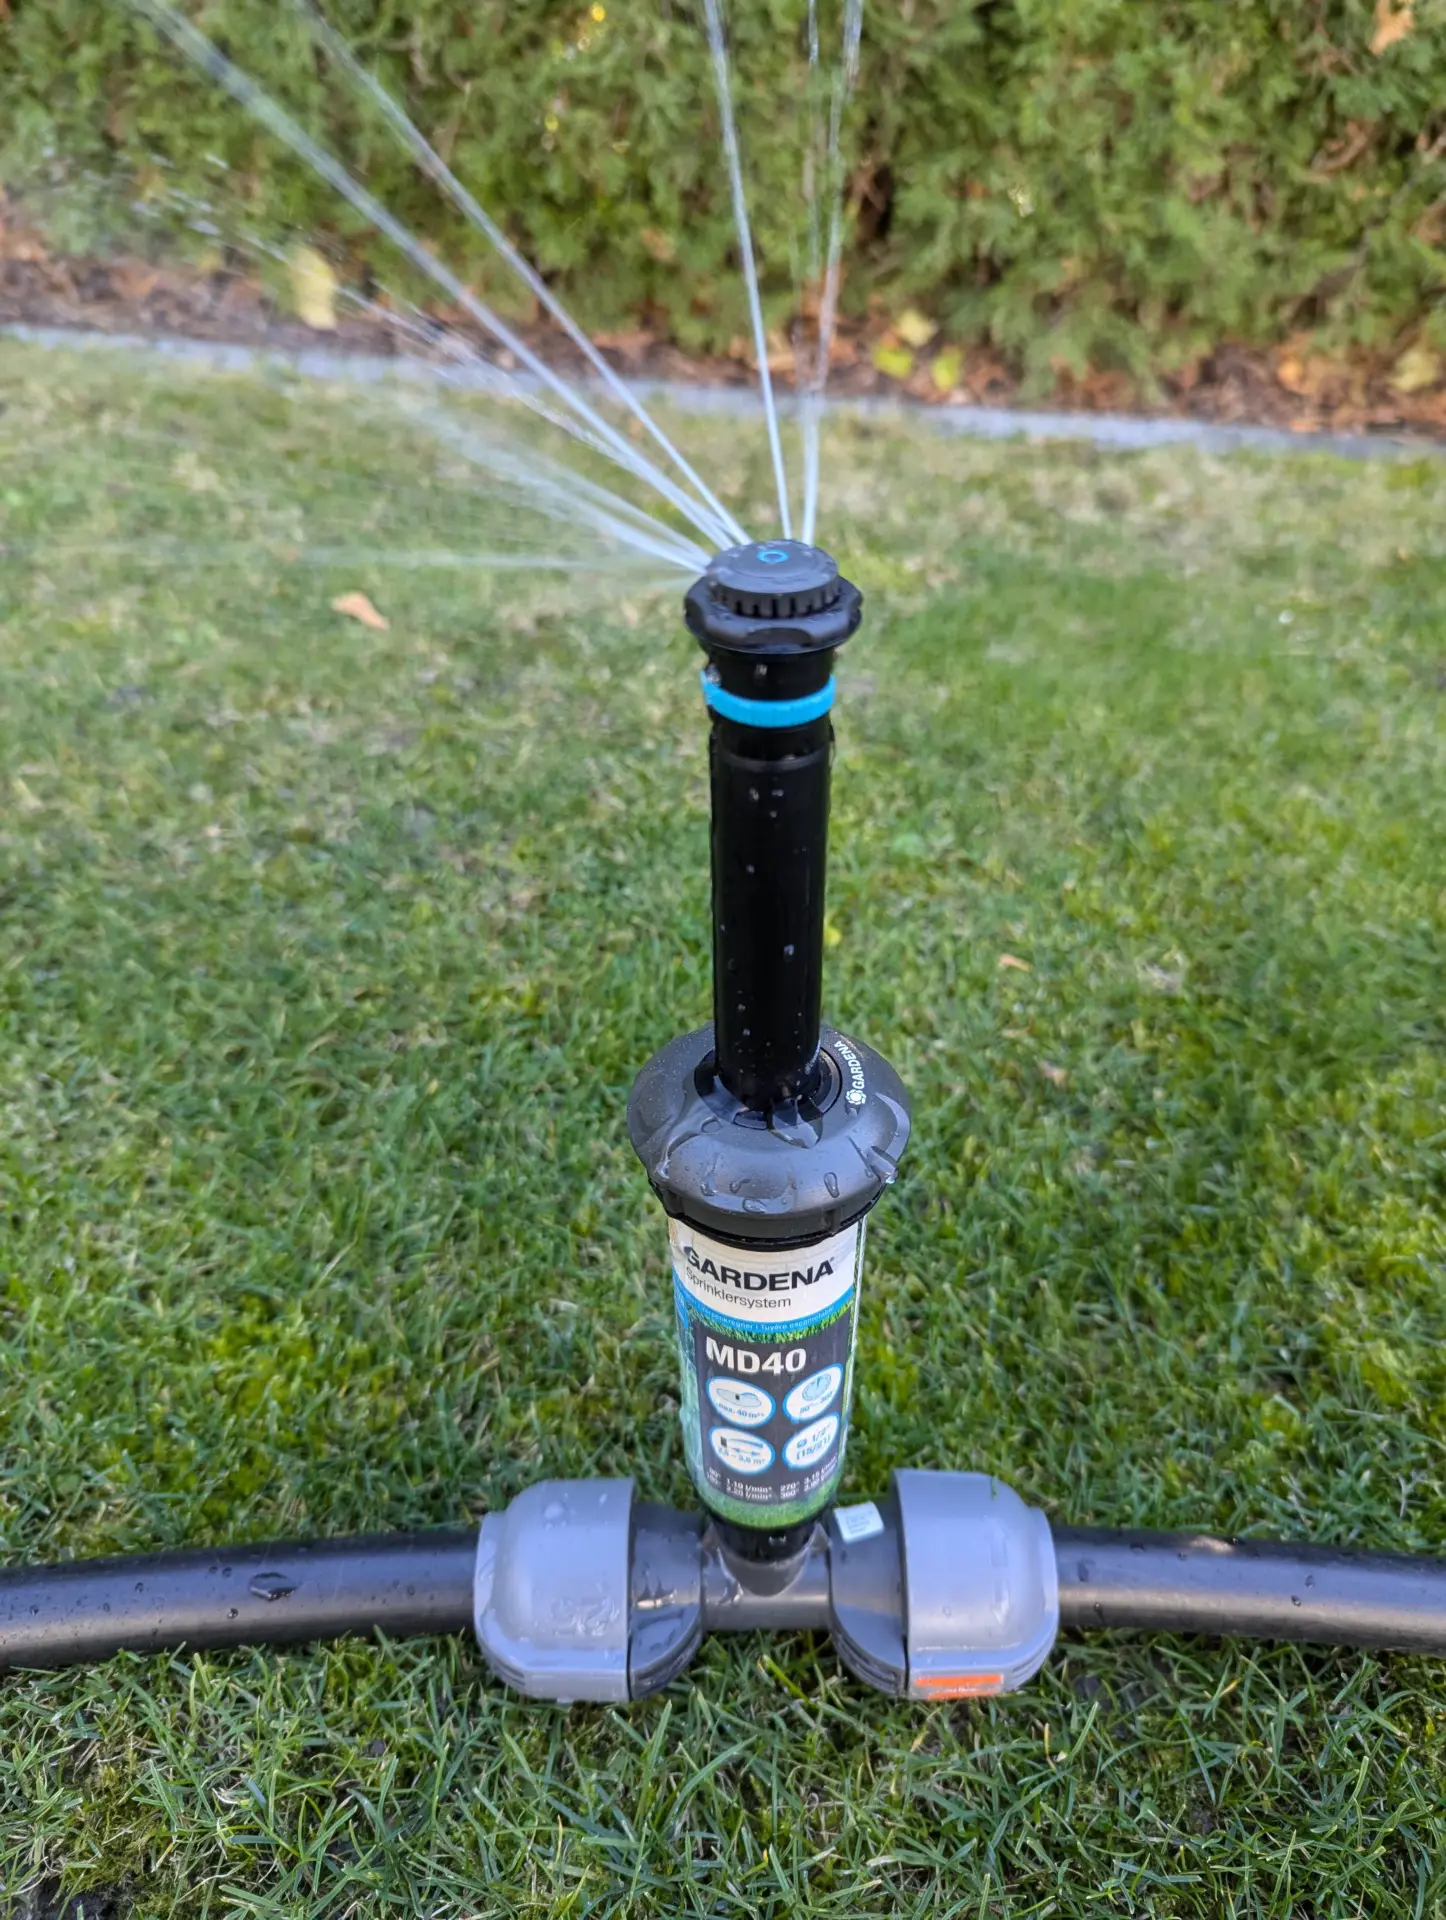
The MD sprinklers are currently the most modern Gardena sprinklers and, along with the OS-140, the only ones that can be adjusted completely without tools. The adjustment process is the same for all three available models MD40, MD80, and MD180.
Gardena MD40/MD80/MD180
Preparation (before turning on the water supply)
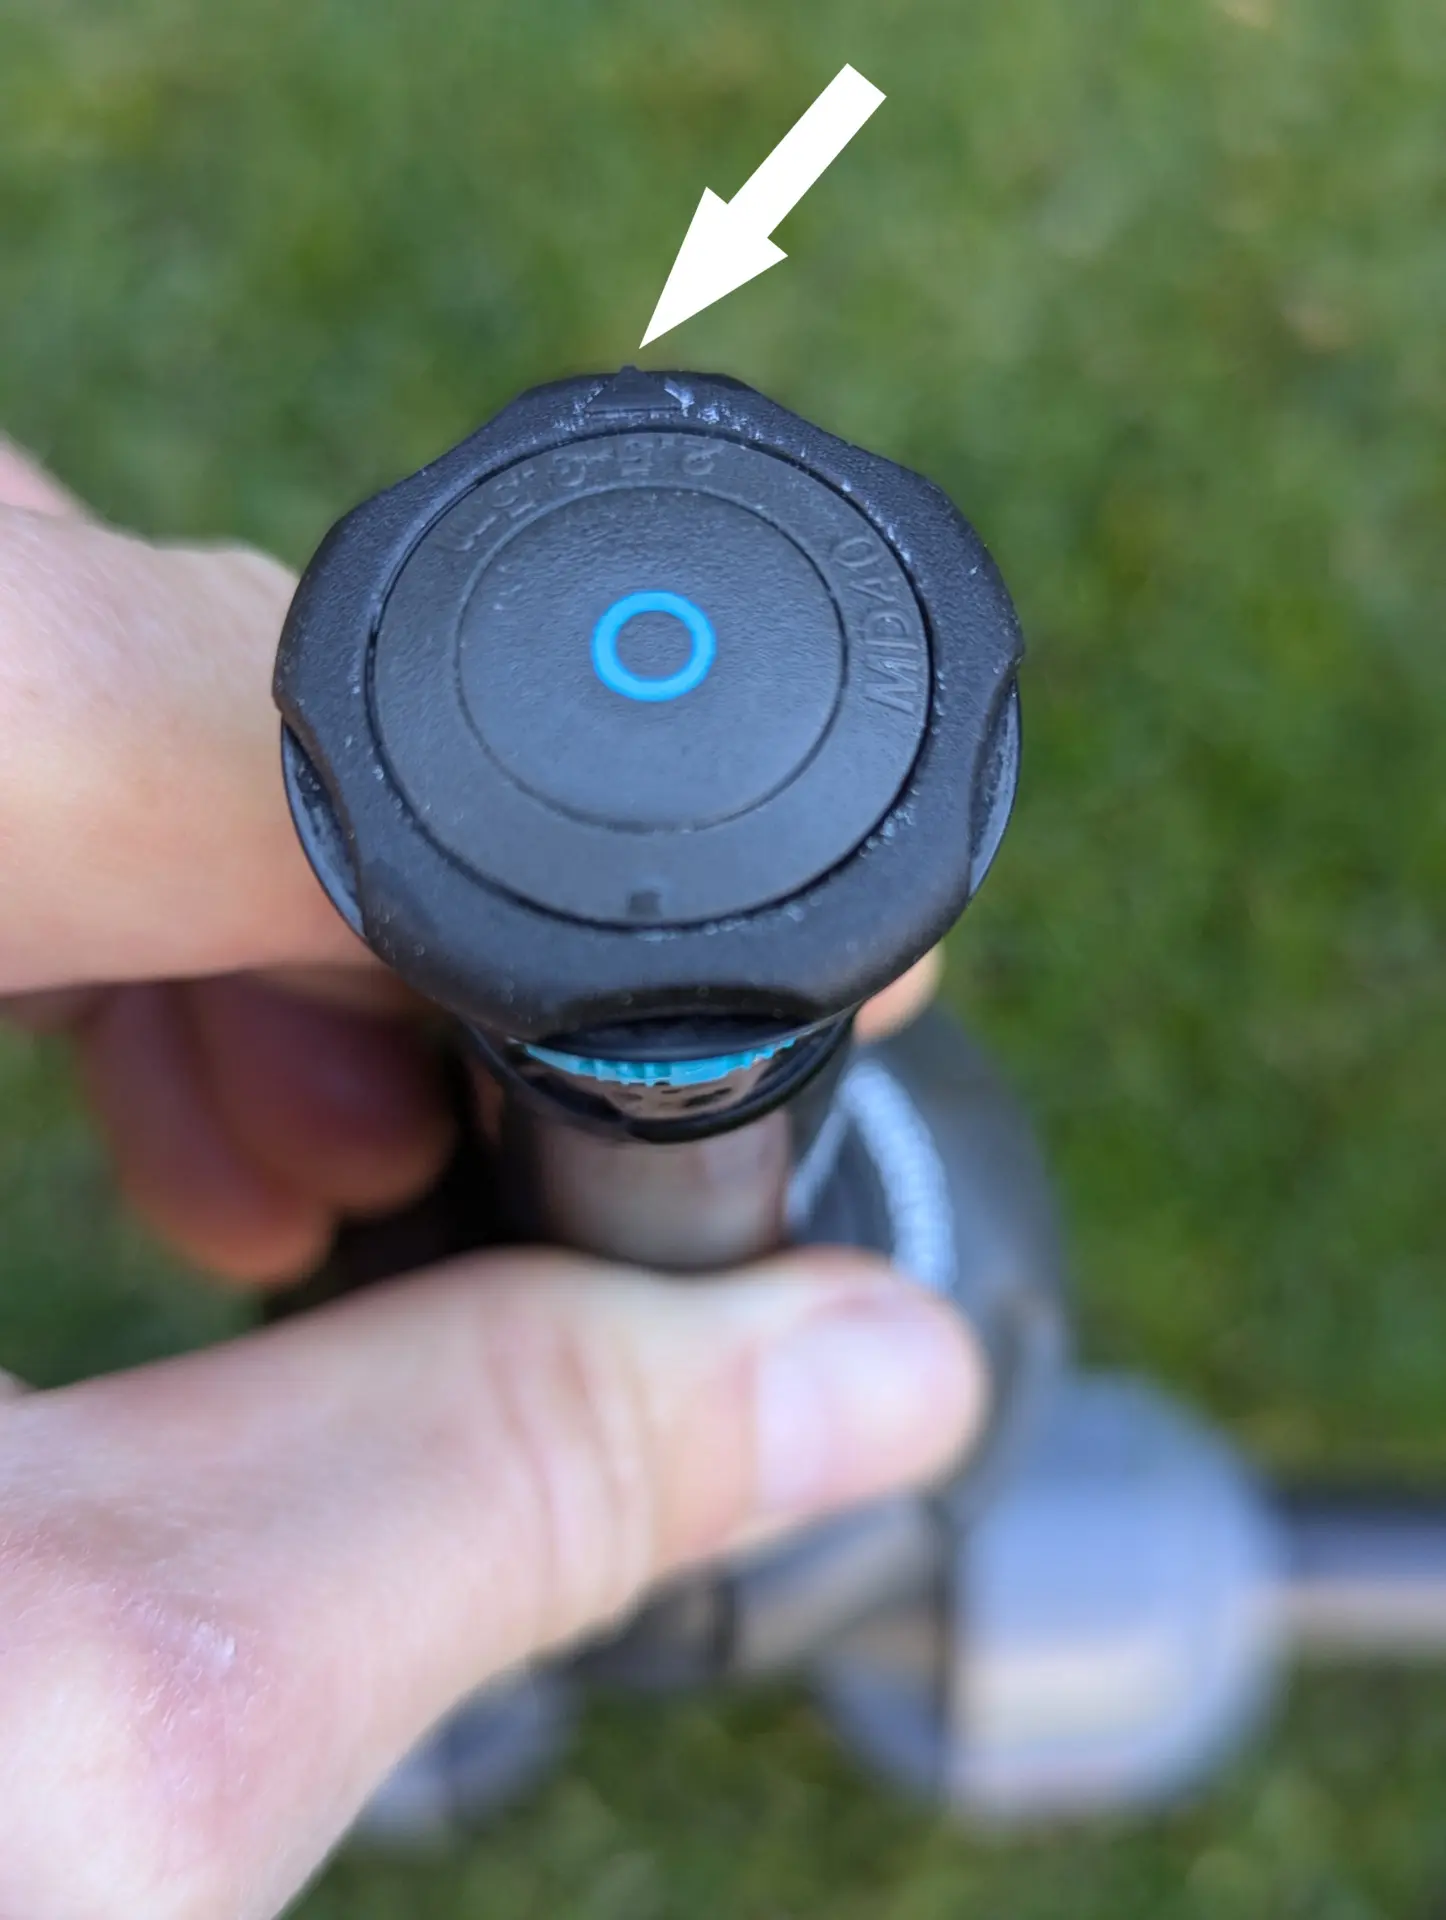
The area to be watered is reduced by turning the adjusting ring on the nozzle counterclockwise. After approximately 3/4 of a turn, the adjusting ring is in place and the circular section is reduced to a minimum of 80 degrees.
Now, turn the sprinkler head on the black riser until the small black arrow on it points away from you in the direction to be watered.
Turn the adjusting ring counterclockwise as far as it will go to minimize the area to be watered.
Grasp the sprinkler by the riser and turn it until the small black arrow points away from you.
Activate the water supply
After watering has started, the spray pattern will look like this.
Watering of the smallest possible 80-degree sector.
Adjust the sector to be watered
You can determine how far to the left the sprinkler should water by turning the riser to the left. You can determine the right point by turning the adjusting ring to the right. If you turn it as far to the right as possible, a full circle will be watered.
Turn the sprinkler to the desired left starting point.
Turn the adjusting ring to the right until the desired sector size is reached.
Adjust the throw
On MD sprinklers, this can be set without tools using the turquoise ring located in the riser. This can be turned up to a quarter turn. To the left, it decreases the throw, to the right, it increases it.
Note: Especially with the MD40, you’ll barely notice any difference at first glance; only a very slight adjustment of the throw distance is possible. The effect is more noticeable with the MD80 and MD180.
The throw distance can be adjusted using the turquoise ring.
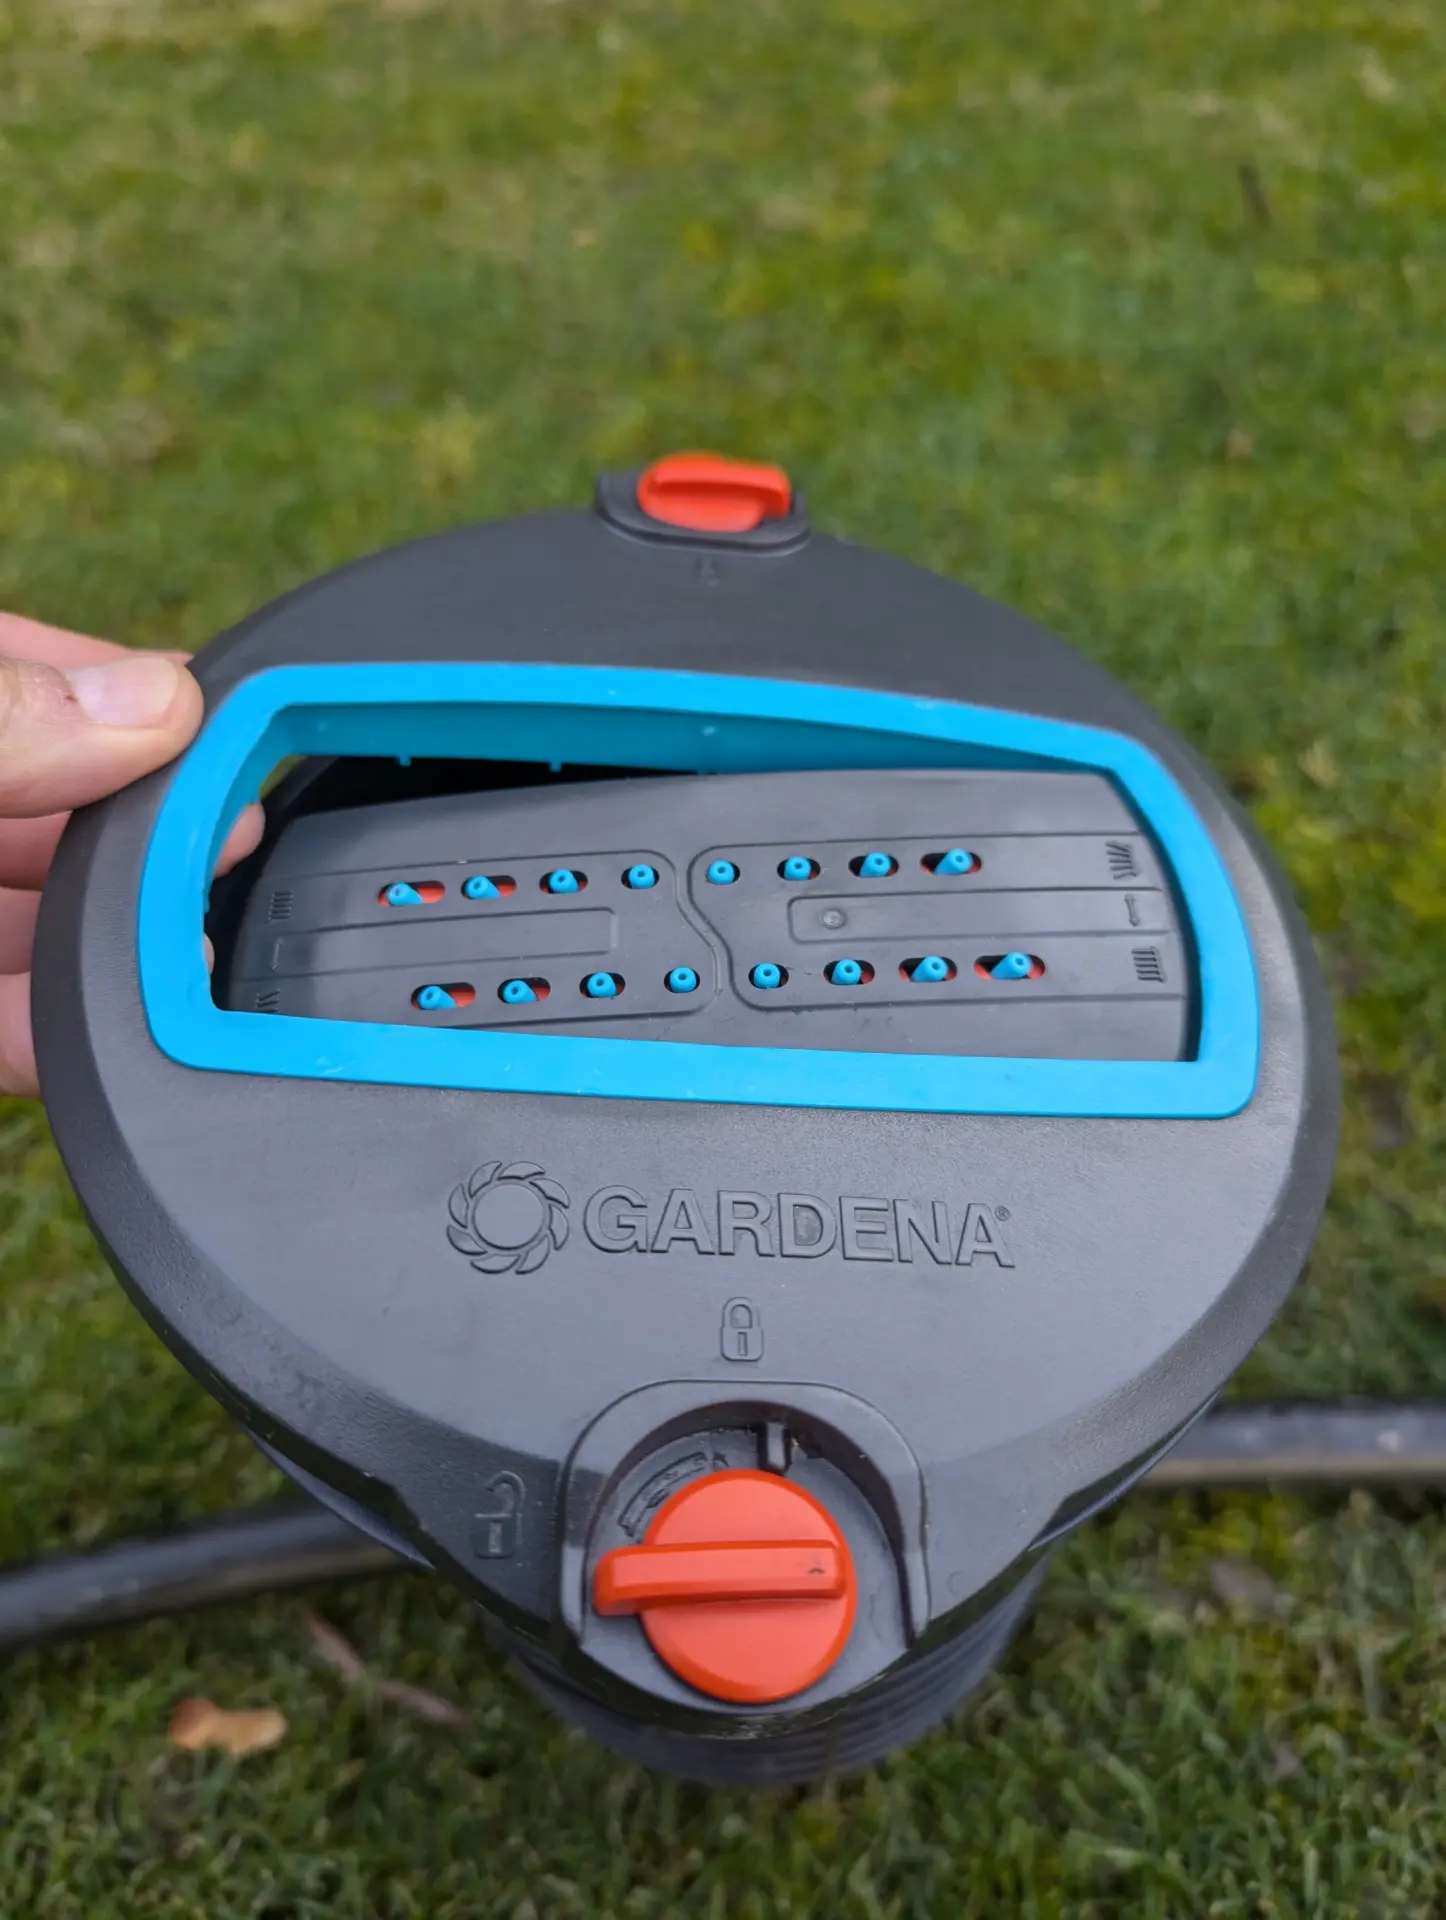
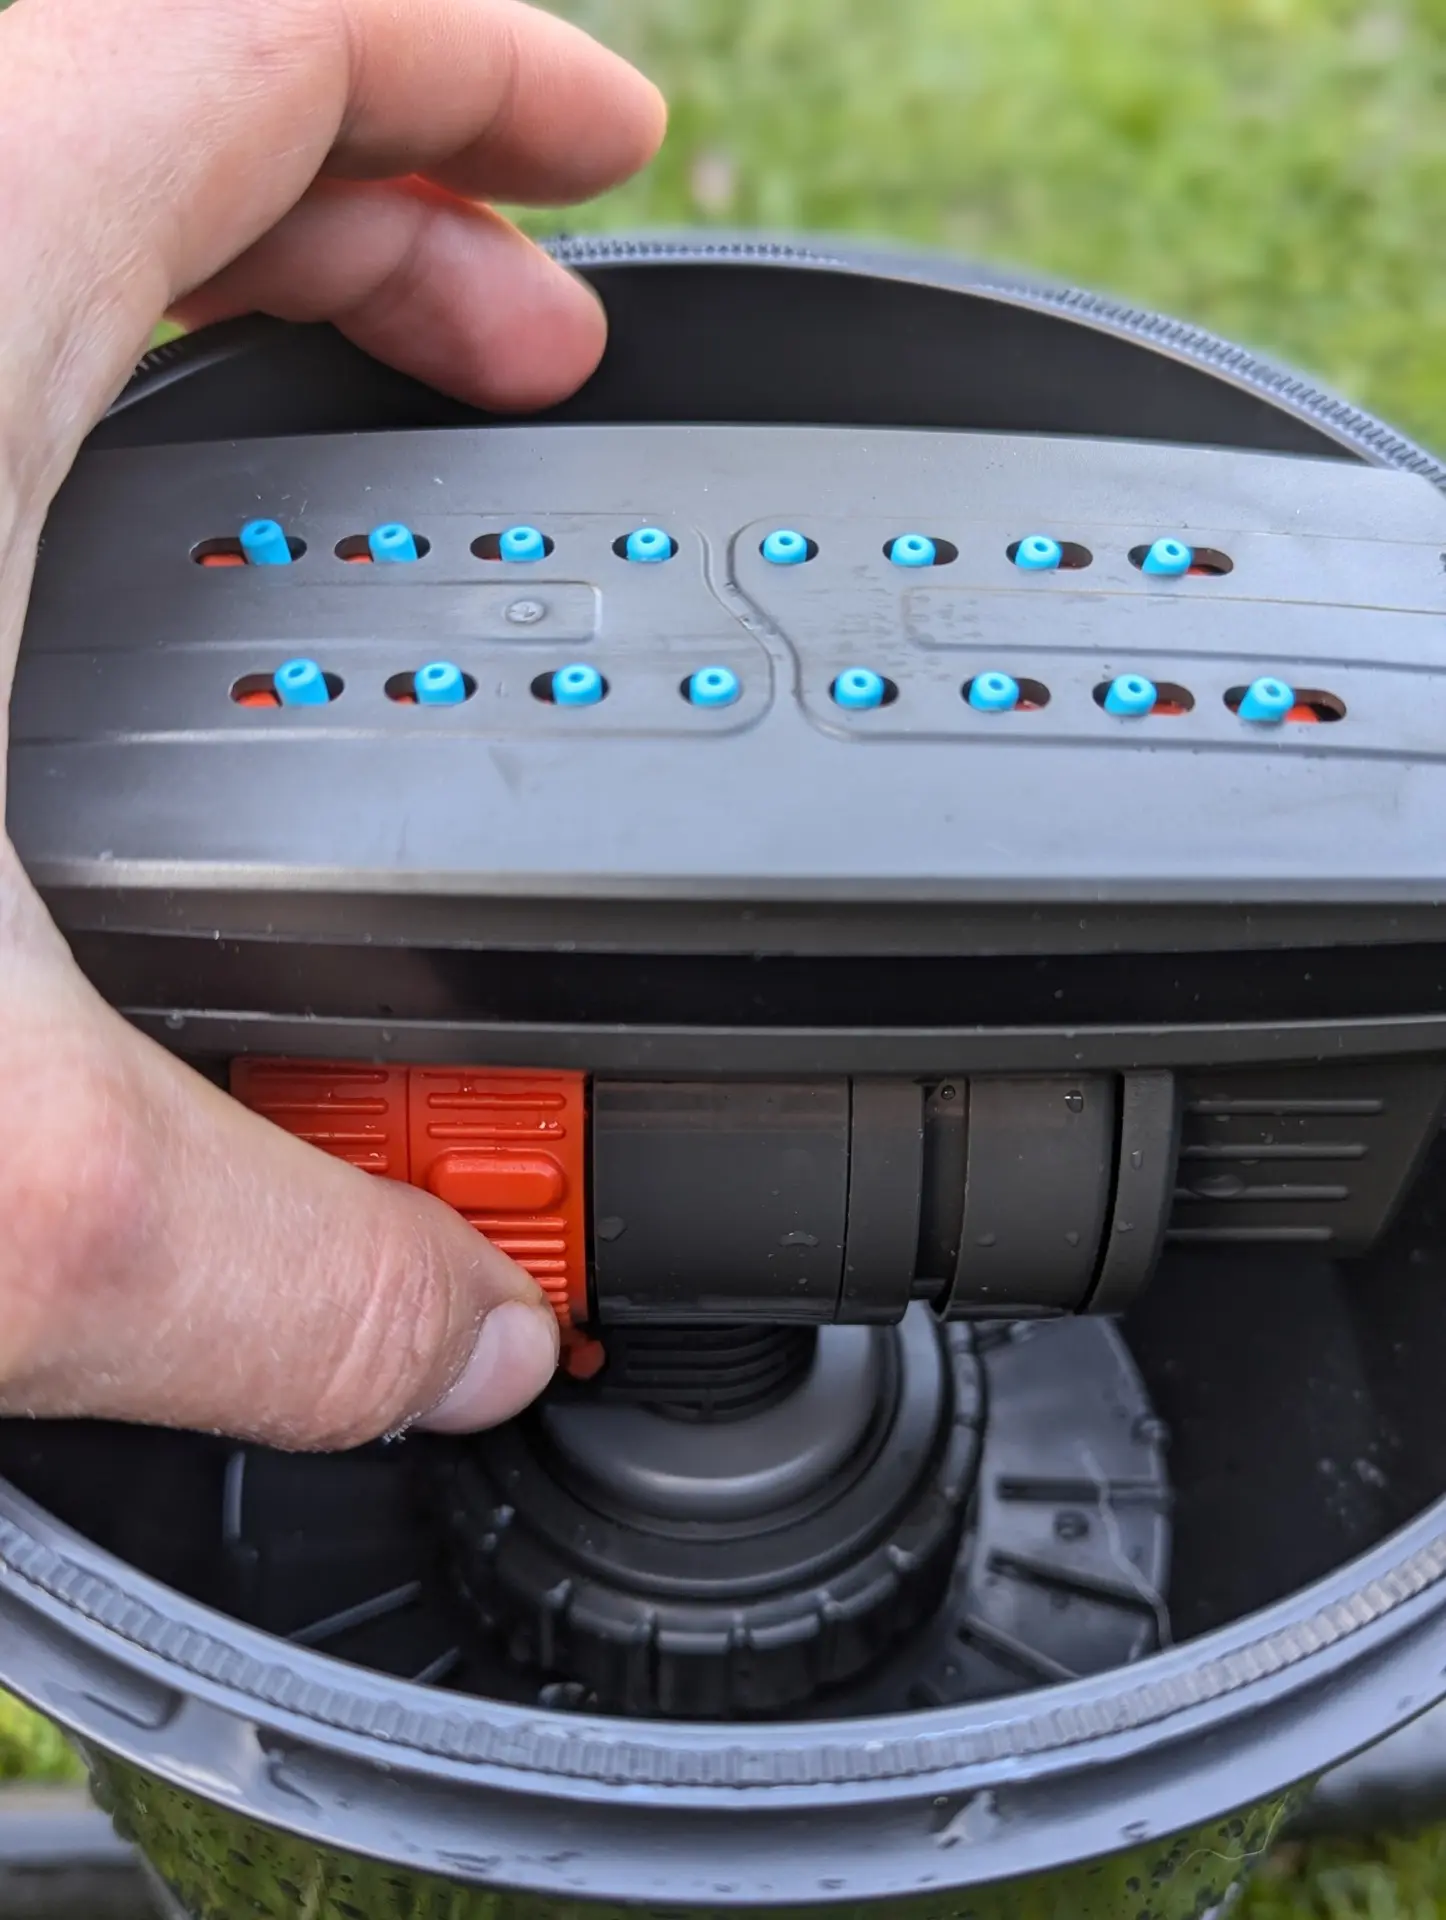
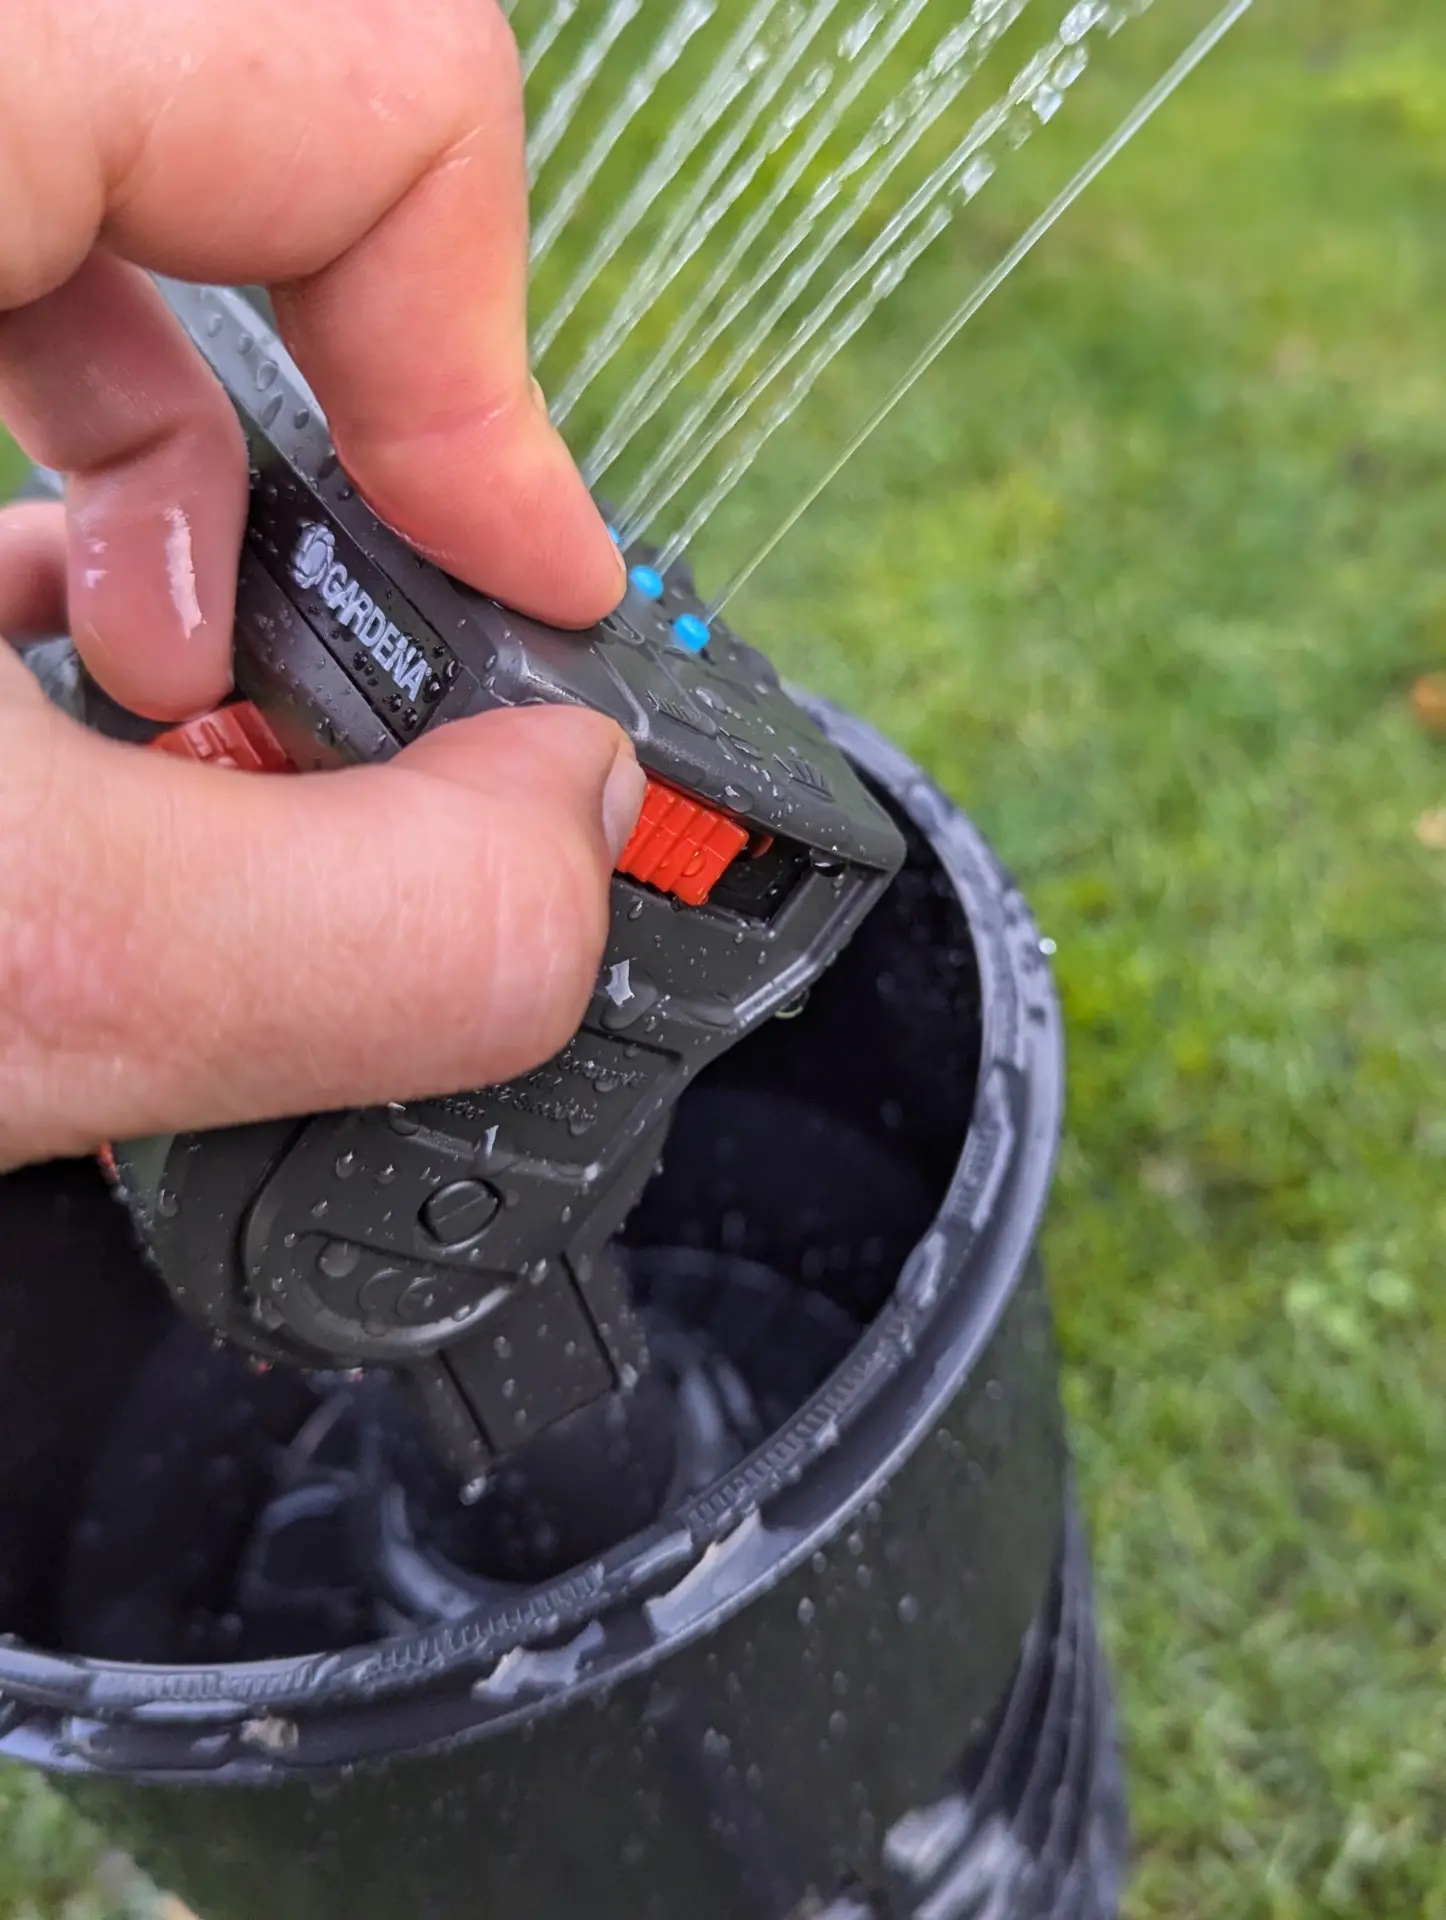
Gardena OS140
Preparation (before turning on the water supply)
With this sprinkler, this first step of preparing the sprinkler is particularly important, as it has a fairly large operating radius when fully turned on, posing a significant risk of inadvertently splashing water-sensitive items, yourself, or other people. Without first restraining the sprinkler, it is virtually impossible to adjust it without getting a shower.
To adjust the sprinkler, first unlock the two latches on the cover and remove it. The cover should only be replaced at the very end, as otherwise it would be difficult to reach the necessary adjustment points.
Turn the two latches counterclockwise a quarter turn.
Then the cover can be removed.
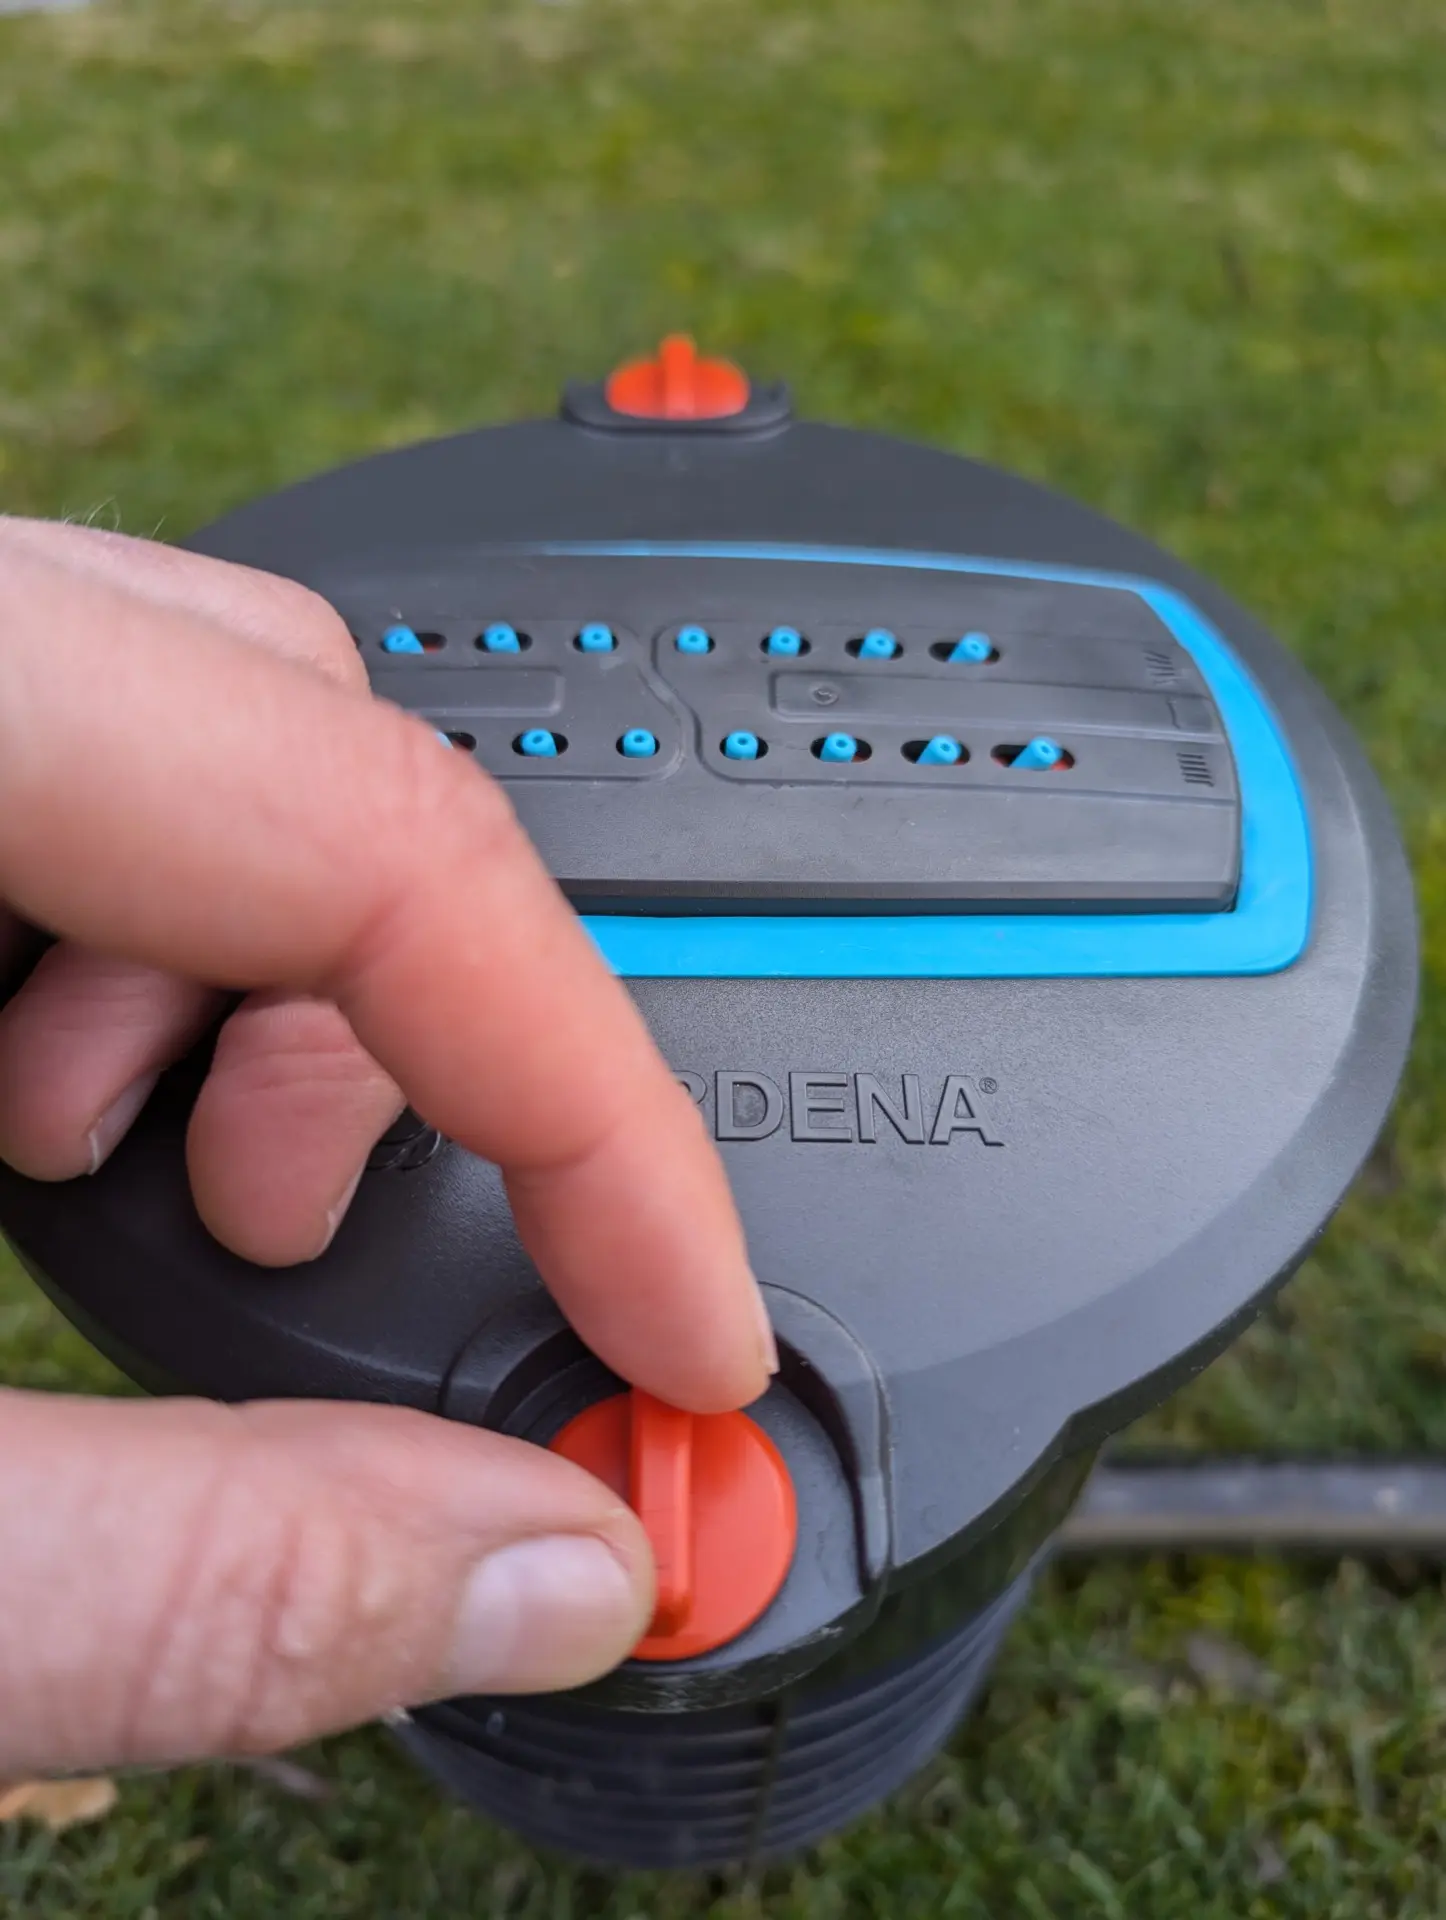
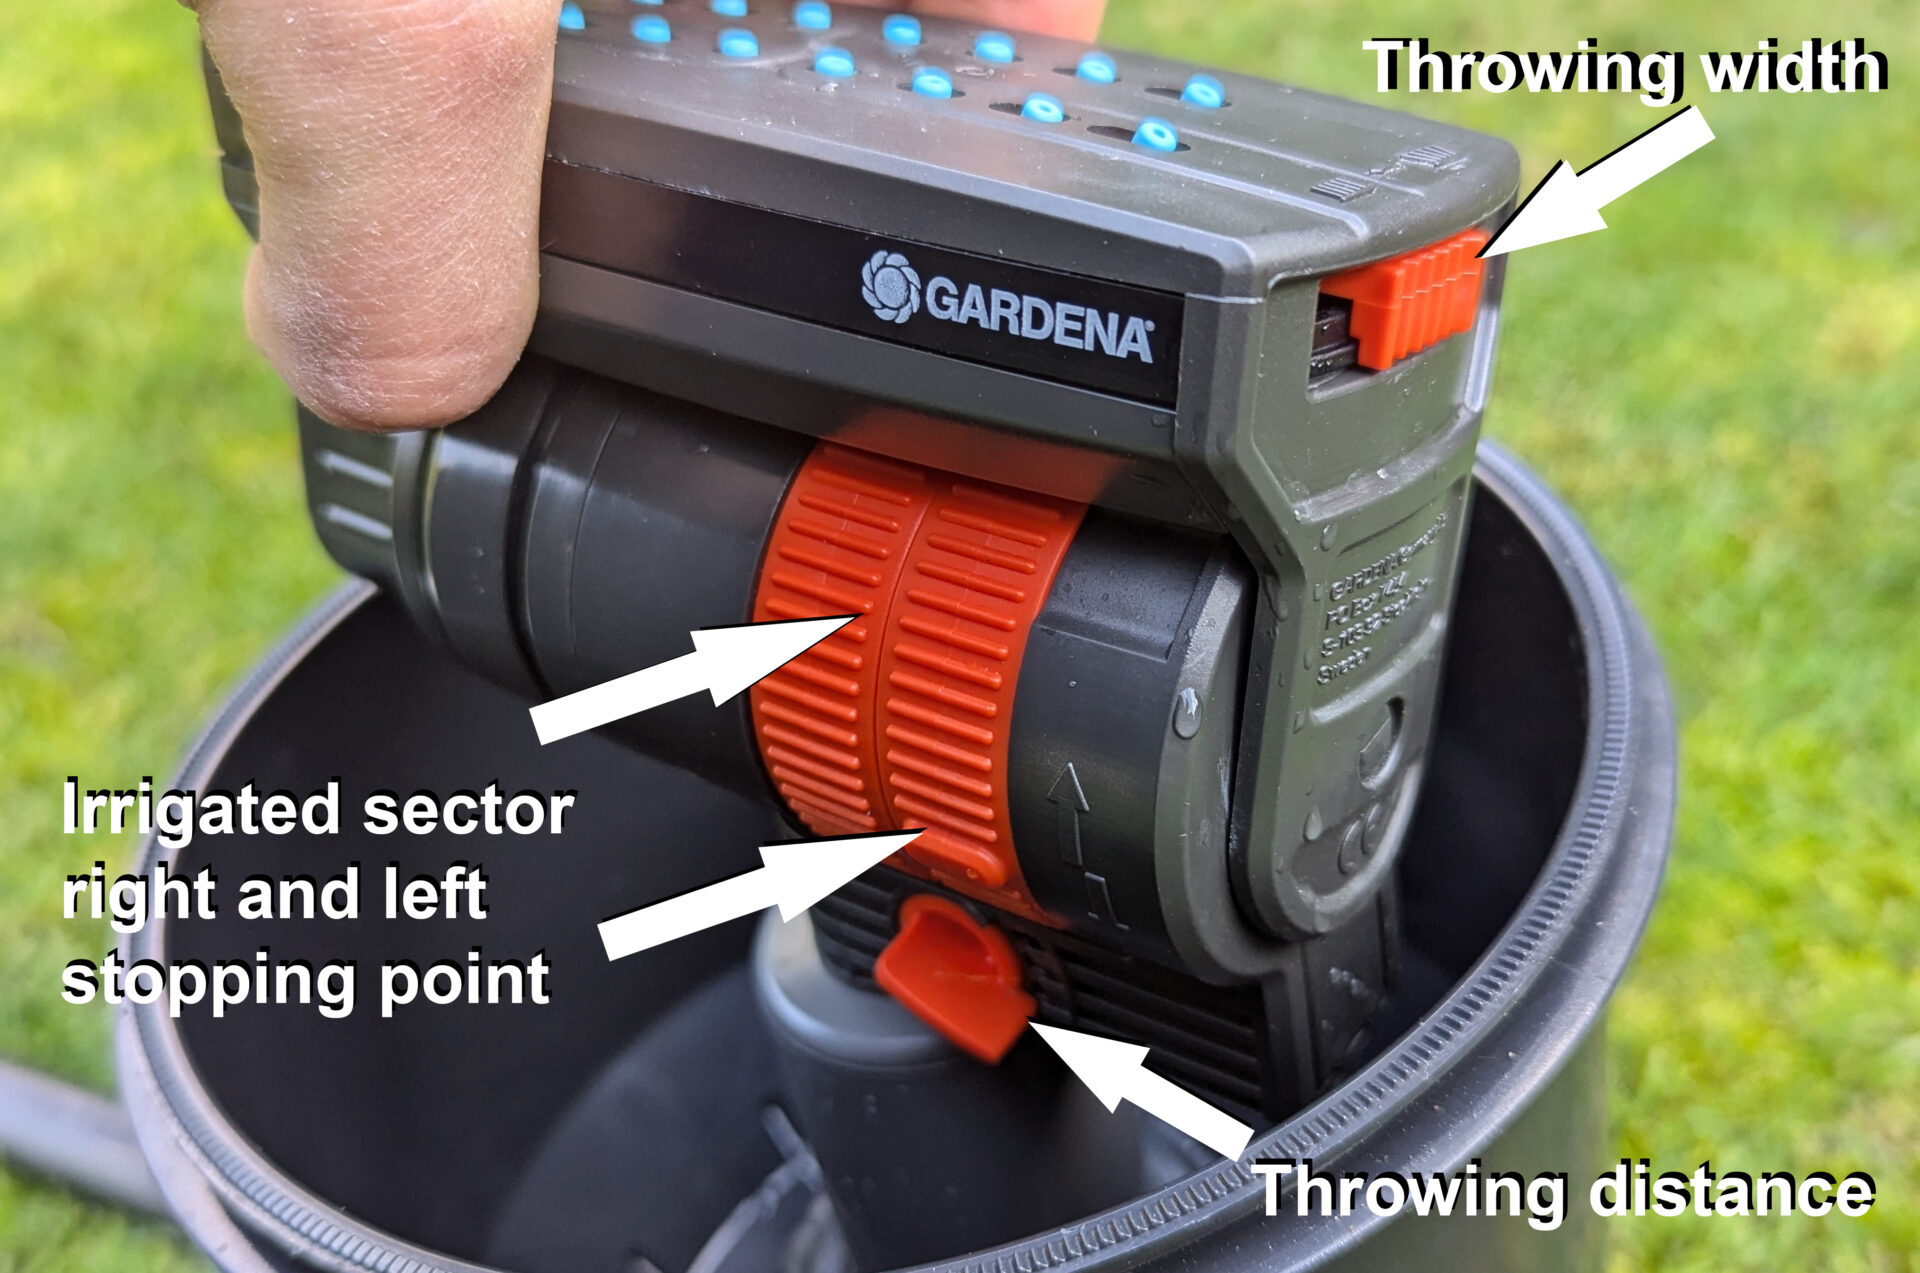
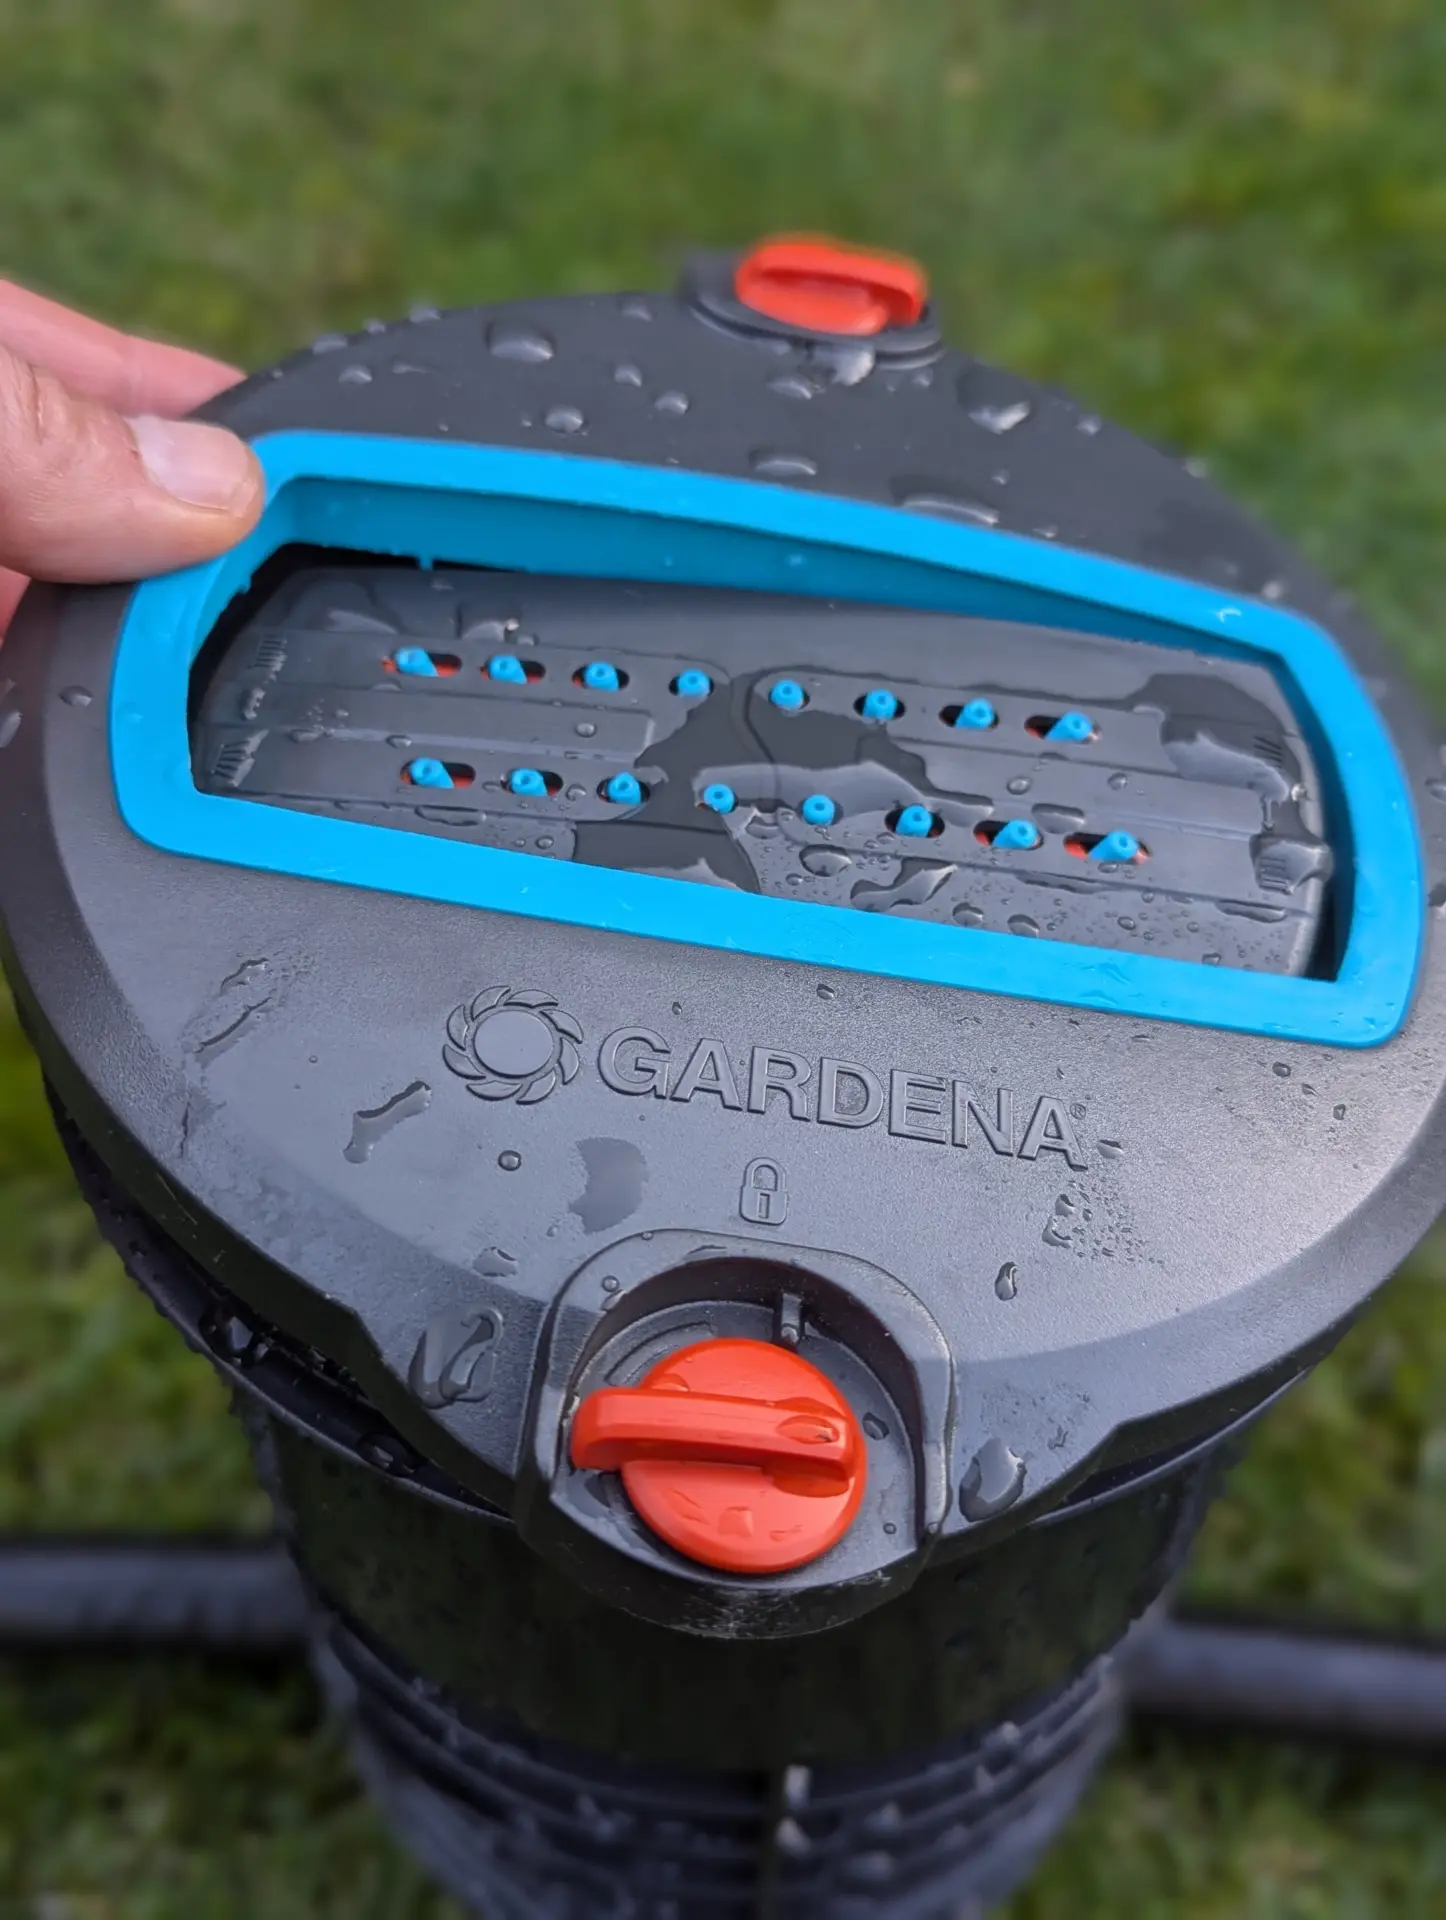
If you now pull the sprinkler out of the housing, you will see the orange adjustment mechanisms for the sector to be watered, the throw distance, and the throw width:
3 Adjustment mechanisms for the OS-140
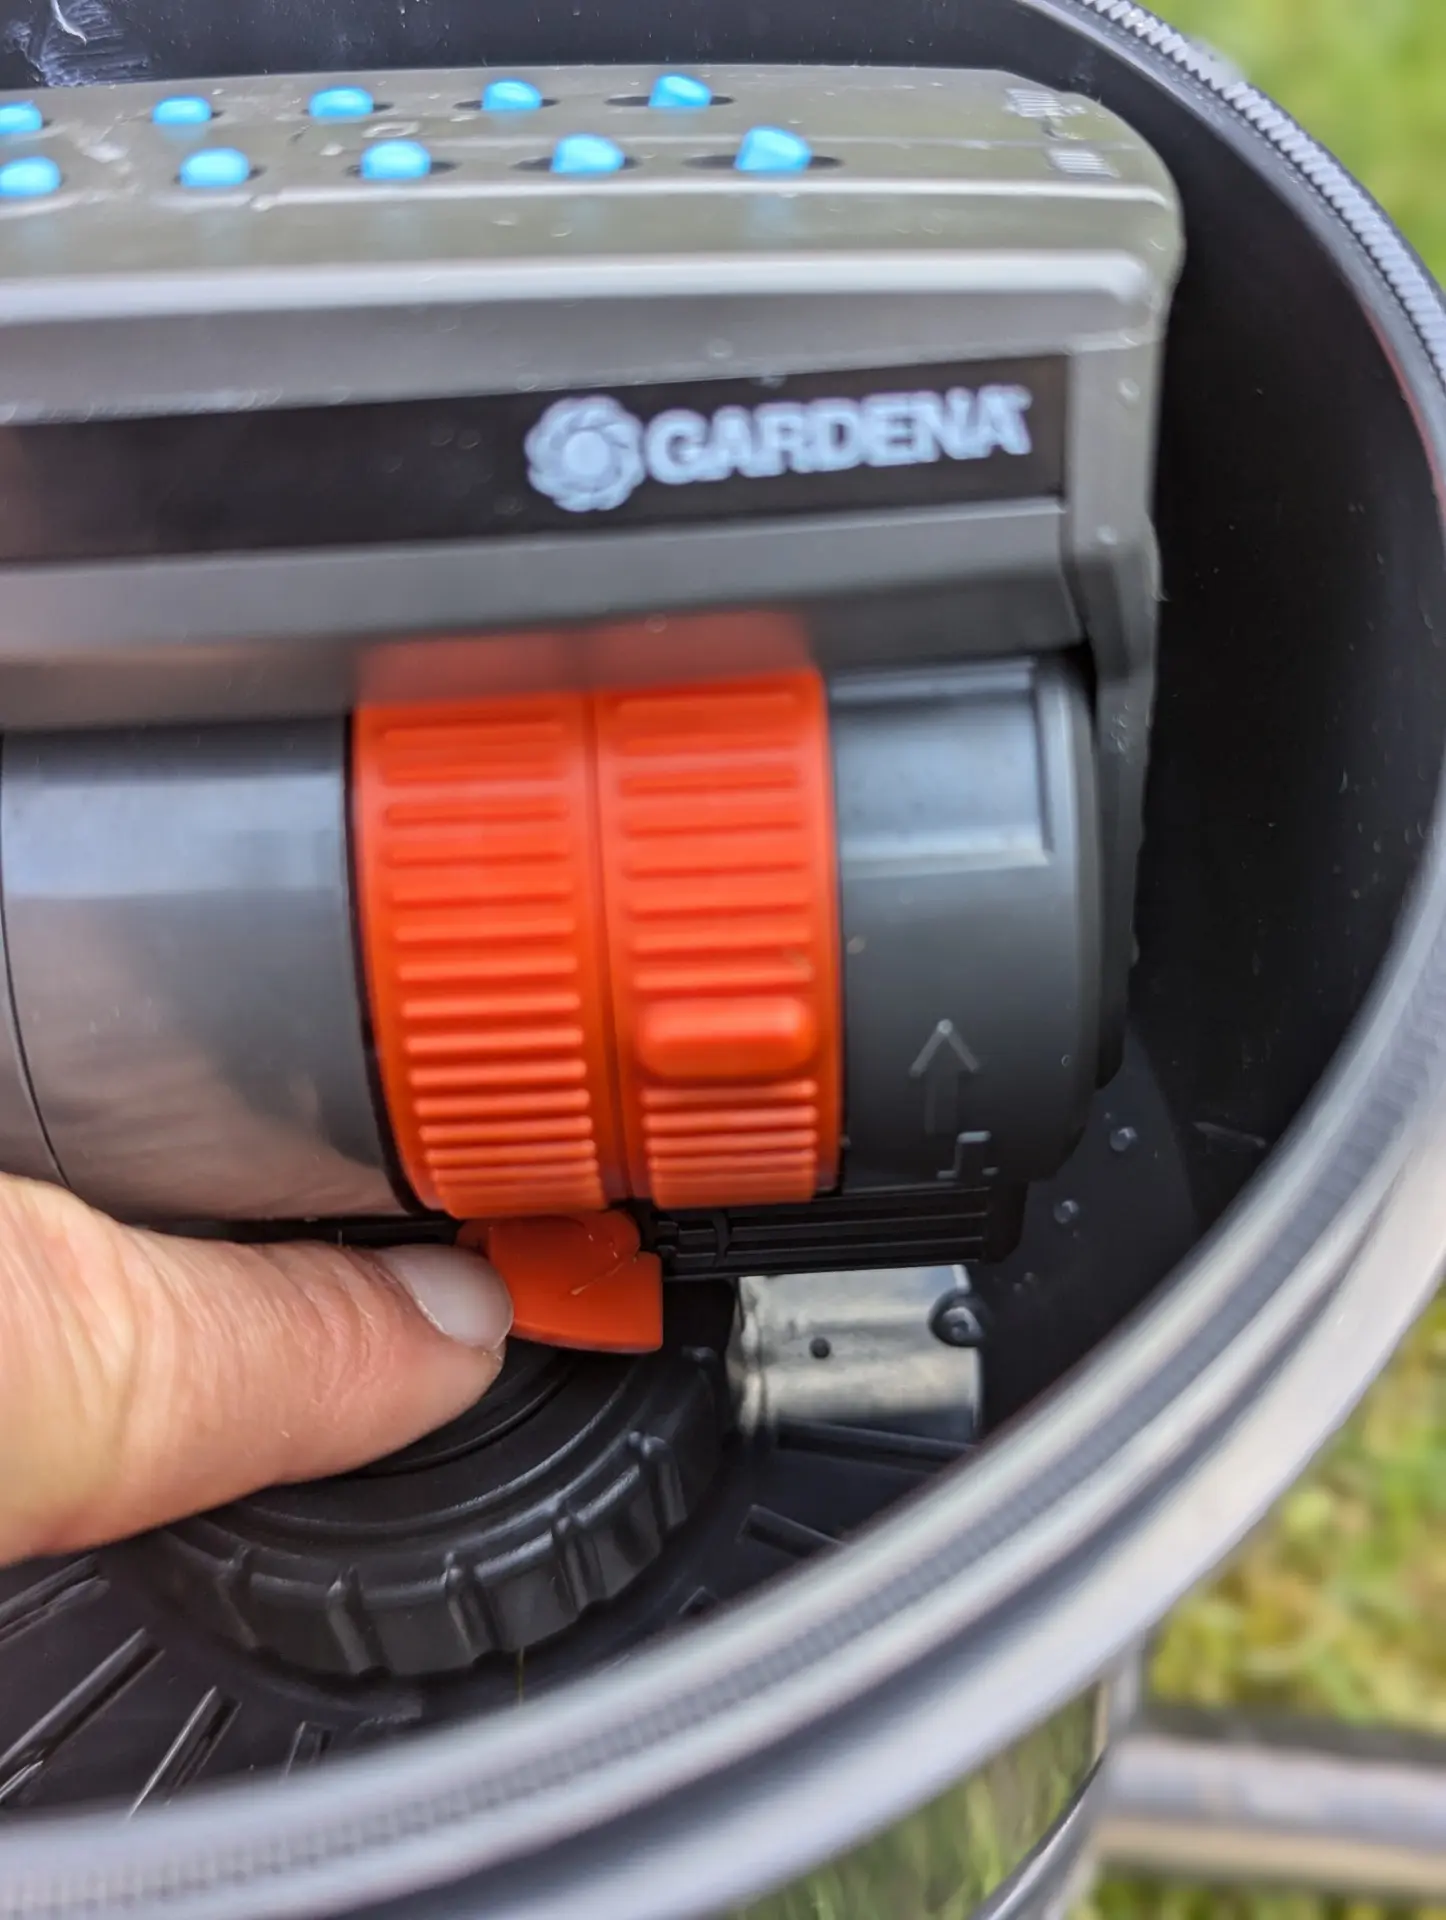
The most important preliminary step is to reduce the water supply to the minimum using the orange dial. This allows the sprinkler to start with the shortest possible throw distance, allowing you to then work your way up to the appropriate throw distance. To do this, turn the adjustment wheel approximately 1/4 turn to the right until it stops.
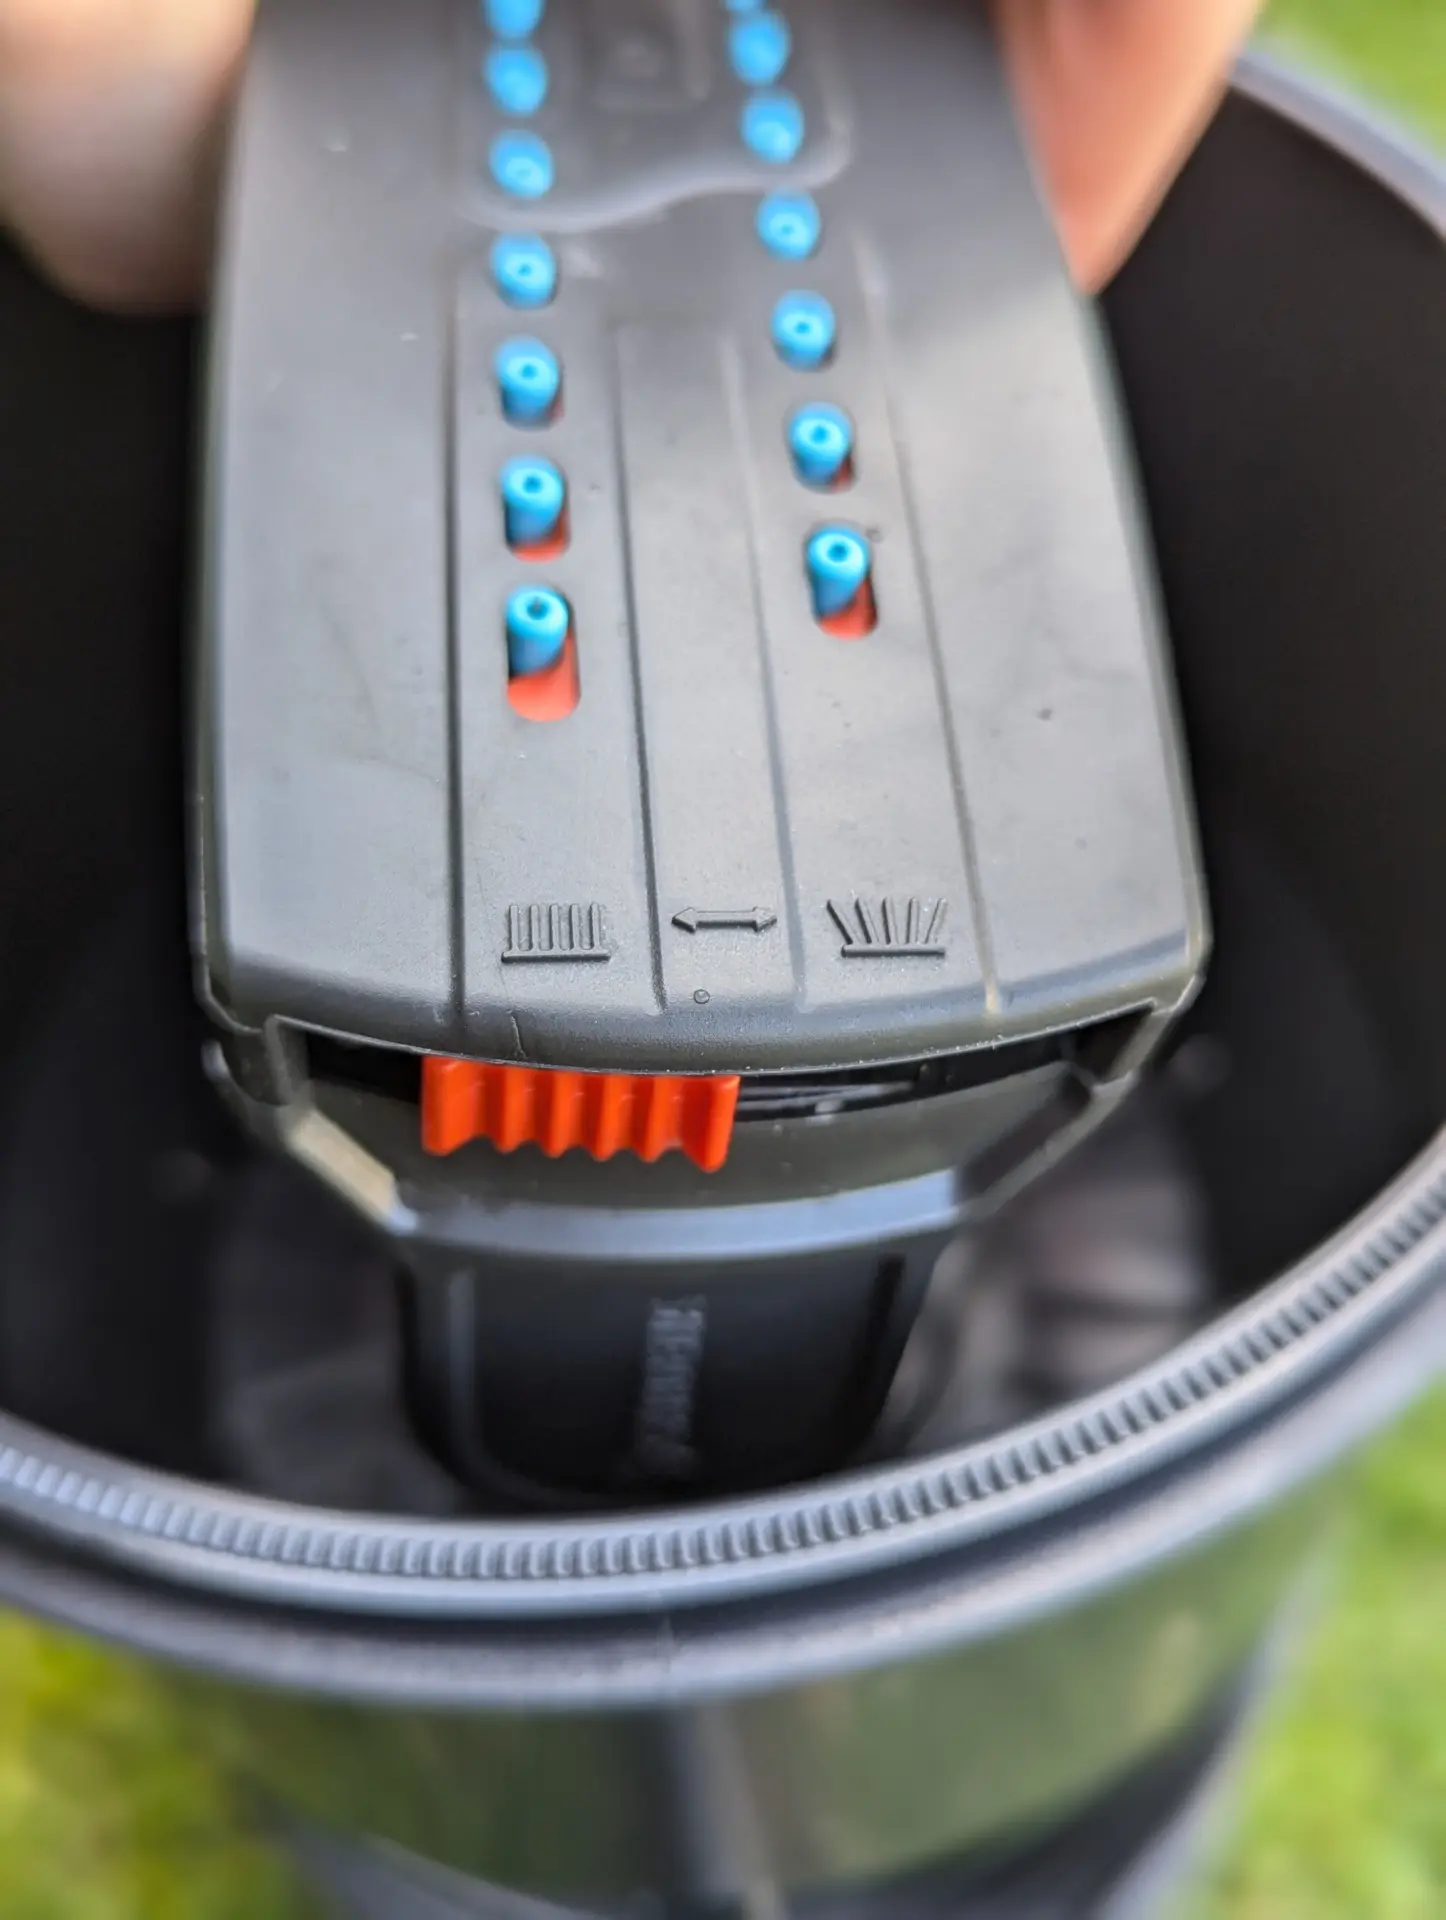
I also recommend setting the throw width to the minimum initially. This is done for both sides using the orange sliders on the left and right.
Turn the adjustment wheel all the way to the right to reduce the throw distance to the minimum.
Move the slider all the way to the left to minimize the throw distance.
Finally, grasp the sprinkler head and rotate it in the desired direction. The area to be watered is limited by turning the wheel on the side closest to you as far up as possible. Turn it so that the bar-shaped mark on the wheel is almost at the top.
The mark on the wheel determines the turning point to which the sprinkler will pivot.
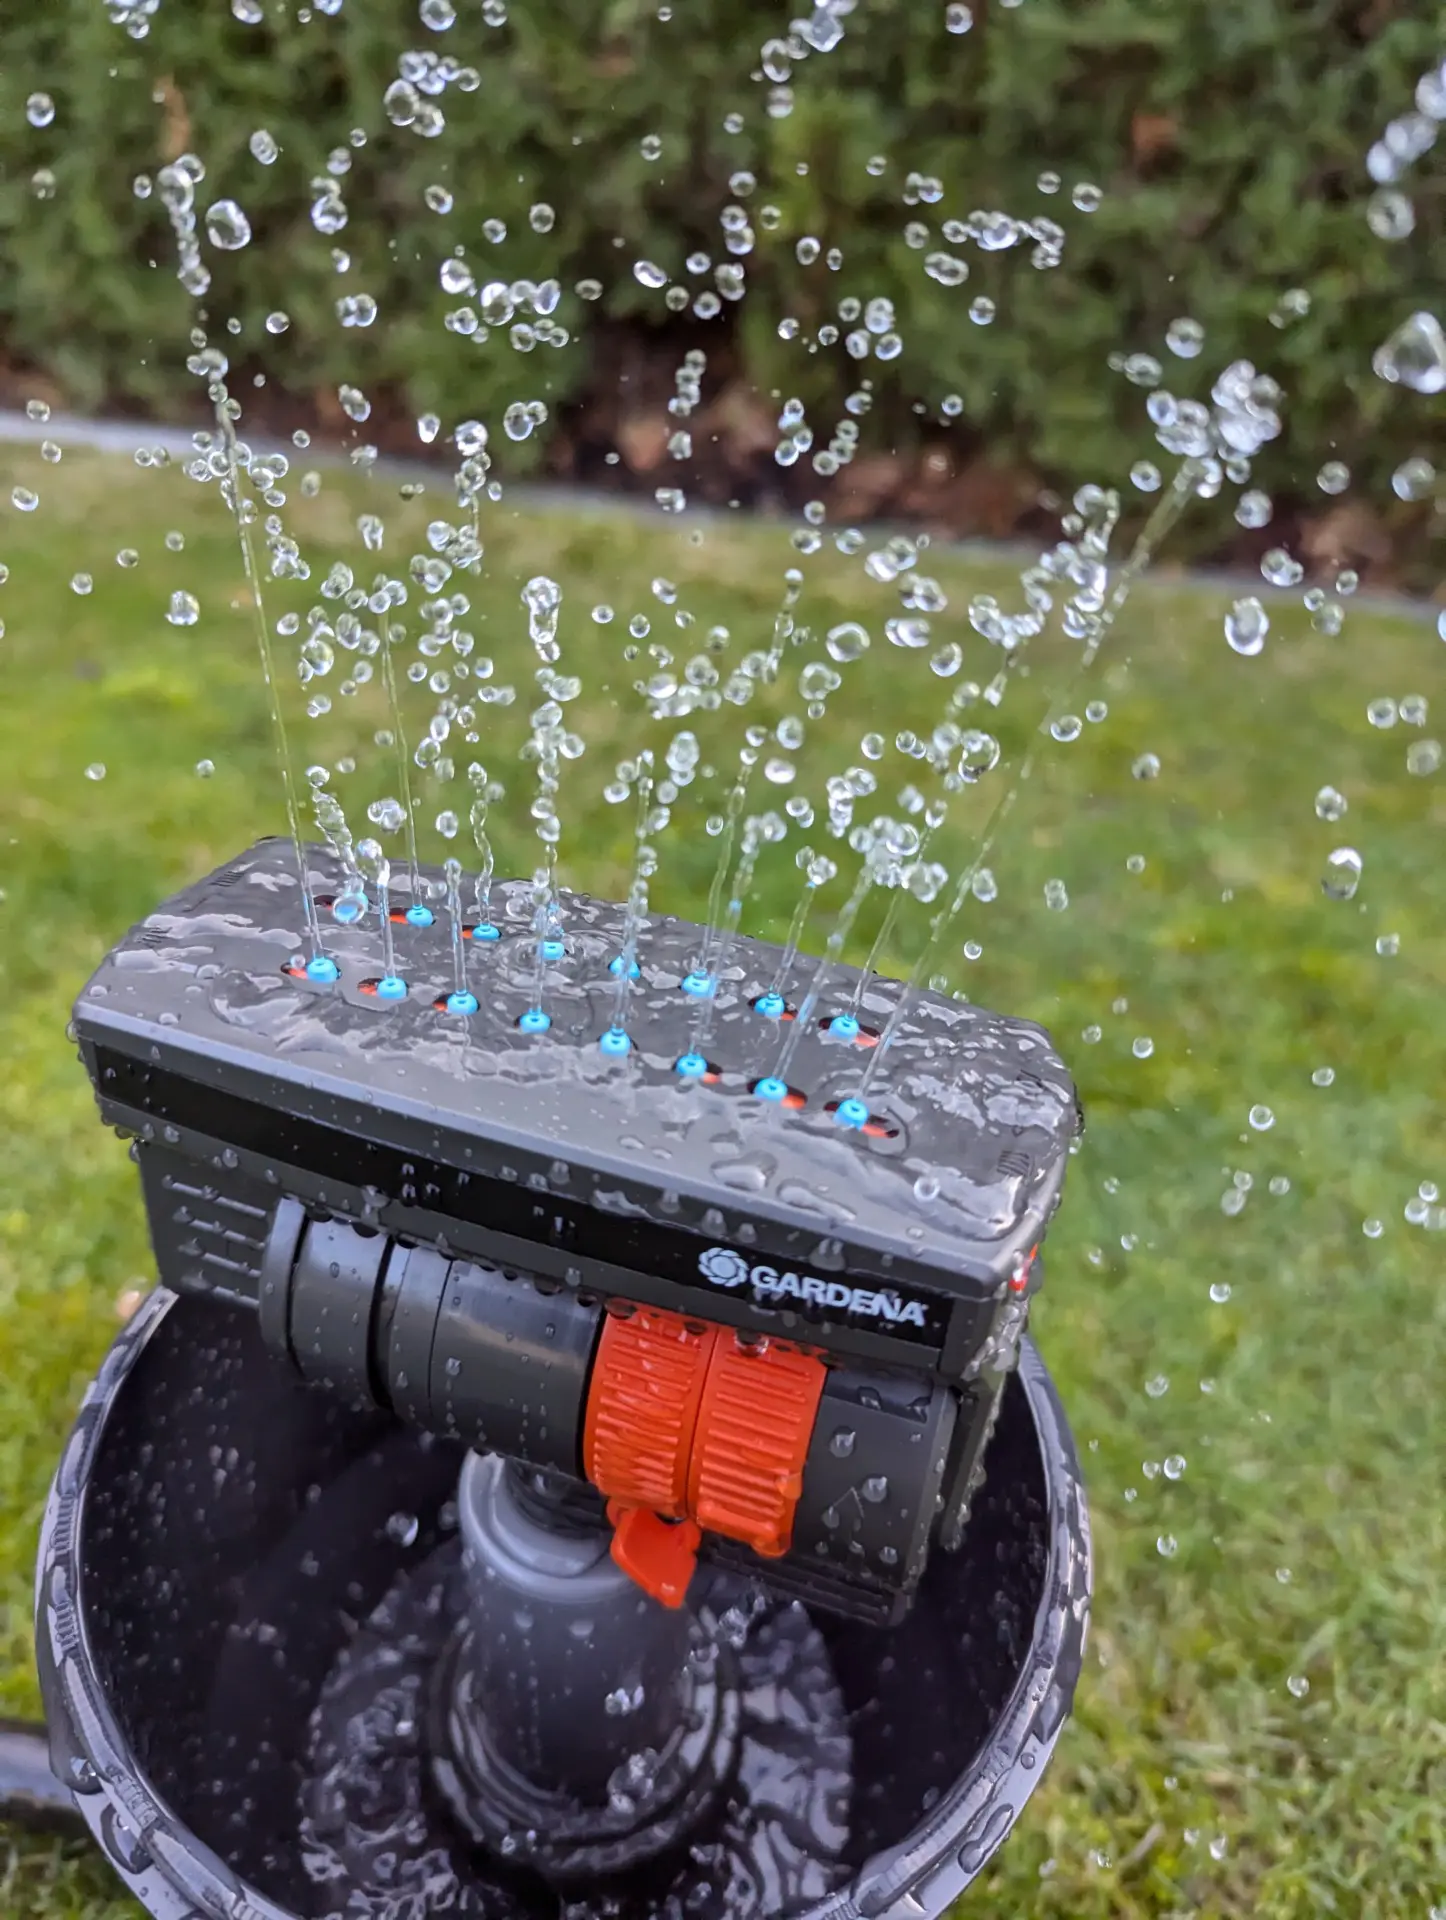
Activate the water supply
After watering starts, the water will initially trickle weakly from the sprinkler, and due to the lack of water pressure, it probably won’t move yet.
Gardena OS-140 with minimum throw setting
Setting the irrigated sector, throw distance, and throw width
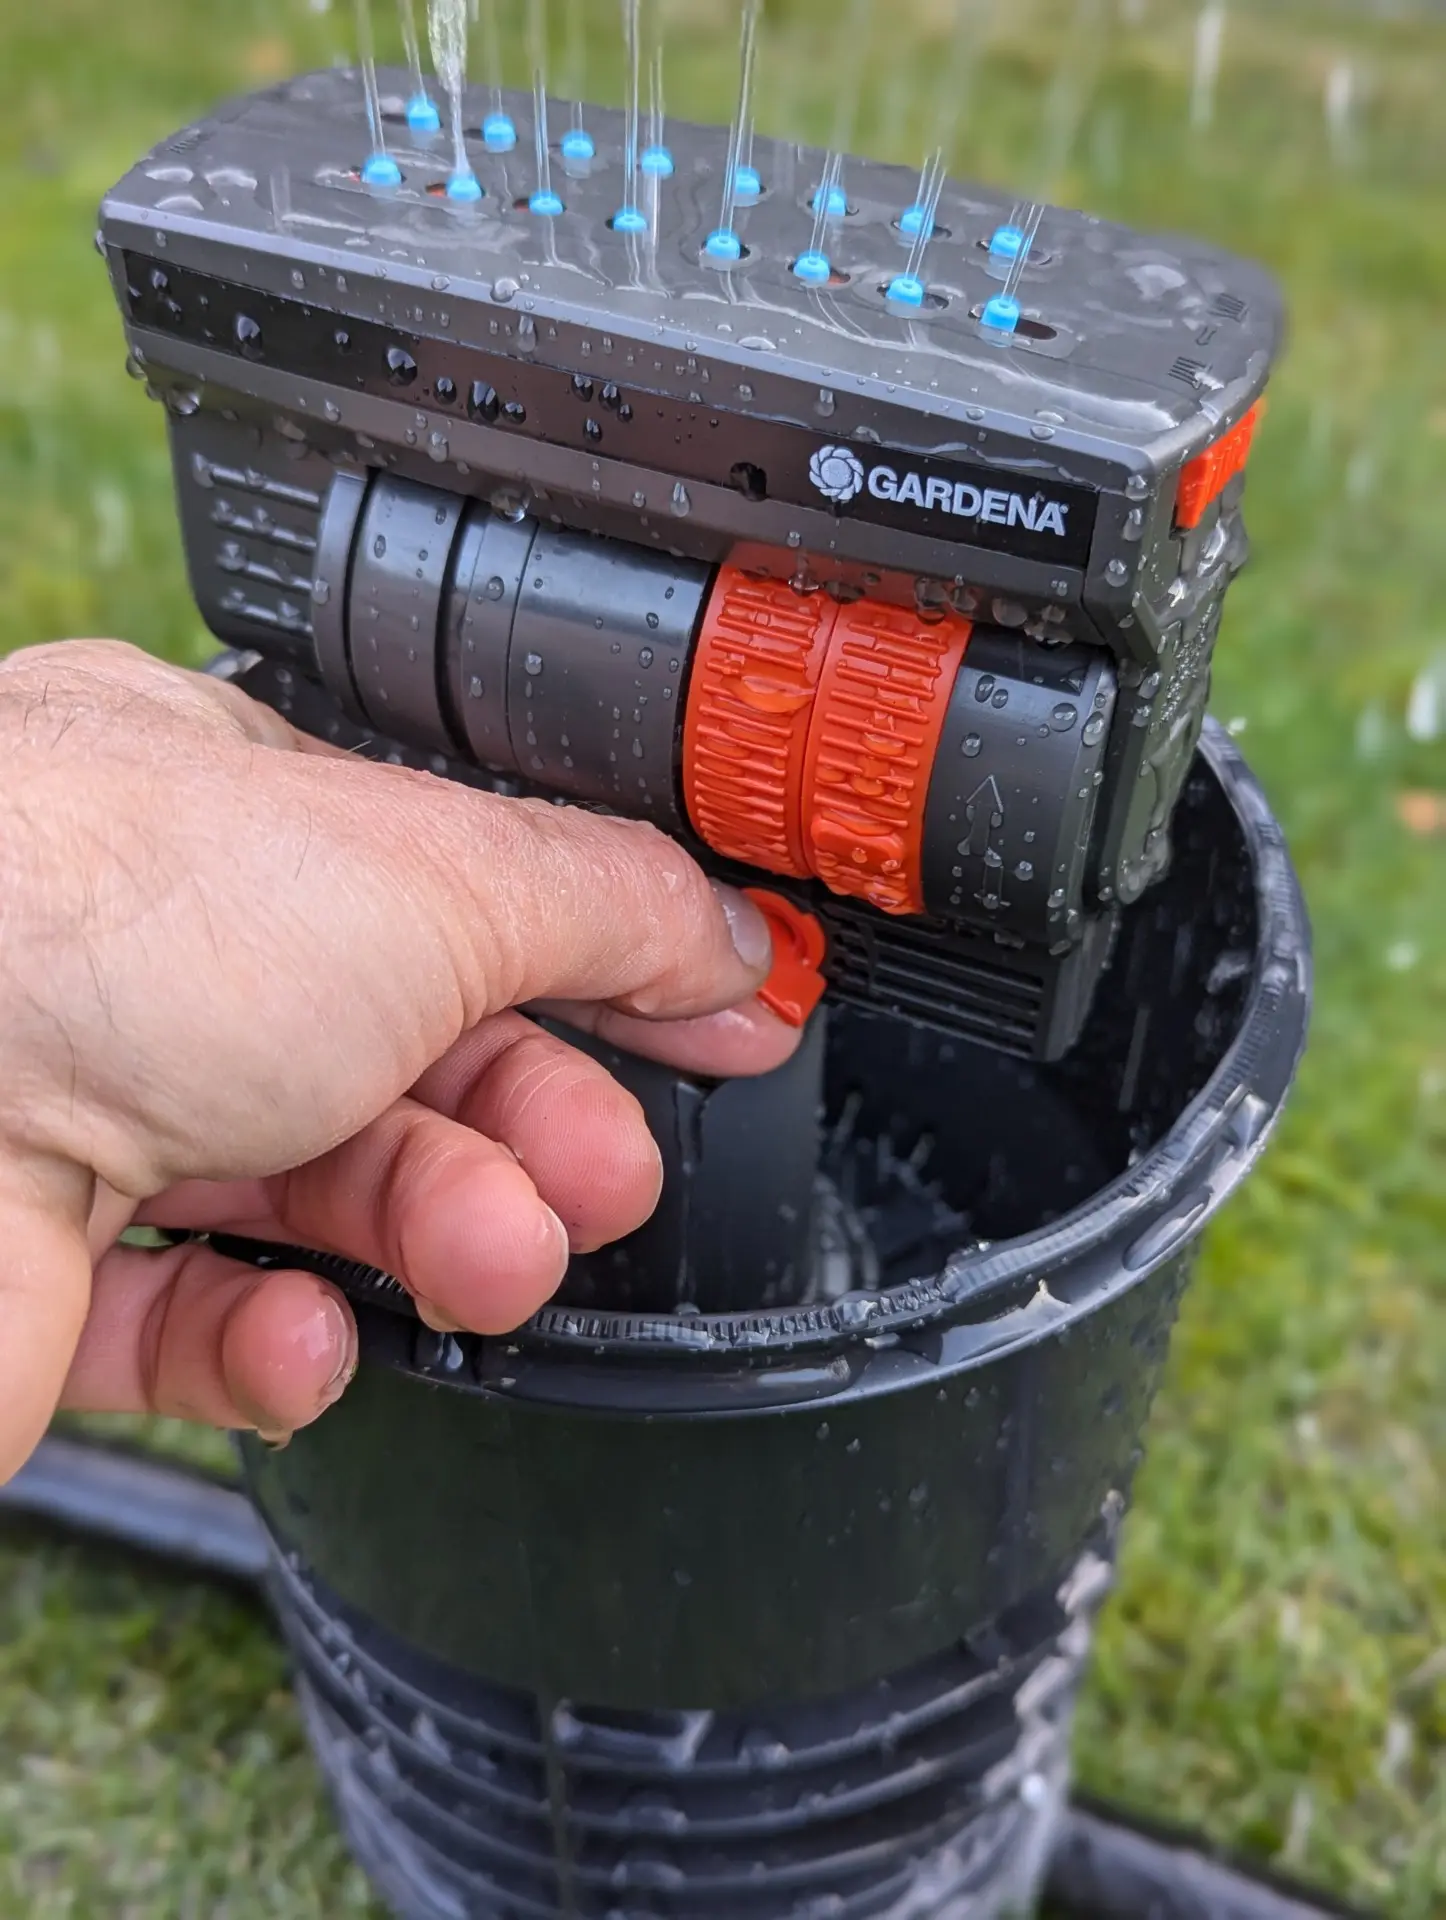
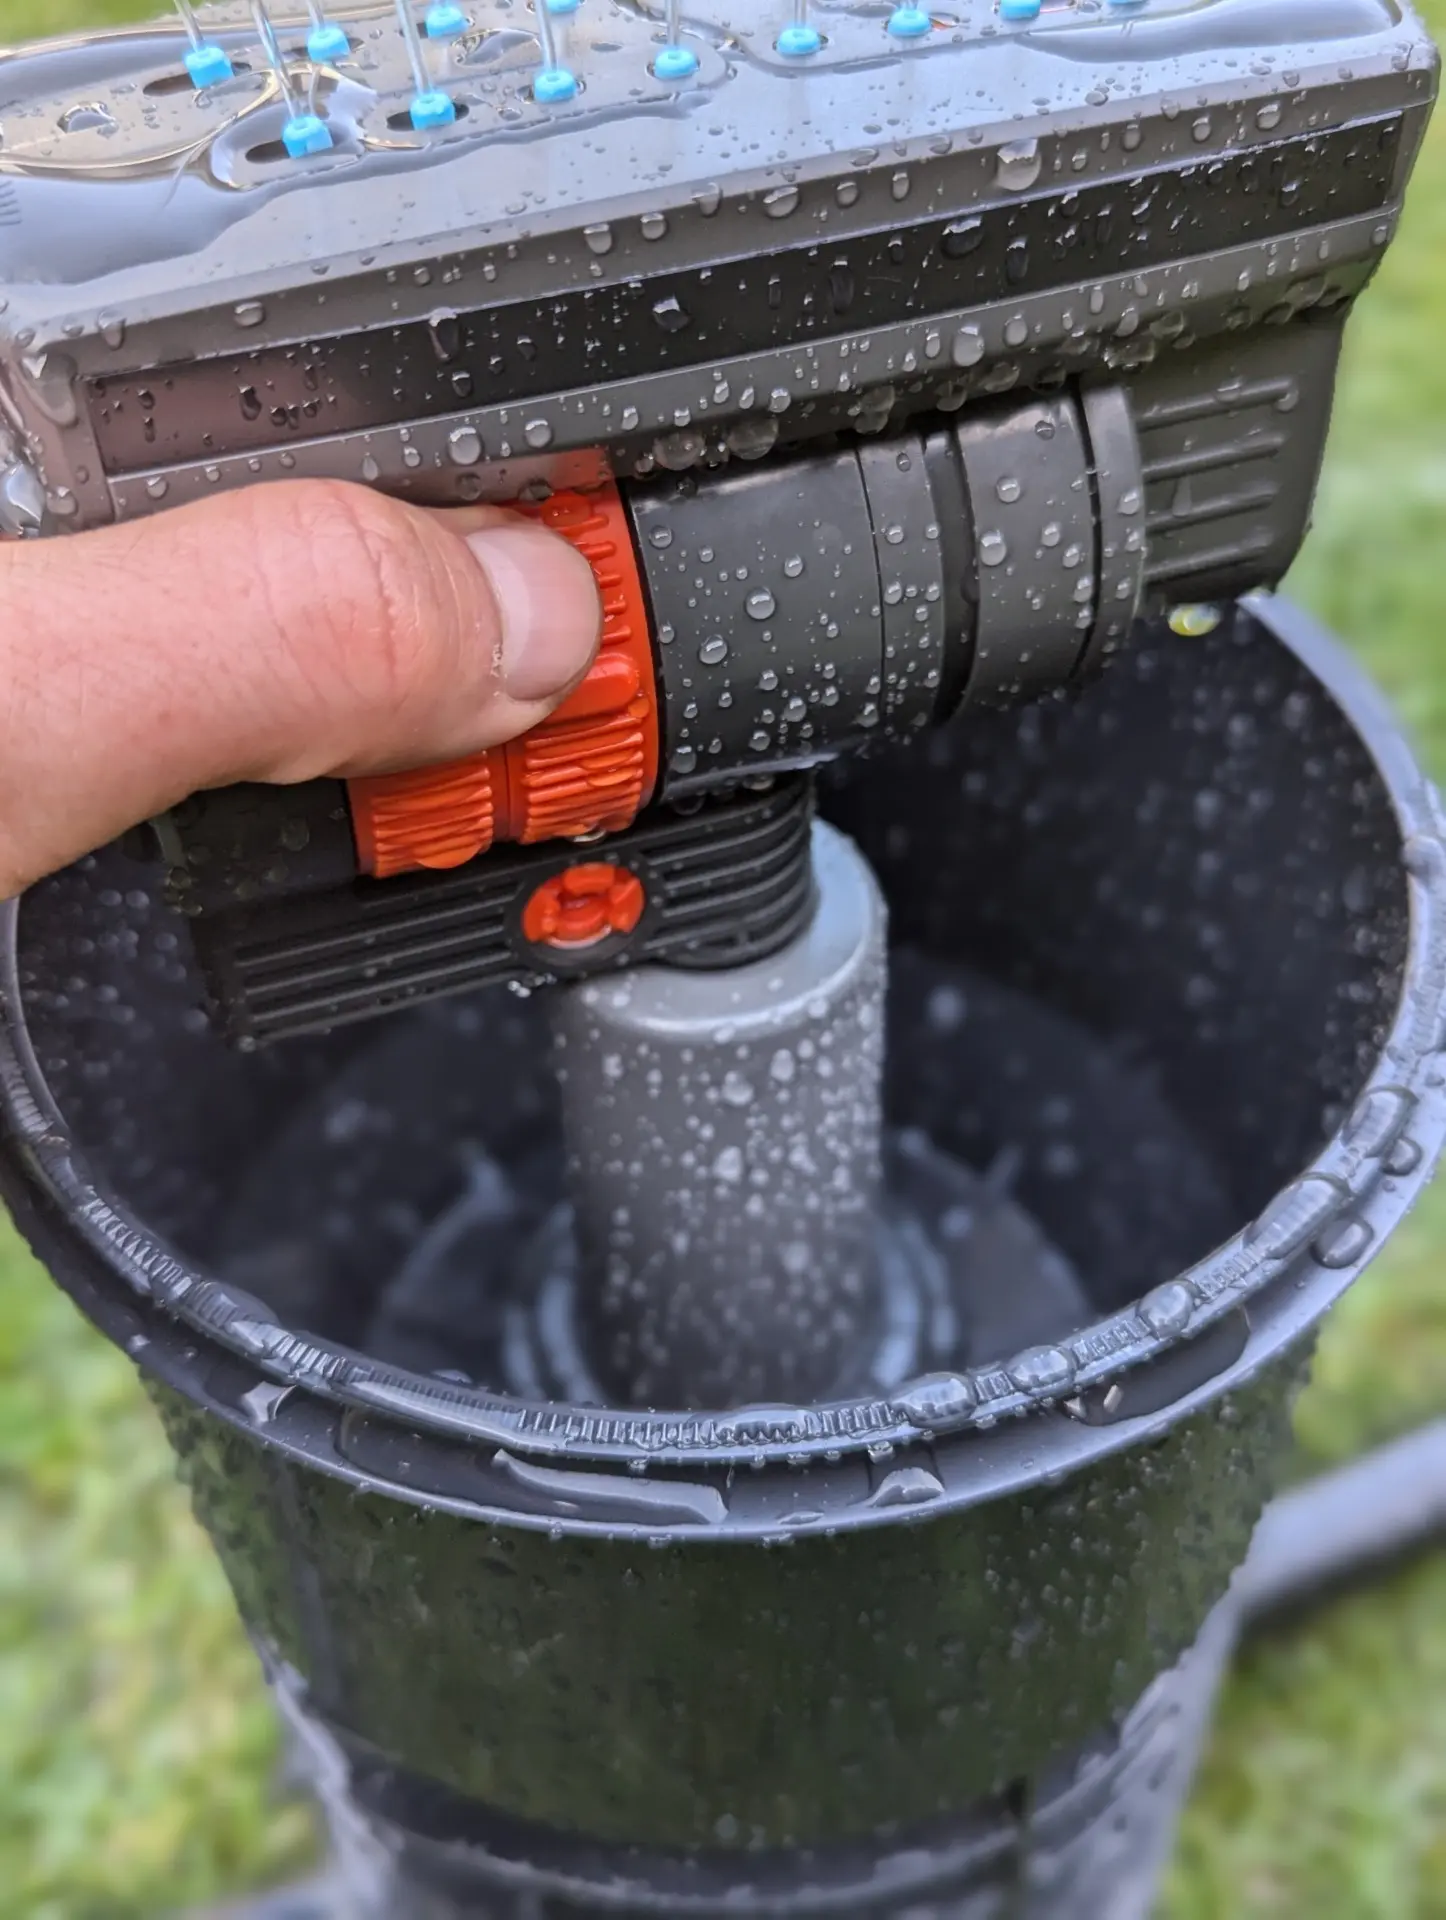
Now, slowly increase the water pressure on the orange wheel so that the sprinkler head begins to move. First, for the side facing away from you, turn the adjustment wheel and further increase the water pressure to determine the point to which the sprinkler head will swivel and how far in that direction the sprinkler will irrigate. At the same time, use the two slide controls to set the desired throw width.
It’s important to work your way up gradually until you find the best setting, as both the throw distance and the throw width respond to the set water pressure.
Turn the wheel to the right to increase the water pressure.
Use the wheel to adjust how far the sprinkler head should swivel.
Use the slide controls on the left and right sides to adjust the throw width.
Then, in the same way, set the turning point for the side closest to you using the second adjustment wheel. During this step, you may need to step back a bit to avoid getting wet, as the sprinkler may now be watering overhead.
Once all settings are correct, you can finally replace the cover.
Once the adjustment is complete, replace the cover.
I am an enthusiastic do-it-yourselfer and have been running this blog on the subject of garden irrigation for more than 6 years now. In over 150 specialist articles, I share my own experiences and know-how from years of research and numerous product tests. -> More about me


")


