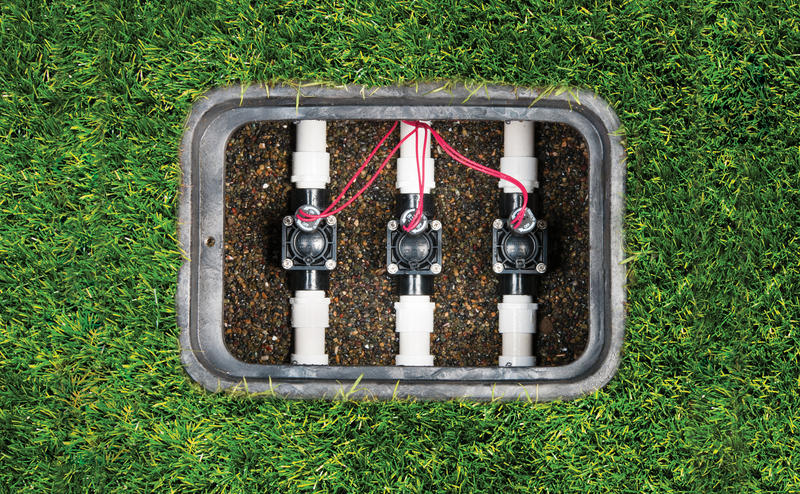
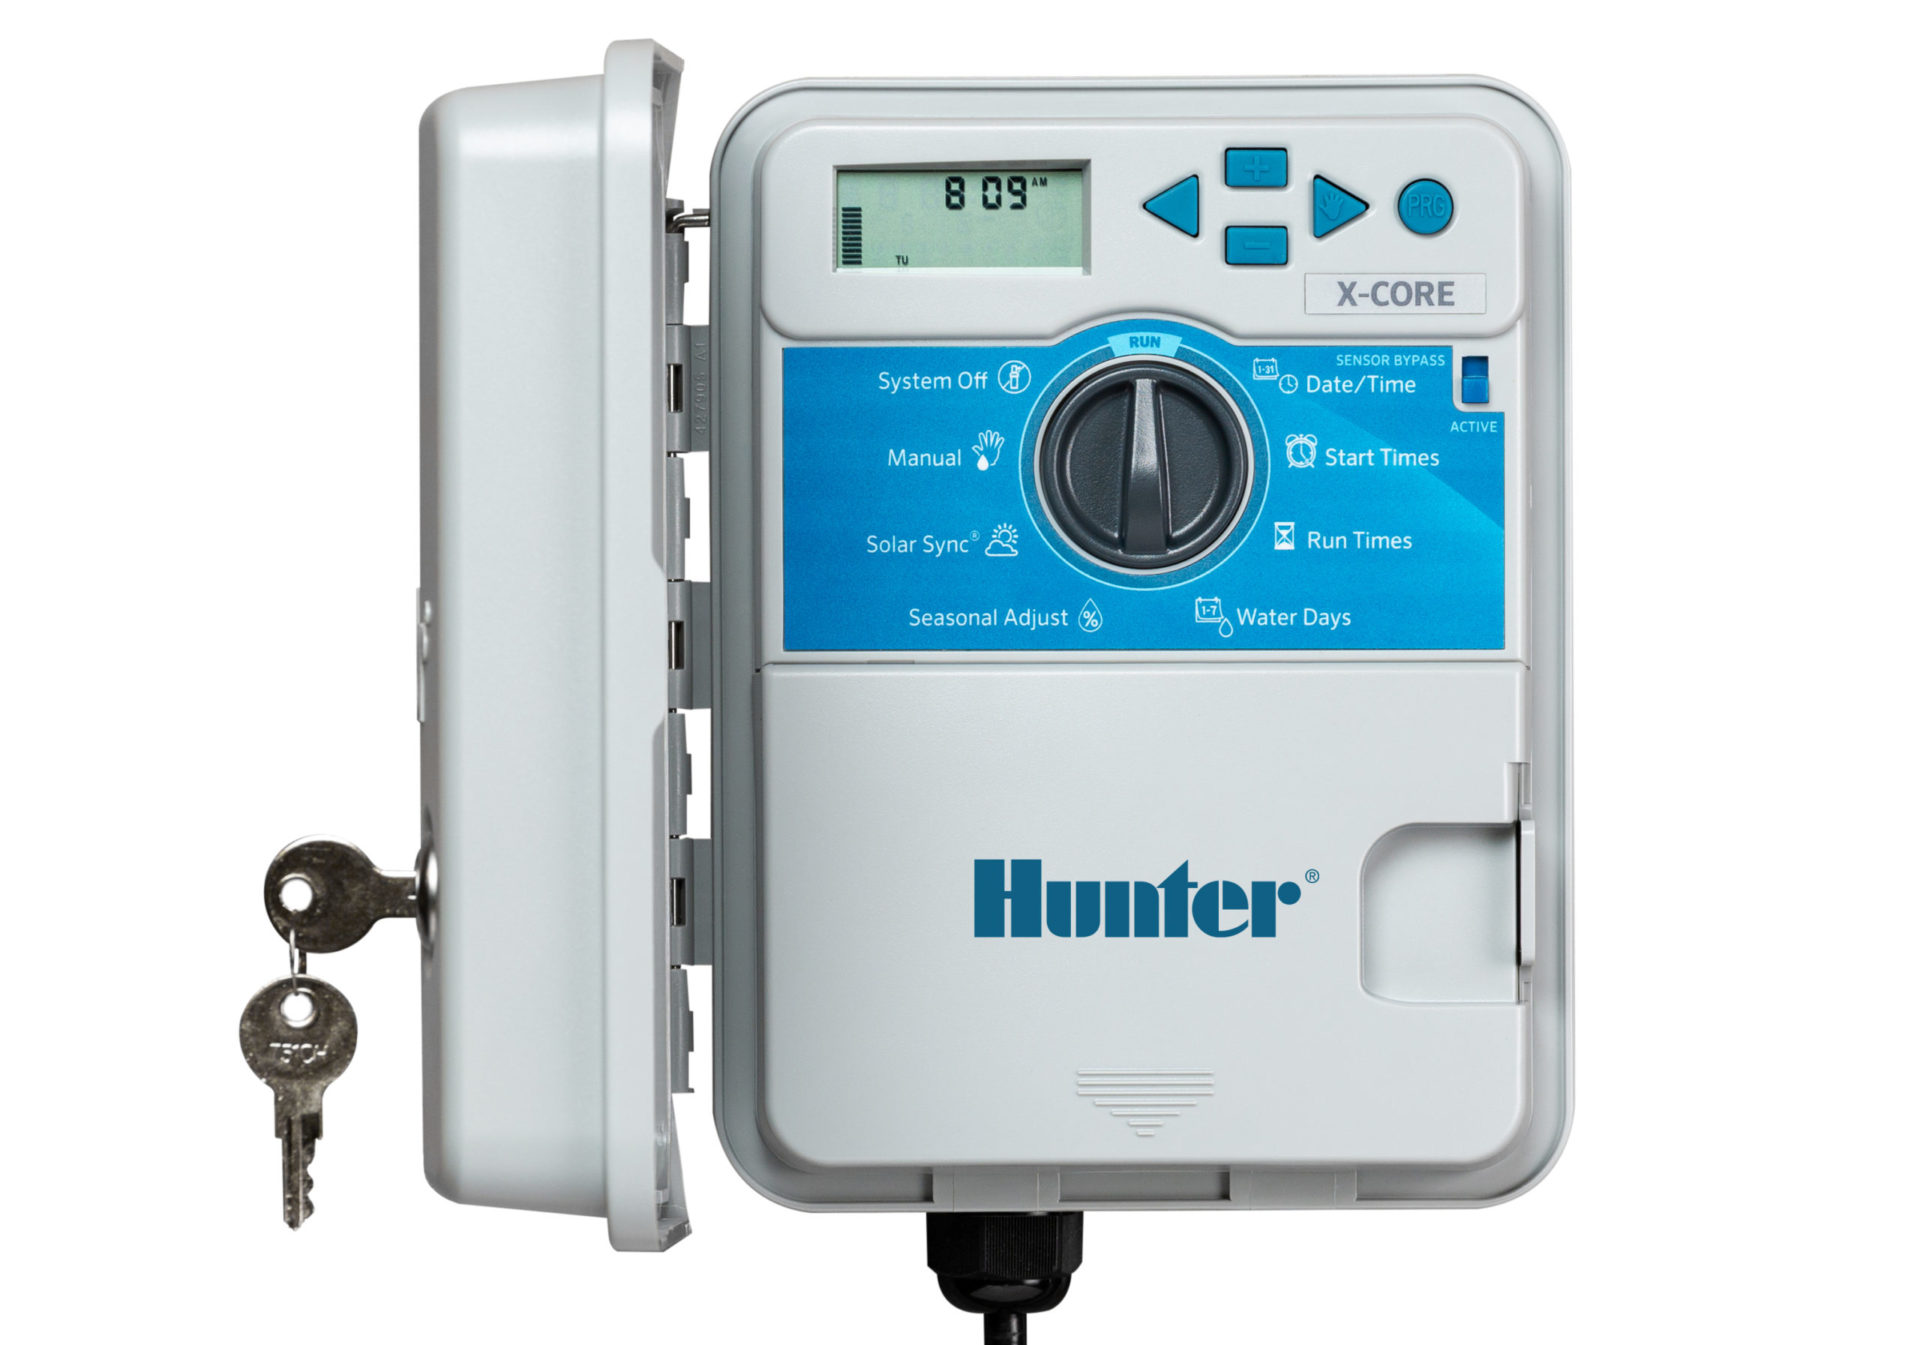
If you use solenoid valves in your garden to switch between different irrigation zones during an irrigation cycle, the question inevitably arises as to how to safely and effectively house the valves. A suitable and widely used solution is a solenoid valve box, a stable, robust housing that is usually buried underground and houses the solenoid valves and, if necessary, other equipment.
In this article, I describe the function of a solenoid valve box in an irrigation system, how to install it, the advantages of using one, and what alternative options exist. I will also introduce some solenoid valve boxes available on the market and show the differences between them.
A solenoid valve box can be used for both regular lawn irrigation and micro-irrigation, and of course, you can also combine both within a single box.
Advantages of Using a Solenoid Valve Box
Using a solenoid valve box offers the following advantages:
Protection from Accidental Damage
This is especially true if you are considering installing the solenoid valves unprotected in the garden as an alternative. Passersby could get caught on such an unprotected structure and inadvertently damage it. Lawnmowers, trimmers, gardening activities, or animals that approach the system out of curiosity or chew on components could also cause damage. The buried box, which is enclosed at the sides and protected by gravel at the bottom and a lid at the top, provides a physical barrier against such damage and also protects against accidental adjustment of settings.
Protection from Wind and Weather
The housing in a solenoid valve box protects the components and wires inside from adverse weather conditions, whether heavy rain, heat, cold, or UV sunlight. It also keeps dirt, debris, moisture, and pests out of the irrigation system. This saves repair costs and extends the life of the system.
Easy Access for Maintenance
A valve box provides easy central access to the solenoid valves, whether in the event of necessary repairs or cleaning, or should a valve need to be replaced. Furthermore, the annual purging of the irrigation system with compressed air can be easily performed centrally via the solenoid valve box.
Neat, visually appealing housing
Unlike exposed valves and cables, a valve box is visually invisible at first glance and unnoticeable. This creates a tidy and clean appearance and does not affect the appearance and aesthetics of the garden.
What does a solenoid valve box consist of?
The following components are used in a solenoid valve box:
- Solenoid valves
- Connecting pipes
- 1 connection fitting for connecting to the supply line
- Several connection fittings at the outlet for connecting to the outgoing pipelines
As well as a few optional components that can be very useful in practice:
- Filter
- Compressed air connection
- Ball valve
- Damp-proof box for wiring
Both solenoid valve boxes and wall-mounted systems are very simple in their basic design: The water flows through a main pipe, from which branches lead either on both sides or on one side at right angles. A solenoid valve is attached to each of these branches, which allows water to flow into the corresponding zone on command or closes again, thus terminating the water supply.
Pipe Connections and Connection Fittings
For residential applications, 1-inch diameter pipes are typically used within the solenoid valve box. The connection fittings on the inlet and outlets of the box are usually either 1-inch or 3/4-inch.
Depending on the size of the pipeline you want to work with, it’s best to go straight for the box with the appropriate fittings to avoid the need for intermediate pieces. The pipe connections are not constructed like standard PE fittings; instead, they use special connectors called valve manifolds.
These are designed to save space, so the box doesn’t have to be unnecessarily large, and the connection points are designed as union joints rather than standard threads. This has the great advantage that the connections in the valve box can be removed relatively easily at a later date without having to disassemble the entire box, allowing, for example, a defective solenoid valve to be easily replaced. It’s also relatively easy to make modifications to the box at a later date.

In this view from below, you can see the cross-piece pipe connections arranged one behind the other to save space.
Such valve manifolds are offered by brands such as Dura, Rain Bird, and Irritec. Unlike the connectors used in pipelines, a cross connector is also offered here, i.e., a connector that distributes the water crosswise in four directions.
Solenoid Valves
In principle, any type of solenoid valve can be used in a valve box. It is only important that the connections match the connections of the pipe connections, as solenoid valves are available in different thread sizes and with both external and internal threads. Some solenoid valves also have a flow regulator built in, such as the Hunter PGV-101, which is not a requirement but can be useful in some situations.
Filters
A sieve or disc filter is often installed at the inlet to prevent contaminants from entering the irrigation system. This filter must be cleaned from time to time. If a filter is already installed in the pump or directly downstream of the pump, then the additional filter in the solenoid valve box is not necessary. A filter basket on the intake opening of a suction hose should not be considered a filter replacement in this regard, as it only filters very coarsely.

Example of a filter
Compressed air connection
This is used to blow out the irrigation system with compressed air before winter. A compressor is connected using a suitable connector, and the water is blown out through the sprinklers or other openings. This is not necessary if the system is designed to drain using a drain valve or a manually opened ball valve located at the lowest point .
Ball valve
This is located in the solenoid valve box on the supply line and allows the water supply to the box to be completely shut off. This can be used for maintenance work in the box or in the event of a leak. It is also practical for closing the connection to the water source when blowing out with compressed air, so that the compressed air can only spread in the desired direction toward the sprinklers.
Waterproof junction box for wiring (cable box)
A waterproof junction box, in which the cable wires of the solenoid valves are brought together, is not mandatory, but it makes connecting the solenoid valves to the water computer easier. This saves you the trouble of creating a waterproof connection yourself, and in many cases, the seller already pre-wired the wiring.
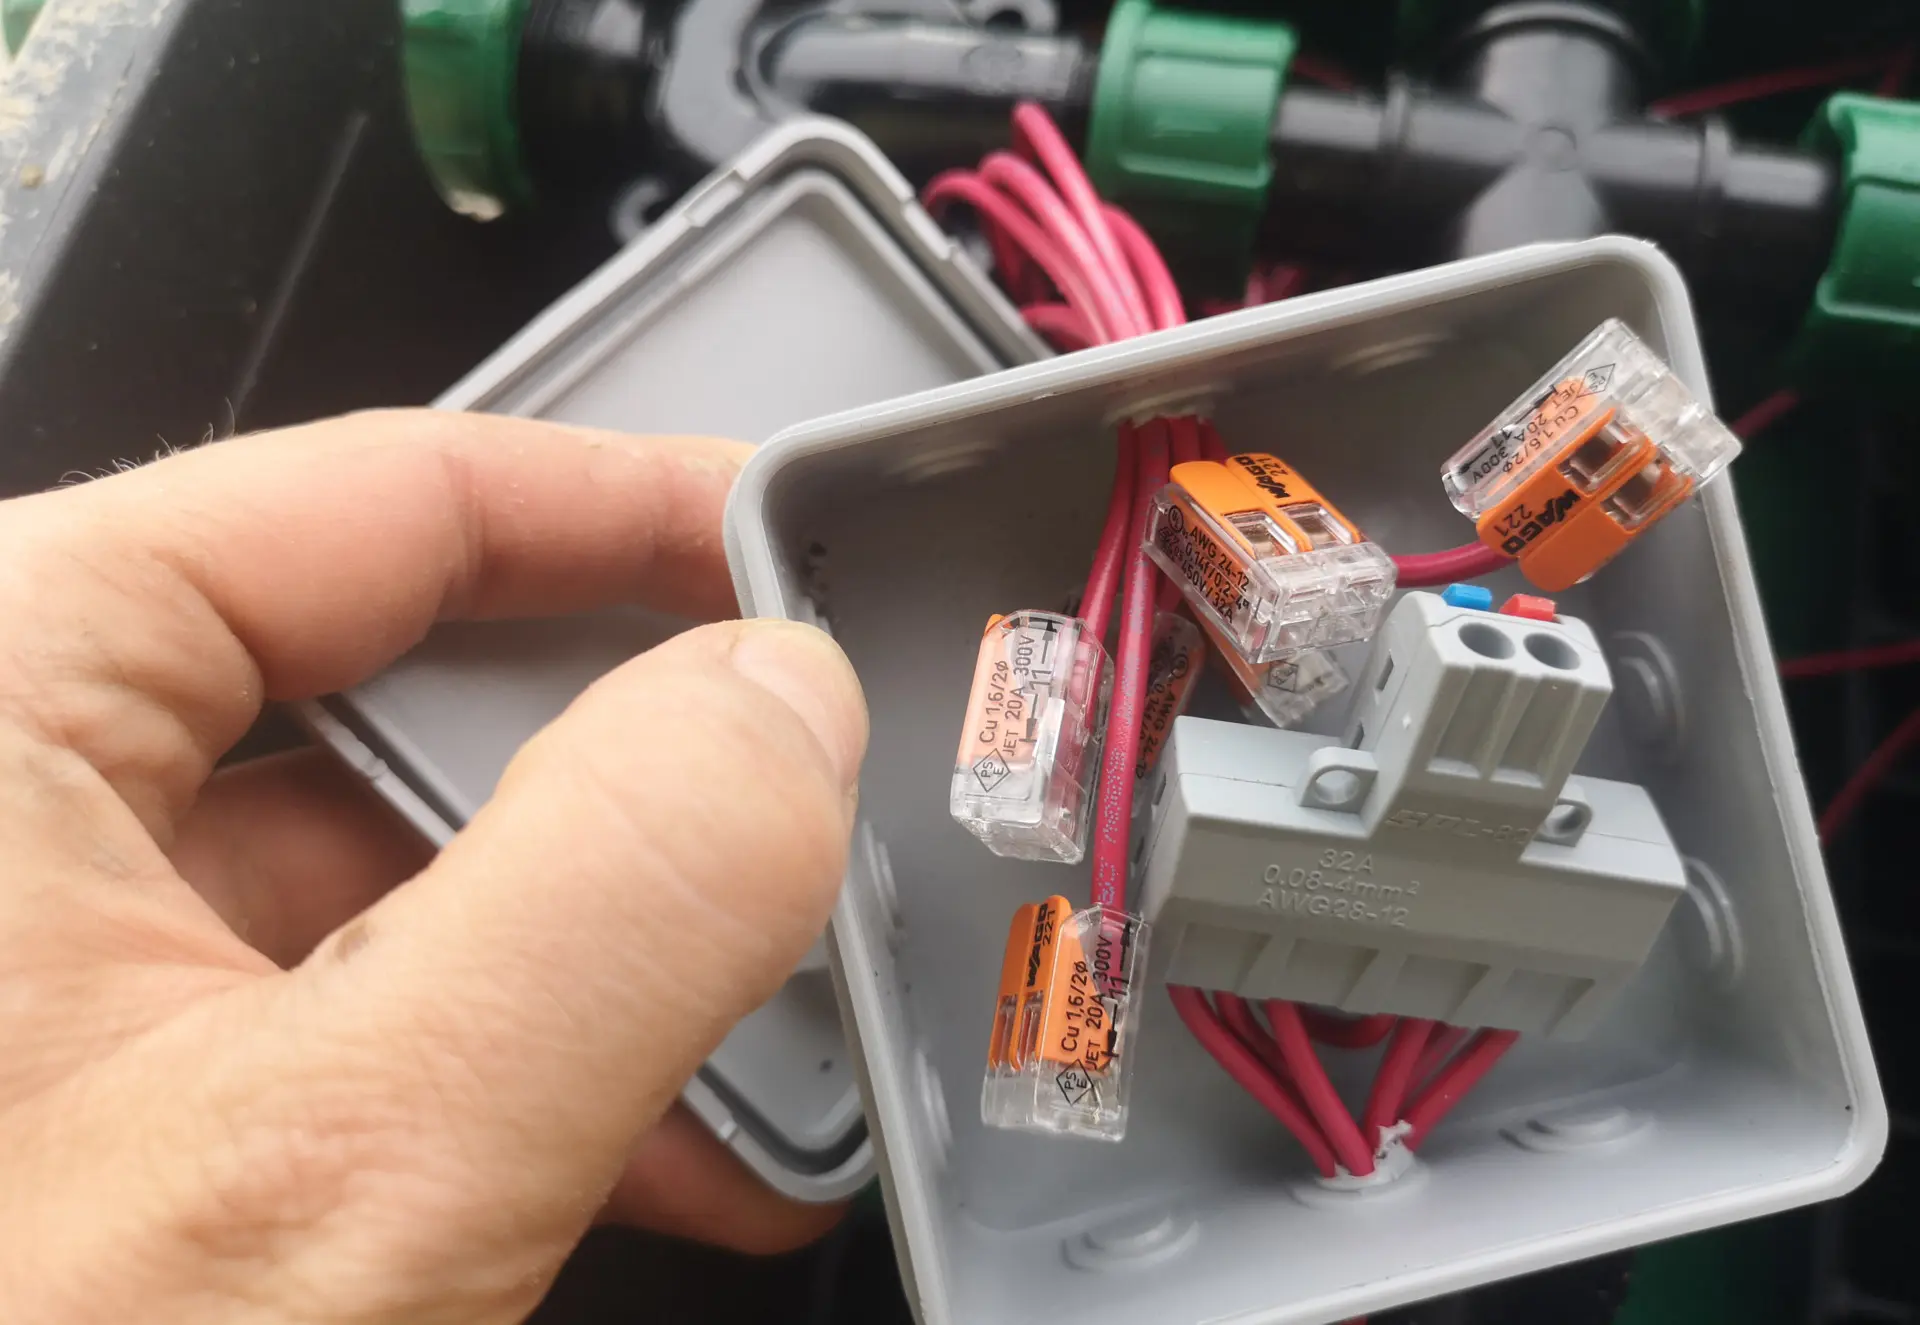
This solenoid valve box includes a waterproof junction box, and the solenoid valves are already connected to the junction box. The wiring to the water computer then runs directly from the junction box.
How do you install a solenoid valve box?
Installation isn’t too complicated and involves the following steps:
Selecting a suitable location for the box
It’s important that the cable connections from the solenoid valves housed in the box to the irrigation computer can be neatly laid, so the solenoid valve box is often placed near the irrigation computer. However, this isn’t mandatory; with 19 AWG cables, distances of up to 300 feet are generally possible.
You’ll only see the lid of the final buried box, so choosing the location can also depend on where in the garden it fits best or is least disruptive. Such lids are quite stable and can be walked on, and some can even be driven over by car (check the manufacturer’s instructions!).
Access to the solenoid valve box isn’t usually needed very often. If you use compressed air, then once a year before the start of winter; if you use a filter in the box, then every few months, depending on the level of water contamination, to clean the filter. Otherwise, if everything goes according to plan, there is usually no reason to open the solenoid valve box during normal operation.
Dig a Hole
The hole for the box should be slightly deeper and significantly longer and wider than the outer dimensions of the box to allow space underneath for the gravel fill and sufficient space on the sides to guide the supply line and the pipeline outlets to the zones. Allow about 2 to 4 inches at the bottom, and at least 8 inches around the box.
Fill with Gravel
Ideally, you should place a weed barrier in the area under the box to prevent weeds from growing through from below. Then, add about 2 to 4 inches of coarse gravel to prevent rainwater from stagnating in the box, instead draining away quickly. The gravel is then compacted to prevent the base from giving way.
Insert the box
The box is then positioned so that it is level, there is enough space on the sides for the connections, and its lid sits slightly above ground level, about 0,5 inches. This way, it is not visible in the lawn at first glance and can be safely driven over with the lawnmower. The slight protrusion above ground level prevents softened soil from being washed onto the box during heavy rainfall.

Box positioned in the hole
Connect the pipeline
Now, the connector at the box inlet is connected to the supply pipeline leading to the water source, and the pipelines supplying the individual irrigation zones are connected to the outlets. As always, the following applies here: Use as few connectors as possible to avoid unnecessary pressure loss! Therefore, only use 90-degree connectors (L-pieces) if they are absolutely necessary due to the space available. If conditions permit, it’s better to simply route the pipeline in a wide arc around the bend.
It can’t hurt to color-code the different pipeline ends leading to the irrigation zones, e.g., with differently colored insulating tape. This makes it easier to distinguish which end of the pipeline belongs to which zone when connecting, and you don’t have to figure it out by trial and error.
Test the connections for leaks
I would perform this step before connecting the irrigation computer. Common solenoid valves allow for this by allowing manual opening of the valve. If that’s not possible, this step is only possible once the control system is connected.
To do this, activate the water source and then open and close the individual solenoid valves one after the other. This is done by turning the solenoid valve coil a quarter turn in the direction indicated on the valve.
After opening, carefully check each zone to ensure that no water is leaking at any of the connection points inside or outside the box. Once everything is sealed, you can proceed to the next step.
Connecting Solenoid Valves to the Irrigation Computer
Two wires lead from each solenoid valve. One of these wires must be connected to one of the zone outputs of the irrigation computer. These are usually labeled with numbers, so for an irrigation computer with six zone outputs, for example, these are labeled “1” through “6.” The second wire must be connected to the COM port of the irrigation computer. It doesn’t matter which of the two wires goes to the zone output and which to the COM port. If it’s important that the zones follow a specific order, for example, a certain zone is number 1, then another zone is number 2, and so on, then the wiring must be done accordingly.
Since space would quickly become limited at the shared COM port if the wires from numerous solenoid valves were routed through it, these wires are combined beforehand and then connected to a common wire at the COM port. And since the wires leading from the solenoid valve aren’t very long (approx. 20 inches), an additional control cable is usually required to extend them to the irrigation computer.
These control cables are cables for low-voltage applications with a relatively small cross-section, but a larger number of wires, which can be purchased from irrigation retailers.
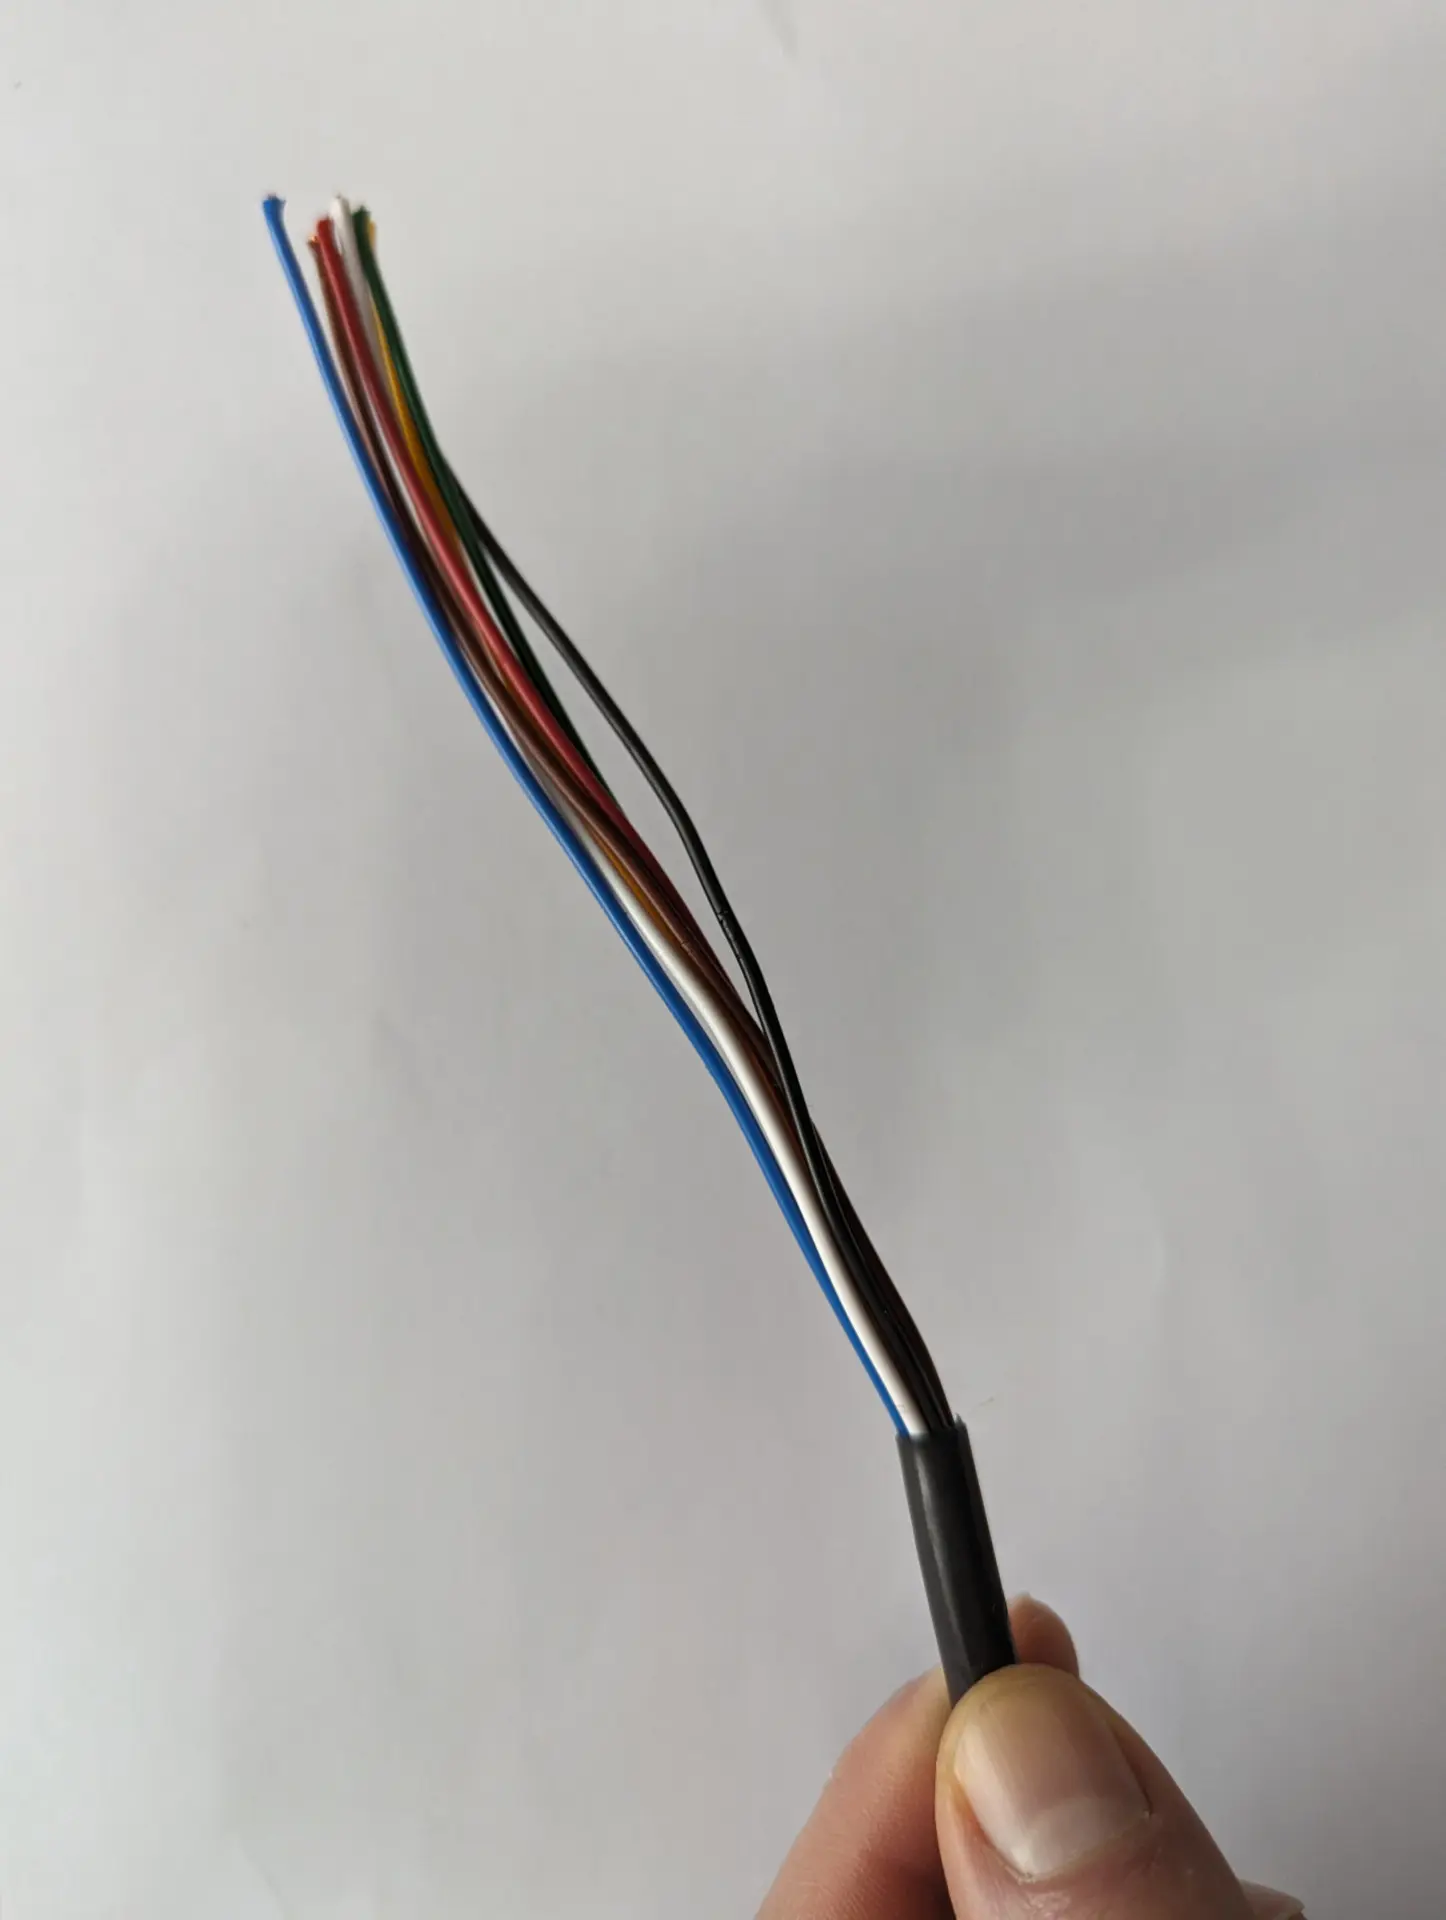
This is what a control cable looks like. In this case, it has 7 wires, i.e., for 6 zones.
When joining the wires, make sure they are watertight. Specially offered cable sleeves and grease caps can be used for this purpose. The following article provides a detailed practical example for connecting solenoid valves to the irrigation computer.
Fill the hole again
Now you should perform another test to ensure that the zones can be switched on and off correctly via the computer and that all connections in the box are still sealed. Then, carefully fill the remaining space around the box with soil. It’s best to dig it slightly above the soil level, as the soil will settle slightly over the next few days. Optionally, you can add some humus and sow grass seed, or reinsert a previously dug-out turf so that the area around the lid can quickly become regrowth.

Solenoid valve box fully installed
What alternatives are there to the solenoid valve box?
Under no circumstances is it recommended to bury the solenoid valves themselves – without anything around them – or to bury them in a box that is inaccessible from above or that is completely buried in the ground. In the first case, the valves are not adequately protected, and long-term functionality is not guaranteed. In the second case, if something malfunctions, you cannot reach the valves, or after a longer period of time, you may not even know where the valves are buried.
It is also no longer state of the art to place the valves individually in several locations in the garden. This used to be common practice to save on pipeline costs, but it brings with it disadvantages in operational handling that are far from offset by the comparatively small savings in material costs.
Wall Mounting
An equivalent alternative to placement in a valve box is a wall-mounted system. The components included are practically identical to the internal components of a solenoid valve box, but they are mounted in such a way that the system is suitable for wall mounting.
The advantage over a solenoid valve box is a comparatively lower price and easier installation. The disadvantage is that the valves cannot be elegantly concealed underground; instead, they are visible from the outside. This may not be a problem if the wall bracket is installed in a location that is not or hardly visible from the outside, or in a separate utility room, but in other cases it could make the garden look a bit cluttered.

Example of a valve distributor set suitable for wall mounting (Image: DVS Irrigation)
Automatic Water Distributor
An automatic water distributor is a way to do without solenoid valves altogether. This solution doesn’t work quite as professionally as a solution with solenoid valves, but it is significantly less expensive. Currently, the only product in this segment is the Gardena Automatic Water Distributor. It has 6 zone outputs and operates without electricity, instead using the pressure of the flowing water to switch from one zone output to another.
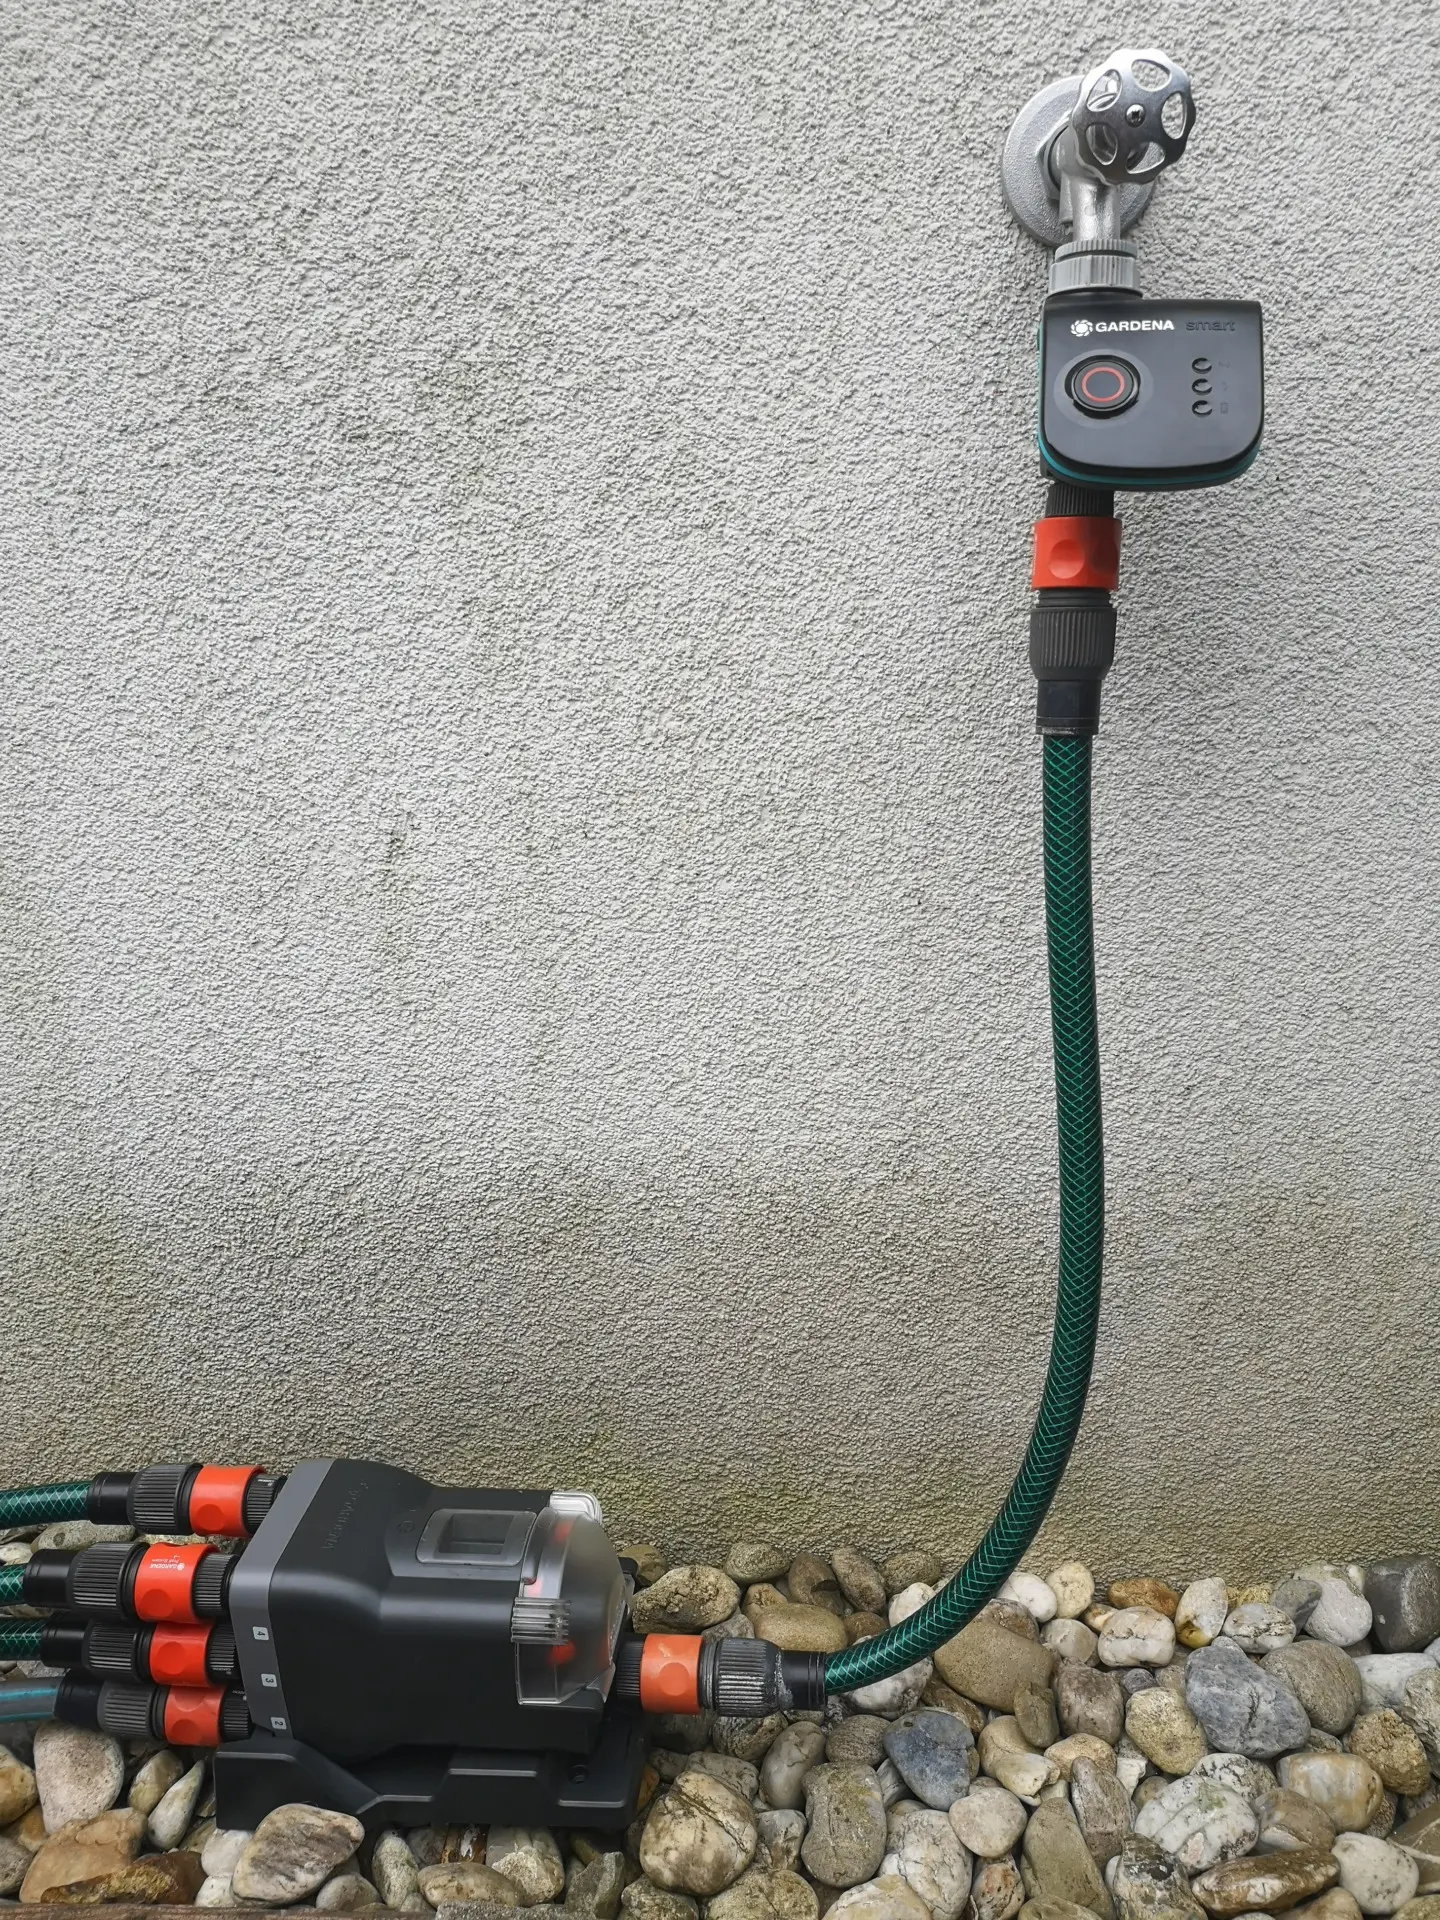
Gardena Automatic Water Distributor
For this to work, you need a different type of irrigation computer than the one used for switching external solenoid valves—namely, one through which the water flows. And its software must be compatible with the automatic irrigation computer; I explicitly point this out in the following irrigation computer comparison.
Irrigation Computers with Multiple Outputs
Theoretically, it’s even easier to use an irrigation computer with multiple outputs. Models with 2, 3, and even 4 outputs are available on the market; with the Orbit B-Hyve XD and the LinkTap Q1, there are even smart models with 4 outputs that can be controlled via the web.

Orbit B-hyve XD Irrigation Computer with 4 outlets
Should you buy a ready-made solenoid valve box or assemble it yourself?
Building it yourself is basically quite possible; all the necessary components are also available separately. The challenge is, on the one hand, to ensure everything is properly sealed and, on the other, to make the box compact enough to avoid taking up too much space in the garden.
You can only save a limited amount by building it yourself: Ready-made solenoid valve boxes for 6 zones cost around $400 to $500 in stores, with the cheapest options starting at around $300. Six solenoid valves alone cost around $150. A large empty jumbo valve box costs $70 to $100. Three valve manifold crosspieces cost around $25, and the seven required PE pipe connectors cost around $35. This brings the material costs to around $300, and that doesn’t include a filter, compressed air connection, ball valve, or moisture-proof box. These add up to another $80 to $100.
Ultimately, a maximum saving of $100 seems possible, but it involves a lot of effort and the risk of having to deal with leaks or purchasing incorrect components that don’t fit together properly. In my experience, DIY construction isn’t really worth it in this area. I would only recommend it if you need a solution outside of the standard range, e.g., because space isn’t available, or if it’s important to you to install very specific components in the box.
What should you look for when buying?
There’s a wide range of pre-assembled solenoid valve boxes on the market, some from well-known brands like Rain Bird or Hunter, and some from no-name suppliers. And some are also hybrids, e.g., no-name pipe connections and housings combined with branded solenoid valves from Hunter.
Brand or no-name?
My tip: I would advise against completely no-name products in this area, as the product quality is questionable and you run the risk of purchasing a product that is unreliable in everyday use and potentially causes a lot of trouble. However, I think a hybrid, where the essential components like the solenoid valves are from branded manufacturers, but the rest of the components are partly or entirely no-name, is worth considering. This could save you a few hundred dollars or more compared to a 100% branded product. In such a case, I would just pay special attention to ensuring the housing is sturdily built. Some boxes are offered that look quite delicate, and I have doubts about whether they’re even suitable for driving over them. The option with the lowest risk is obviously to go for the complete branded product.
Number of Zones
The first selection criterion is the number of zones you want to supply with the valve box. The box must contain at least that many solenoid valves, although it never hurts to have one or two zones in reserve in case you want to expand or modify something. Solenoid valve boxes aren’t available in any size; the largest I know of are for 10 zones, but usually they top out at 6. If you need more, you’ll have to install multiple boxes.
Direct or alternating current
Depending on whether you’re using a water computer with a power connection or a battery-powered water computer, you’ll need a box with 24-volt alternating current (AC) or 9-volt direct current (DC) solenoid valves. Most of the models available are 24V valves.
Size of the inlets and outlets
Boxes are available with 1-inch or 3/4-inch inlets and outlets, some packages allow you to select the size variable at the time of purchase. Ideally, you should buy a box that matches the planned connection sizes. So, if you have a 1-inch supply line, choose one with a 1-inch connector on the inlet side, and if you’re using a 3/4-inch pipeline on the zone side, choose one with a 3/4-inch connector on the outlet side.
Included extras
If you haven’t planned a drain valve or a deep-seated ball valve in your irrigation system for frost protection, then a compressed air connection included in the box is mandatory. In conjunction with the compressed air connection, a ball valve on the inlet side is a great advantage, as it makes it very easy to avoid the compressed air blowing toward the water source.
A filter is also required if you haven’t already planned for one elsewhere. This is even more important if you are also operating micro-irrigation zones.
A damp-proof box is also perfectly fine; it simplifies the initial installation. Alternatively, you can easily make the waterproof connections yourself using suitable accessories.
