In this post, I’ll describe the functionality of the HomGar app for RainPoint irrigation computers with web connectivity. RainPoint currently offers three different apps for its irrigation computers, although not all computers work with every app. I’ll describe the two other apps, RainPoint Tuya and RainPoint Home, in the following two blog posts:
Blog post: How the RainPoint Tuya app works
Blog post: How the RainPoint Home app works
The HomGar app works the same for all RainPoint computers compatible with HomGar, regardless of the specific RainPoint model selected. In this article, I will describe the individual features in detail and conclude by discussing how the RainPoint software compares to the two other RainPoint apps and the competition.
RainPoint Product Overview
Before, here’s a quick overview of the currently available RainPoint models that use the HomGar software presented here. The screenshots refer to the model with two outputs. The model with one output has the same functionality, but, logically, only one output can be programmed.


Main Menu/Navigation
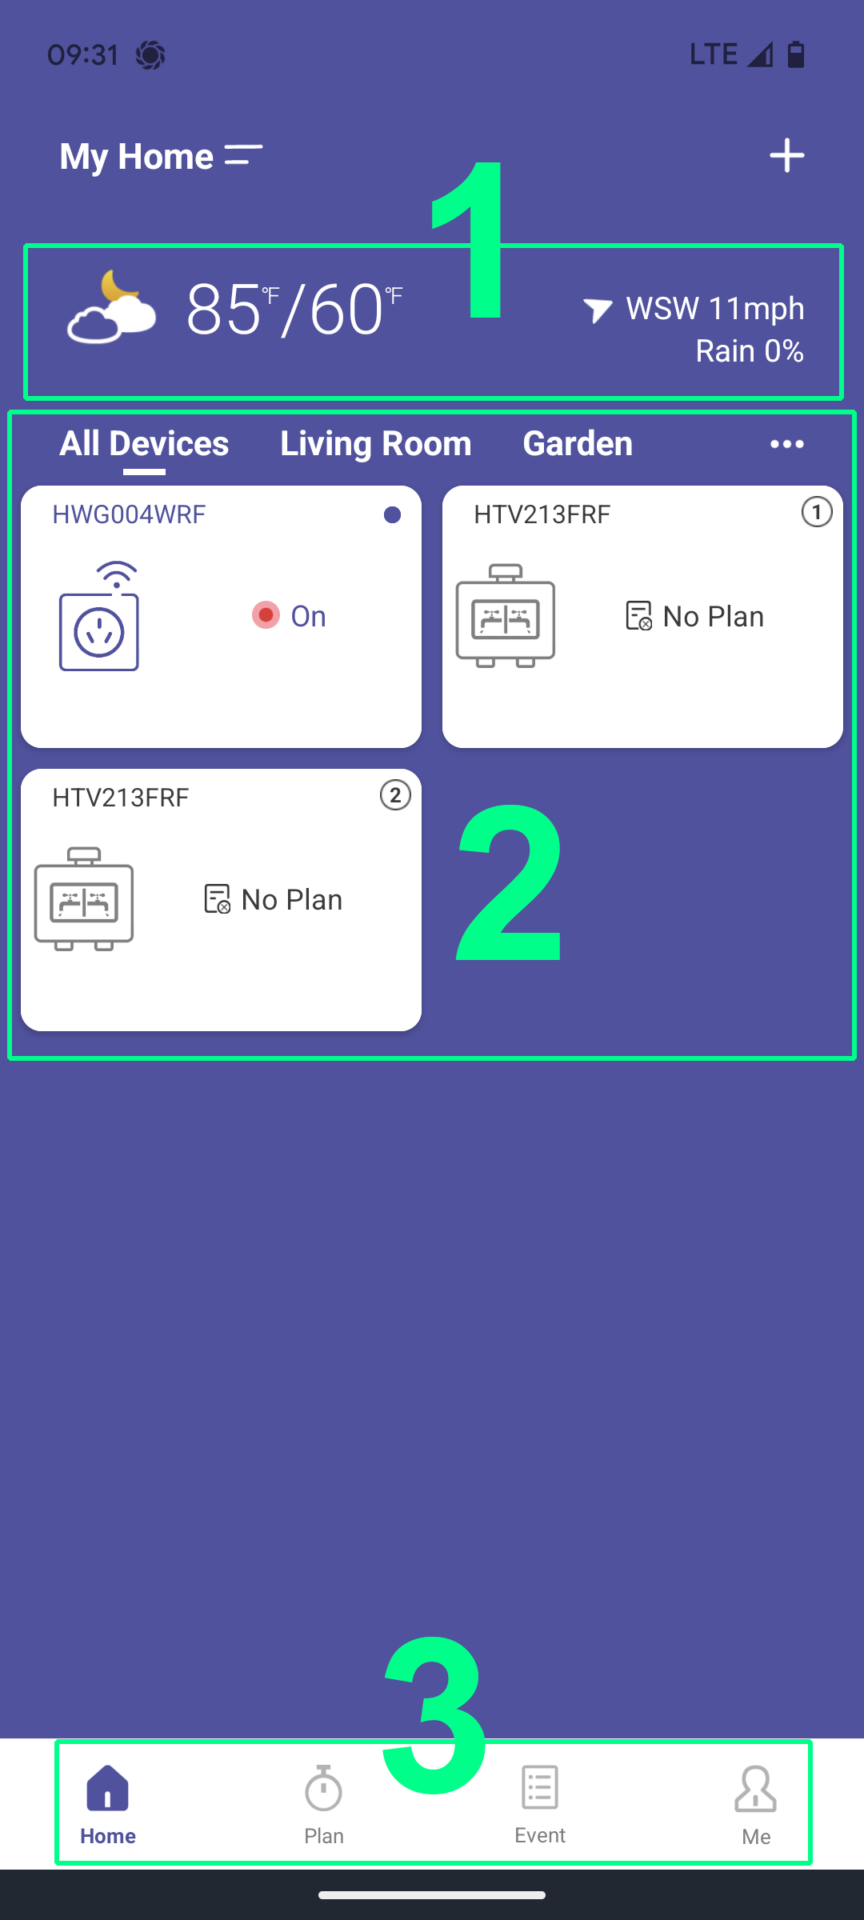
When you start the app, the following overview appears, from which you can navigate to the individual functions:
- HomGar
At first glance, this view appears very tidy and pleasant. It is essentially divided into the following sections:
- Weather display
- Overview of connected devices
- Main menu
In the following screenshot, I have visually highlighted the three sections:
The first section, the weather display, is purely informational. No functions are based on the displayed weather. The local weather is displayed based on the stored location. This information can be used to pause irrigation, for example, if very rainy weather is forecast. Clicking on the weather section displays even more detailed weather information, including a 24-hour and 7-day forecast, including the probability of rain.
- Displaying the weather for the coming week
The second section displays the devices connected to the software. In my case, this is the gateway itself, which establishes the connection with the irrigation computer. And the irrigation computer itself, which is displayed twice, as each output of the computer is represented as a separate device.
The third section is the actual main menu with four different menu items. The Home menu item leads to the previously introduced home page.
Creating an Irrigation Program
To create a new irrigation program, click on the irrigation computer in the Home menu and then select the “Plan” menu item. You can add a new irrigation program by clicking on the plus symbol in the top right corner.
- A new program is added by clicking on the plus symbol.
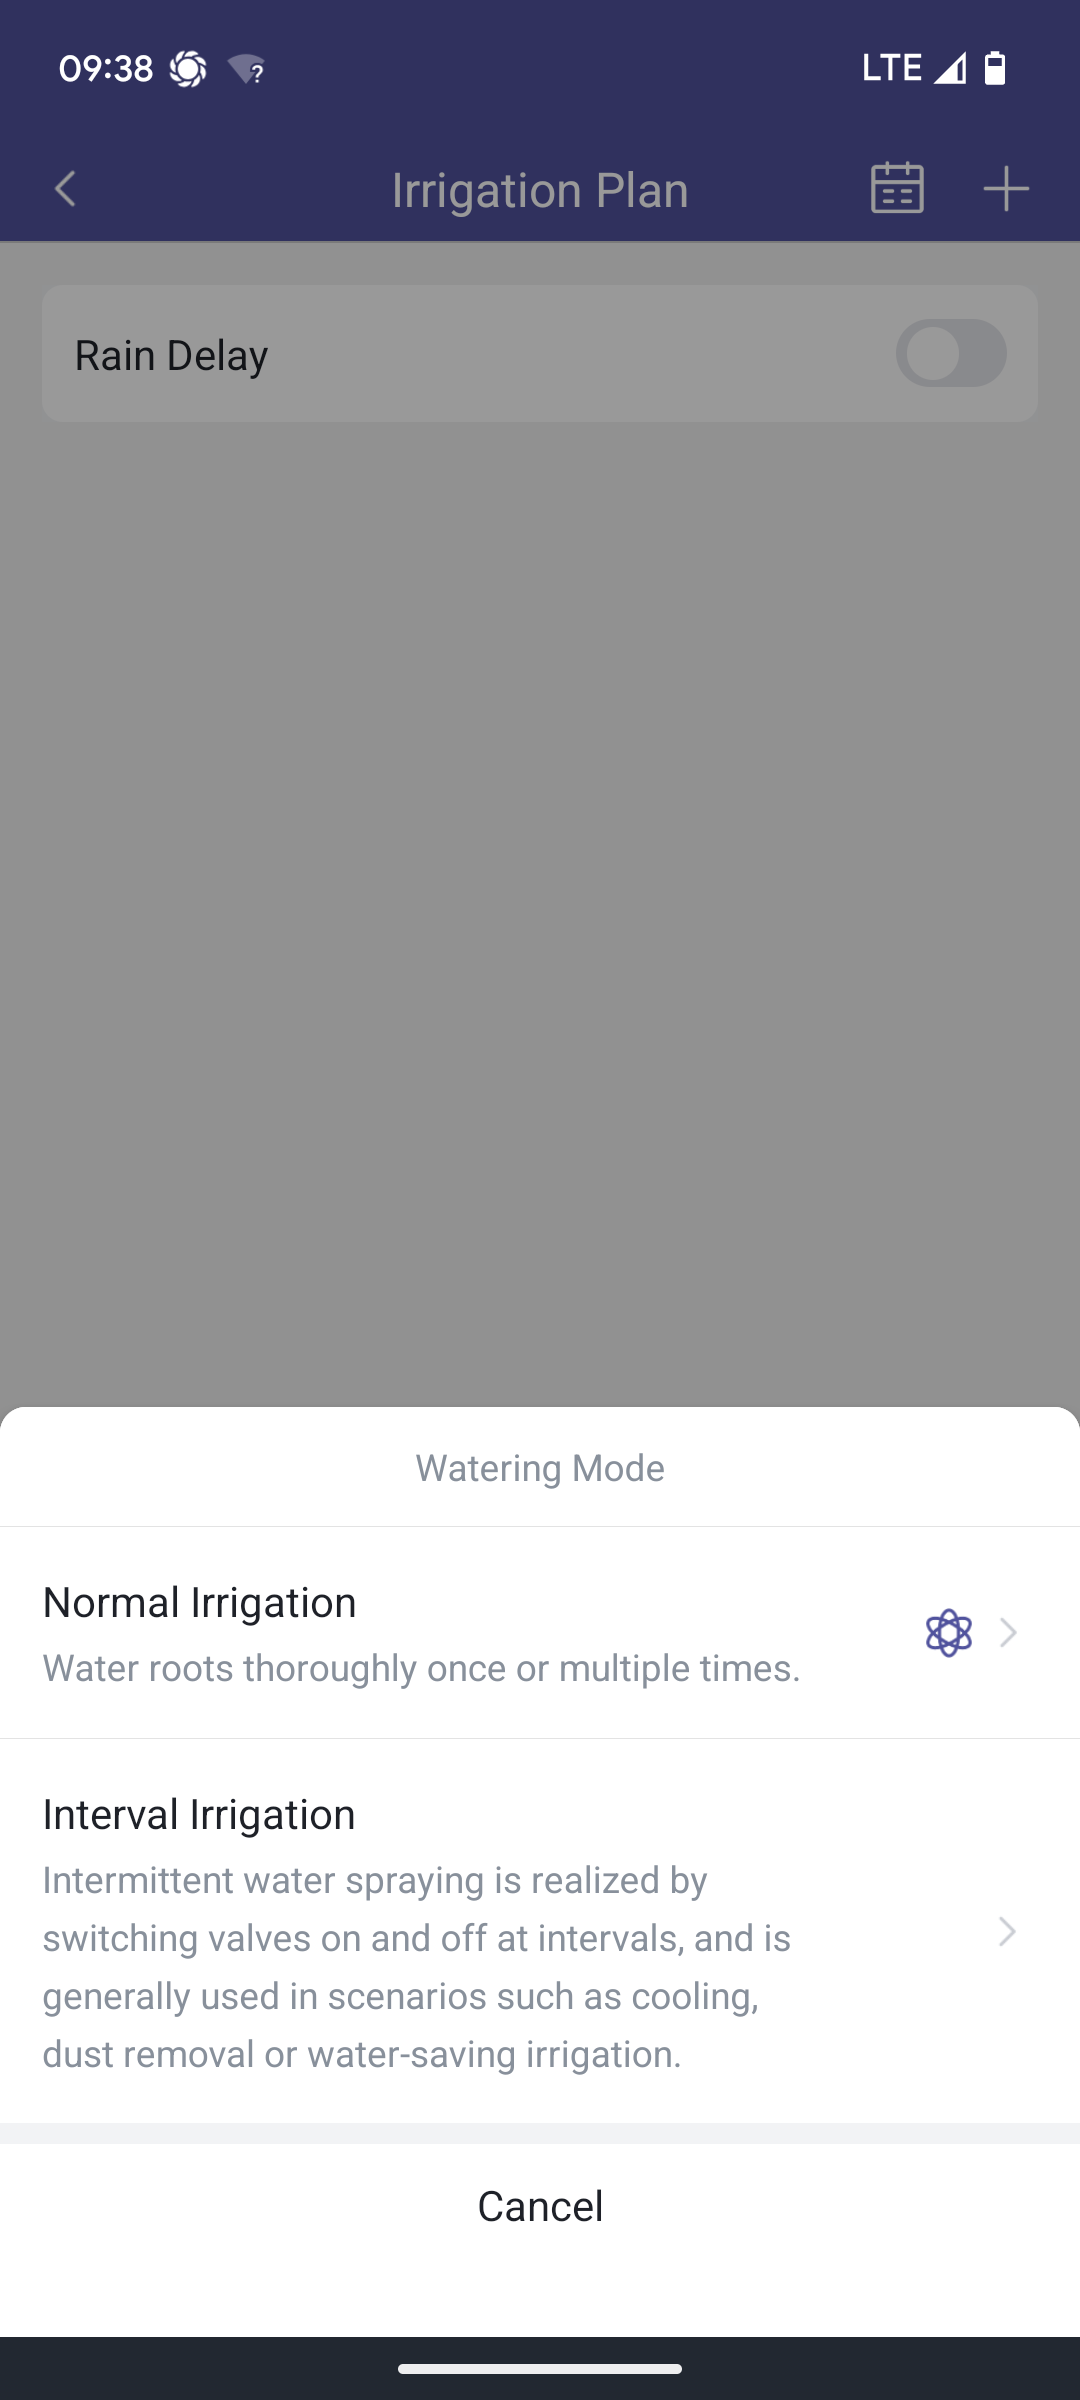
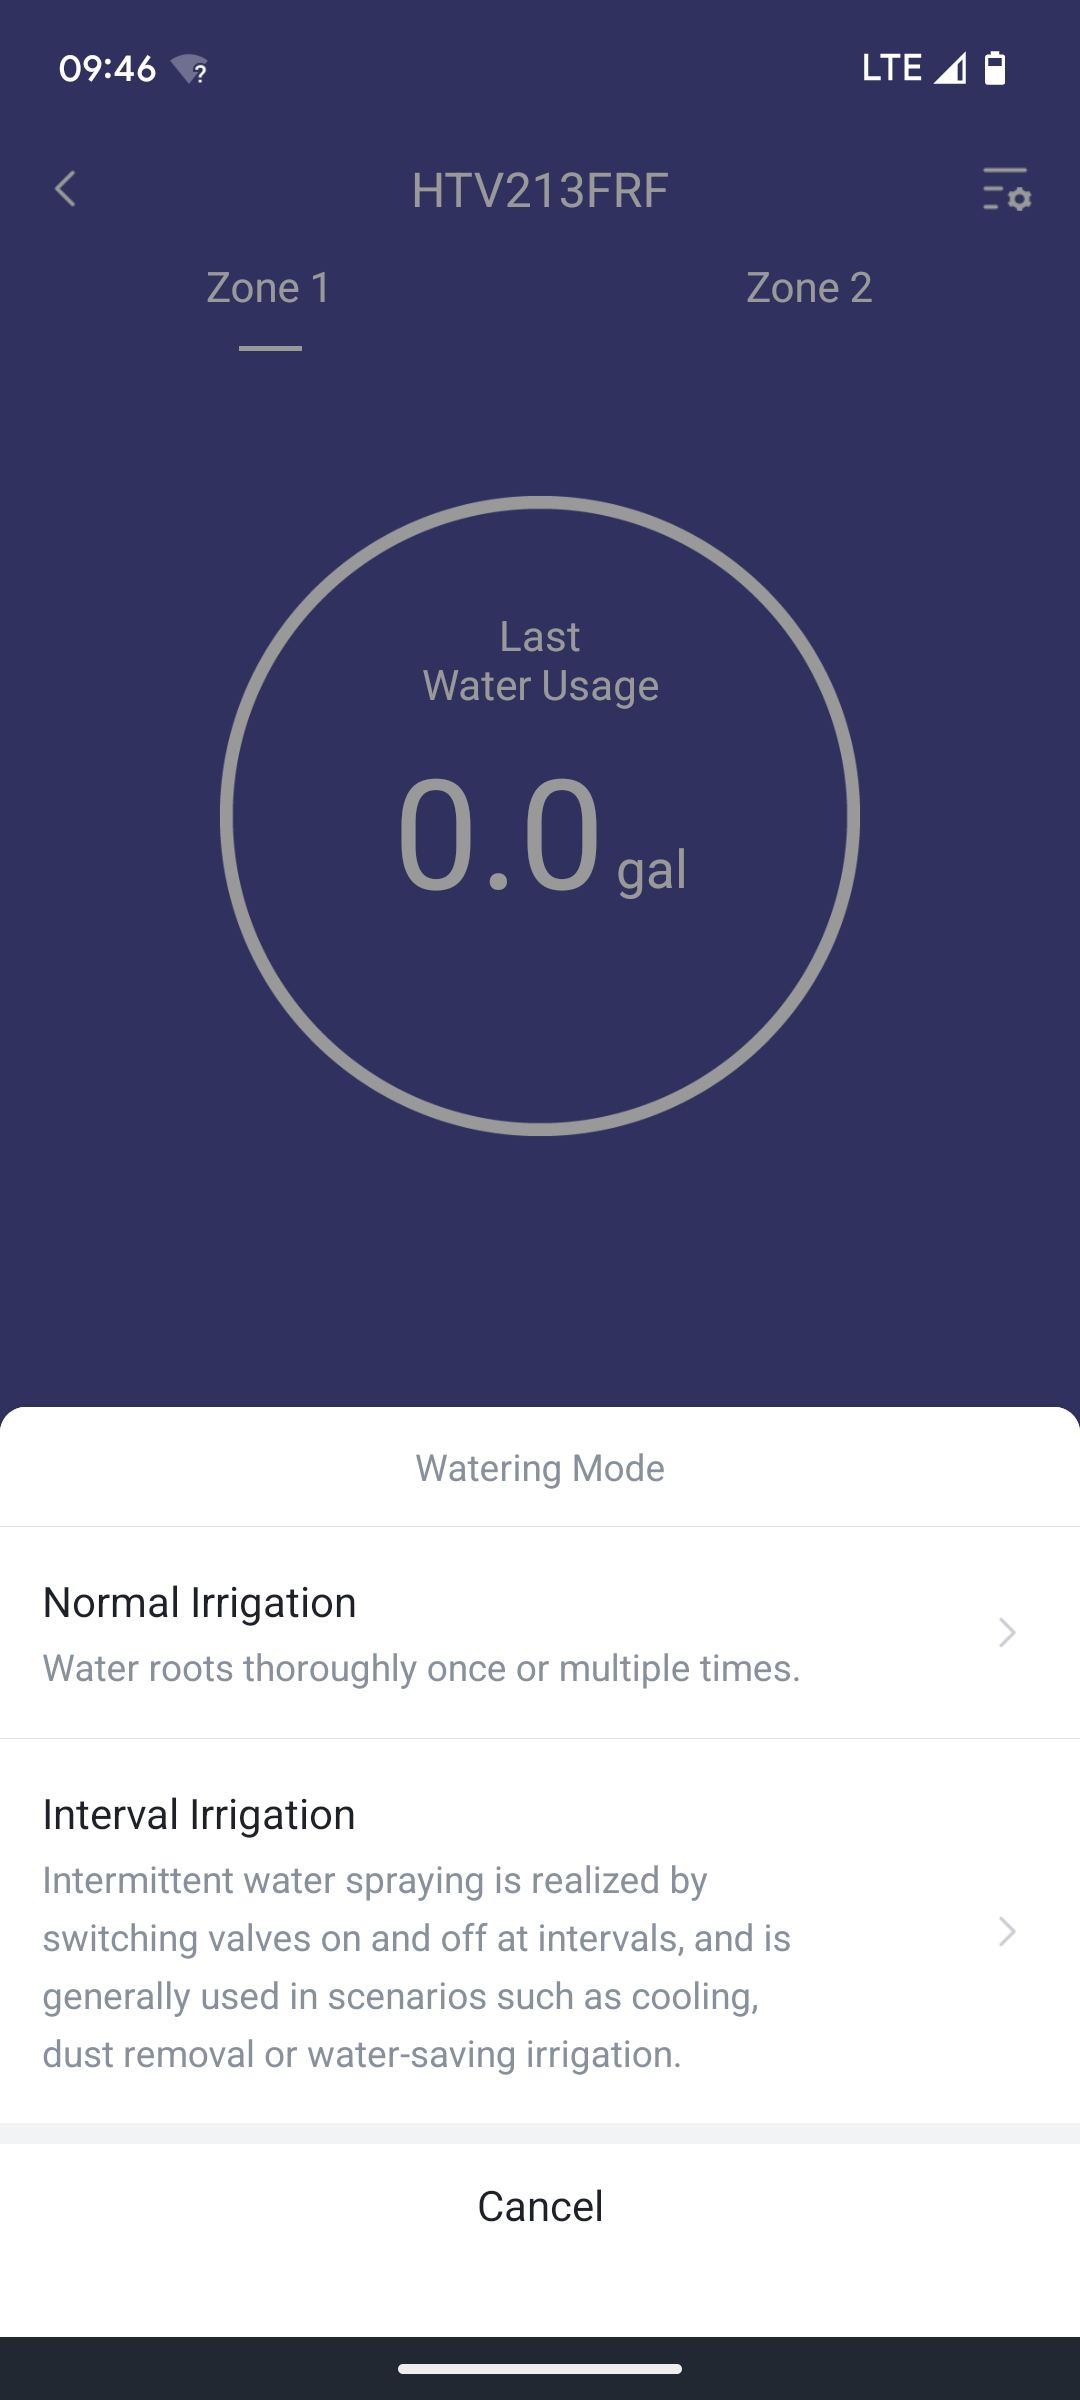
Before creating a new program, you must select the basic irrigation mode:
- Selecting the irrigation mode
You can choose between “normal irrigation” and “interval irrigation,” although the two modes are rather misleadingly named. Interval irrigation, as we usually know it, i.e., where you repeat a watering cycle at specific intervals, is not created under “interval irrigation” but in normal mode.
Interval irrigation, on the other hand, includes the function that other manufacturers call the “cycle and seepage function,” in which the system divides irrigation cycles into irrigation and waiting phases to allow for better water seepage.
Below is a description of the form for “normal irrigation runs”:
- Setting options in normal irrigation mode
- Start Time – Specifies when the watering run starts
- Duration – Duration of the watering run
- Repeat – Here you can either specify an interval at which the watering run should be repeated (daily, on odd days, on even days), or you can specifically select the days of the week on which watering should take place.
- Water Usage Limit – You can also specify a maximum amount of water to be watered here, which must not be exceeded. If this limit is reached before the specified run time has elapsed, the watering run will end early.
The blue atomic nucleus symbol, which appears in some places, indicates values suggested by the system. These are based on a small amount of information about the garden that can be stored in the app; see the “Zone Default Settings” and “Zone Information” sections.
Cycle and Soak Function (Interval Irrigation)
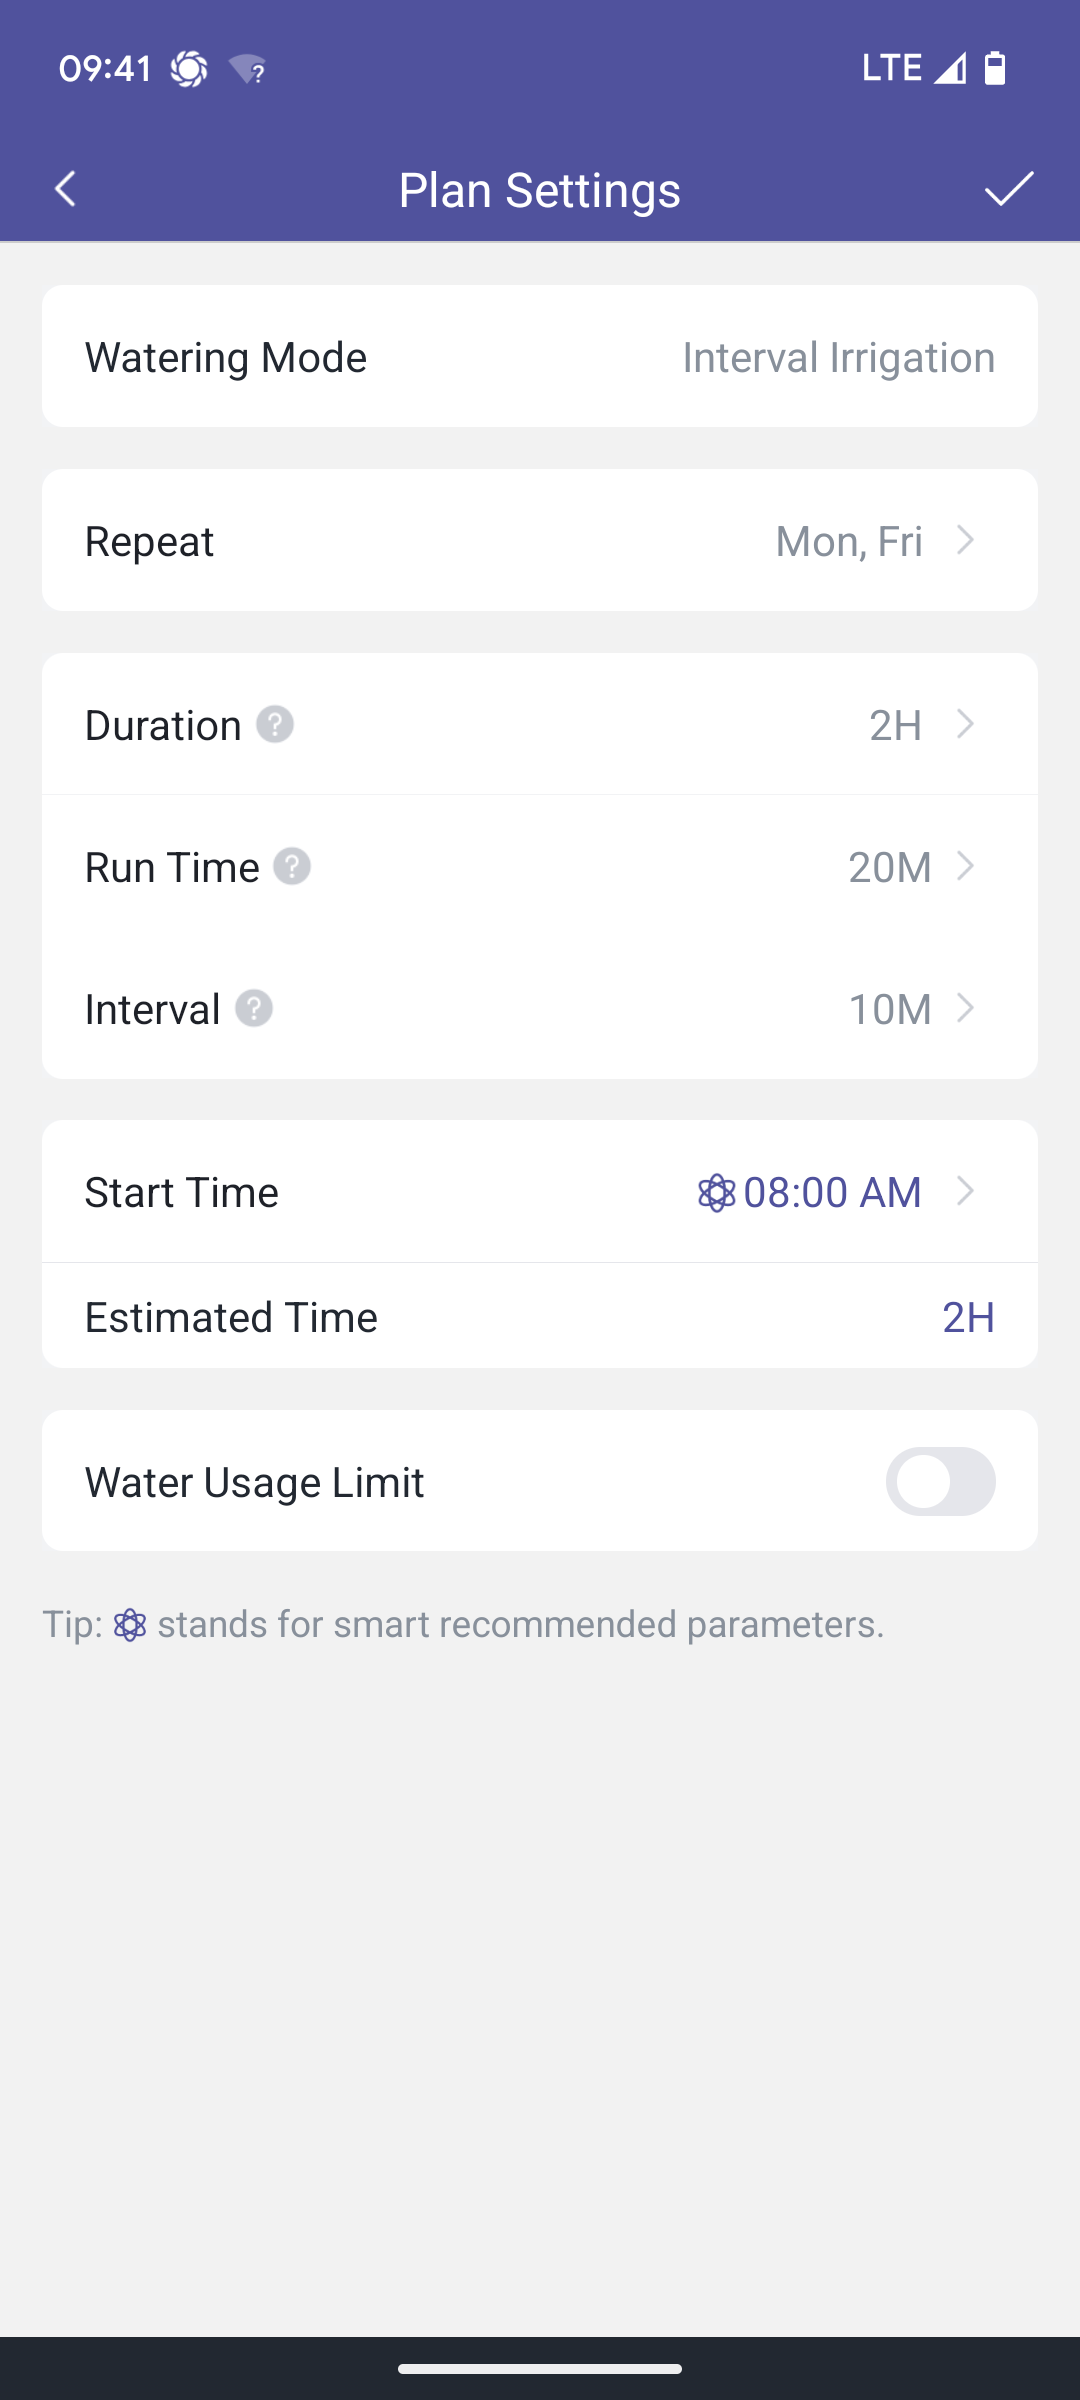
As already mentioned, the second program mode is the function commonly known as the Cycle and Soak-Off function. The setting options are essentially the same as before, with the addition of two additional parameters: Runtime and Interval:
- Interval Irrigation Setting Options
- Runtime – Sets the duration of the irrigation phases. Irrigation continues for this time until a pause occurs.
- Interval – Sets the duration of the pauses. This time is paused after each irrigation phase.
For example, if the runtime is 30 minutes and the interval is 15 minutes, irrigation will continue for 30 minutes, then a 15-minute pause, then another 30 minutes, then a 15-minute pause, and so on. This continues until the specified duration is reached.
A small disadvantage of this implementation compared to competing systems is that you may have to do some calculations yourself to achieve your desired result. For example, if you want the lawn to be watered for 60 minutes, but then take a 10-minute break every 20 minutes, you have to consider that first you water for 20 minutes, followed by a 10-minute break, then another 20 minutes of watering, then a 10-minute break, and another 20 minutes of watering. Adding all of this up, you get a total of 80 minutes, which you would have to enter under Duration for the irrigation to work as desired.
Why do you even need such a cycle and soak function? Typically, for very clayey soils that cannot absorb water so quickly and where too much water would run by unused, you would run the irrigation cycle without breaks. The same applies to very sloping surfaces.
RainPoint brings another function into play here and also calls this mode mist mode. This means that you use the mode to create a cooling mist at certain intervals, like some cafes do outdoors during the summer months.
Limited Flexibility
The maximum number of possible programs is limited to six. Compared to most competing systems, this means significantly limited flexibility in irrigation because:
- Only one start time per day can be defined for each program.
- Only one duration can be defined for each program.
- Within a program, it is not possible to differentiate between the start time and duration by day of the week.
For comparison: With other systems, such as the one from LinkTap, multiple start times and different irrigation durations can be defined per day. And these can be defined variably for each day of the week. Since this is not the case with RainPoint, you quickly need a larger number of programs for a somewhat more flexible irrigation schedule, so the six available per outlet could be quite limited. For 95% of users, these will be sufficient, but if you plan to do something a little different from the norm, then you should keep this limitation in mind!
Display of the created irrigation programs
Created programs are displayed in the Plan menu. This menu exists twice: once at the irrigation computer level and once at a higher level in the main menu. There, you can see which programs are active for all existing outputs of the irrigation computer, and under “Plan Bypass” you can see whether an irrigation pause is currently active or not (more on this below). If you want to edit an existing program, simply click on it.
- Overview of the active irrigation programs
Calendar overview of scheduled irrigation cycles
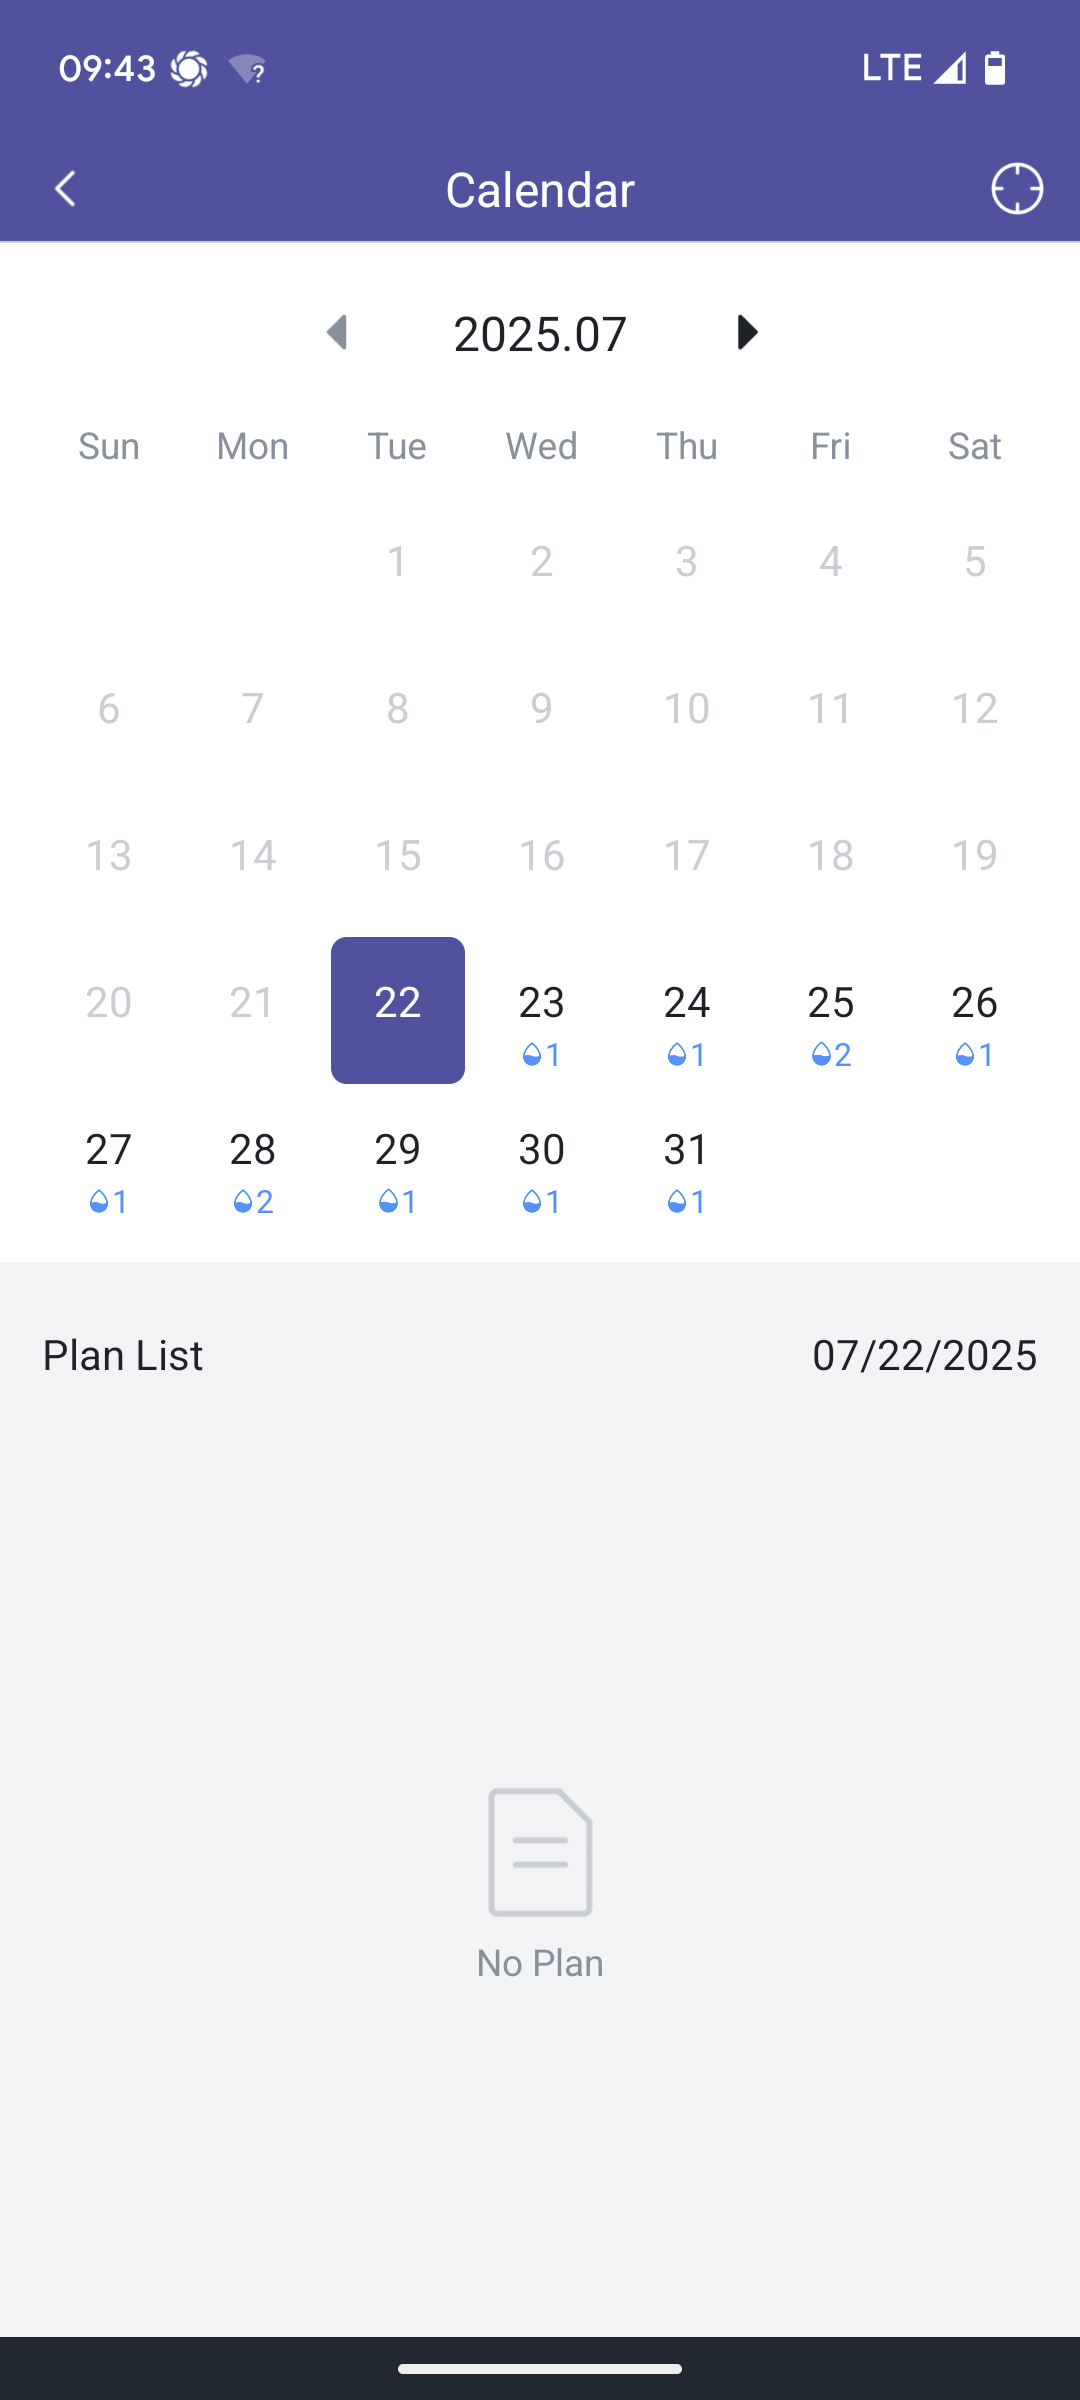
You can also view the scheduled irrigation cycles in a calendar overview by clicking on the calendar icon.
- Calendar overview
Irrigation pause (bypass)
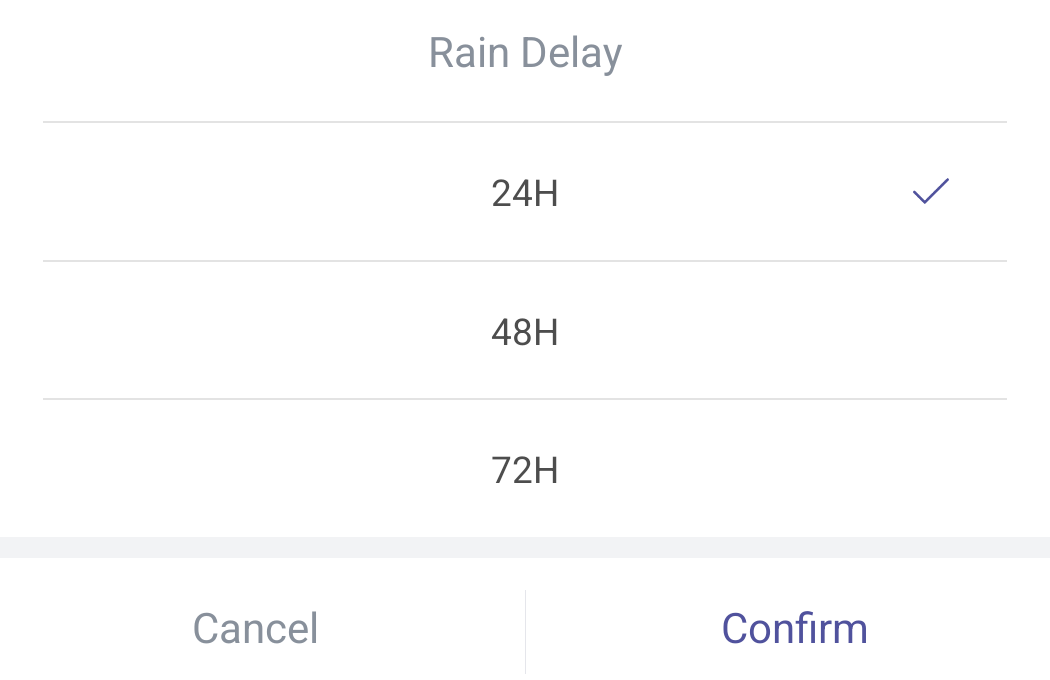
You are also offered a “bypass” option. This pauses irrigation for 24, 48, or 72 hours. This can be useful for manually responding to rainy weather and thus avoiding unnecessary watering. Or for suspending scheduled irrigation cycles as an exception, for example, if a barbecue is taking place in the garden during the scheduled watering time.
The pause is set for each output of the irrigation computer. Unlike competing products, there is no option to set the pause indefinitely, which can be useful at the end of the season, for example. The RainPoint HomGar software does not automatically set the pause based on weather data.
- Setting an Irrigation Pause
Event (Alerts)
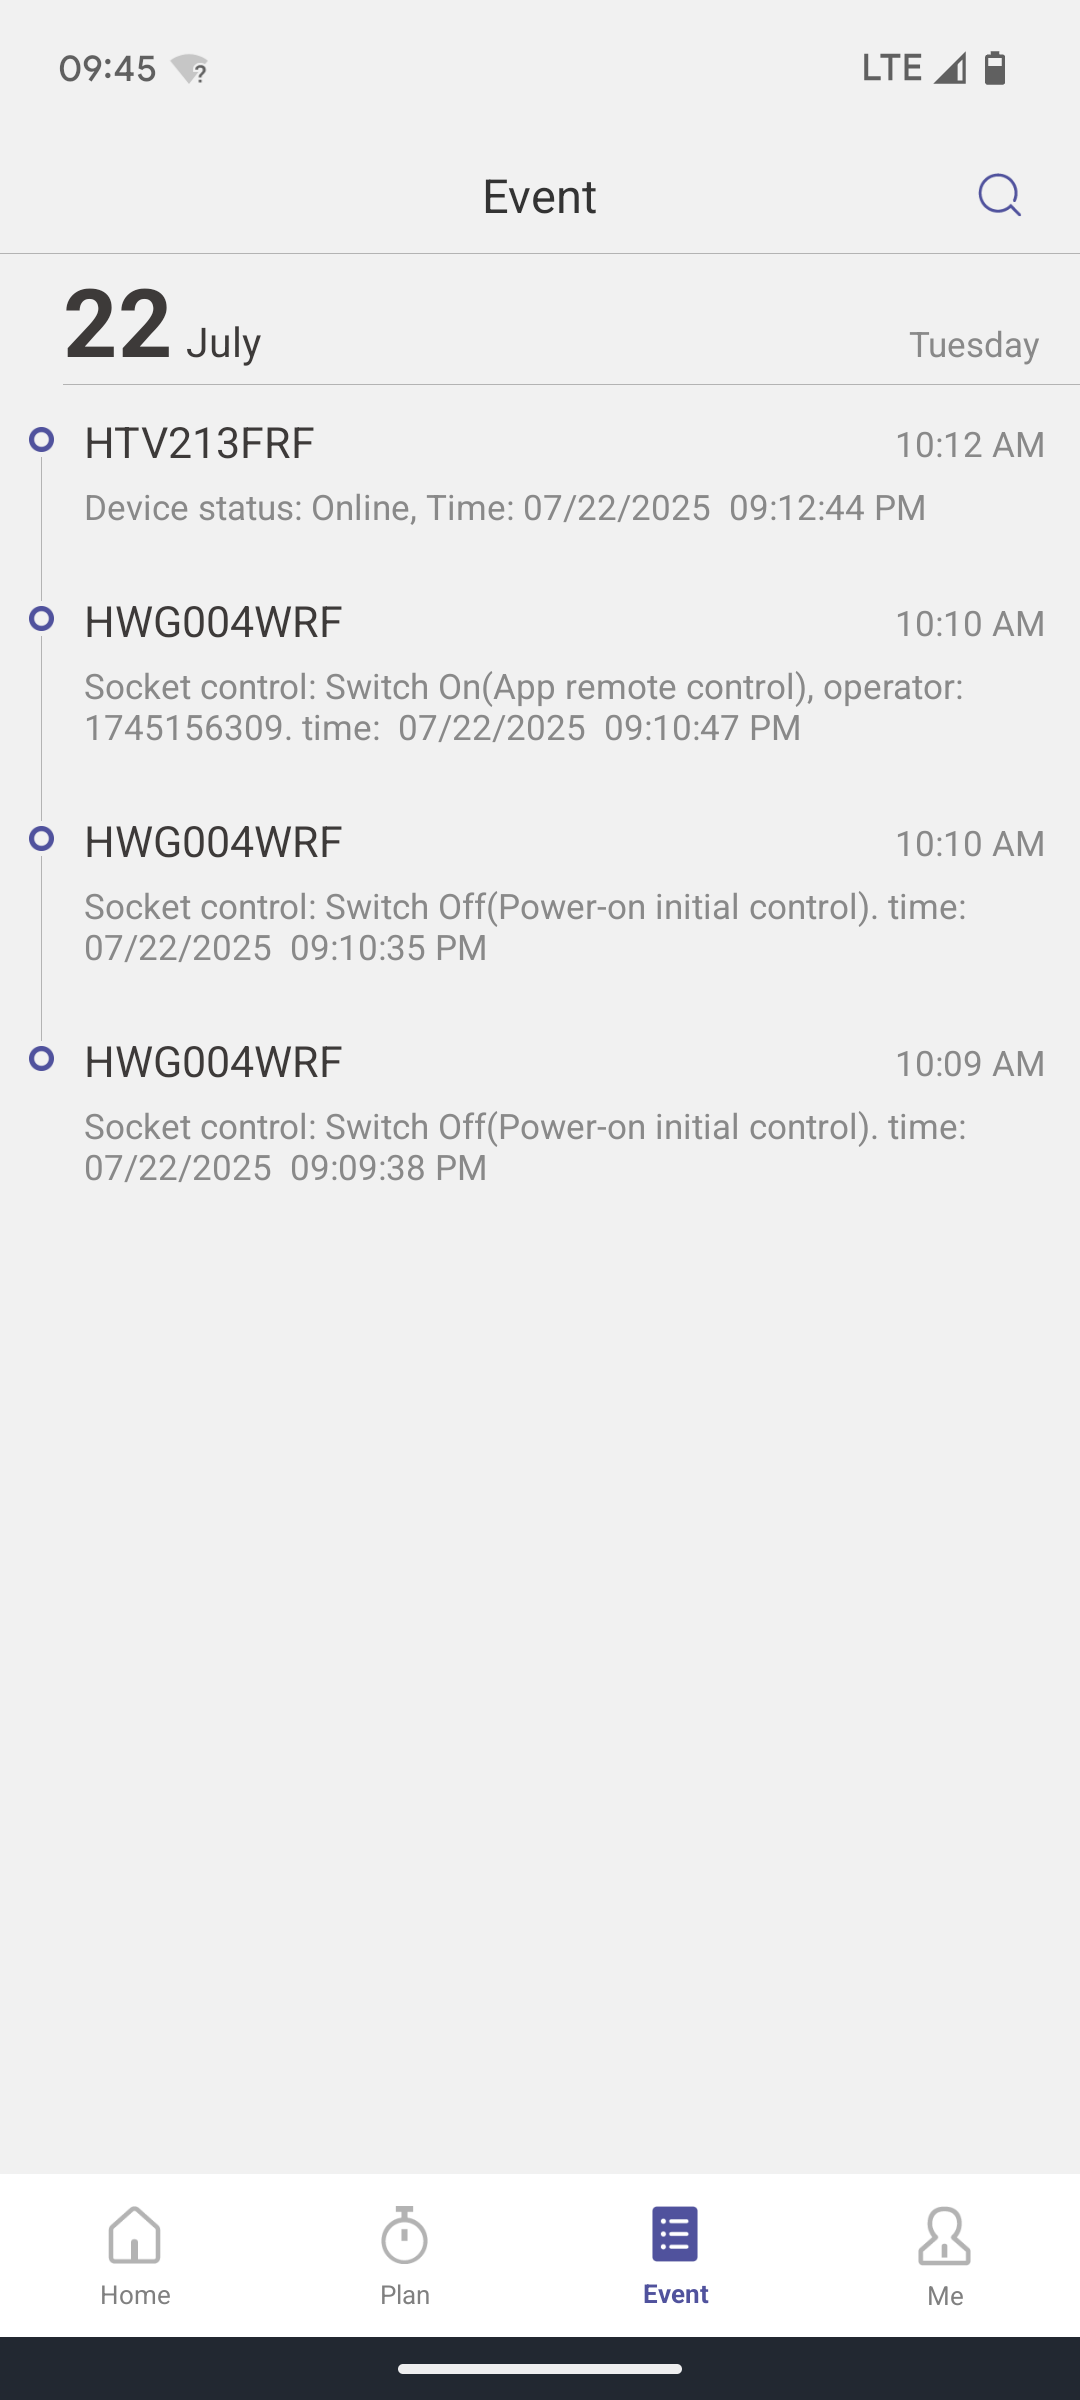
Under this menu item, you can access some recorded events.
- Event log
These include:
- Completed watering cycle
- Recorded water consumption
- Various warnings about water leaks, low temperatures, etc.
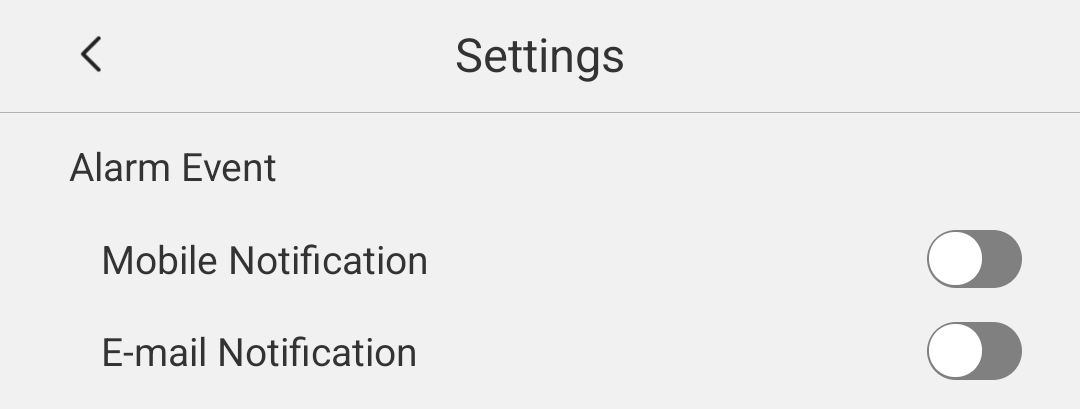
By clicking on the lens, you can limit the display to specific event types. By default, these events are only logged and can then be accessed here. However, some of them only really make sense if you are actively notified about them. To do this, you can activate notifications in the settings both via mobile (= push notification on your phone) and via email (= email notification).
Note: What’s really poorly done here is that you can’t distinguish between the events you want to be notified about and those you don’t. If you activate the actually useful notification on your phone or via email, you will be inundated with notifications from now on, including, for example, every watering cycle that has taken place.
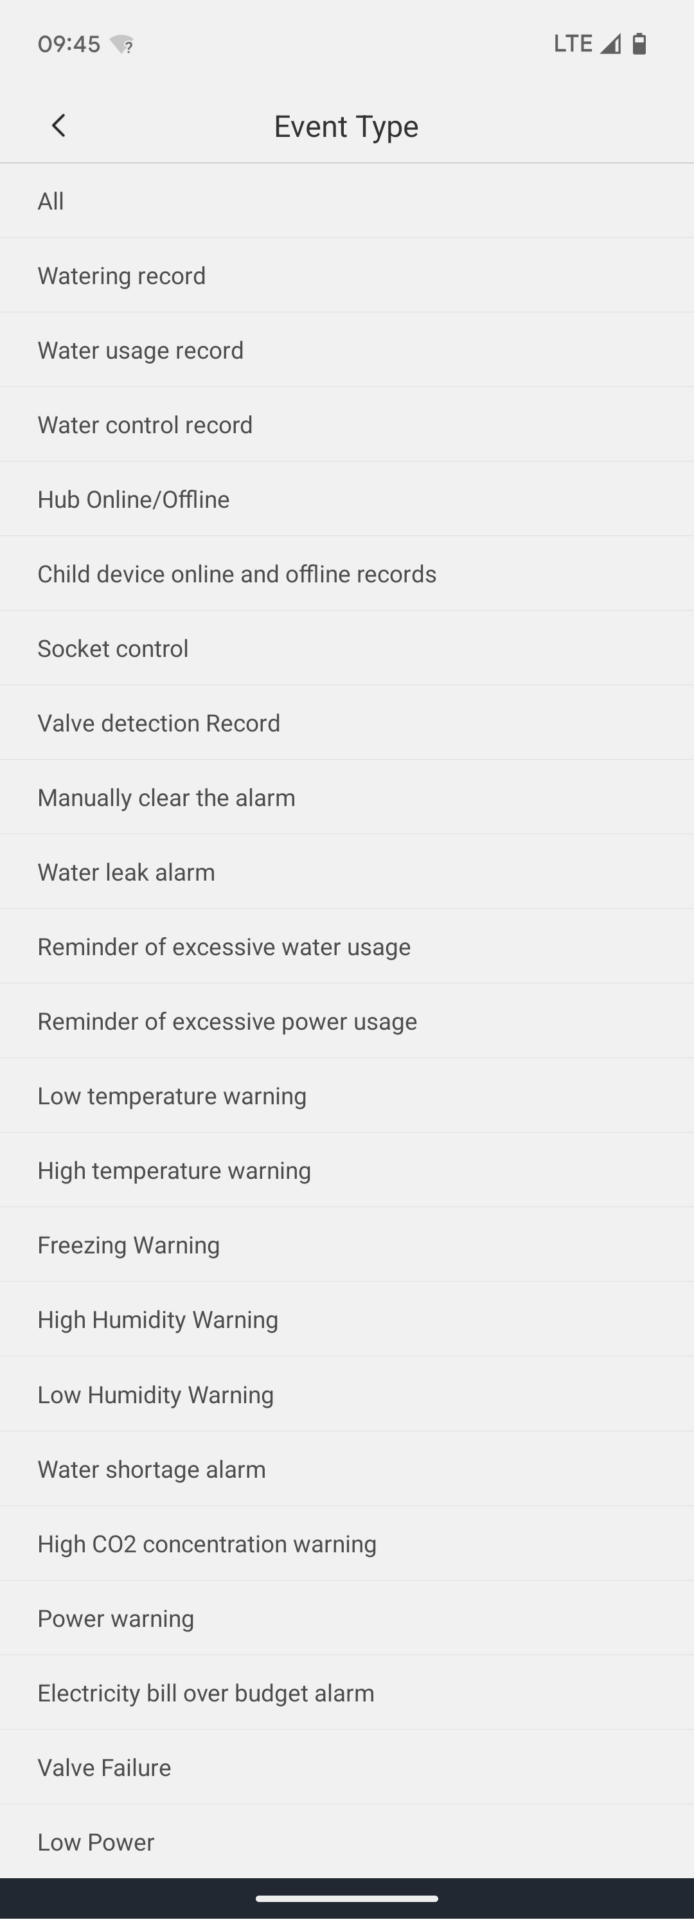
The following events are listed in the RainPoint software, although some of them refer to smart devices other than the irrigation computer:
- Events
Basic Settings
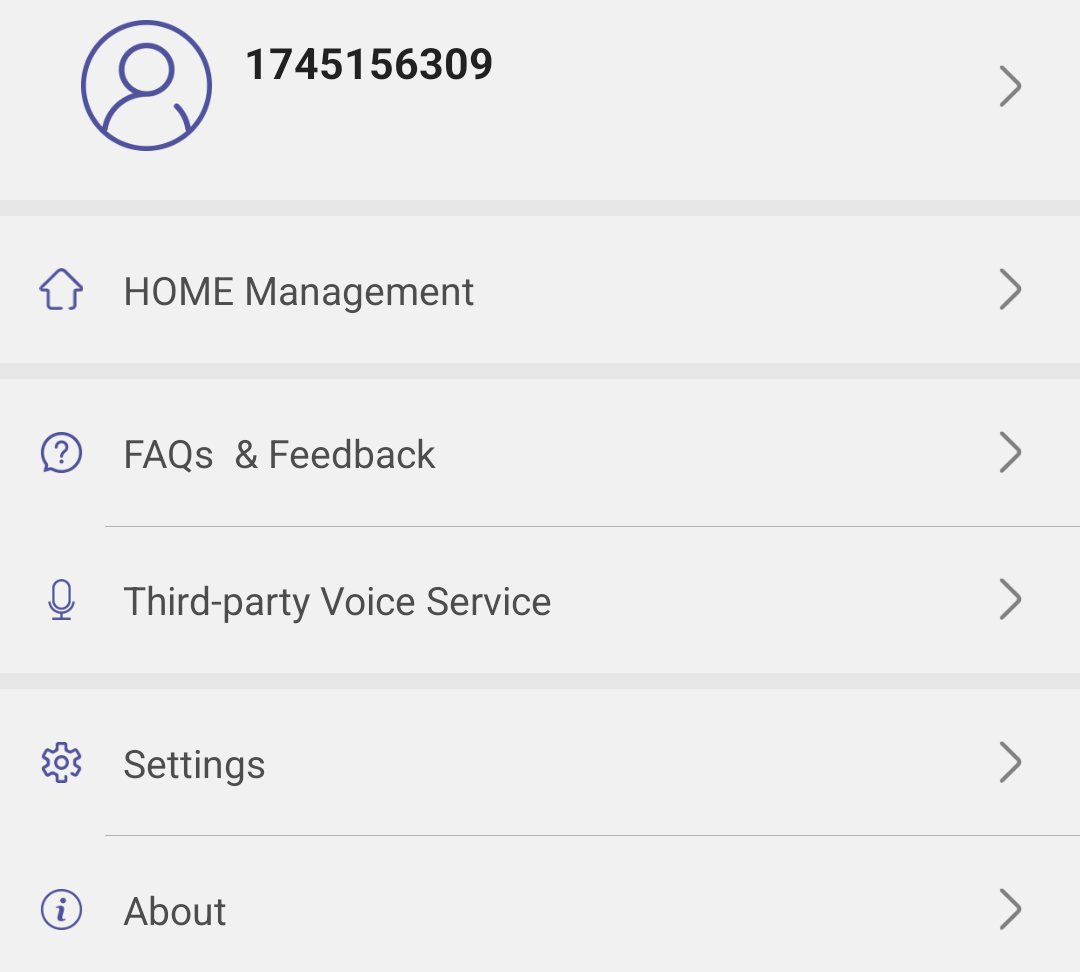
All basic app settings are managed here. The following menu items are available:
Personal Data
By clicking the arrow next to the person icon, you can edit personal data such as your email address and password, and add a profile photo if desired. You can also delete your account here.
Home Management
Here you can edit names, management zones, and the location where irrigation takes place. The last option affects the weather information displayed in the app. You can also set which units, time zone, and currency the app uses.
Invite Additional Users
Also located in Home Management is the option to grant additional people access to the irrigation control system. To do so, simply enter the email address of the user who should have access.
Important and not mentioned anywhere in the app: For this to work, the user must first create a Homgar app account with this email address! Only users previously registered with Homgar can be invited. Once the user logs into the account, they can accept the invitation.
FAQs and Feedback
Here you’ll find the most frequently asked questions and answers about the app and user manuals for all watering computer models.
Third-party voice services
Here you’ll find two instructions on how to integrate the HomGar app with Google Assistant or Amazon Alexa and thus perform some of its functions using voice commands. For example, “Ok Google, turn on water timer” starts watering. “Ok Google, turn off water timer” stops it. If you have multiple devices/outputs stored in the app, you must also state the device name: “Ok Google, turn on water timer (device name).”
Settings
Under Settings, you’ll find the important option to actively be notified of events that have occurred. You can activate a push notification on your phone or have the notification sent via email.
You can also change the app language (currently, there are 7 languages to choose from) and choose between different app designs, thus changing the appearance (backgrounds, font colors, etc.) of the app.
About
In addition to various legal information such as the privacy policy and user agreement, you can also actively search for updates for the app here.
Manual Irrigation Run
As an alternative to creating an irrigation program that is then repeatedly executed in the same way, you can also simply start a manual irrigation run. This is done by accessing the irrigation computer menu under Home. By clicking on the “Manual” menu item, you can start a spontaneous irrigation run.

Here, too, you can choose between normal mode and interval mode:
- Selecting the Irrigation Mode
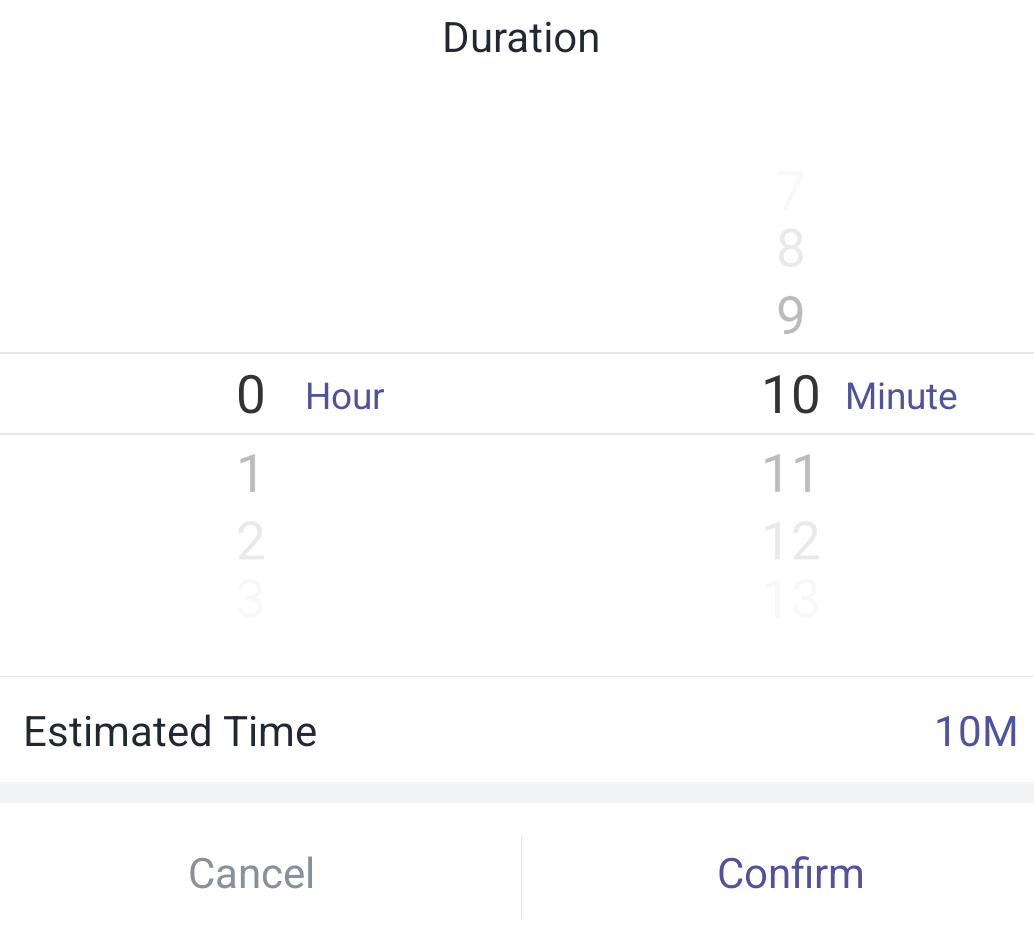
With the first mode, you simply specify the desired run time. Watering a specific amount of liters, as offered within a program, is not possible in the manual irrigation run.
- Normal Mode
In interval mode, you specify the runtime and interval in addition to the duration, so that watering is always interrupted after the specified runtime:
- Interval Mode
During the manual watering run, the remaining time is displayed. You can interrupt the run prematurely at any time by clicking “Manual” again.
Gateway Settings
Selecting the gateway in the Home menu and then clicking the Options icon in the top right will take you to the gateway settings:
- Gateway Settings
You will rarely need these options in practice. The most likely time to need them is when there are problems with the wireless connection. You can check the signal strength and change the communication channel here.
Irrigation Computer Settings
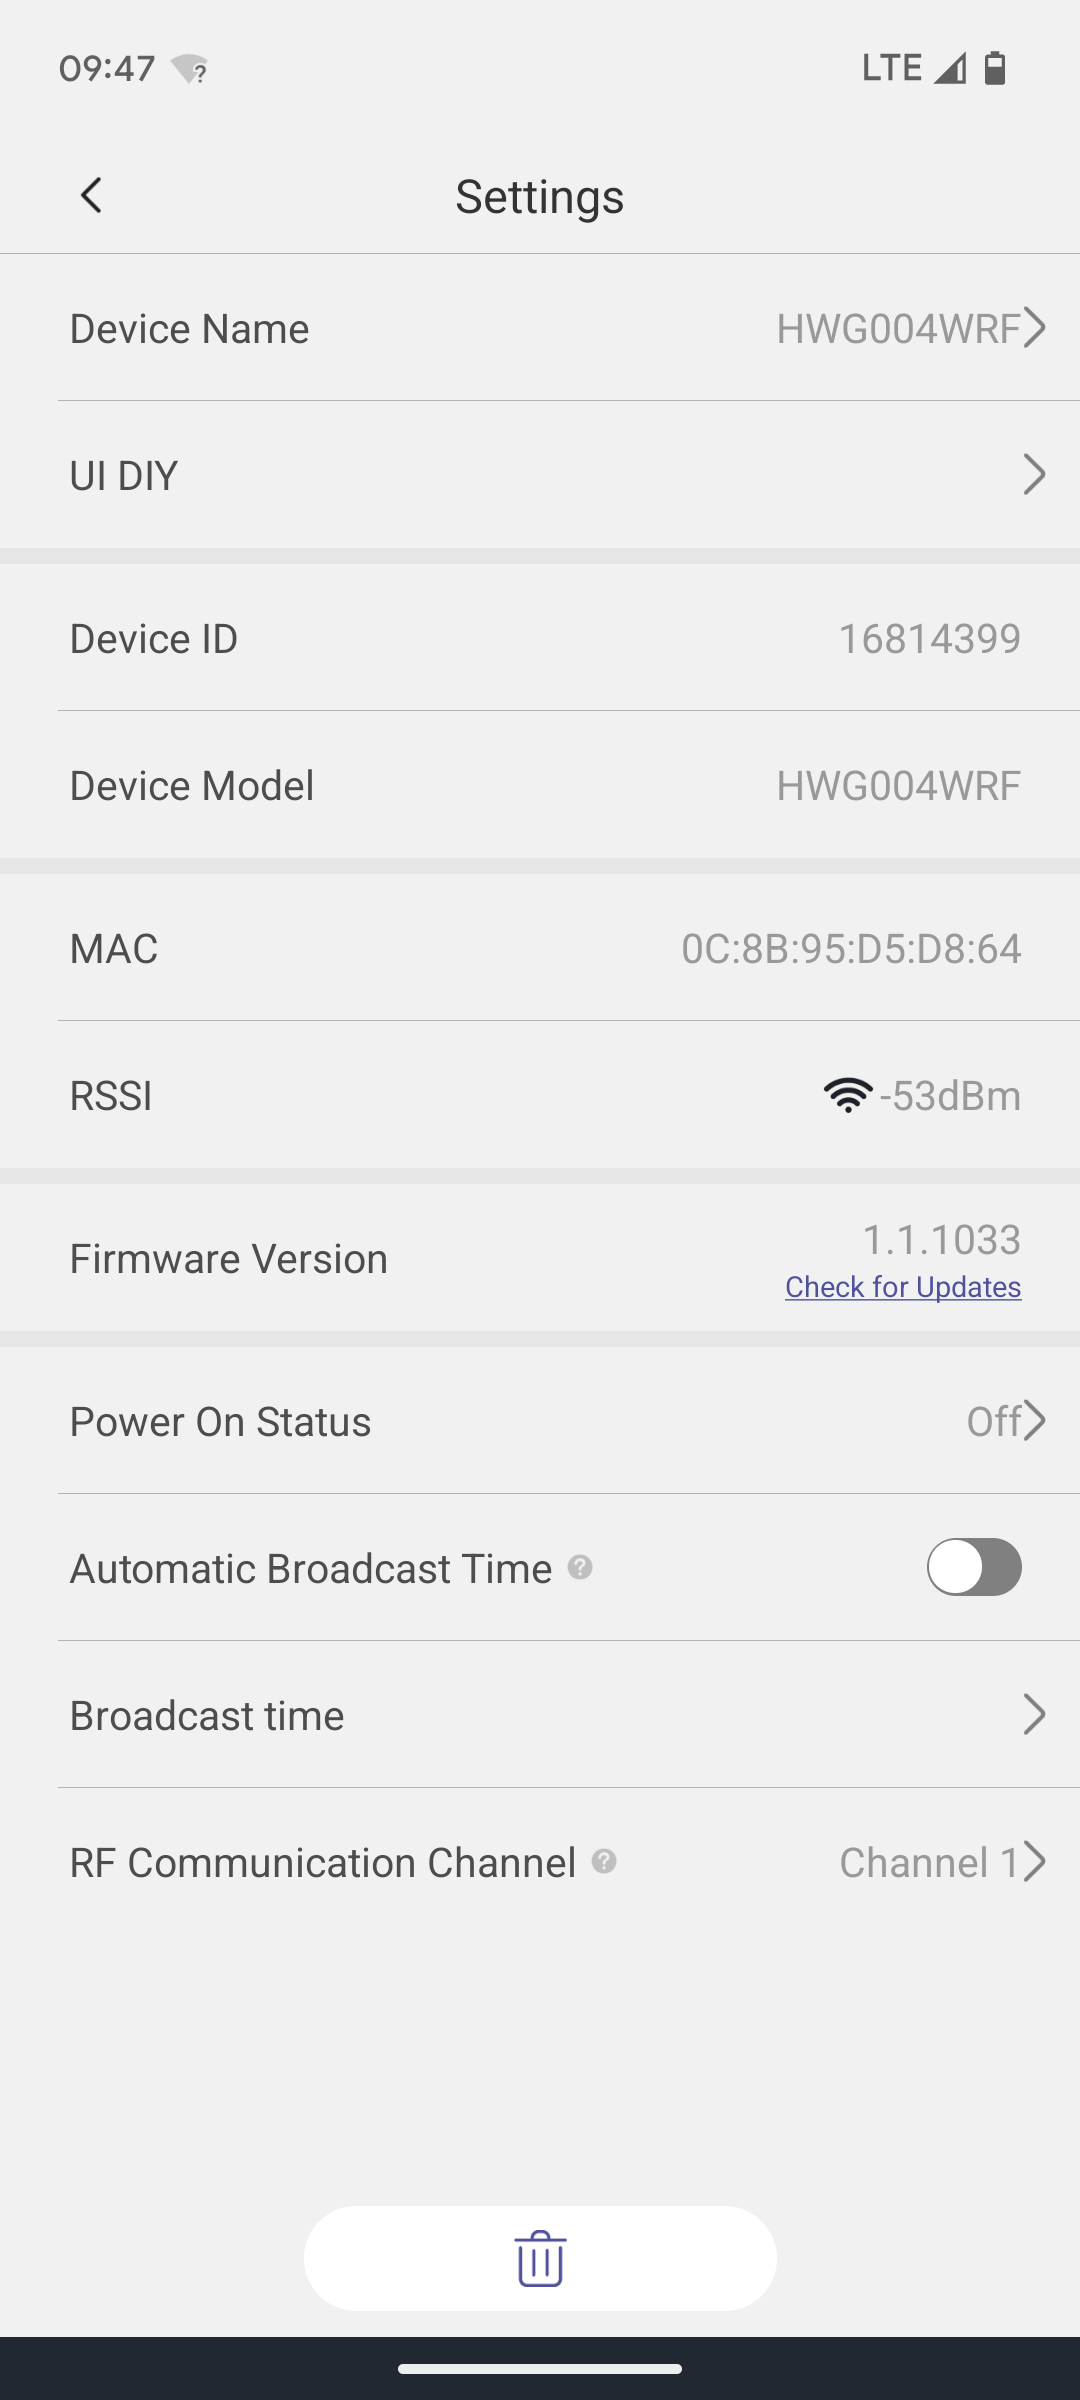
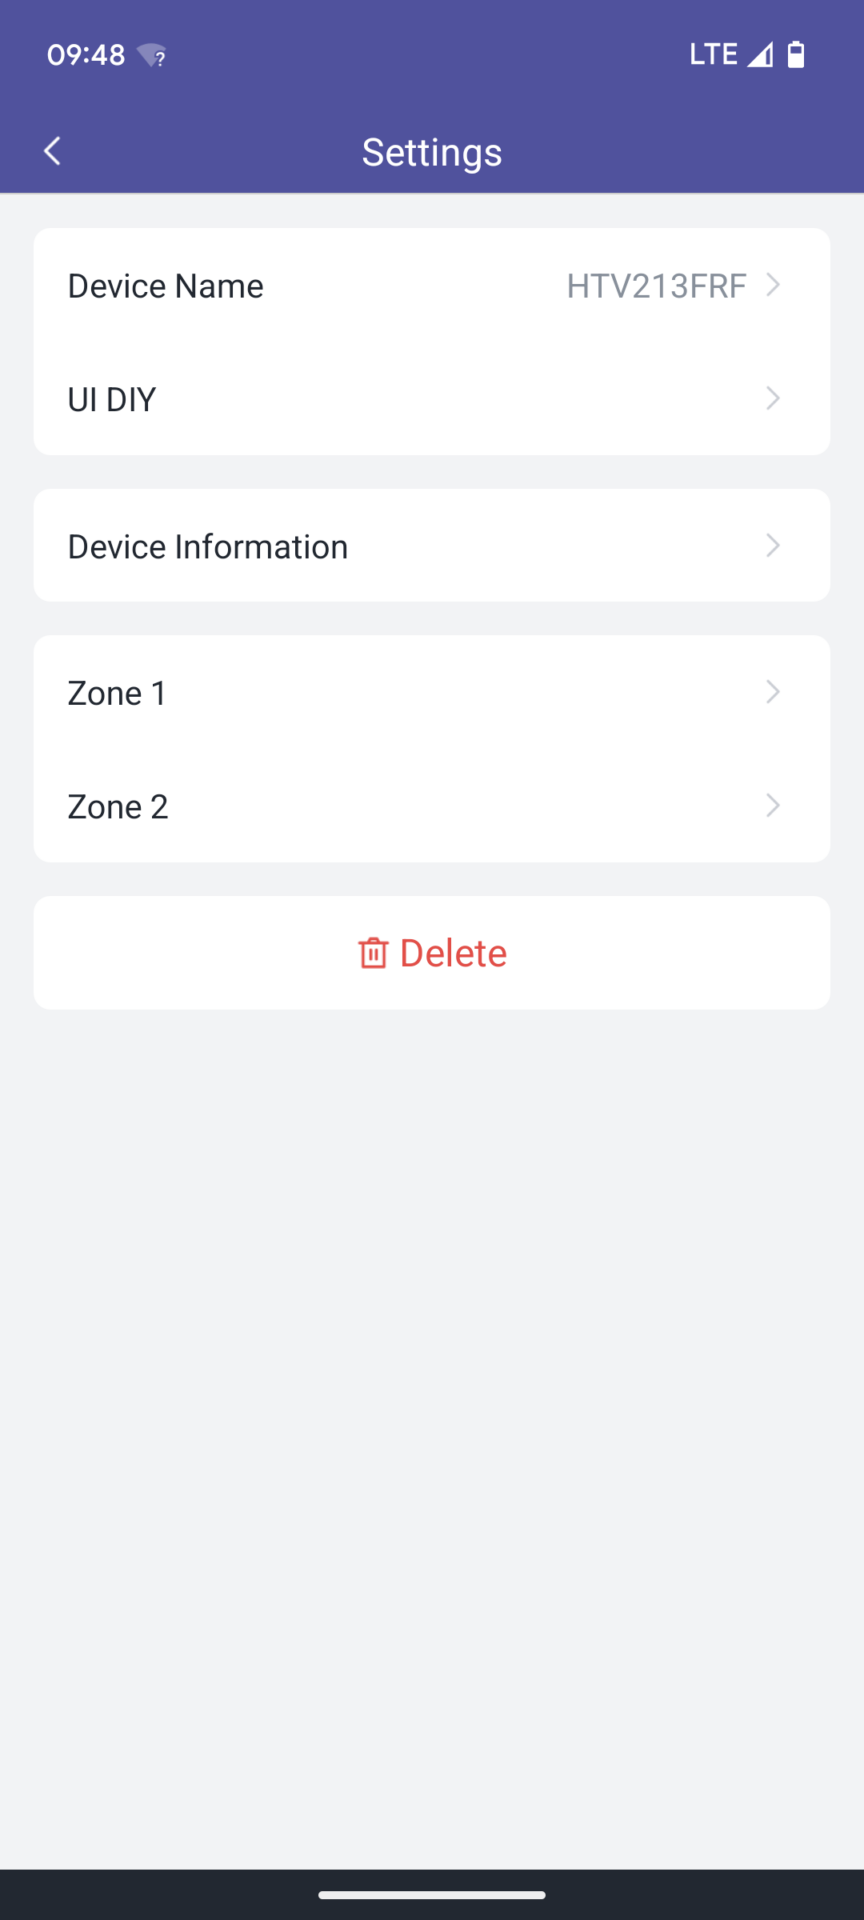
Selecting the water computer in the Home menu and clicking the Settings icon in the top right will take you to the water computer settings.
- Irrigation Computer Settings
Device Information
Here you will find essential information about the water computer’s battery level and the signal strength of the wireless connection:
- Device Information Submenu
Zone Default Settings
- Defining Default Values for the Zone
Here you can define default settings for each zone output, which will then be automatically suggested when creating new watering programs. If you don’t want these recommendations, you can also deactivate the “Smartplan recommendations.” And you can select a soil moisture sensor for the zone.
Under the “Water Usage Correction” menu item, you can define a correction factor for the computer’s integrated water flow sensor. For example, if it turns out in practice that the sensor measures the actual water quantity 10% too low, you would enter a calibration coefficient of 11% so that the measurement result is always automatically corrected upwards by 11%.
Zone Information
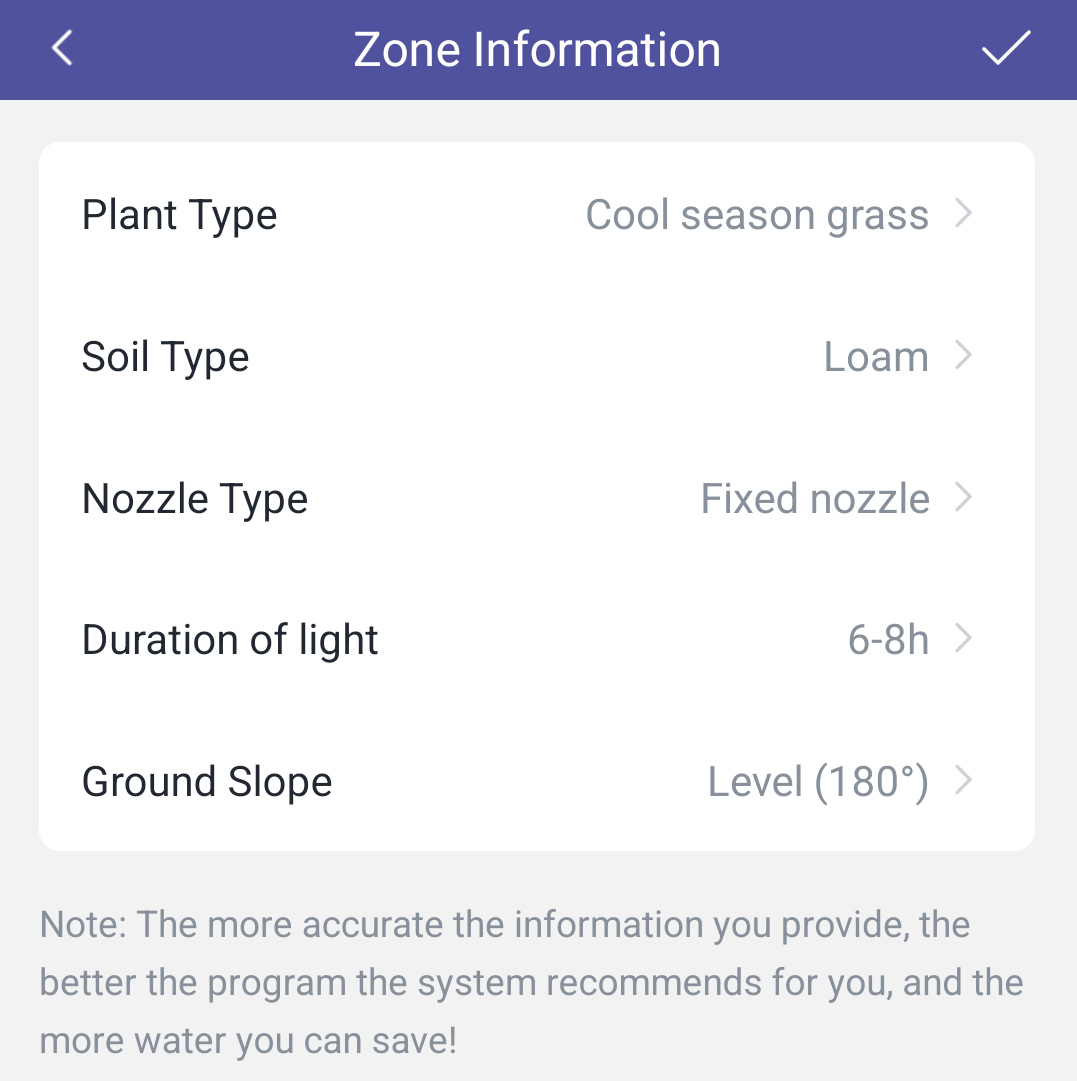
- Zone Information
Under this menu item, you can describe the zone to be irrigated in more detail. To do this, you must define five properties as realistically as possible. This information then forms the basis for the system’s “Smartplan recommendations,” for example, the irrigation runtime or a suggested division of irrigation runs into irrigation and pause phases.
My opinion: It works very poorly and, in my opinion, serves no purpose or value! Firstly, the parameters you have to enter are far too limited to even derive any meaningful recommendations. And secondly, some of the recommendations I received during my test were completely wrong. For a normal lawn, for example, they recommended short daily watering cycles instead of the current state-of-the-art long watering cycles only once or twice a week. This functionality is somewhat copied from Orbit B-hyve, but in a much poorer, essentially pointless version.
Interfaces
As already mentioned above in the Basic Settings chapter, connection to the following two systems is possible:
- Google Assistant
- Amazon Alexa
Conclusion and Recommendation
RainPoint’s HomGar software is clear and well-designed, but essentially offers little more than remote control of the computer while on the go.
The complex functionalities that separate the wheat from the chaff in smart irrigation computers, such as automatic weather-dependent control, sensor integration, automatic seasonal adjustments, etc., are either not available at all or are implemented only to a very limited extent or are sometimes implemented in a tokenistic manner.
That’s fine if your main concern is the ability to operate the computer while on vacation or to manually suspend an unnecessary irrigation cycle when the weather is bad. Then RainPoint, along with Diivoo, offers the most affordable web-controlled irrigation computer currently available, with functioning software that covers the basic functions.
The RainPoint software can’t compete with the current best providers of Wi-Fi irrigation timers in terms of functionality; Hunter Hydrawise, LinkTap, and OpenSprinkler are in a completely different league.
The software from Orbit B-hyve, a provider of very affordable timers only slightly above RainPoint’s price point, is also significantly more comprehensive and better. It might be worth considering spending an extra $20 or $30 to get more powerful software. However, B-hyve’s approach of letting the software make its own decisions regarding irrigation scheduling in a black box may not suit every user, so it’s best to read the blog post on the B-hyve software first!
One option for slightly better weather control is to use the RainPoint Home software instead. This is based on the HomGar app, but has been expanded to include automation features and also works with all white RainPoint timers that use the HomGar software!
If you want really good software with sophisticated weather control, extensive sensor integration options, automatic seasonal adjustment, and many other features, then your only option is Hunter Hydrawise, LinkTap, or OpenSprinkler. However, you’ll have to dig considerably deeper into your wallet for that.
On the other hand, there’s hardly any reason to buy a smart Gardena or Rain Bird computer. Both are significantly more expensive than RainPoint, but their software also offers mostly basic functionality.
