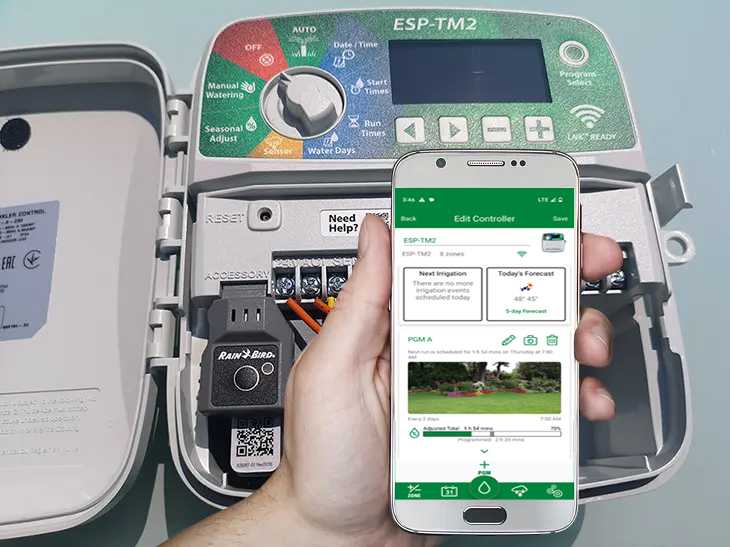
This article introduces the features of the Rain Bird Smart Watering System used in web-enabled Rain Bird computers. This allows access to the irrigation computer from anywhere in the world and is used on the one hand when using a Rain Bird RC2, ESP-RZX, ESP-TM2, ESP-ME or ESP-ME3 irrigation computer in combination with a Rain Bird LNK WiFi module and on the other hand when using a Rain Bird ST8 computer, which is delivered web-capable from the factory.
The Rain Bird Smart Watering software used is always the same regardless of the computer model. What this allows in terms of zones, programs and start times and sometimes also functions depends on the capabilities of the hardware used, i.e. the irrigation computer. The reason for this is that the Rain Bird software works on the principle that everything that is possible via the app should also be possible when entered directly on the irrigation computer.
For this purpose, changes made to the app are always transferred 1 to 1 to the irrigation computer and, conversely, changes made to the irrigation computer are synchronized with the app. This principle has advantages, but also has the disadvantage that only as many programs and start times can be created via the app as would be possible if programmed directly via the computer and that additional functions such as setting up cycle and soak phases, i.e. small breaks during irrigation runs to allow the water to seep away, are sometimes only possible with newer Rain Bird models. This is not possible for the Rain Bird ESP-TM2, for example. So you are artificially restricted in the software when using cheaper Rain Bird models, even though the software could actually do more. How many zones can be programmed also depends on how many are possible in terms of hardware, but this is clear since you have to wire them to the irrigation computer.
Rain Bird smart watering computers
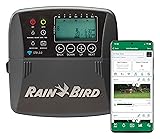
Below is a brief overview of the web-enabled Rain Bird irrigation computers available on the market:
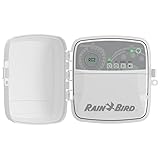
In addition, the following module is required for all models except the Rain Bird ST8 and the Rain Bird RC2 to make the computers web-enabled:
No products found.
In the following article I will describe the functions of the Rain Bird Smart Watering System, take a look at the voice control options and end my article with a description of my personal impression and my recommendation of the Rain Bird Smart Watering System.
Navigation and menu items of the app
First, a quick overview of how navigation works in the Rain Bird app. This goes over several menu levels and some functions are hidden behind links built into the content area. At the beginning you can miss one or two things or ask yourself where a function you are looking for is hidden. But since the functionality isn’t extremely extensive, you’ll soon find your way around it.
When you start the app, you will be shown a home page with the Rain Bird irrigation computers stored in the app. For most users, this will only be one computer, as in the example shown, but theoretically there could be several stored here and you could operate several control devices from here.
From the home page you have the following options:
Pencil icon: Switch to the main menu of the watering computer
Drop icon: Start a manual watering run
Email icon: Give someone else access to the water computer
Trash can icon: Delete the irrigation computer from the software
Gear icon: View/change app settings
Rain Bird Smart Watering home page menu items
Irrigation computer main menu
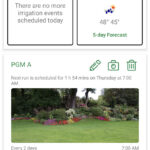
After switching to the main menu of the irrigation computer, essential information about irrigation is displayed:
Information about an irrigation that is currently running
Information about today’s weather (daily low and daily high) – When you click on the “5-day forecast” link, the weather forecast for the next 5 days is displayed
Information about irrigation programs that have been created (name of the program, information about when the program will next run)
Signal strength of the watering computer’s Wi-Fi connection (after clicking on the radio signal symbol)
Watering computer main menu
The following options are available in the green control bar in the footer area:
Plus/minus icon: Manage zones
Calendar icon: View planned and past irrigation runs on the calendar
Water drop icon: Add program
Rain cloud icon: Suspend watering
Gear icon: Change control unit settings
I will then describe all the functionalities contained in the menus.
Start watering run manually
In this mask, spontaneous watering can be carried out apart from programmed watering runs. There are three options to choose from:
1. Set a watering time for all zones
For example, if you enter 20 minutes here and have 6 zones, then these will be run through one after the other with a running time of 20 minutes each.
2. Execution of an existing program
A predefined watering program is started manually immediately. You can choose from all created programs.
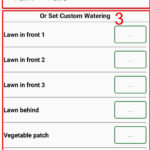
3. Set watering times for desired zones
A watering time is entered for all zones that are to be watered. After the start, the zones are run through one after the other with the defined time.
Mask with the 3 manual watering options
Grant access to other users
Under this menu item you can give other users app access to your irrigation computer, e.g. other family members or someone who should temporarily take care of the irrigation. You can decide whether access should be permanent or limited to 24 or 48 hours. The invitation can be sent via email, WhatsApp, messages, etc. The invitee will then receive a message with precise instructions on what steps it needs to take to gain access (download the Rain Bird app, open the RBCF file attached to the message).
Set duration of access
Select communication channel
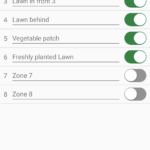
Set up and manage zones
Under this menu item, zones can be activated and named with a zone name. Depending on the irrigation computer model, there are different numbers of zones to choose from.
In the example, 6 zones are named and set to active (= wired)
Create programs
By clicking on the add program button you will be taken to the following mask in which the program can be created:
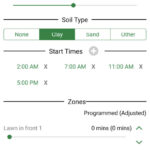
Setting up an irrigation program
The individual input options are briefly explained below:
A name for the program is defined at the top. This should be as descriptive as possible so that it is clear from the name what the program is used for. In my case, I use this program to water a strip of newly laid lawn.
The frequency of watering is determined below. You can either set specific days under “custom”, for example Monday and Thursday, or you can define that watering takes place on every even or odd day. If you choose “cyclic”, you can determine the daily intervals at which watering should take place within a range of 1 to 31 days. A daily cycle of 1 means that watering takes place every day, a daily cycle of 2 means that watering occurs every other day, etc. etc. In addition, the remaining days can be defined: 0 remaining days means that watering will begin today, 1 day remaining means the cycle will not start until the next day. Up to 31 days are also possible here.
Under Seasonal Adjustment it is possible to increase or reduce the irrigation runtime by a certain percentage. This setting is usually used to compensate for the different water requirements in different warm months of the year. The duration is set for the hottest month, e.g. July, and in less warm months this can be reduced globally. For example, if you have set 50 minutes and set 80% under “Seasonal Adjustment”, then the zones would not be watered for 50 minutes, but only for 40 minutes. If this is followed by an even less warm month, you can go down to 75% and so on and so forth.
The alternative is to activate Automatic Seasonal Adjustment. In this case, the system automatically performs the seasonal adjustment based on the online weather data transmitted every night, from which the evapotranspiration (based on evaporation) is extrapolated. For this purpose, the weather data from the last few days and the weather forecasts for the coming days are used. Rain Bird does not disclose the exact logic used here.
Despite extensive testing, I was unable to figure out the function of the soil type; changing it had no effect on me in the test. Web searches didn’t provide any information about this either. There may currently be an error in the software or the function has not yet been fully developed. It is possible that this setting affects the automatic seasonal adjustment, as the rate of evaporation also depends on the soil type.
Four or more start times can be set depending on the computer model.
The watering time can be set for each zone independently. The zones are passed through in the order listed. All activated zones are always listed here; those that you do not want to take into account in the program can simply be left at a running time of 0 minutes.
What is not available in the screenshot shown is a way to divide the watering time of the zones into cycle and soak phases. This doesn’t work with the Rain Bird ESP-TM2 I used for this article, but it is possible with other Rain Bird models. The irrigation time can then be divided into irrigation phases and soak phases for each zone, so that the water has more time to seep away (advantageous on dense soil and sloping terrain).
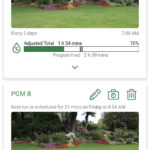
Once the program has been created, it is displayed on the irrigation computer start screen. A symbolic image for the garden is automatically added, which you can replace with an image of your own garden. The program shows when it will next be executed and whether the runtime will be adjusted.
Display of the program on the main page of the watering computer. In this case, an adjustment of the running time to 70% of the originally stored time is predicted for both programs displayed.
Delay watering
With this function you can pause watering for a certain number of days. This can make sense because seasonal adjustment only reduces the running time of irrigation, but never completely stops it. But if it rained very heavily beforehand, that could be exactly what makes sense. A suspension of up to 14 days is possible.
Watering is suspended for 4 days
View planned and completed irrigation runs in the calendar
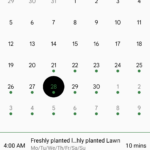
By default, the calendar opens in a monthly overview and today’s irrigation runs are displayed below. All days on which irrigation runs are planned or have already taken place are marked with a green dot. You can optionally switch to a weekly overview. Irrigation runs that have already taken place can be looked up for the current month and the month before, and planned irrigation runs can be called up for the current and the coming month.
Irrigation calendar overview for the month of November
Enable alerts
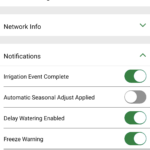
In the “Notifications” menu item in the Controller Settings menu you can define which events you would like to be actively informed about. The message is sent via a push notification on the mobile phone. Currently, notifications can be activated for eight different events:
Watering run has been completed (message contains the duration of the watering process and the time at which it was completed)
An automatic seasonal adjustment was applied to the irrigation, so watering was carried out for a shorter period of time than originally set in the program
An irrigation was postponed by x days (this message primarily makes sense if multiple users have access to the control)
There is a risk of frost as the lowest temperature of the day is below 35 degrees Fahrenheit (2 degrees Celsius)
A short circuit was detected in the solenoid coil of a connected valve
The irrigation computer was accessed locally in AP/Hotspot mode
The date or time stored on the irrigation computer appears to be incorrect
The WiFi module restarted or the irrigation computer lost power
Note: In order for the activated notifications to be delivered, the “Push notifications” option must also be activated in the app settings
“Notifications” menu item in the controller settings
Get weather forecast
The weather used for automatic seasonal adjustment can be viewed on the irrigation computer’s overview page.
In the main overview of the watering computer, today’s forecast temperature is displayed (highest and lowest temperature)
After clicking on the “5-day forecast” link, the weather forecasts for today and the next 4 days are displayed
Activate rain sensor
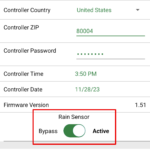
A rain sensor used with the irrigation computer can be activated in the “Controller info” menu item in the Controller settings menu. Since the automatic adjustment based on the weather data obtained online only influences the duration of the irrigation, an additional rain sensor is the only way to automatically eliminate irrigation completely due to the weather. The rain sensor sends a signal when the defined amount of rain has been exceeded, thereby blocking planned irrigation runs.
Activation of a rain sensor
Change computer and app settings
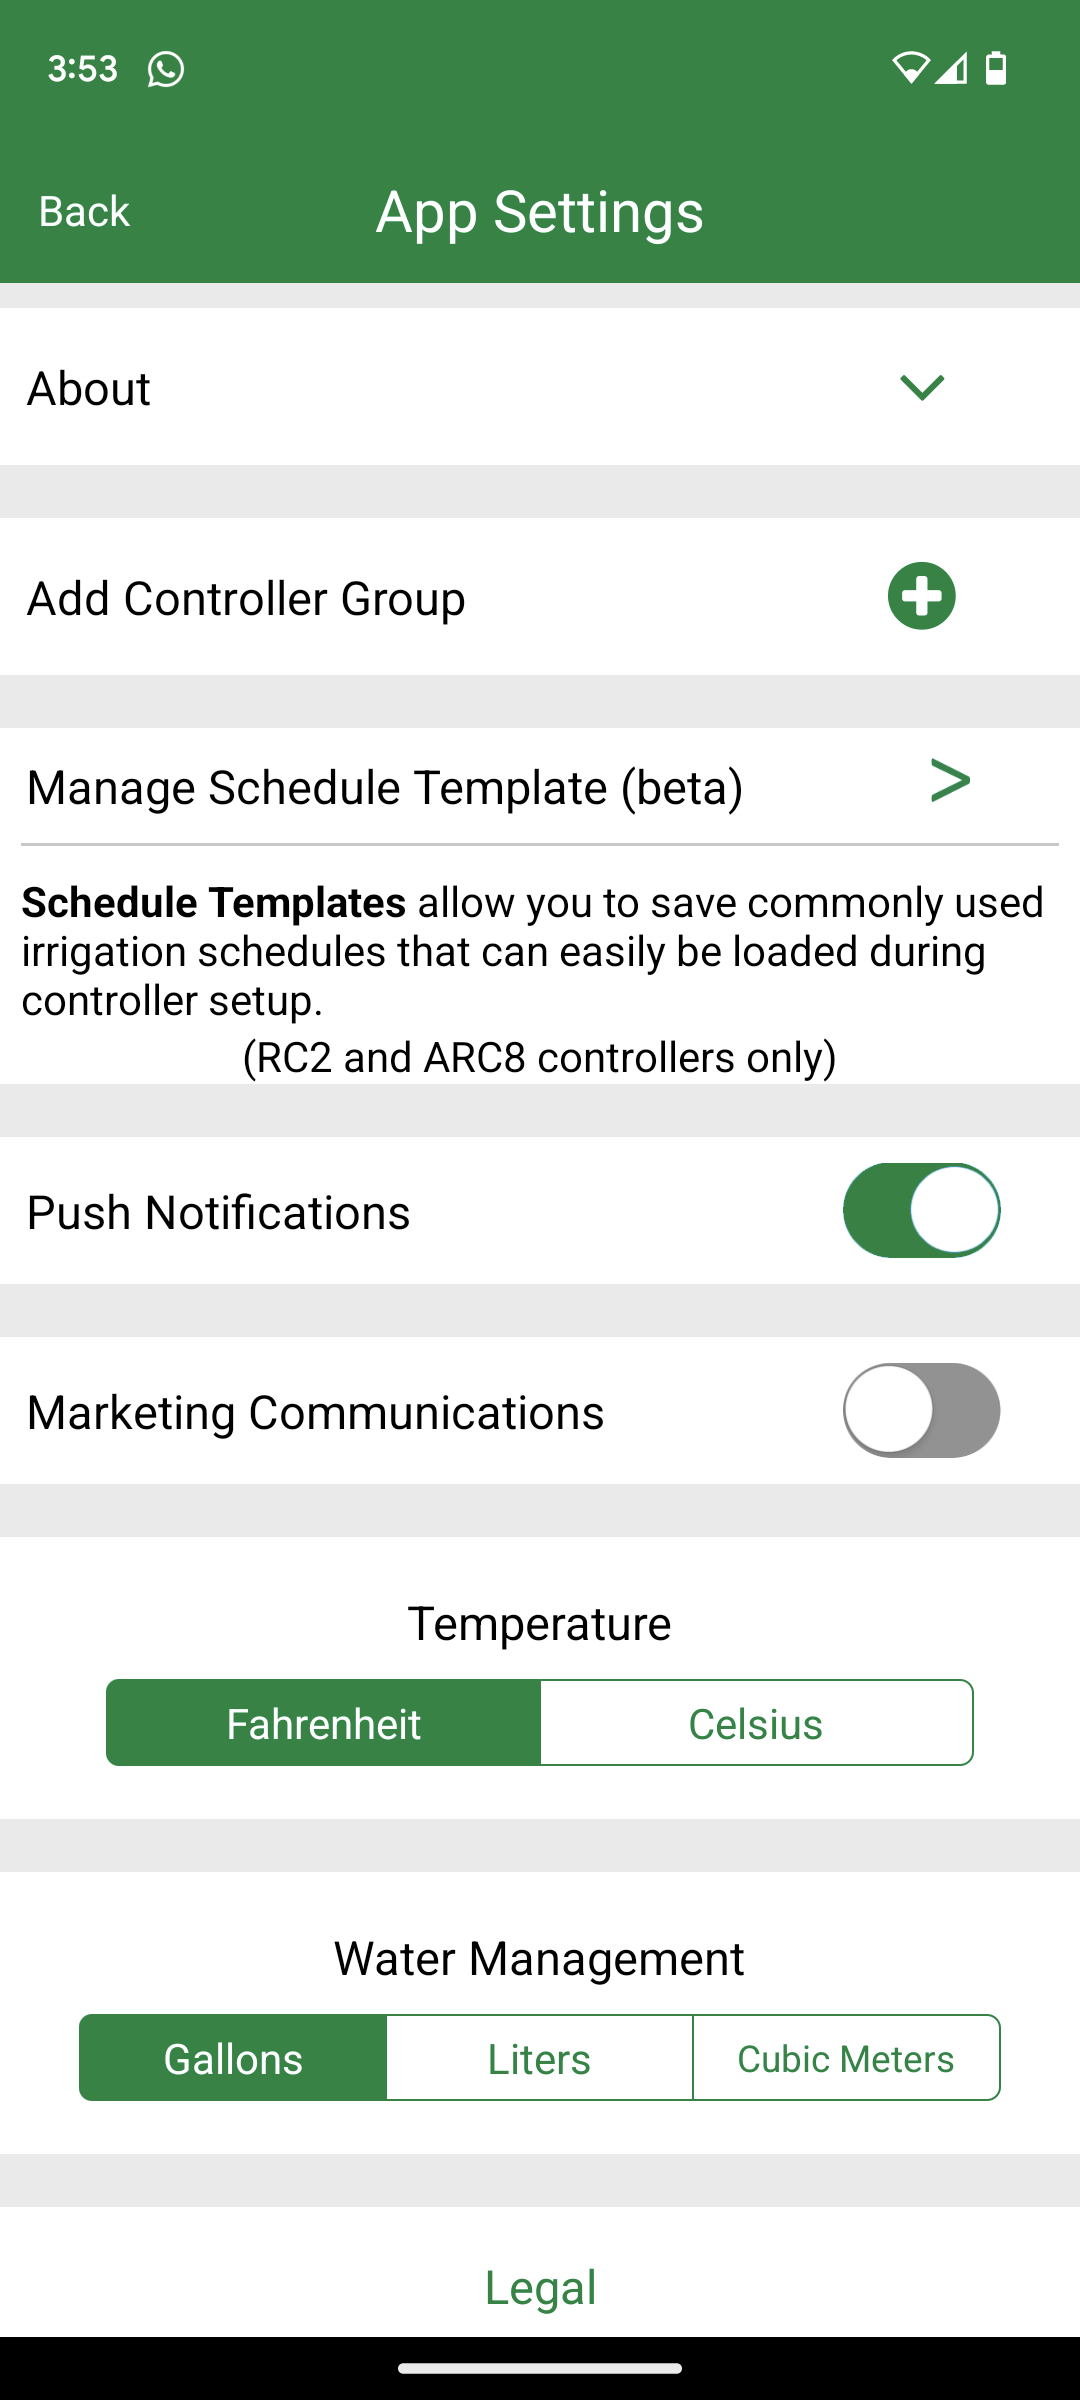
In addition to the options already described in the points above, a few additional settings can be made in the app settings and watering computer settings:
The location can be changed, e.g. after moving house. The location is crucial for obtaining local weather values
The temperature and water flow measurement units used in the program can be changed to those used in your own country
Date and time can be changed
The password stored in the app can be changed
The watering computer can be given a different name
The WLAN settings can be changed if, for example, the router has been replaced
Alternatively, you can switch to hotspot mode in the WiFi settings so that access to the irrigation computer from your cell phone is possible even without an existing WiFi connection. To do this, you have to be in close proximity to the computer with your cell phone.
As already described in the points above, push notifications or a rain sensor can be activated/deactivated
App settings
Controller settings
Voice control options
Rain Bird offers a connection to Google Home and Amazon Alexa, so that it is possible to control the irrigation computer via voice control, i.e. start or end irrigation runs and query information about irrigation.
Conclusion and recommendation
With its LNK WiFi module, Rain Bird offers a very simple solution to make your Rain Bird irrigation computer web-enabled. This can be done right away when purchasing or later, so it also has the advantage that as a buyer you can first buy the cheaper and simpler solution and upgrade it later.
Putting the LNK WiFi module into operation is quite easy and can be done in just a few minutes. The software itself is quite manageable. This can be seen both positively and negatively. Positive: You find your way around very quickly and need little background information to use the application. With the software, Rain Bird primarily provides a way to remotely control the irrigation computer from anywhere in the world. This works well and easily and may probably be absolutely sufficient for many users; overall, the module is rated quite positively on Amazon. The fact that you can switch back to normal control directly via the irrigation computer at any time is of course not a disadvantage, although I can hardly imagine that anyone will do that. You quickly get used to the convenience of using the app.
The negative aspect is that the Rain Bird Smart Watering System is little more than a very smart remote control. Although automatic seasonal adjustment based on online weather data would be a very smart and intelligent function on paper, Rain Bird implements this in a very non-transparent manner with no adjustment options for the customer. So you neither know what criteria Rain Bird uses to calculate the adjustment factor in the background, nor can you influence it if it doesn’t work properly. The automatic seasonal adjustment can only shorten an irrigation run, but not cancel it completely, which is disadvantageous in some situations. In order to function very well, you are more or less forced to use an additional rain sensor.
The system works reasonably well in practice, although in a few isolated cases I experienced slight interruptions in the connection, meaning that I needed several attempts to access the computer. Irrigations are carried out correctly and defined push messages arrive correctly on the cell phone. The adjustment factor of the automatic seasonal adjustment was always unexpectedly reserved in my tests over several weeks, even when the weather was sometimes rather cool. That surprised me; I would have seen even more potential for savings here.
Conclusion: The Rain Bird System is a good system if you are primarily looking for a way to remotely control the irrigation computer from anywhere in the world and to program it and access information conveniently via your cell phone. The additional costs to make the computer web-enabled are manageable at 80 to 90 USD and you will quickly find your way around the system. However, if you want a web-enabled irrigation computer with the ulterior motive of optimally adapting irrigation to your own requirements based on a wide variety of weather factors and saving as much water as possible, then there are better systems. Compared to Hunter Hydrawise, for example, Rain Bird simply allows the user far too little customization and is far too opaque in its functionality. If you are looking for such a system, you will not have much fun with the Rain Bird System.
I am an enthusiastic do-it-yourselfer and have been running this blog on the subject of garden irrigation for more than 6 years now. In over 150 specialist articles, I share my own experiences and know-how from years of research and numerous product tests. -> More about me


")


