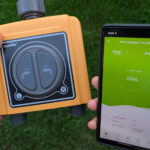
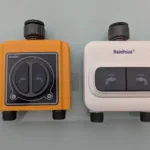
In this post, I describe the features of the RainPoint Home app for Wi-Fi RainPoint irrigation timers. This is the newest of the three RainPoint apps. In addition to RainPoint Home, there are also RainPoint Tuya and HomGar, although each of these apps only works with certain RainPoint models!
RainPoint Home is essentially a mix of the other two RainPoint apps with a few additional features. It is based on the basic framework of the comparatively clear and user-friendly HomGar app. When you first open the program, you might think you’ve accidentally opened the HomGar app, as the appearance and navigation of the two apps are so similar. Additionally, however, the automation functionality from the RainPoint Tuya app has been integrated, allowing you to control irrigation based on weather events.
In this post, I describe in detail the functionality of the RainPaint Home app. You can read about the functionality of the two other RainPoint apps in the following two articles:
Blog post: How the RainPoint Tuya App works
Blog post: How the HomGar App works
In the following post, I will describe all the app’s features in detail and then compare them with the other two RainPoint apps and, above all, with the smart apps of competitors, and explain how RainPoint Home compares.
RainPoint Product Overview
To begin with, an overview of the RainPoint models that can be controlled with the RainPoint Home app. These include all the new bright green models and the two white models.


Main Menu/Navigation
When you start the app, you’re always taken to the home page. This doesn’t really contain much information, just the devices stored in the app (marked with 1 below) and the main menu (marked with 2). For a home page, this is quite sparse in terms of information, presumably reflecting RainPoint’s intention to use the app for a variety of devices, not just the irrigation computer. Then a few more devices might be listed here, whose submenus you can access by clicking on them.
The second device displayed next to the irrigation computer is the gateway, including the additional power outlet it contains.
- Home page
From the start menu, you now have two options:
- Click on one of the devices to open the irrigation computer menu or the gateway menu.
- Continue navigating in the menu below.
In this post, I will first show the functionality of the irrigation computer menu and gateway menu, followed by the menu bar.
Irrigation computer settings
You can access these, as previously described, by clicking on the irrigation computer on the home page.
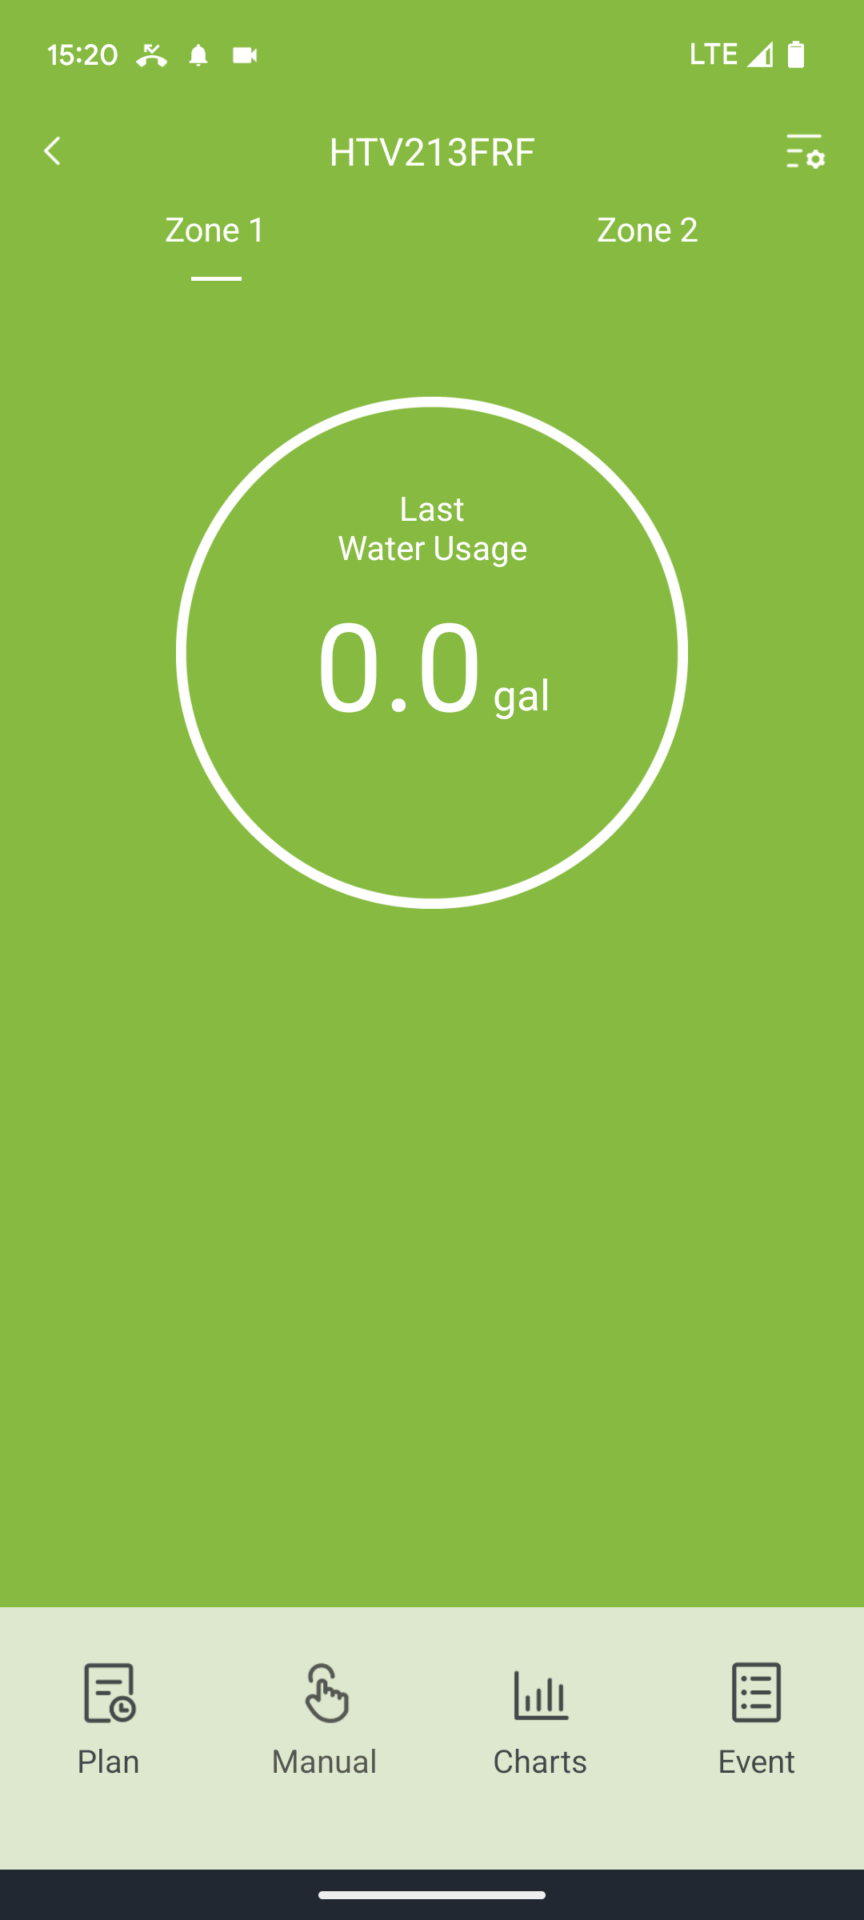
- Irrigation computer homepage
This displays the water consumption of the last irrigation run. This display alternates with the date and time of the next irrigation run. If you have a computer with multiple outlets, you can switch between the different outlets (zones).
From the home page, you have two navigation options:
- Access the irrigation computer settings by clicking on the gear icon in the top right corner.
- Access one of the four items in the irrigation computer menu.

Create an irrigation program
![]()
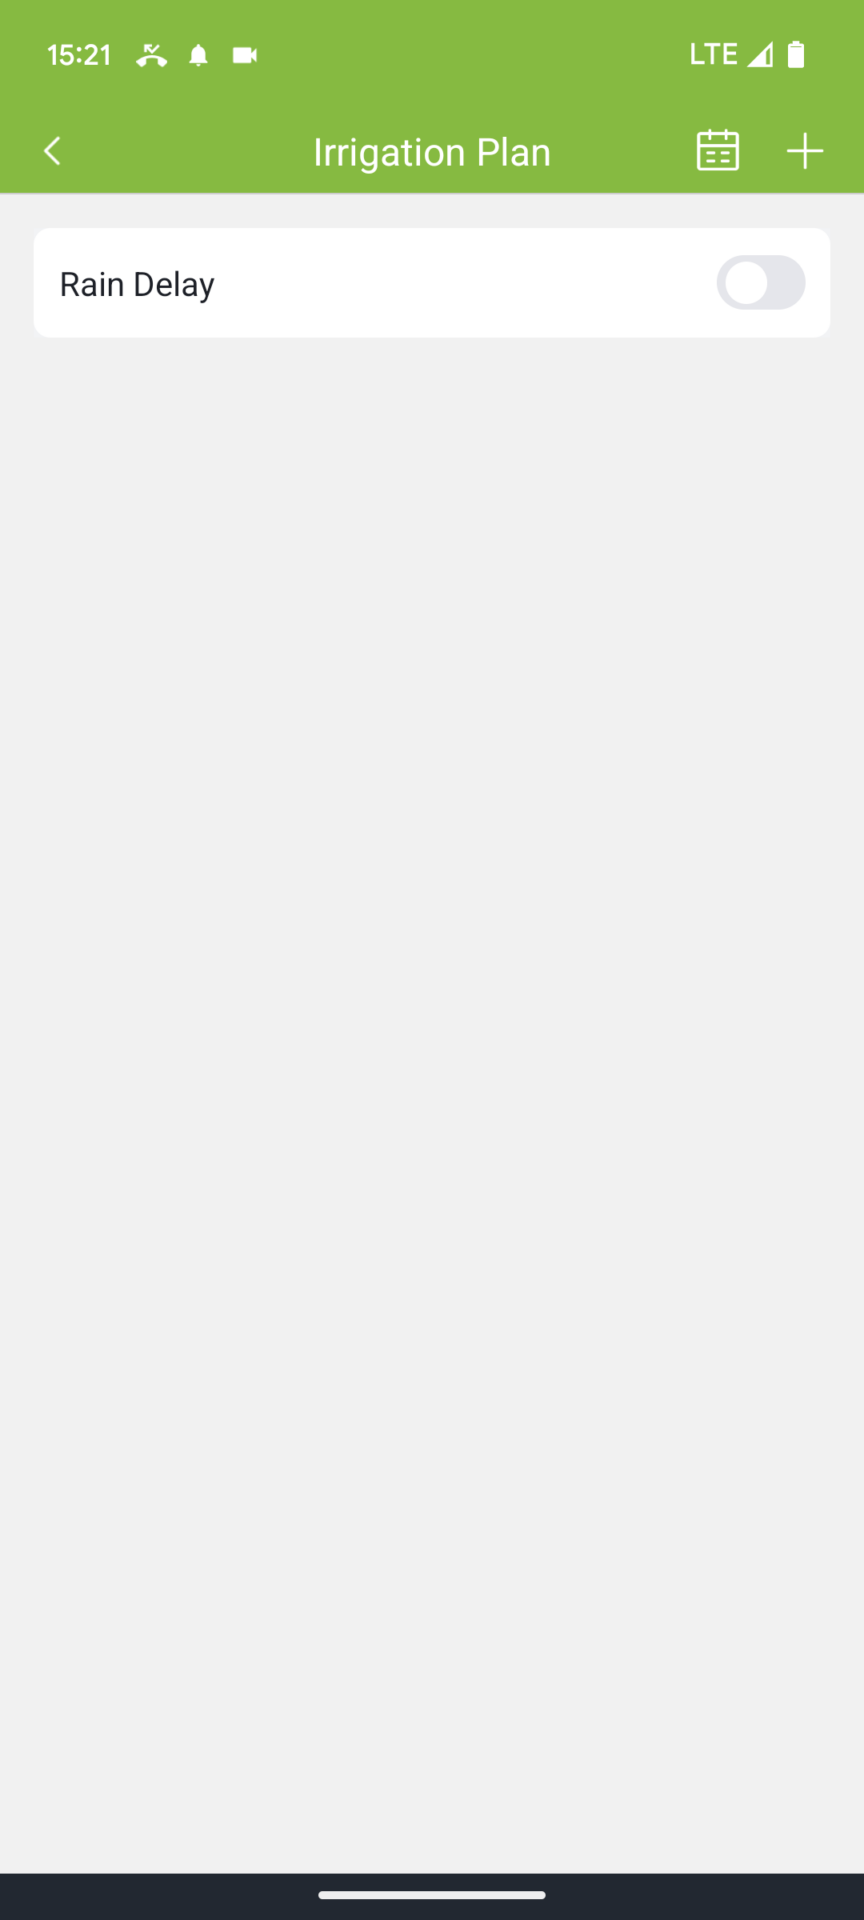
After clicking on this menu item, you will first see a blank page:
- Plan menu
By clicking on the plus symbol in the top right, you can create your first watering program. You can choose between two types of programs:
- Normal Irrigation
- Interval Irrigation
Creating a Regular Watering Program
To do this, enter the following four parameters:
- Start time for the watering program to begin
- Duration of the watering program or alternatively
- Number of gallons to be watered
Repeat frequency of the watering program (possible daily, on odd days, on even days, or on selected days of the week)
When you start the screen, you may already be presented with suggested values. These values, marked with an atomic nucleus symbol, are so-called Smart Plan recommendations from the system, which the system suggests using its built-in intelligence. I’ll explain exactly how this works and how useful it is below. You can keep these values or simply enter your own.
- Example of setting up a normal irrigation program
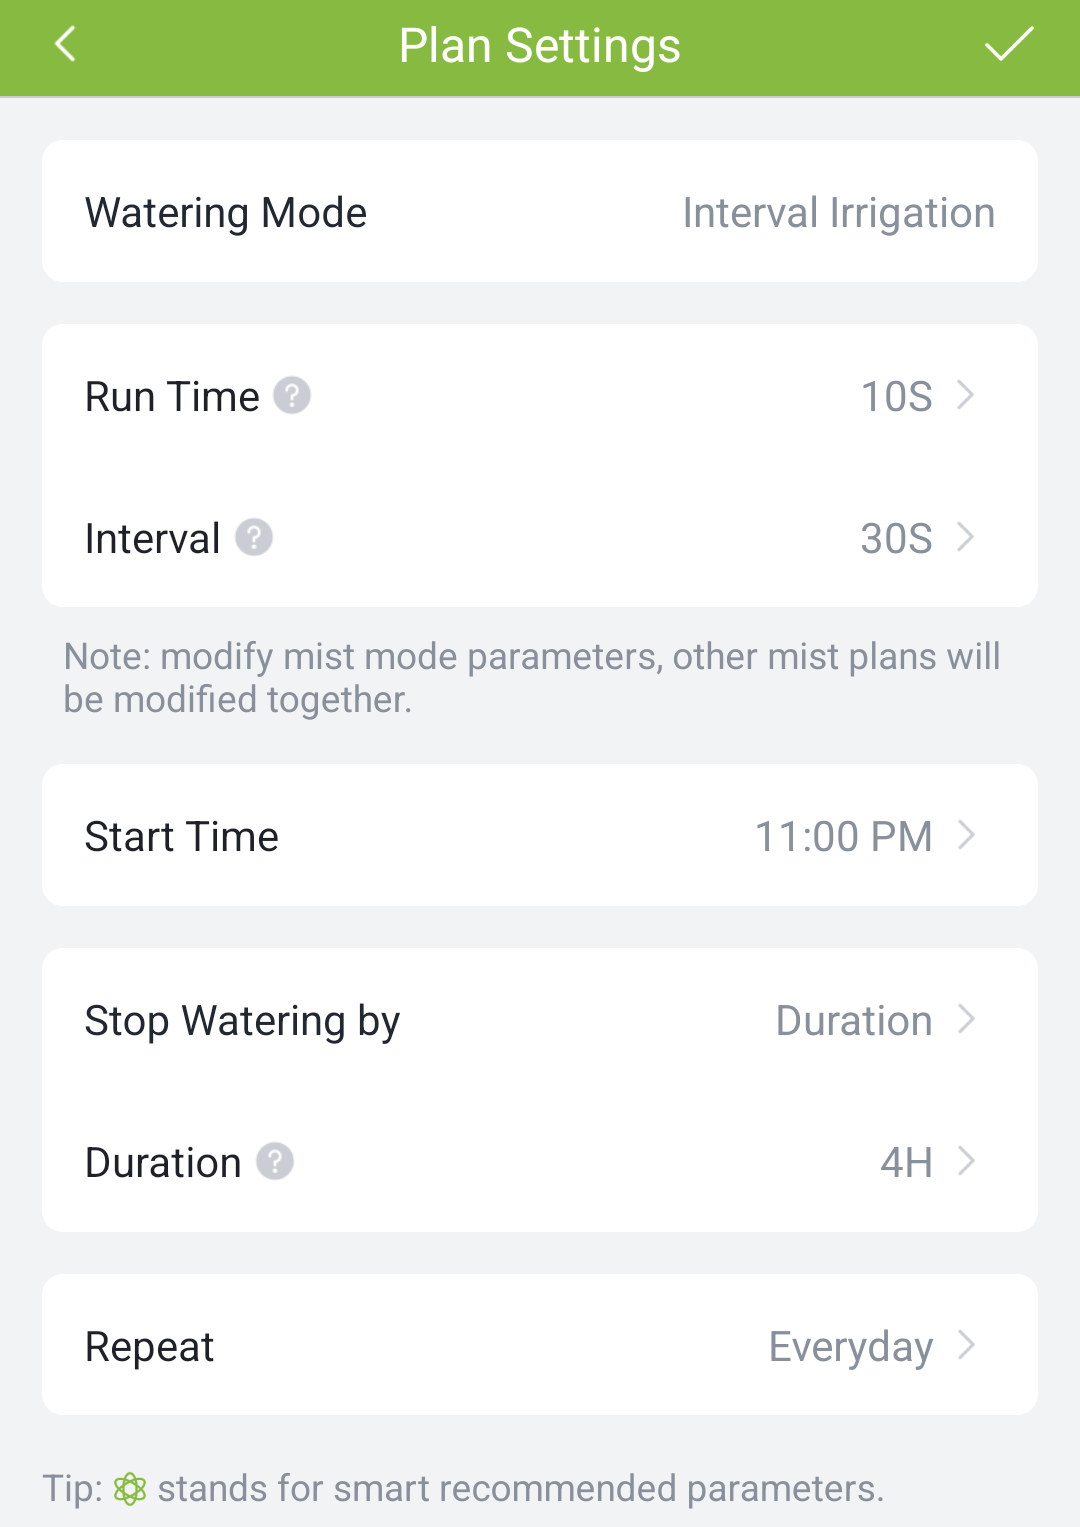
Create an interval irrigation program (cycle and soak function)
In this mode, in addition to the start time and duration of the irrigation, intervals are defined in which irrigation should run or pause. This is done with the two additional specifications “Runtime” and “Interval.”
- The runtime determines how long irrigation should run before an interruption occurs.
- The interval determines how long this interruption should last.
For example, if you have set a duration of 1 hour and 20 minutes with a runtime of 20 minutes and an interval of 10 minutes, the result would be:
- 20 minutes of irrigation
- 10 minutes pause
- 20 minutes of irrigation
- 10 minutes pause
- 20 minutes of irrigation
This function is also known as cycle and soak. It is used for staggered irrigation with pauses on soils that are difficult to absorb water or are very sloping, so that less water runs off unused.
However, they can also be used – as RainPoint suggests – to implement mist cooling. In this case, both the runtime and interval would need to be set relatively short. Runtimes and intervals from 1 second to 60 minutes are possible.
- Example of interval irrigation
Compared to competitor systems, one disadvantage is that you have to do some calculations yourself to determine the desired total watering time. For example, if you want to water the lawn for 60 minutes, but no more than 20 minutes at a time, with 10-minute breaks in between, you have to calculate the time to water for 20 minutes, then a 10-minute break, then water for 20 minutes, another 10-minute break, and finally water for 20 minutes again. By adding up the totals, you arrive at 80 minutes, which you have to enter as the duration. In other systems, you simply enter how long you want to water, the runtime, and the interval, and the system automatically calculates the total duration.
Created Programs
The programs you’ve already created, along with their key data, are displayed as follows when you start the Plan menu:
- Created programs
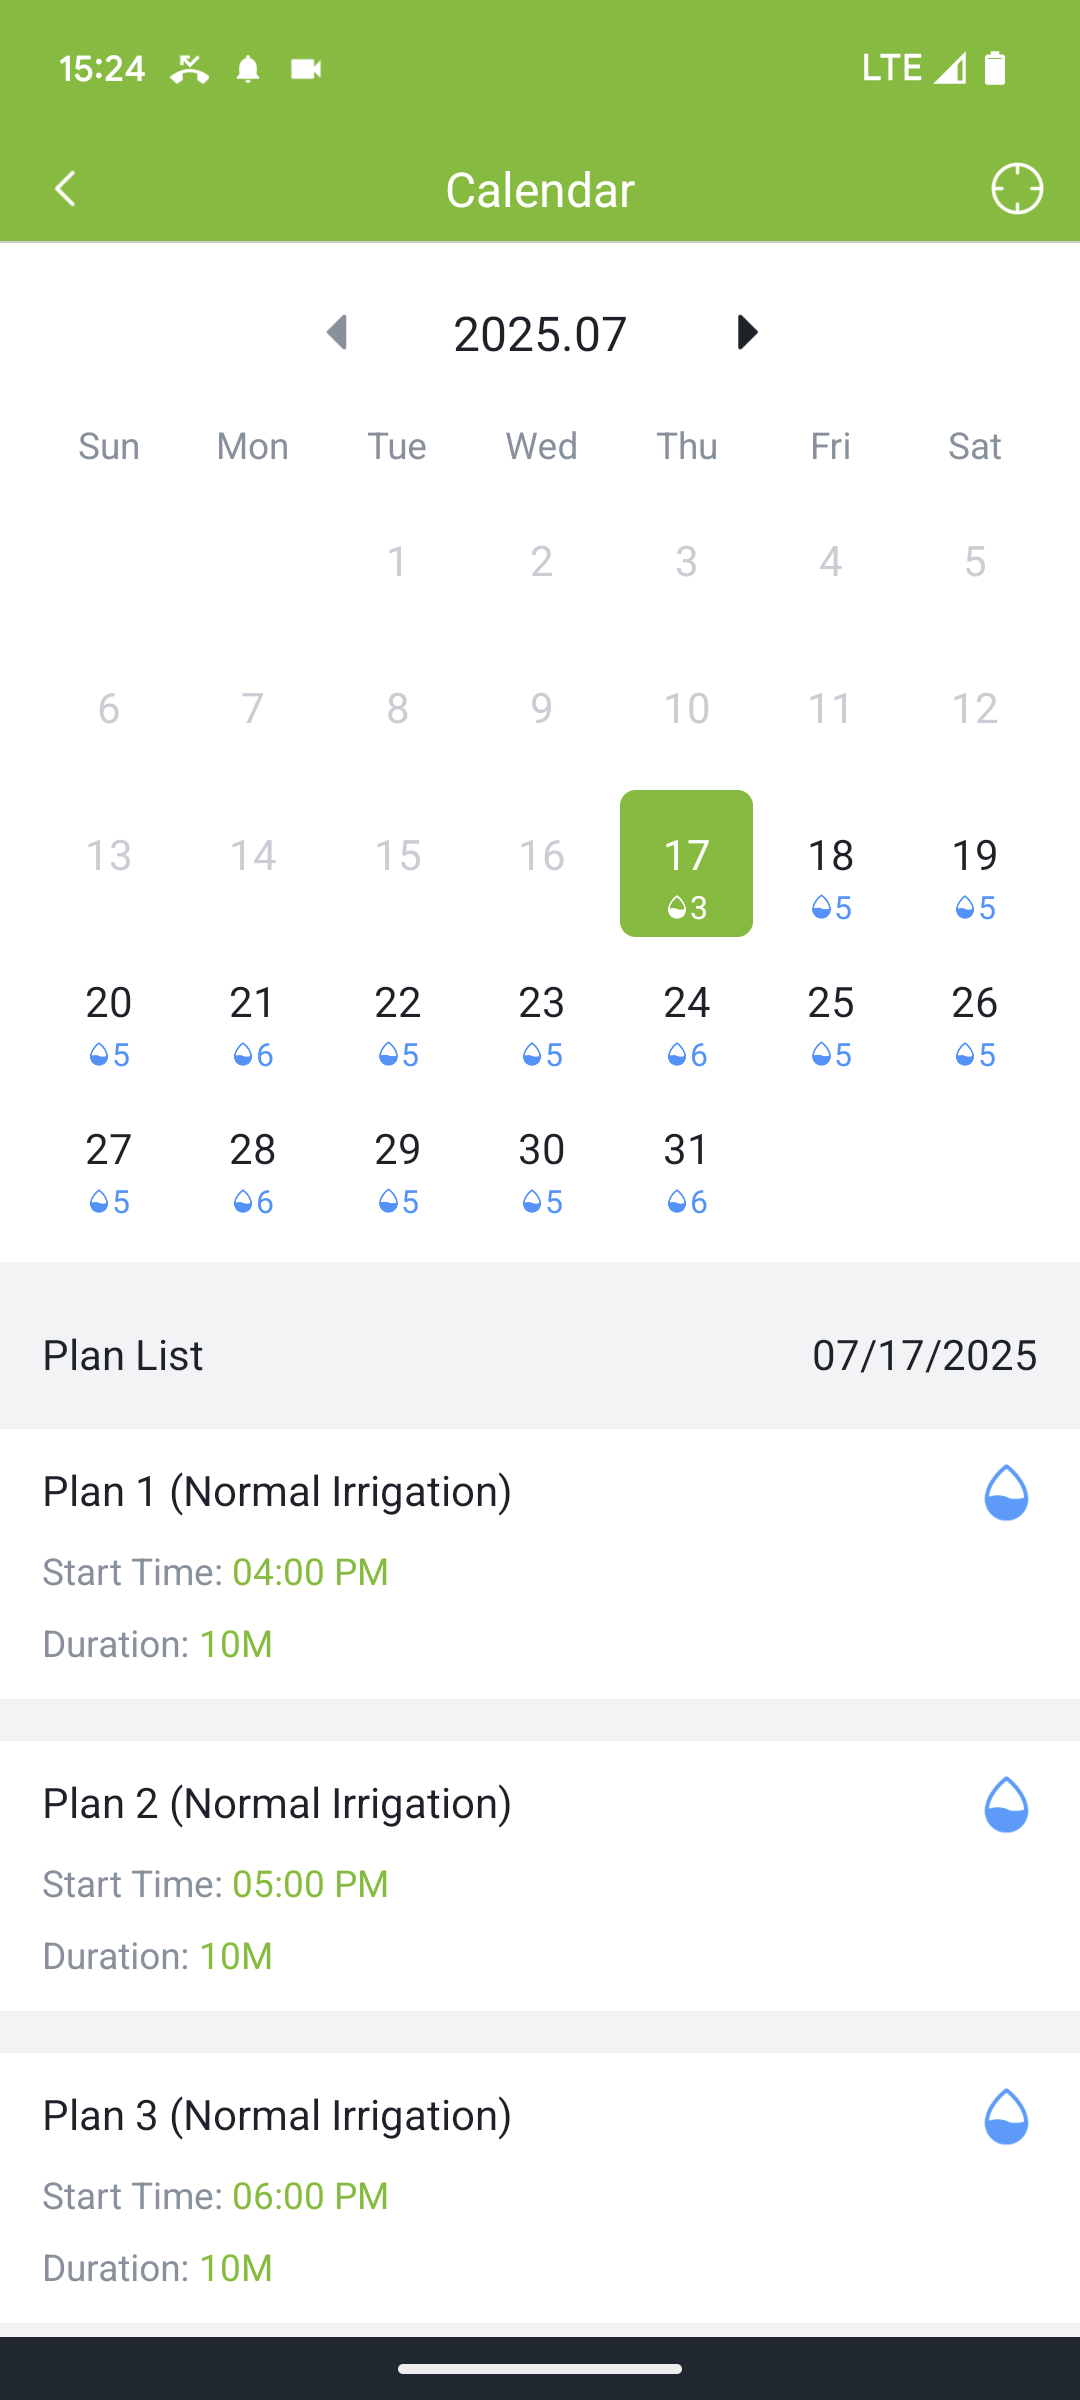
Calendar View
By clicking on the calendar icon in the top right corner, you can open a calendar view that shows when irrigation runs are scheduled for the selected month:
- Calendar view
Irrigation Pause (Bypass)
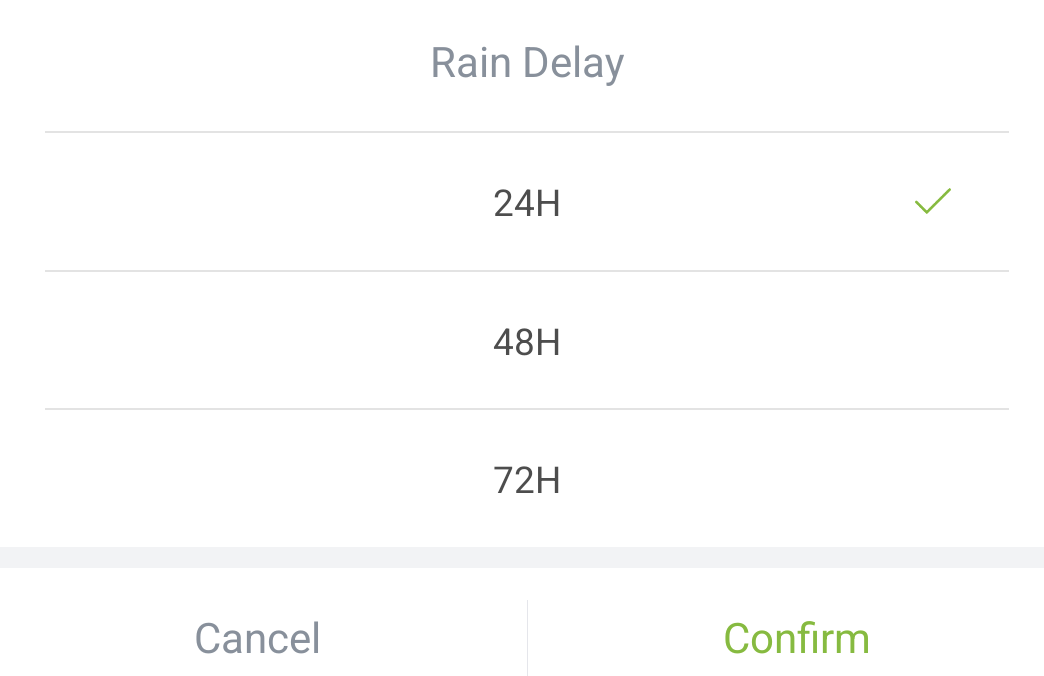
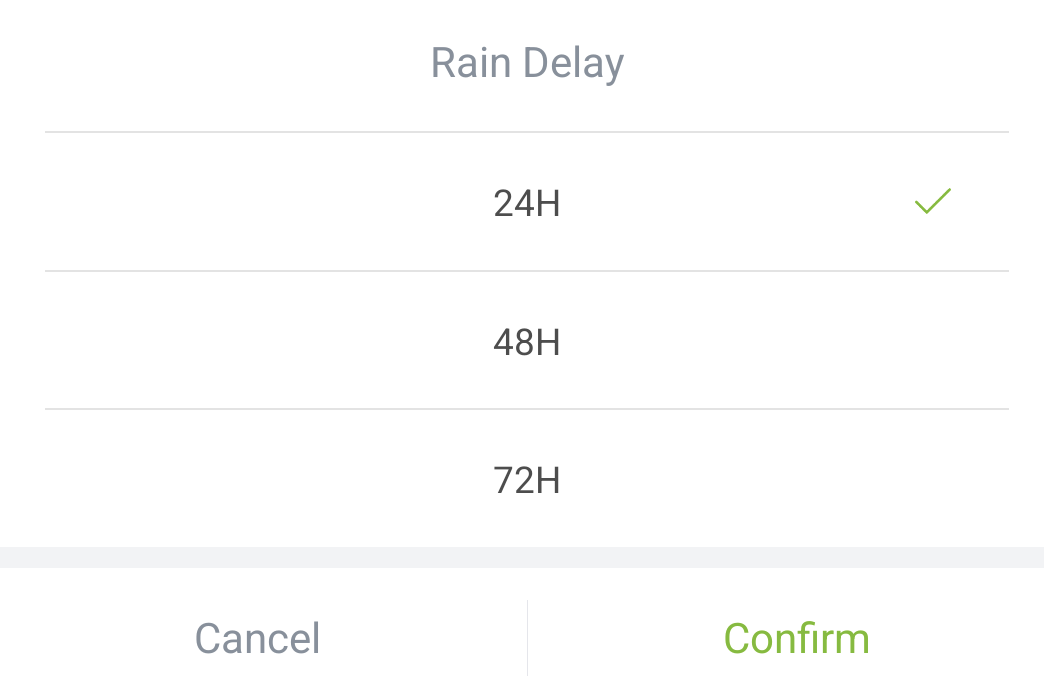
This allows you to manually set an irrigation pause of 24, 48, or 72 hours. This can be useful, for example, if it has just rained heavily and therefore no irrigation is necessary for the next few days, or if heavy rainfall is forecast for the coming days. It also gives you the flexibility to skip a scheduled irrigation session, for example, if a party is planned in the garden at the scheduled irrigation time, without having to adjust the irrigation program.
The irrigation pause can only be set and canceled globally for all programs of an output, and not for each program individually.
Compared to competitor products, I also lack the option to set an indefinite pause. This can be useful, for example, at the end of the season.
- Set watering pause
Somewhat limited flexibility
Compared to competitor apps, RainPoint Home’s program creation is somewhat limited, as it allows a maximum of six programs. This alone might be sufficient under certain circumstances, but there are also additional limitations:
- Only one start time per day can be defined for each program.
- And only one duration can be defined for each program.
- Furthermore, a program cannot differentiate between the start time and duration for different days of the week; all days are watered according to the same schedule.
In comparison, other systems allow multiple start times and different watering durations per day, which can be varied for each day of the week. Due to the very inflexible programming of RainPoint Home, the six programs are used up relatively quickly. For most users, this should be sufficient, but if you have more specific requirements, the six programs might be quite limited!
Using Manual Irrigation
![]()
In addition to executing scheduled irrigation cycles, you can also start a manual irrigation cycle at any time by clicking on the “Manual” menu item. Controllers with multiple outputs have multiple zones available. Depending on which zone you selected when starting manual irrigation, the corresponding zone will be watered.
With manual irrigation, you can again choose between normal mode and interval mode:
- Selecting the irrigation mode
Both modes work in principle like the irrigation program, except that both only allow for continuous irrigation; watering a specific liter flow rate is not possible in manual irrigation.
- Normal Mode
In normal mode, a minimum run time of 1 minute and a maximum run time of 12 hours are possible in minute increments. The run time in interval mode can be set in second increments from 1 second to 60 minutes.
- Intervall Mode
Once the irrigation cycle has started, the remaining time is displayed. You can stop the cycle at any time by clicking on the “Manual” menu item again.
After the manual watering cycle is complete, the amount of water used will be displayed.
Retrieve consumption statistics
![]()
Under this menu item, water consumption is displayed as a chart. You can switch between a daily view of the last 30 days and a monthly view of the last 12 months. The display is in landscape format, so you have to rotate your phone. A separate display of consumption broken down by computer outputs is not possible. Nor is there a distinction made between scheduled and manual watering runs. There’s also no optional display of water costs, as offered in other apps.
My opinion: There’s still a lot of room for improvement in terms of information content!
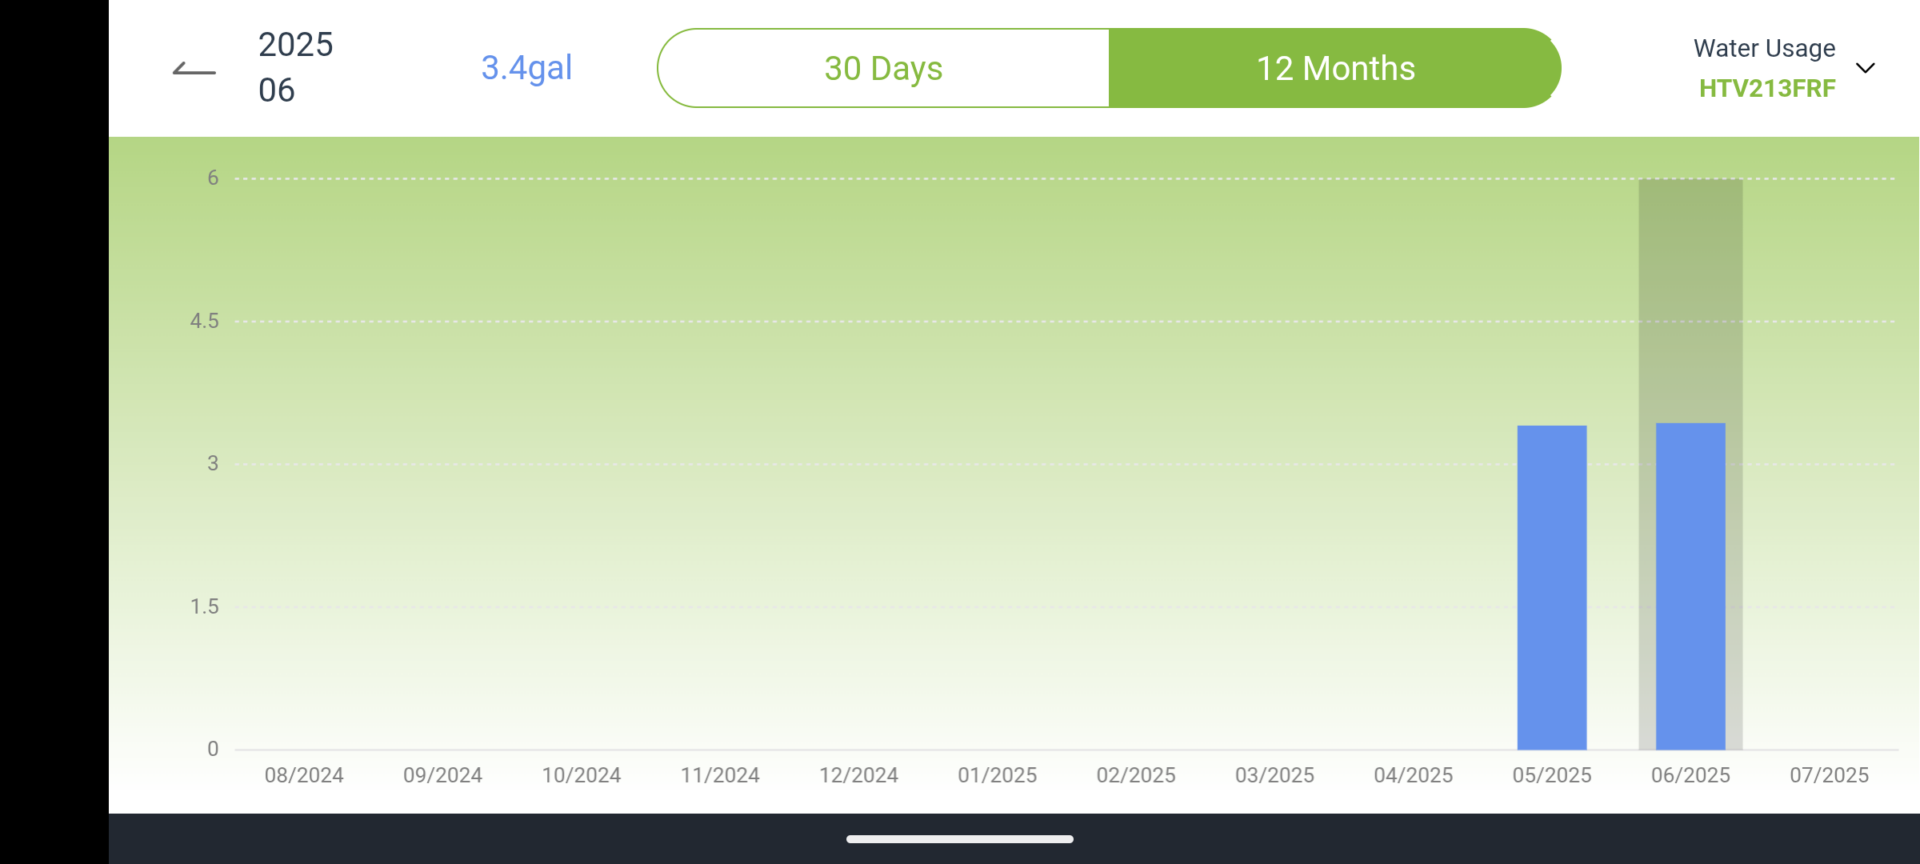
Water consumption statistics
Access Event History
![]()
Here you can view the completed irrigation cycles and other logged events (alerts) of the irrigation computer.
These include:
- Completed irrigation cycles
- Recorded water consumption
- Various warnings about things like water leaks, low temperatures, etc.
- Event Log
Irrigation Computer Settings
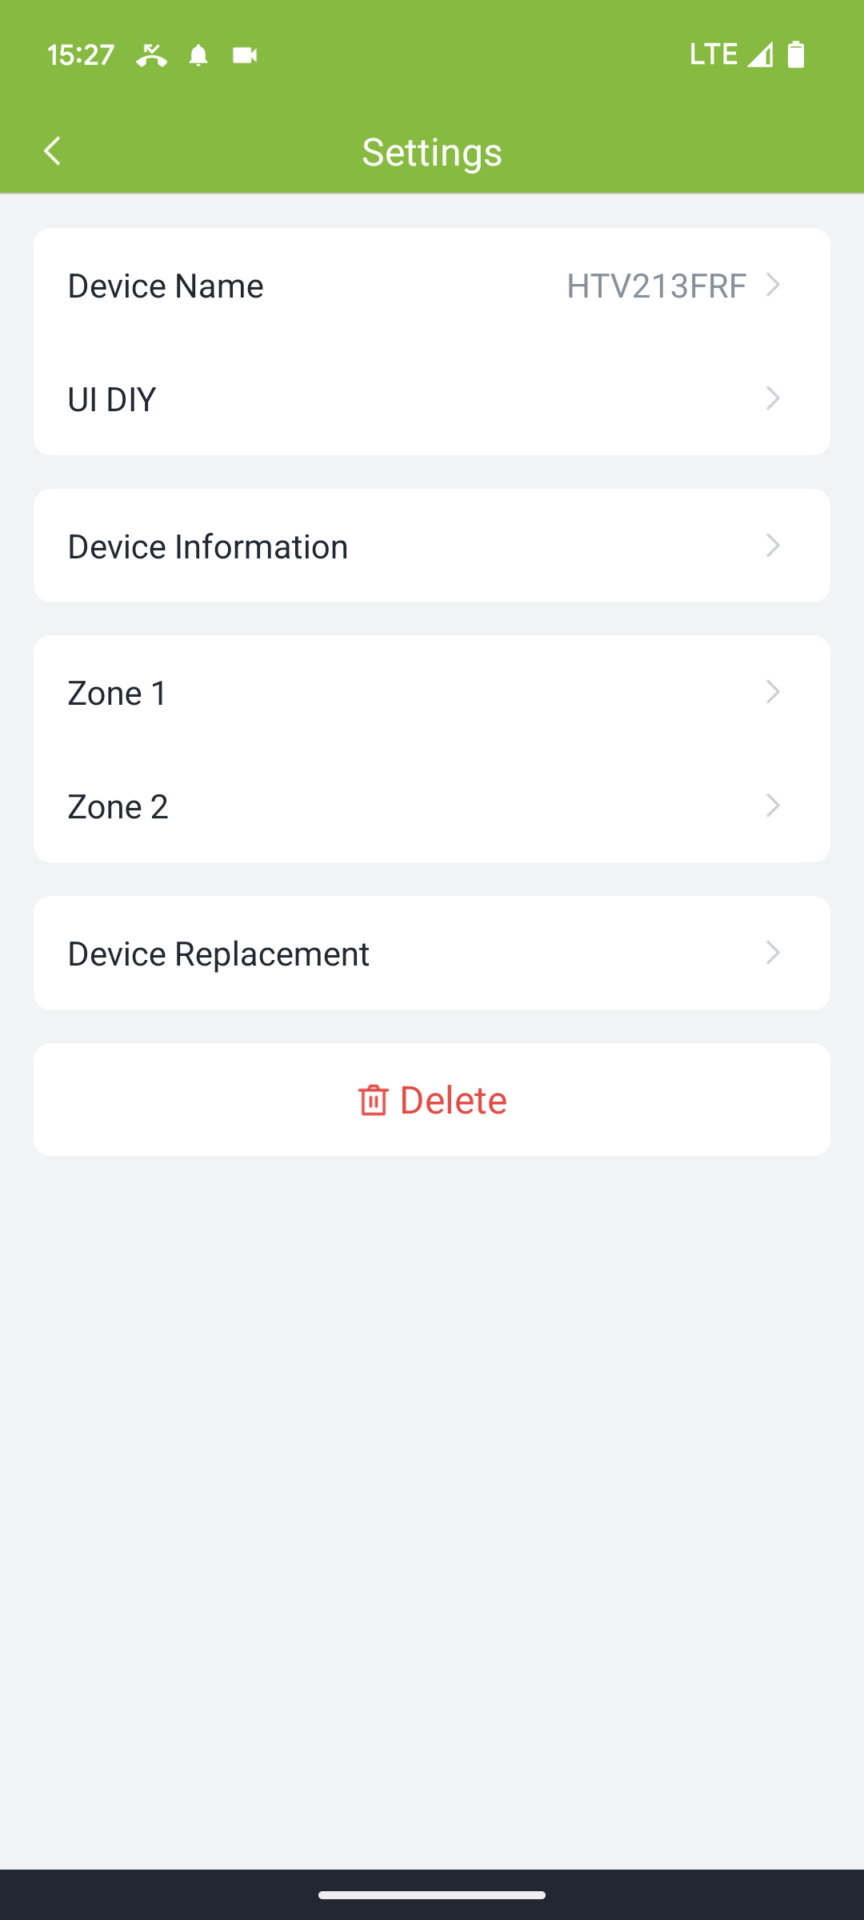
You can access these settings by clicking the Settings icon in the top right corner of the Irrigation Computer menu.
- Irrigation Computer Settings
Device Information
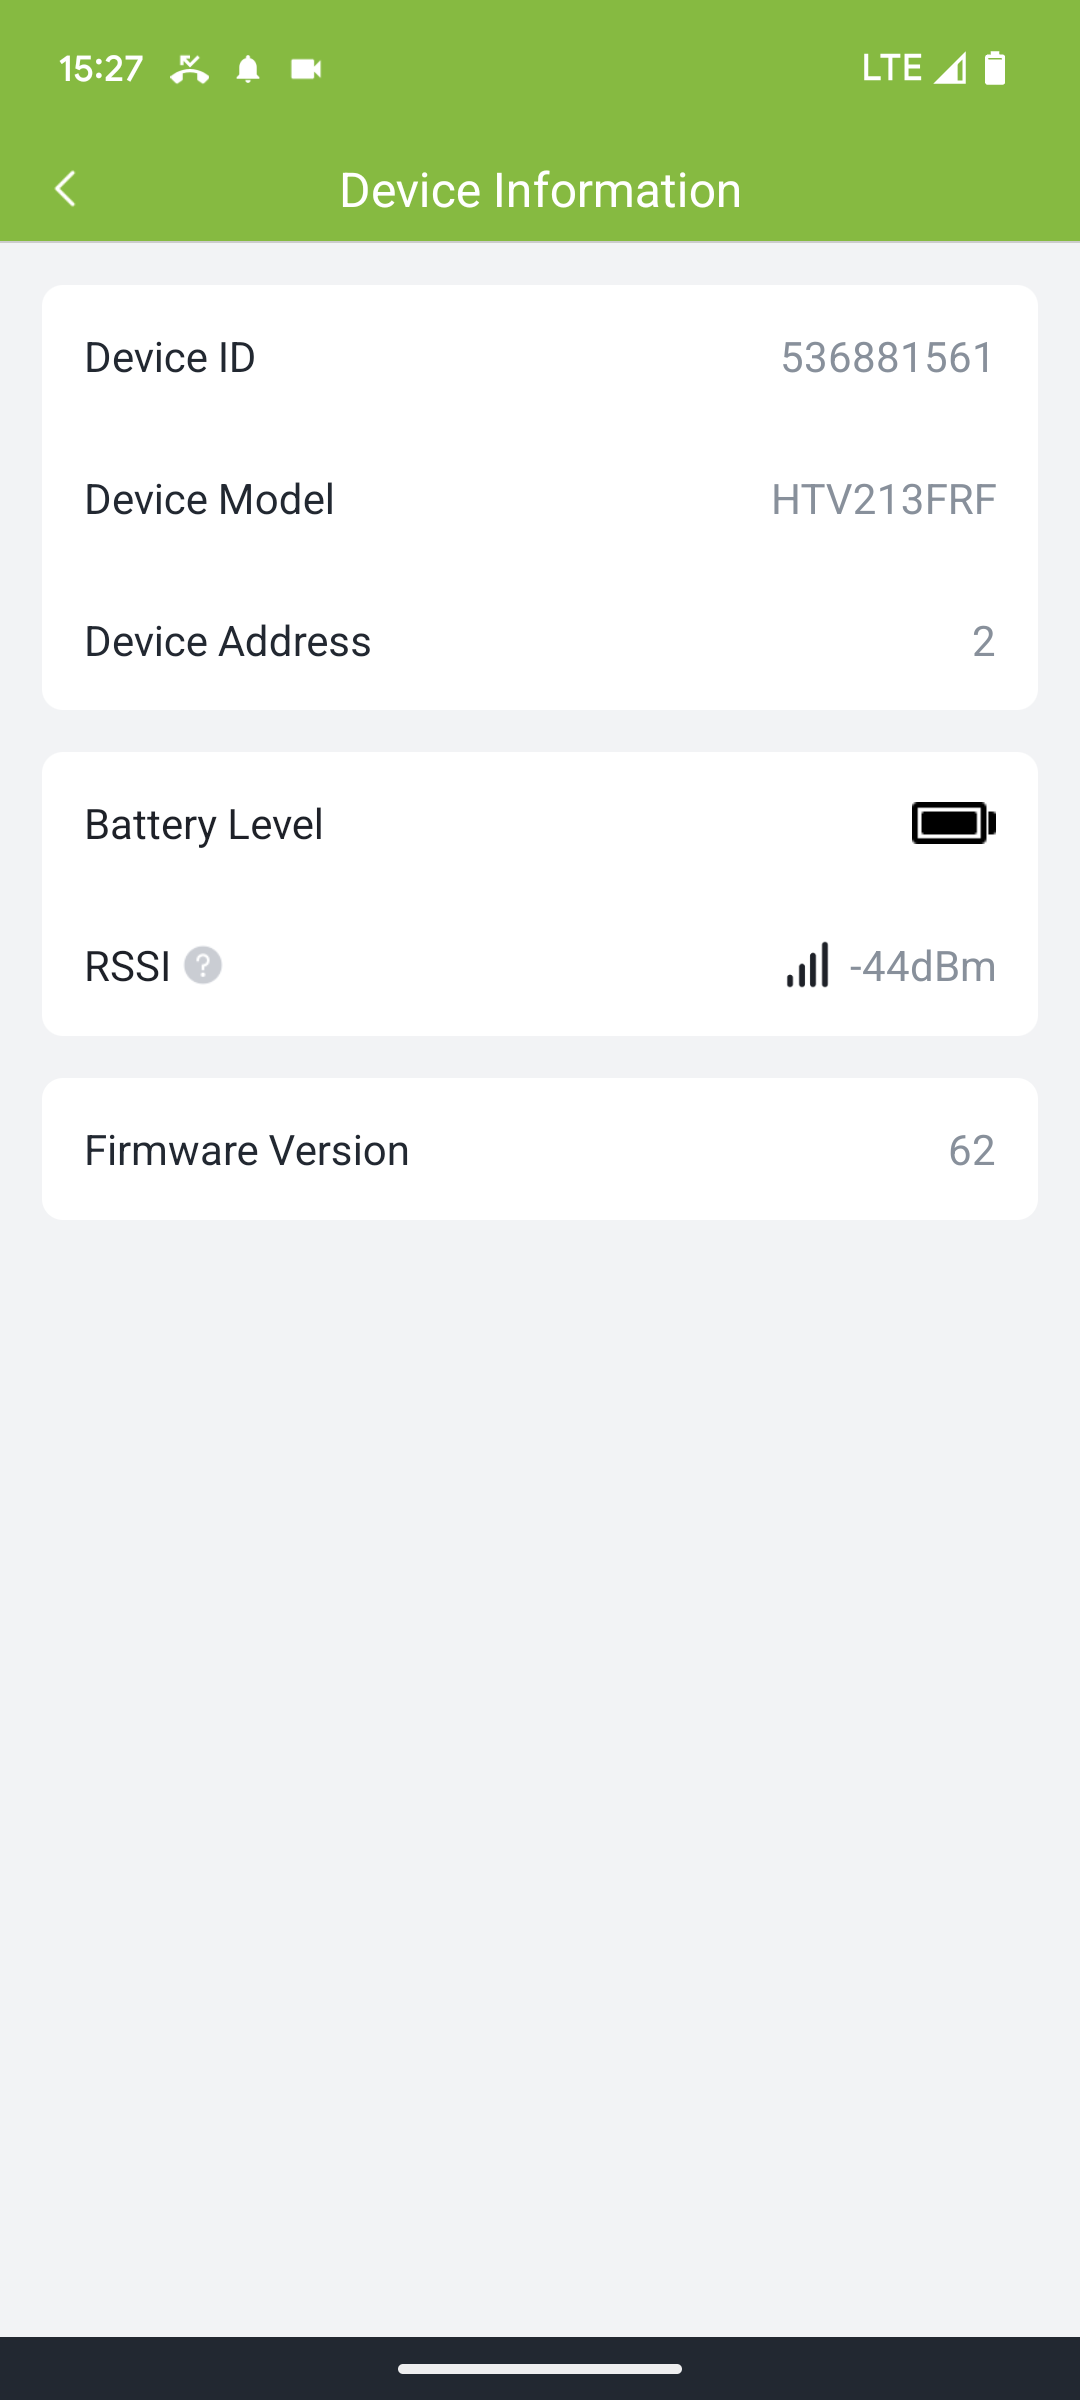
Under this menu item, you can view the water computer’s battery level and display the wireless signal strength:
- Device information submenu
Zone settings
- Defining settings and default values for the zones
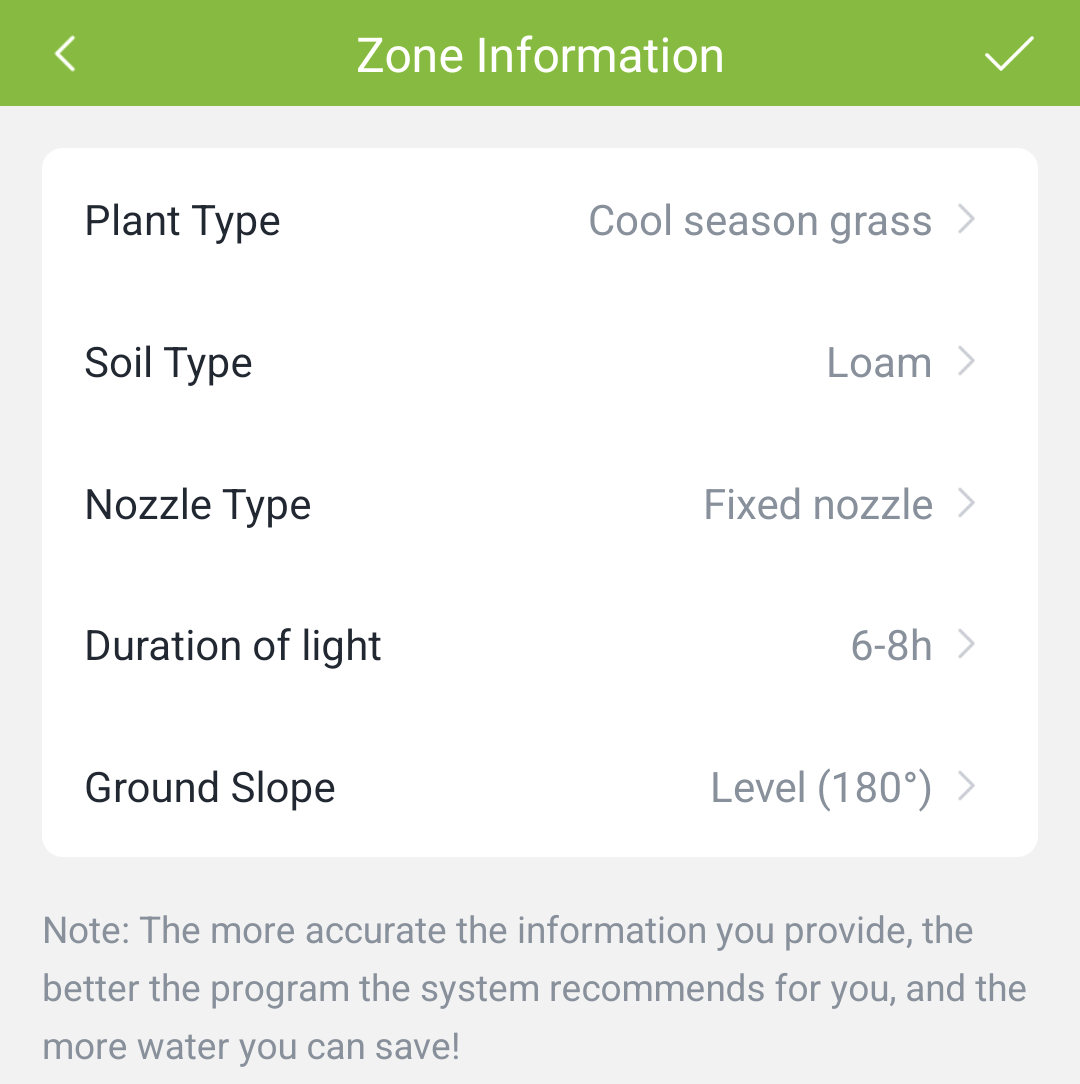
Settings can be made here for each irrigation computer output (zone). The zone can also be described in more detail. If you have activated the RainPoint artificial intelligence “SmartPlan,” default values for the irrigation duration for regular irrigation and for the runtime and interval for interval irrigation are generated based on these values. These values are then automatically suggested by the system when you create a new irrigation program. If you don’t want such automatic suggestions, you can also deactivate SmartPlan. I would recommend doing this; more on this below!
If you also have a RainPoint soil moisture sensor available in the app, you can activate it here.
Under the “Water Usage Correction” menu item, you can enter a correction factor for the water flow sensor integrated into the computer. This is useful if, in practice, it turns out that the sensor always reports consumption slightly too low or too high. For example, by entering a calibration coefficient of 5%, you can adjust the measured results upwards by 5%.
Zone Information
- Zone Information
Here, as mentioned above, you can describe the zone to be watered in more detail. The more precisely and realistically you do this, the more accurate the built-in Smart Plan logic can be, according to RainPoint. The descriptions are divided into five categories.
My opinion: Sorry, this feature is well-intentioned, but very poorly copied from Orbit B-hyve. Even the smartest AI in the world couldn’t generate meaningful suggestions from this little superficial information. In this form, it would have been wiser to omit it altogether, because it’s simply not useful. The recommendations I received during my test made absolutely no sense and sometimes contradicted all the usual rules. For example, for a normal lawn, short daily watering cycles were recommended, instead of watering the lawn less frequently but more intensively, as is correct according to conventional wisdom. You can safely deactivate this option!
Gateway Settings
If you use a gateway with an additional outlet, you can also control this outlet smartly.
- Gateway Settings
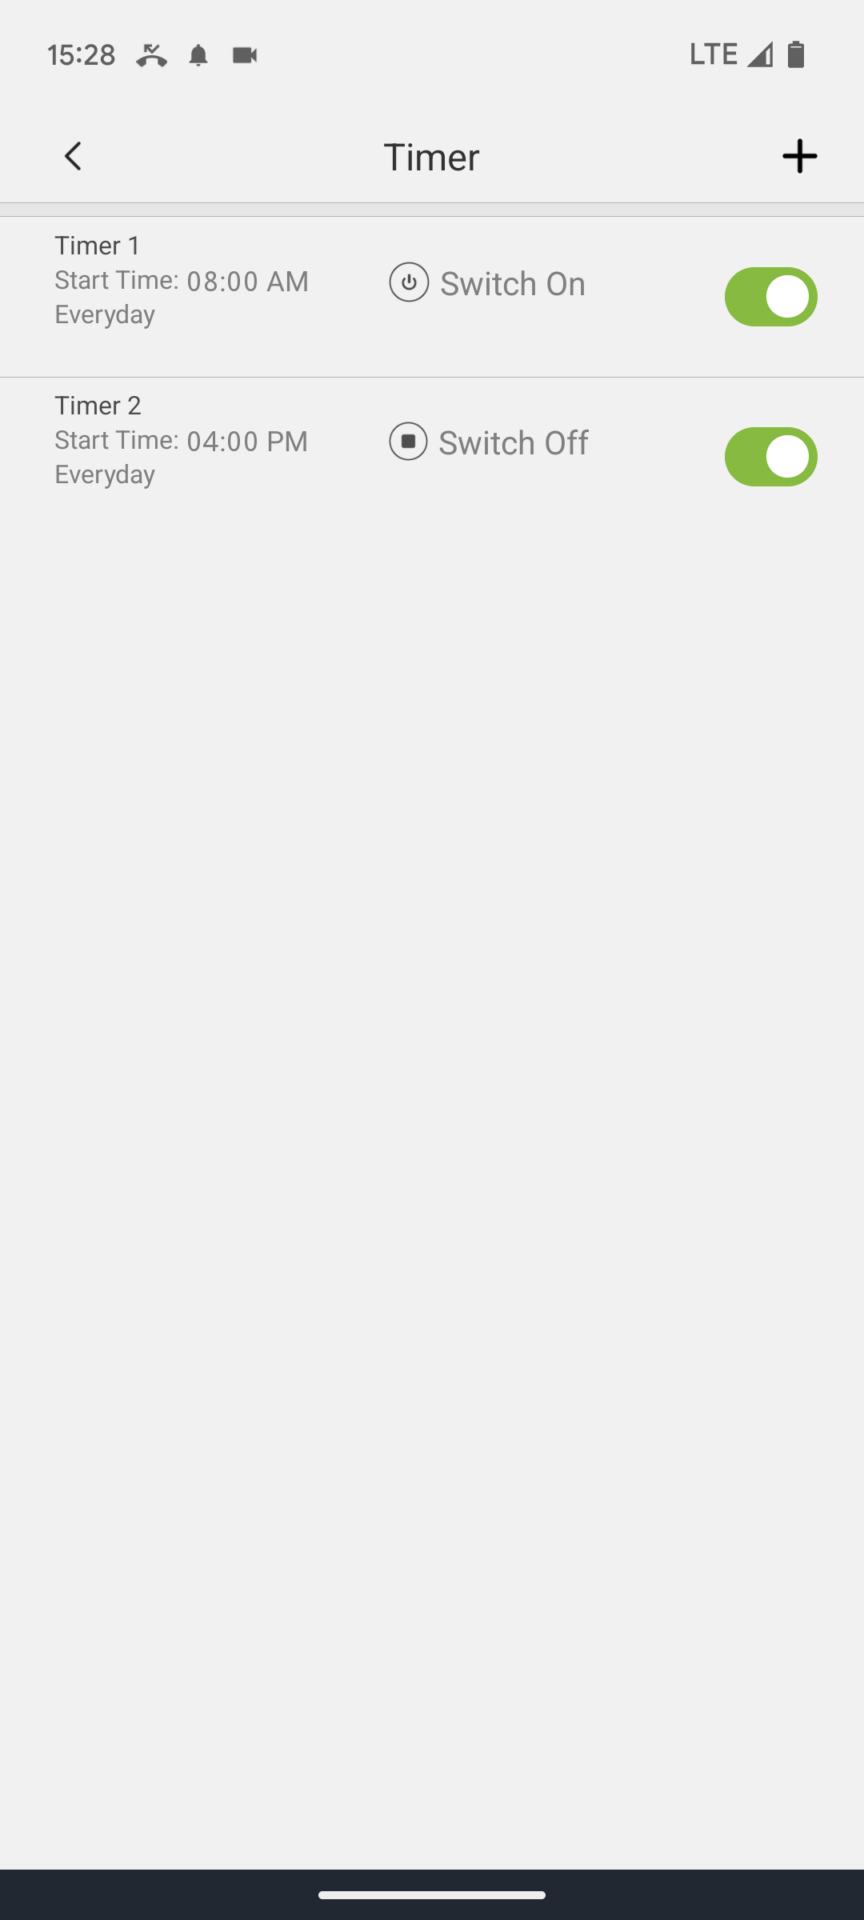
The outlet can be turned on and off via the app, or it can also be used as a timer by specifying when the outlet should turn on and off:
- Timer Function
Additional Settings
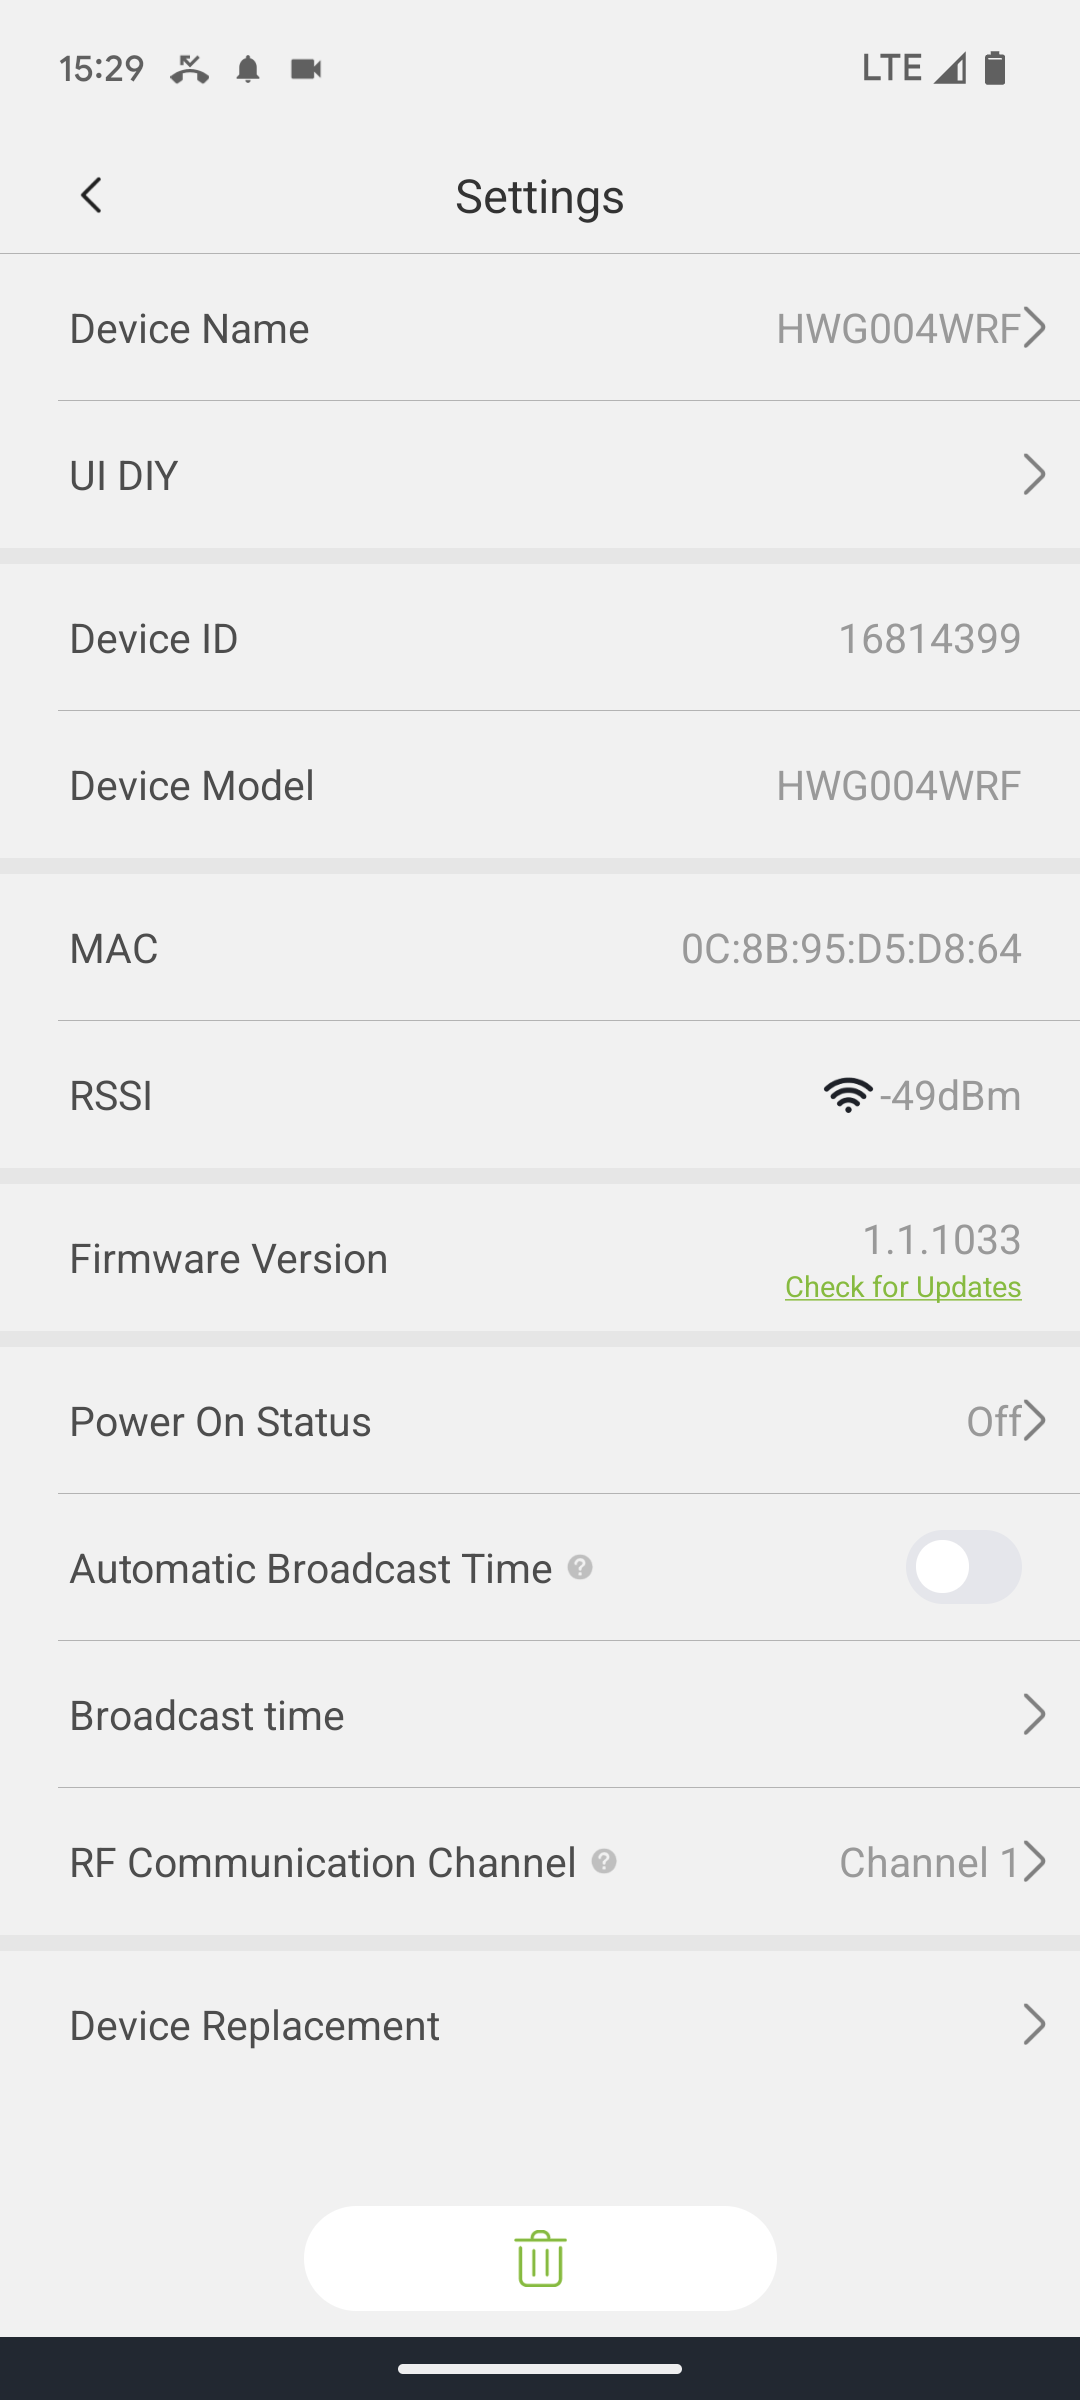
The gateway also has a settings menu in the top right corner. Of particular interest here is the option to check the signal strength or change the communication channel if you’re experiencing problems with the wireless connection.
- Gateway Settings
Quick Info Overview
The description now continues with the overlaid navigation menu.
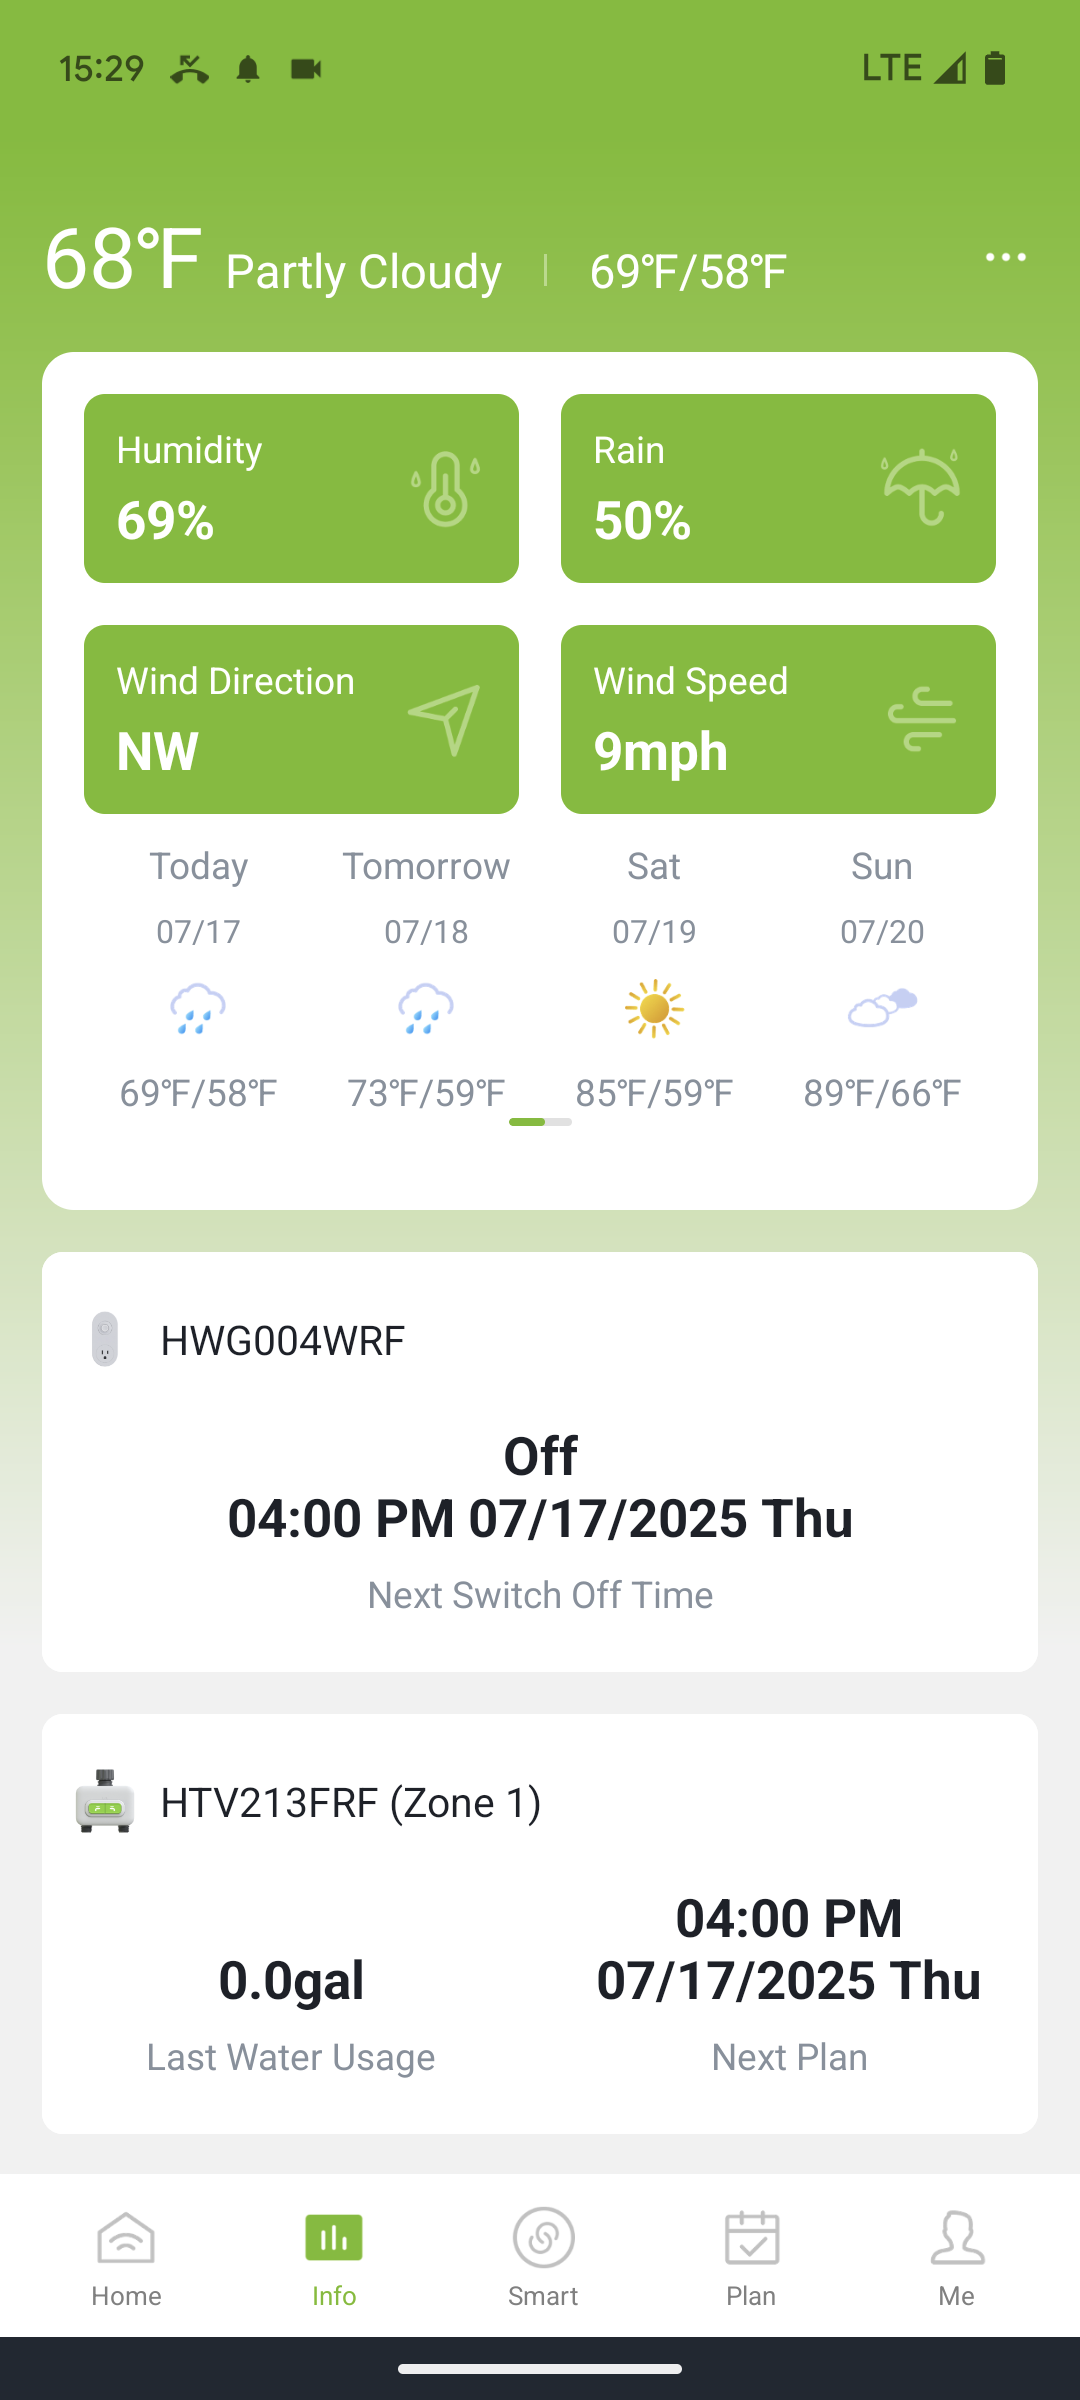
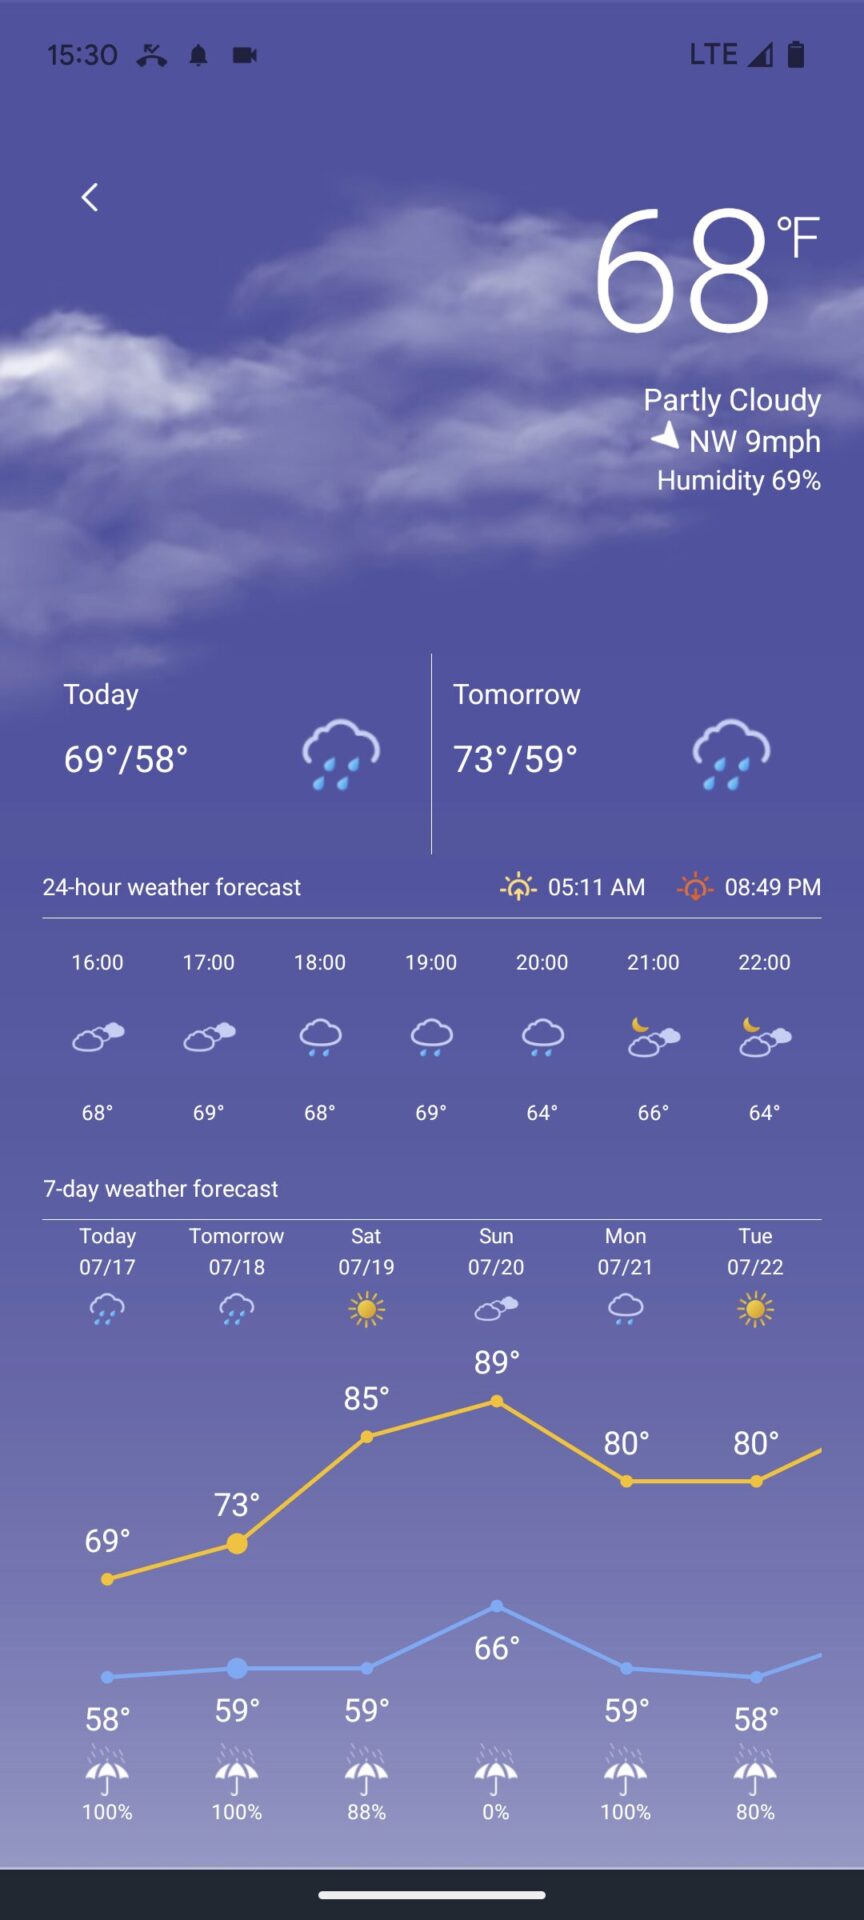
The Info menu displays a quick weather overview and a quick overview of added devices:
- RainPoint Home
Clicking on the weather information takes you to a detailed weather view:
- Detailed Weather View
Automation
![]()
Like RainPoint Tuya, RainPoint Home also offers options for further automating irrigation and making it dependent on certain conditions. In principle, this is similar to the capabilities of the RainPoint Tuya app, with minor enhancements.
As already noted with the RainPoint Tuya app, this feature is relatively large and far-reaching, as it could theoretically connect other devices besides the irrigation computer. Unfortunately, this also makes it more complex than necessary for users who only want to use it to control their irrigation computer and aren’t interested in a comprehensive smart home solution. If you’ve had little experience with smart home and automation before, you’ll need to get used to the functionality and understand the system.
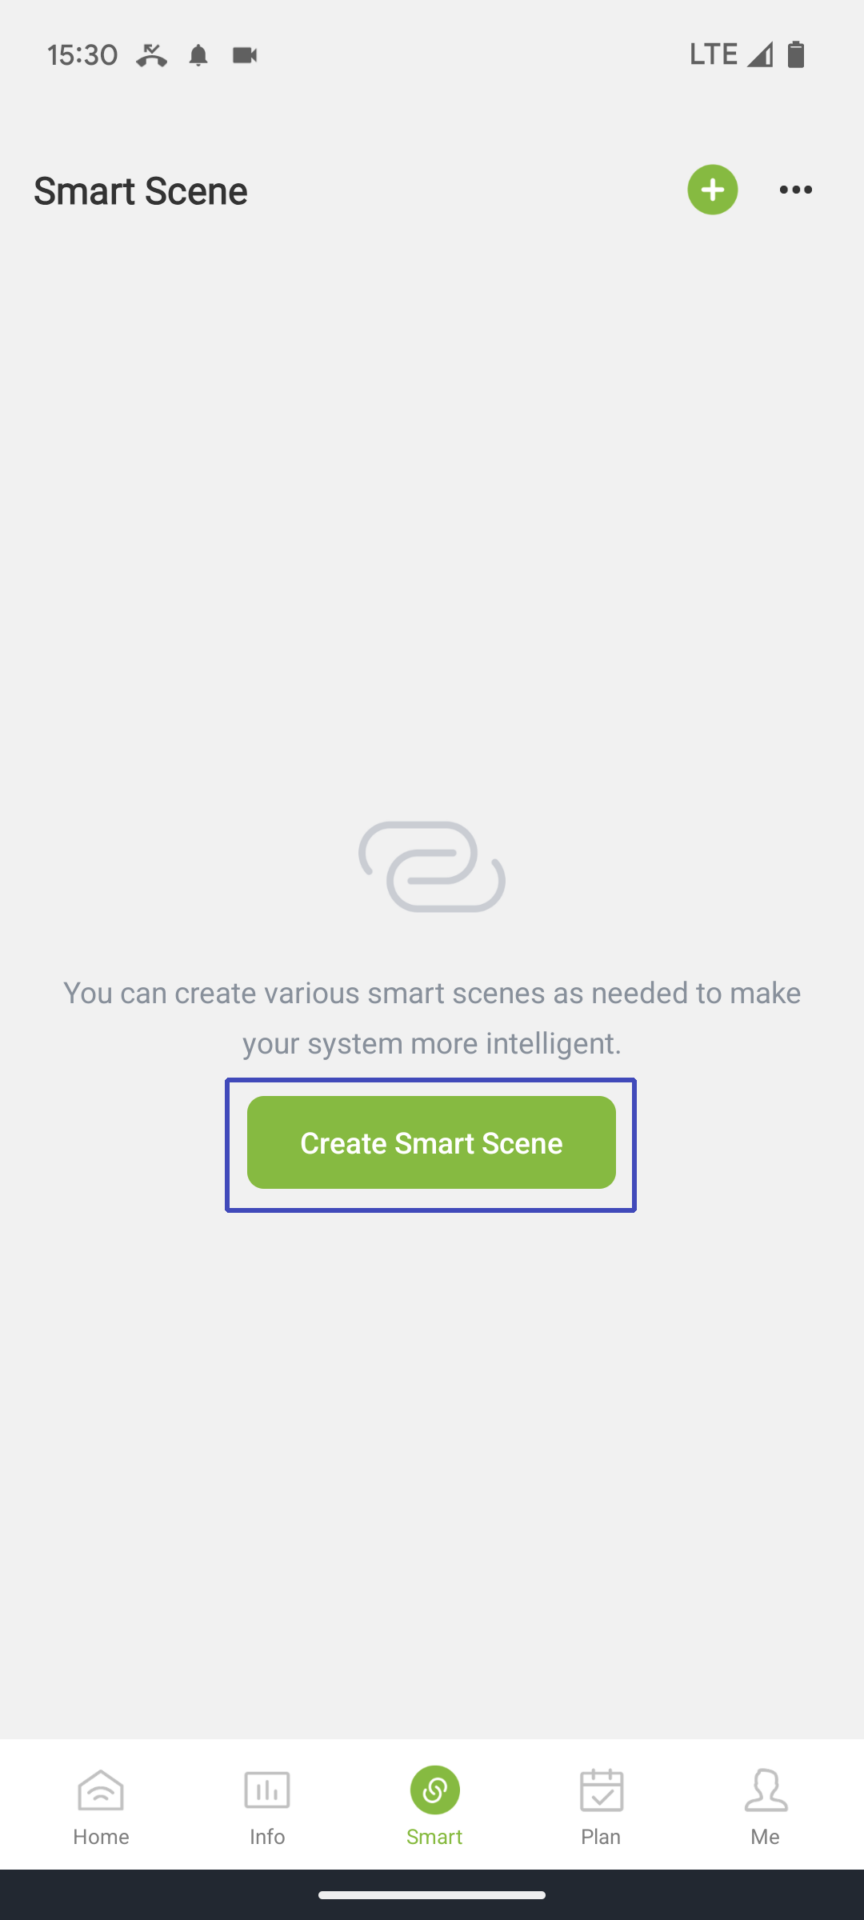
When it comes to controlling the irrigation computer, the weather control option is almost exclusively of interest. To set up such weather-dependent control, click on the “Create Smart Scene” button or the plus symbol in the top right.
Define a Condition
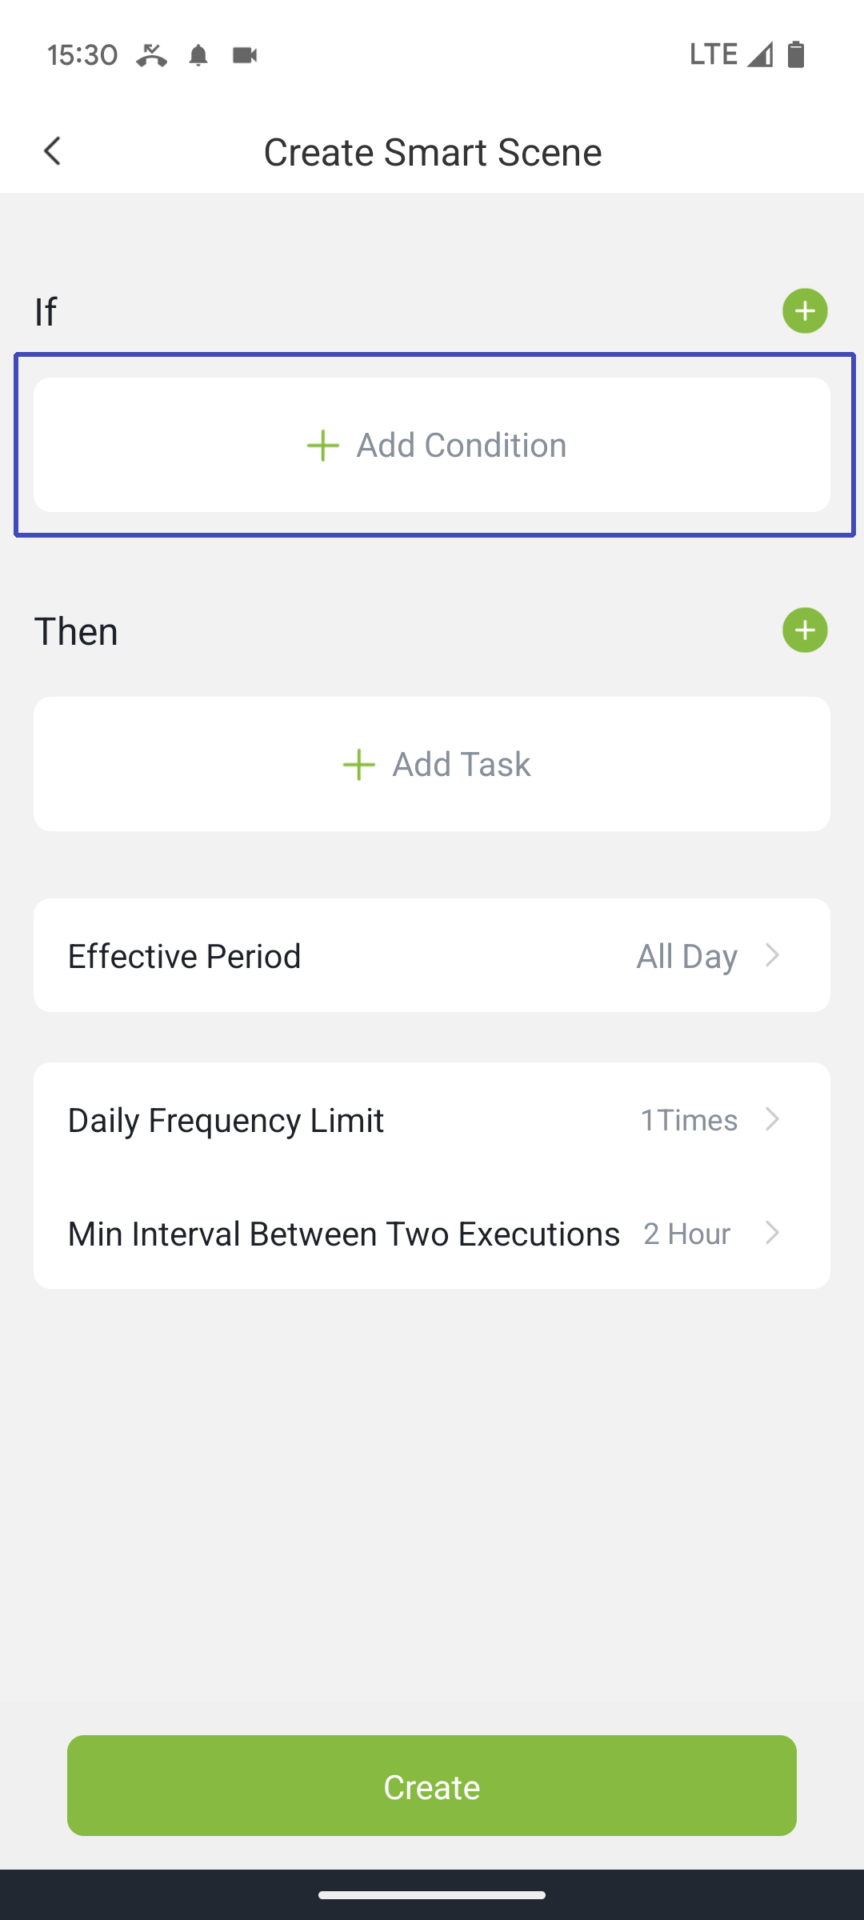
The first step is to add the if condition that should be the prerequisite for executing the desired action and select “Weather Condition.”
- Create a New Scene
- Add a Condition
- Select a Weather Condition
You now have five types of weather conditions to choose from:
- Selectable Weather Conditions
These are almost identical to those in the RainPoint Tuya app, with the difference that the sunrise/sunset event is not available, and the much more important precipitation probability option is available instead.
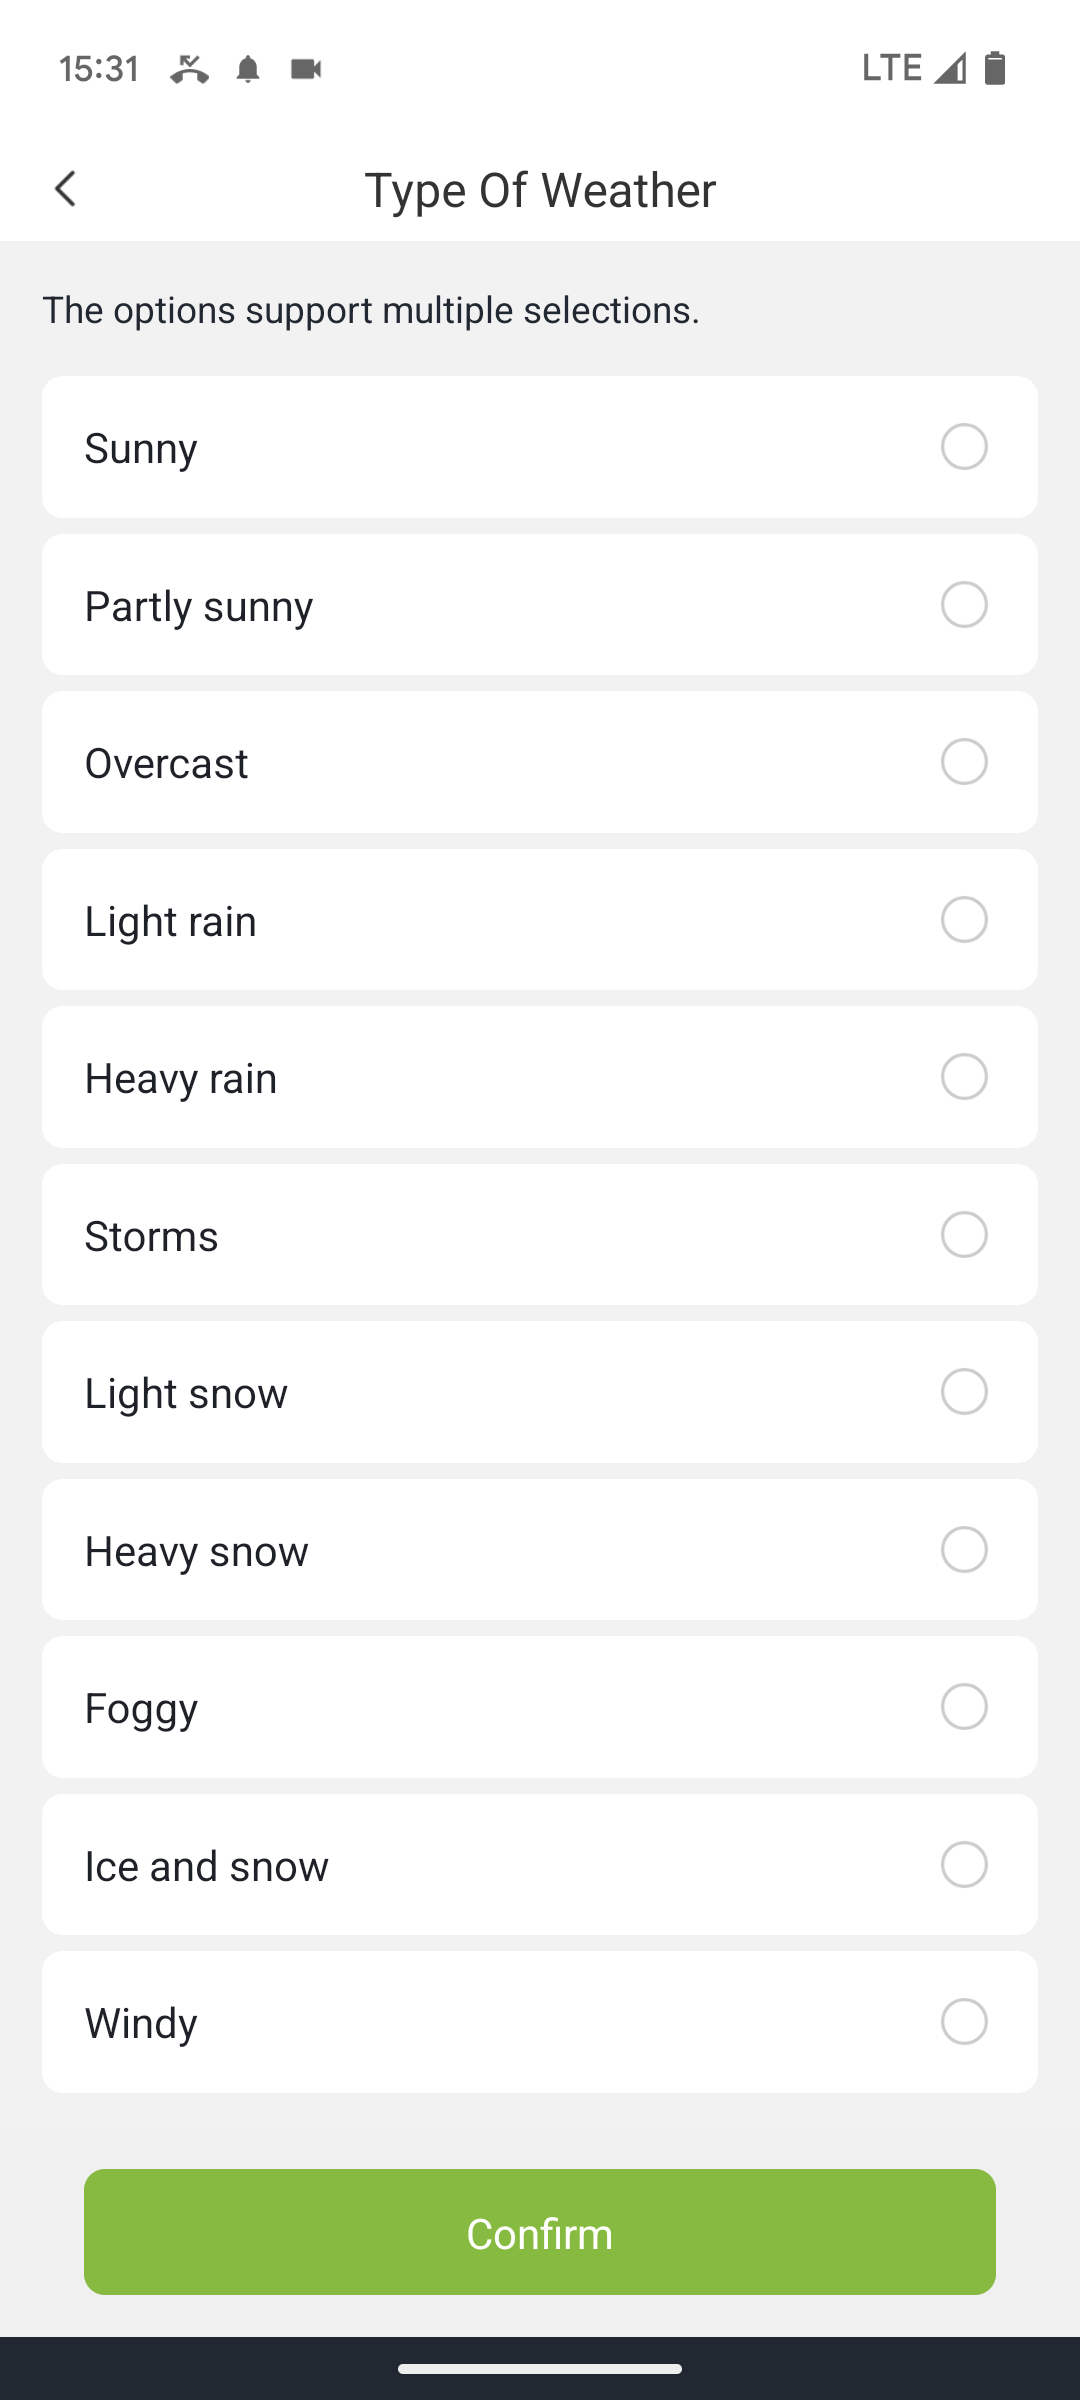
Screenshots below show the setting options for these five options. As already noted with RainPoint Tuya, the disadvantage here is that only limited reference to specific measured values is possible, and it is sometimes unclear how they are determined. For example, you can select “rainy” for the type of weather, but you have no information about what the app considers to be rainy. With the precipitation probability, you also don’t know which period of time it refers to.
Five Weather Setting Options
- Temperature
- Humidity
- General weather situation
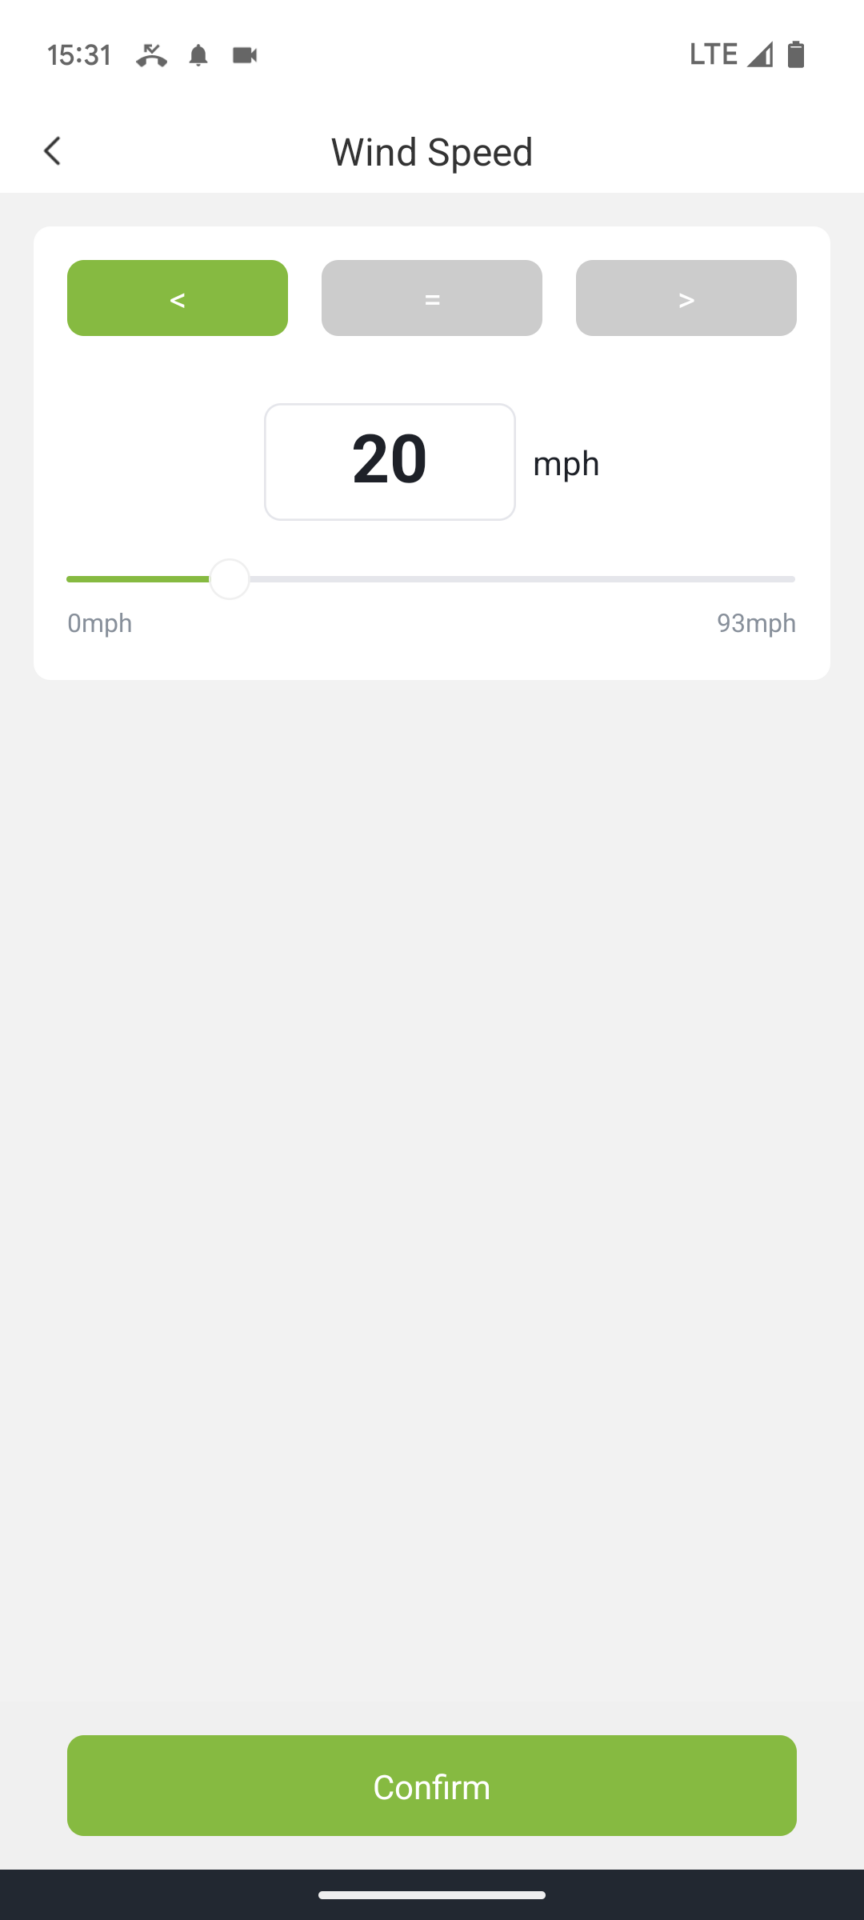
- Wind Speed
- Probability of precipitation
By selecting Temperature, you can specify a maximum or minimum temperature above or below which an action should be performed. As a third option, you can also initiate the action when a specific temperature is measured.
The same applies to Humidity and Wind Speed, except that the humidity and wind speed, respectively, are used as the comparison values.
The Rain Probability works similarly, except that instead of an absolute value, the comparison is based on the probability of rain.
For Type of Weather, the execution of the action depends on the occurrence of a specific weather situation.
Use Device Status as a Trigger Condition
In addition to weather conditions, the second possible trigger type is device status. The following conditions can be used as triggers for the water computer:
- Battery Level (Normal, Low Power, or No Power can be selected)
- Work State (Off, Normal irrigation, Intervall irrigation)
- Valve Failure (Yes, No)
- Water Shortage (Yes, No)
Regarding the gateway socket, the property Switched On (Yes, No) can be selected as a trigger.
Using time as a trigger condition
This allows you to easily define a specific date and time at which an action should be performed. Or, you can have an action repeated at specified intervals.
Defining the action to be performed
Now the condition that must be met has been defined. The only thing missing is the action that should be performed in such a case. To add this, click “Add task” or the plus symbol next to “Execution”.
- Definition of what should happen when the condition is met
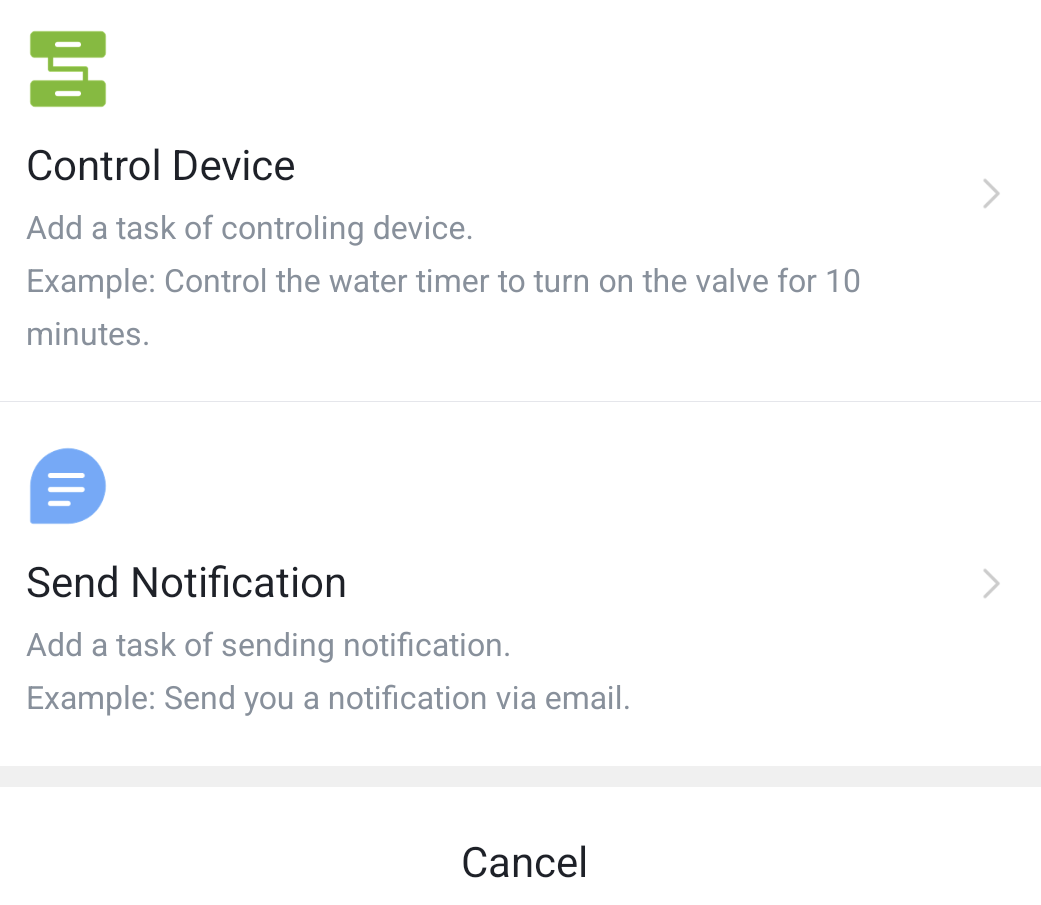
You can now select the type of task to be performed. You can choose between “Control device” and “Send notifications.” If you select the first option, you can control the water computer or the socket in the gateway depending on the condition; if you select the second option, you can send a notification when a condition is met. Multiple actions can also be performed with one trigger; for example, you can control a device and send a message for it at the same time.
- Select the type of action to be performed
I will show the options for both options below.
Control device
This is the main function of RainPoint Home Automation: Depending on the previously defined weather event, you can initiate the following for each zone:
- Postpone the execution of watering runs (a delay of 1 day up to a maximum of 30 days is possible)
- Deactivate the zone so that no watering takes place
- Start a regular watering run with a specific duration or a specific predefined water consumption
- Start an interval watering run with a specific duration or a specific predefined water consumption However, you can’t specify an interval or runtime for the intervals, so the exact function is unclear. It’s possible that the values stored for the zone as default values are used; I haven’t tested this.
And with a gateway with a built-in smart plug, the following is possible:
- Turn on the plug
- Turn off the plug
In the following example, I turn off the watering computer when the condition is met.
- Accessing the watering computer
- Turn off the computer
Sending notifications
For notifications, you can choose between a push notification on your mobile phone and an email notification. The first option is unfortunately very misleadingly named; you might think it’s an SMS notification. However, this isn’t possible in RainPoint Home, even for an additional fee, as is offered with RainPoint Tuya. Instead, the email notification option, sorely lacking in RainPoint Tuya, is available. Up to five different email recipients can be specified.
- Define notification by email
A text is defined for the notification, which is then displayed in the message.
Additional Automation Settings
For each created automation, you can optionally specify a time period during which the rule should apply. By default, this is the entire day, but you can also specify it to apply only during the day, only at night, or only during a specific date range.
You can also specify that the activity is performed a maximum of a certain number of times per day (1 to 30 times) and a minimum time period between rule executions, from 1 minute to 24 hours.
A completed automation rule would then look like this. In the example, the system deactivates irrigation when the weather is rainy.
- Completed automation scene
Scheduled activities for all connected devices
![]()
If you only use the water computer with RainPoint Home, this display is completely identical to the schedule overview in the water computer settings discussed above. All scheduled watering programs are displayed. If you have also scheduled activities for other devices, such as the smart gateway socket in my example, these will also be displayed here. A calendar view like the one in the water computer settings is not possible here.
- Scheduled activities for all connected devices
Global Settings
Various basic settings can be configured in this area. The following menu items are available:
- Global Settings
Unfortunately, the names of the sub-items make it difficult to determine what is located where, and some of them are also misleading. Below is an overview of the most important settings hidden here.
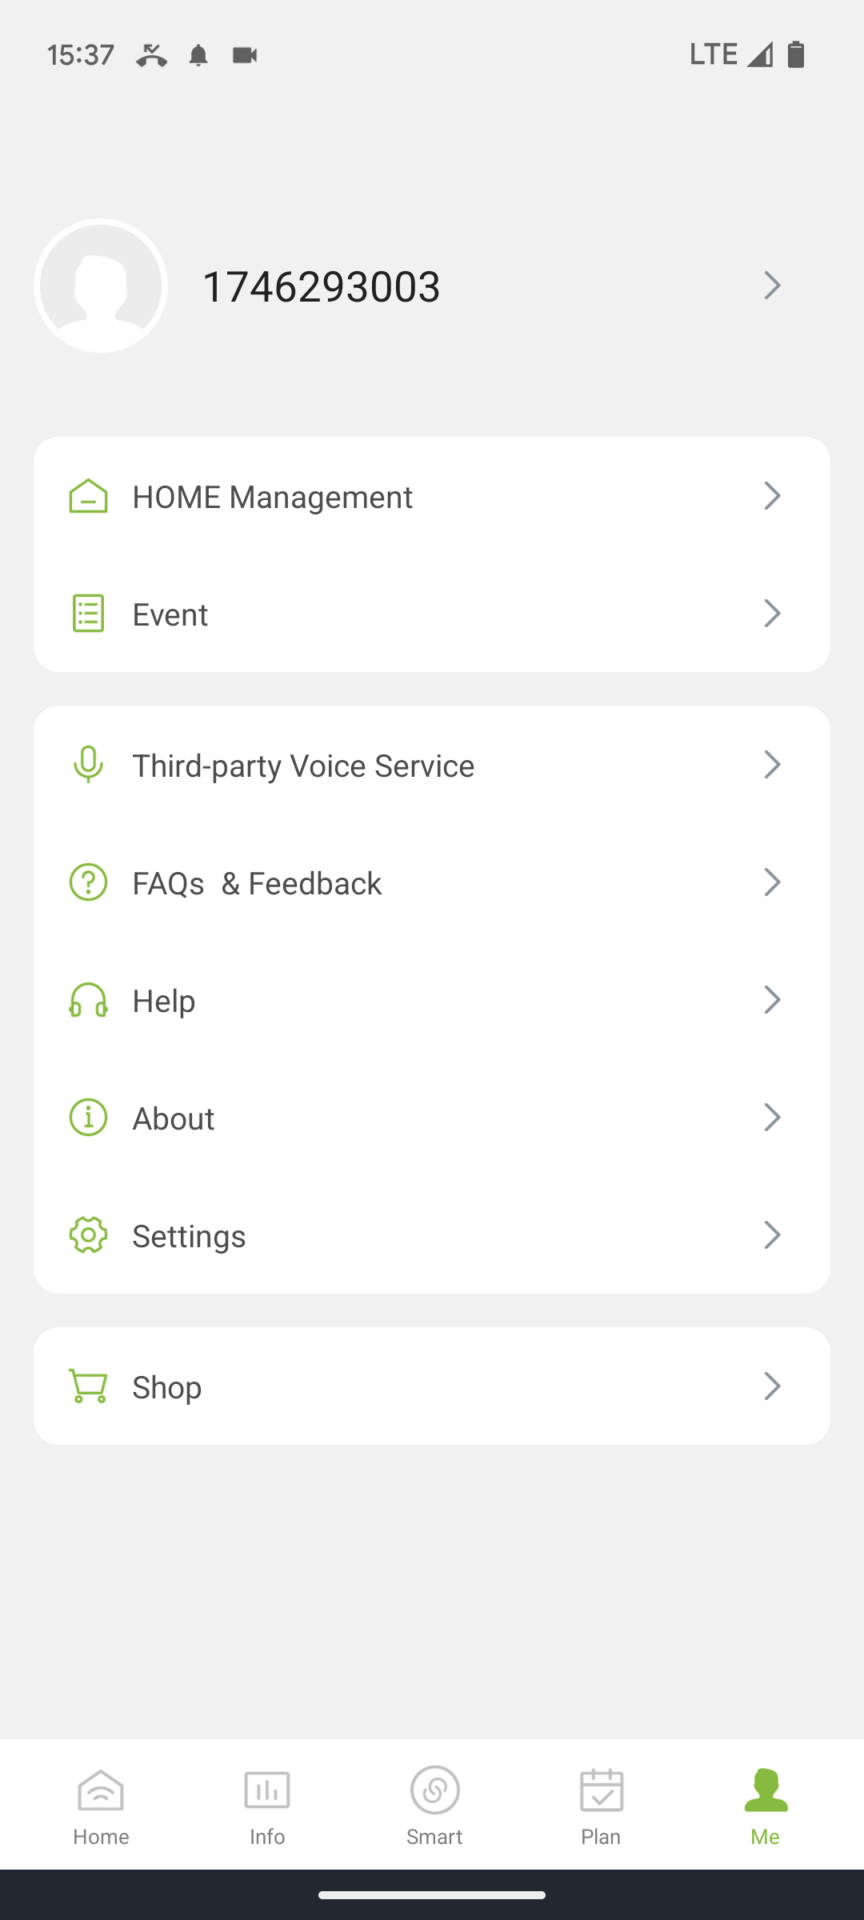
Home Management
Here, you can change the units used in the app, the time zone, and the currency. You can also configure Smart Home settings (dividing into areas such as the living room and garden). You can change the location where watering takes place. You can also grant additional people access to the app.
Change the Garden Location
The “Location” menu item allows you to view the location currently stored in the app on a map. This is responsible for the local weather data used for automatic weather control. If you want to change the location, you can also do so here.
- View or change the garden location
Give access to other users
This function allows you to grant other people access to the app. This could be other family members, for example, or a neighbor who looks after the garden while you’re on vacation. To invite another person, click the plus symbol in the top right corner of the “Members” menu item and enter the email address of the person you want to invite.
Please note, an important point that isn’t mentioned in the app: You can’t enter just any email address here; only email addresses of people who already have a RainPoint account will work! Those you invite must therefore first create an account. This makes it a bit more complicated compared to competitor apps, where you can freely send invitations and the account is only required once the invitation has been accepted.
- Give another person access
Event
Just like in the watering computer settings, the events that have already occurred are displayed here, but not just for the watering computer, but for all connected devices. In my example screenshot, for example, the switching on and off of the gateway socket is also displayed.
You can also limit the display to specific event types by clicking on the magnifying glass.
- Events for all devices
Third-party voice services
This menu item doesn’t contain a function, but rather two instructions for integrating RainPoint Home with Google Assistant or Amazon Alexa. This allows you to execute irrigation computer functions via voice command. For example, you can start irrigation with “Ok Google, turn on water timer!” and stop it with “Ok Google, turn off water timer!”. If multiple devices or irrigation computer outputs are available, the device name must also be included in the instruction, for example, “Ok Google, turn on water timer (device name)!”
FAQs and Feedback
Here you will find the most frequently asked questions and answers about the app and operating instructions for all irrigation computer models.
Help
Is a link to the RainPoint homepage, which provides RainPoint’s contact information.
Info
Here you’ll find various legal information, such as the privacy policy and user agreement, and you can actively search for app updates.
Settings
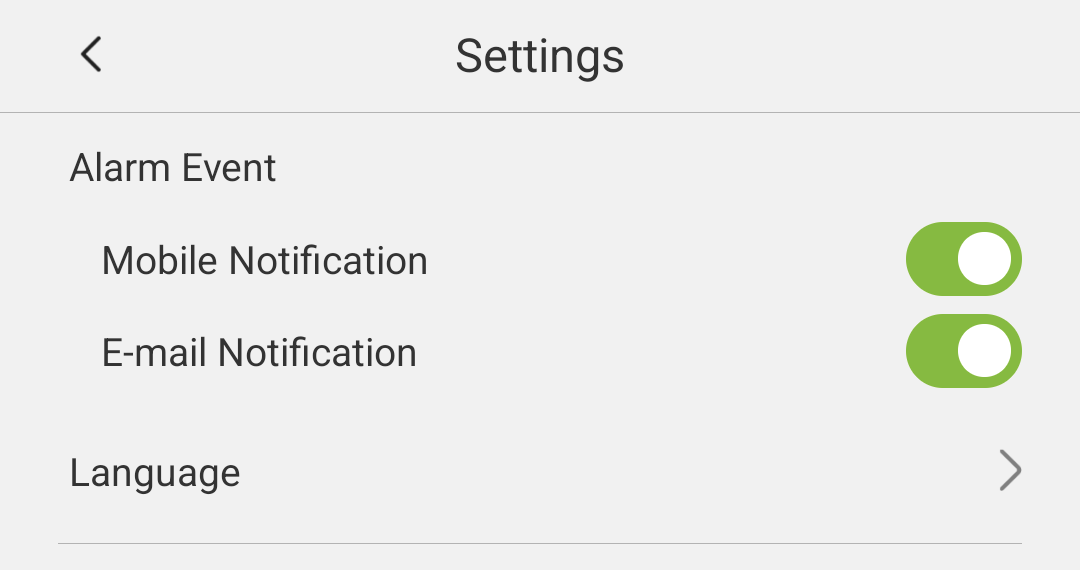
Under the “Settings” submenu item, you’ll also find the option to deactivate notifications. You can deactivate push notifications on your phone and/or email notifications; both are enabled by default.
A major drawback: Unfortunately, there’s no way to specify whether you want to receive notifications for each event type. If you activate this actually very useful feature, you’ll be flooded with notifications for even less interesting events, such as every time a watering cycle starts and ends. There’s also no overview of which events trigger notifications. An alternative is to deactivate all notifications here and configure them yourself via the automation menu.
- Enabling/Disabling Notifications
You can also change the app language here (you can choose from seven languages).
Shop
This is a link to the RainPoint online shop.
Interfaces
As mentioned above, a connection to the following two systems is possible:
- Google Assistant
- Amazon Alexa
Conclusion and Recommendation
The RainPoint Home software is RainPoint’s latest offering. It incorporates the functional elements of the two other RainPoint apps into a single app. This provides an app with a reasonably functional and understandable navigation and the option to incorporate the weather into irrigation control. With the other two RainPoint apps, you have to make significant compromises in either of these two areas.
Conclusion: RainPoint Home offers the most affordable option currently on the market for remotely controlling your irrigation computer via the web and also integrates a somewhat usable weather control feature and limited smart home functionality.
However, even RainPoint Home cannot compete with the currently best irrigation computer providers in terms of weather control and software. The main reason is that the weather data is far too inaccurate and intransparent. Unlike other providers, you can’t define an exact amount of precipitation or the time period in which it should fall, but only whether the weather is generally rainy. Without further information about what rainy means or the time period to which the probability of rain refers, this is hardly useful for weather control.
Competitors like LinkTap, Hunter Hydrawise, or OpenSprinkler do this much better. And they also offer many additional features within the program, such as seasonal adjustments or extensive options for integrating sensors. Furthermore, the competitors’ irrigation programs can be defined much more precisely and in detail. This is where RainPoint Home, with just six possible programs that are also very rigidly defined, presents a potential bottleneck.
Compared to the two other RainPoint apps, bundling the strengths of the other two apps into one program makes sense, but the overall development is very manageable. So, if you want the best possible software that offers you a wide range of options, I would recommend LinkTap, Hunter Hydrawise, or OpenSprinkler.
However, these are also significantly more expensive. If price is your main priority, and the ability to remotely control an irrigation computer (from vacation) is the key selling point, and everything else is just a bonus, then you can definitely consider a RainPoint Home Computer. Especially compared to the two other RainPoint apps, this one is still the best.
Another reasonably priced alternative would be Orbit B-hyve, which is only slightly more expensive than RainPoint but has significantly more powerful software. However, Orbit B-hyve performs most of the weather-dependent control on autopilot, giving you only limited options for active intervention. This concept may or may not appeal to you. I describe it in detail in the blog post on Orbit B-hyve.
In my opinion, the smart systems from Gardena and Rain Bird are not an alternative. Both are significantly more expensive, but they also offer mostly basic functionality. So you can save money and go with RainPoint.
